

Sorry for the delay in this blog post. This project took just a tiny bit longer than I had intended. But, without further ado, here is the project.
I wanted to make something for my coworker Kelli, who is a major Disney fanatic. Without her, I wouldn’t be in the position that I am in and I wouldn’t enjoy going to work as much as I do. So because of this, I wanted to make something for her as a thank you.
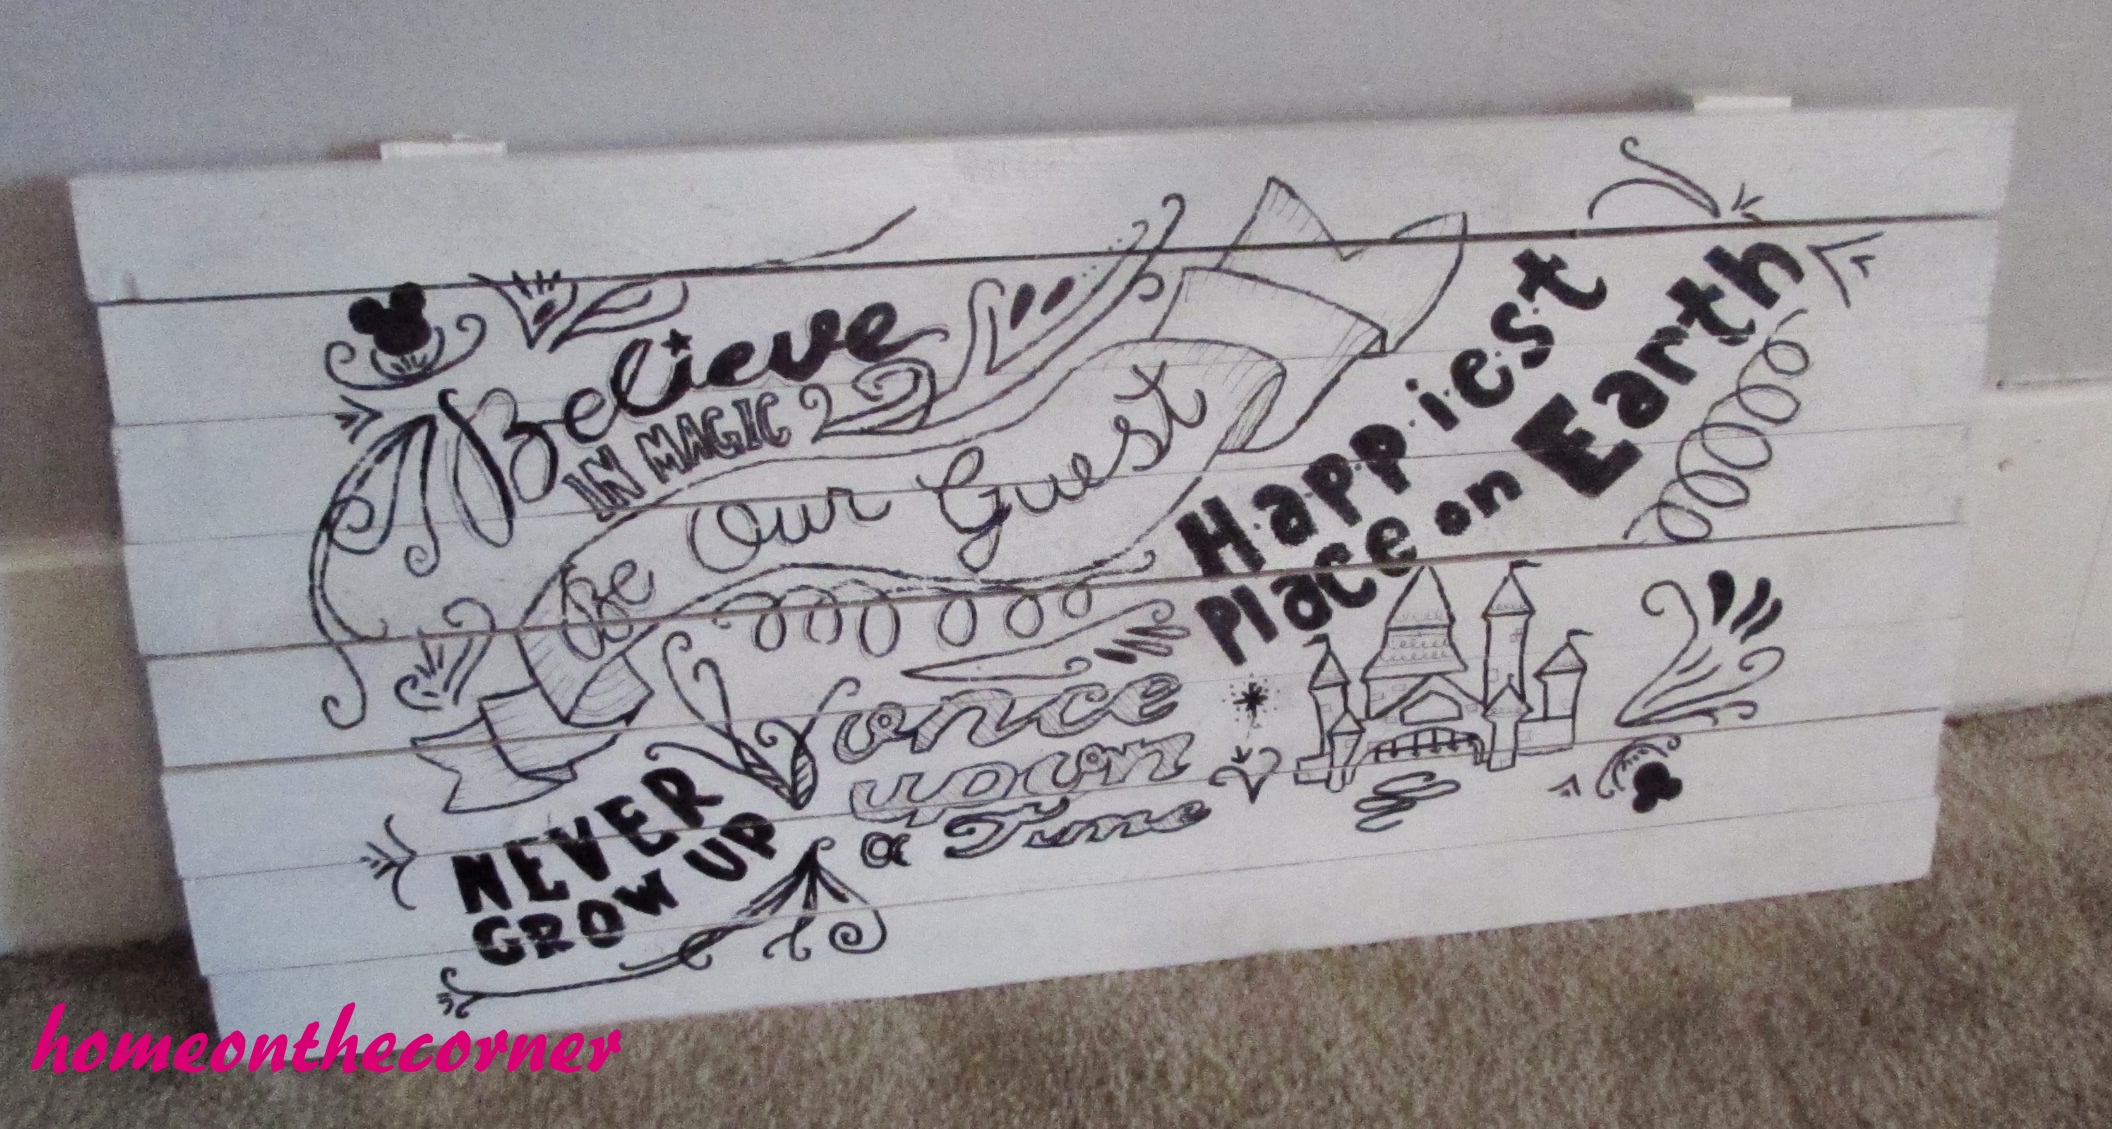
Do you remember the pillow that mom bought from Disneyland? If you don’t, you can click here to see the post. Well, I like the design of it, so I decided to put it on a sign for Kelli.
The first thing that I did was I found some scrap wood that dad had left over from building some cat huts for our friends shelter. They were all about the same length, so I placed 8 pieces next to each other for the width of the sign. I then took a 9th piece and cut it to fit on the back of the sign. I then took the two pieces for the back and nailed all the pieces together.

Next came the fun part, painting! Yeah!

I knew that I wanted the sign to be white and have black writing on it. So, I painted the wood white…and of course the spray paint just soaked in. Urgh! So, I had to spray a few coats on the sign and then it was ready to be drawn on.

Once the paint had dried, I brought the sign inside and was ready to start the fun part. I found a picture of the pillow online and with some maneuvering in Microsoft word, I was able to take the picture and make it fit on my sign. I covered the back of the paper with pencil so that I could draw on the front to have my design come out on the wood.


This was harder than I thought it would be for a few reasons. 1: I had to put the pencil on really thick so that I could see it on the wood. 2: some pieces of the wood was rough and I could hardly see the pencil marks. 3: some of the pieces of wood were so rough that I had to free hand that part.
But with all of this bad, I was able to get a design that I absolutely fell in love with on the sign. I used a sharpie to draw on the sign and used a fine point sharpie to add detail. The final things to add were varnish and picture hangers. I added two on the back because I wasn’t sure how heavy it would be.
And here it is! The finished product is beautiful!


I love how it turned out and it didn’t take that long to make. I hope that Kelli loves it as much as I do. And hopefully, I can make more because they turned out amazing!


This is so beautiful. You are very clever. How did you print the artwork to copy? As my family are huge Disney fans this would make a wonderful gift…maybe not as lovely as yours but….
LikeLike
I searched for the design on Google and cropped the picture to fit over three pages. It took a little to figure out where to crop it, but it worked! Thanks for stopping by!
LikeLike
I love this craft, and I love your creativity! Disney is very big with me and mine, so I may be using your awesome tutorial soon! Thanks for linking this up to Merry Monday!
LikeLike
We love Disney too! Thank you!
LikeLike
LOVE this! I’m a Disney fanatic myself so this is something I would love to have in my home!
LikeLike
Thanks! My friend loved it too!
LikeLike
This turned out great and what a wonderful gift. Thank you for sharing at Share It One More Time Cathy
LikeLike
My friend loved it! It was fun to surprise her!
LikeLike
Very nice. I’m sure she will appreciate the time and effort you put into creating this lovely gift for her.
LikeLike
She loved it! Now more people are asking for one! Thanks for stopping by!
LikeLike
This turned out SO cute! Saral Paper would have made this an easier project for you. Check out my post Pumpkin Carving Design Tips & Tricks: http://lifewithlorelai.com/2013/10/15/pumpkin-carving-design-tips-tricks/ to see what I’m talking about. Super easy! Congrats on being Link #600 — it’s a new record for us. Thanks for sharing at the #HomeMattersParty – we hope to see you again next week. 🙂
~Lorelai
Life With Lorelai
LikeLike
Thanks for the tip! I will check it out! 600!! Wow!! That is so cool! Congratulations!
LikeLike
Cute! I love Disney! Thanks for linking up at the Weekend Blog Hop at My Flagstaff Home!
Jennifer
LikeLike
This turned out great. What a lovely thing to do for your friend. I am sure your friend will love it.
LikeLike
This is such a sweet gift to make and it came out beautifully. I’m sure your friend will cherish it. I’ve used the same transfer method too, it wrks great. XO-Wendi @H2OBungalow
LikeLike
My friend loved it very much! Thanks for coming by to take a look!
LikeLike
Hi Lauren, this looks so nice! I didn’t know the trick with the pencil on the back, so I will definitely try that!
Cheers
LikeLike
The pencil trick helps a lot, especially when you don’t freehand very well! Thanks so much for coming by!
LikeLike