A Special Space in My Backyard

Good morning and Happy Memorial Day! Today is the official kick-off to summer! I still have 4 days of school left, but we are definitely all in summer mode. To get prepared for some wonderful summer memories, I fixed up a small backyard space perfect for relaxing and enjoying the nights. I am so excited to share it with you!

Side note: My pictures were also featured by Serena Appiah from Thrift Diving. Here is the link if you want to see some other great yard makeovers.  https://www.facebook.com/ThriftDiving/videos/1562465847212403/UzpfSTQxODQyODM4MTYzMDE0MzoxMTQ3OTQ5MzY1MzQ0NzA0/

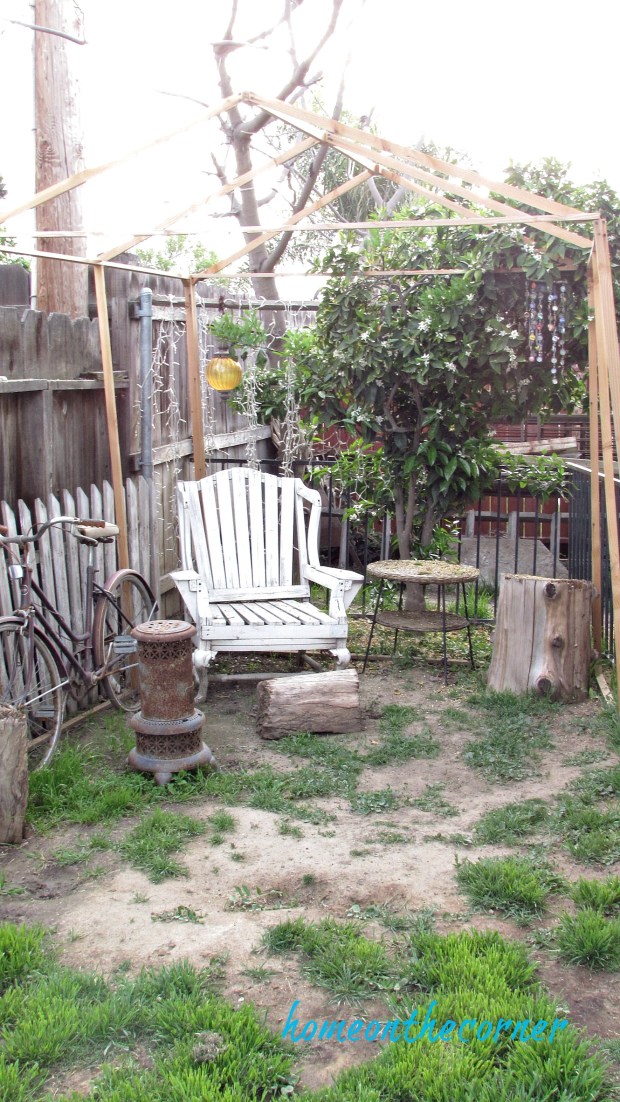
I have this area in my yard that isn’t really usable for entertaining. It’s around the corner from the patio and is pretty narrow. So this is the perfect fit! First of all I had my husband build me this small structure out of 1 x 2’s. Funny thing- we used the basic idea from the cat hutches he built for the animal shelter! Hey, if it works! We did add a pitched roof on this one though. Here are a few of the pieces I hoped to use inside.

backyard gazebo before chair

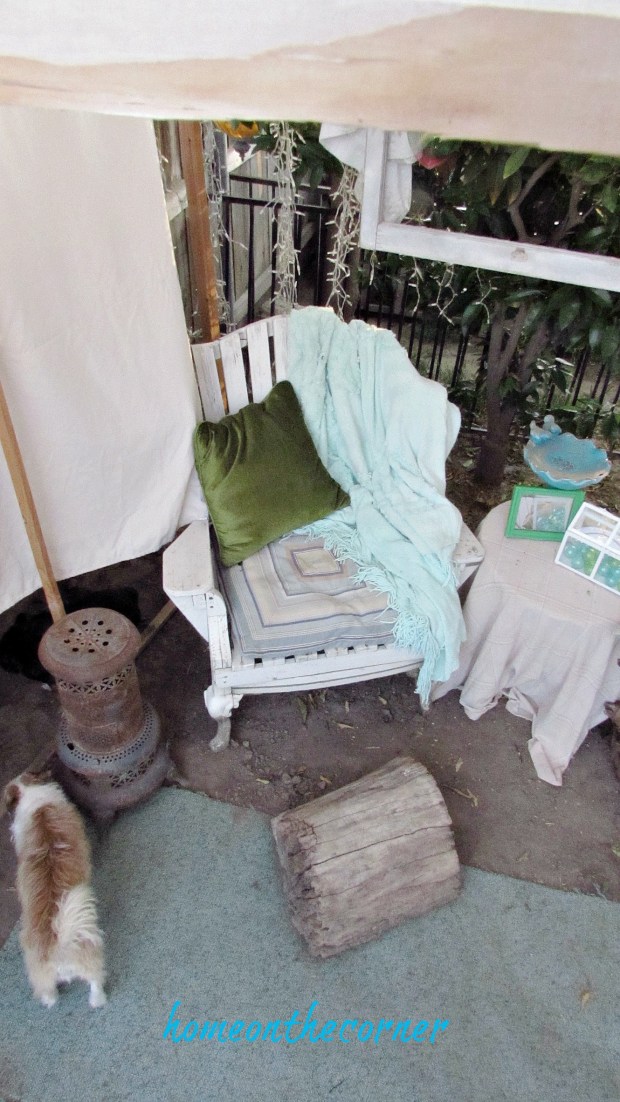
We ‘rescued’ the chair from a backyard at an abandoned house, Steve picked up the small heater at a friends house, the large stump came from a neighbor and the other pieces I already had laying around.

backyard gazebo before

The picket fence actually came from my grandma’s property many years ago. Obviously, it needs some fixing up and refreshing.

backyard gazebo broken fence

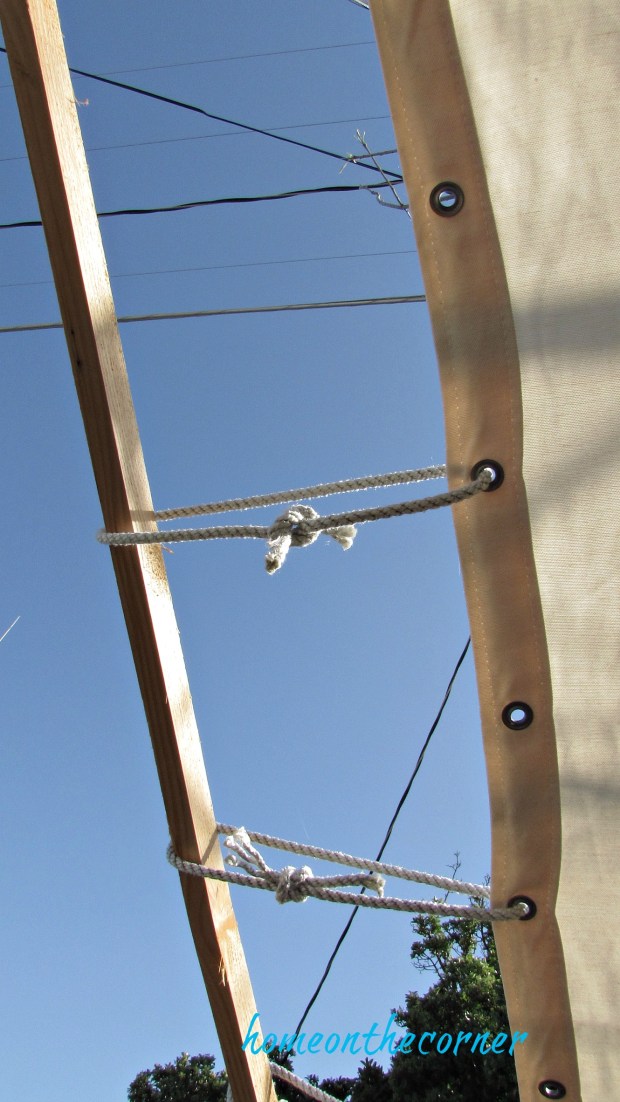
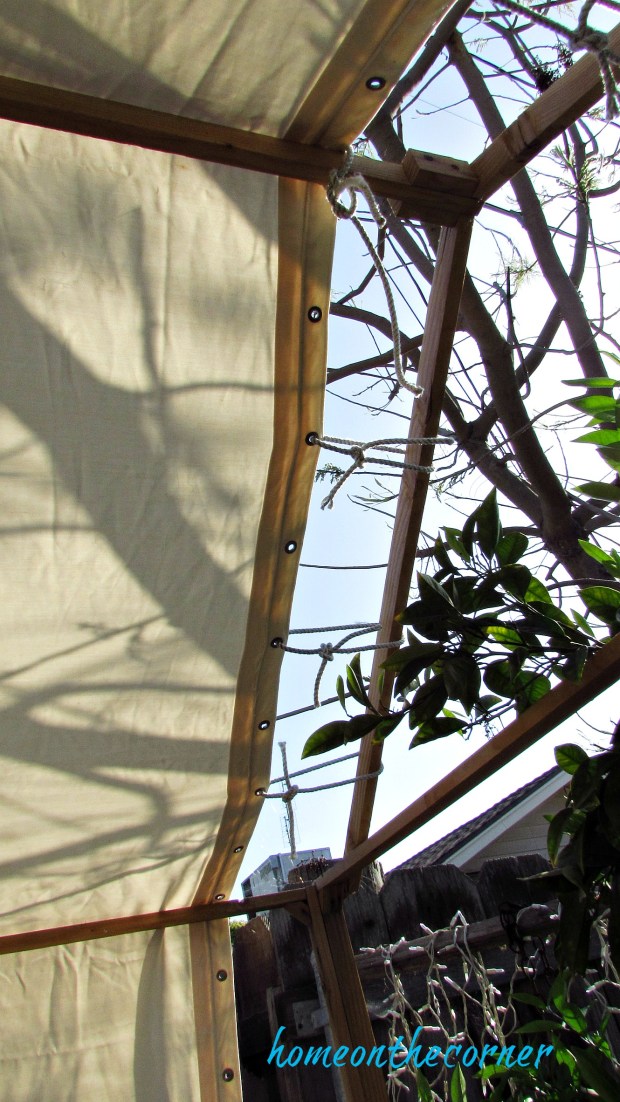
For the roof, I used a large curtain I had from a sale many year ago. I believe it was a hospital curtain. The eyelets were only on one side, so I cut another strip of eyelets from another curtain and sewed it to the other side. I used some pieces of rope to attach it to the frame.

backyard gazebo canvas cover rope tiesbackyard gazebo canvas roof

Progress! Here is some of the pickets reattached. Now it just needs a fresh coat of paint. I also cleaned out some of the weeds and added the walkway. I would like to add some pretty plants in front of the fence.

backyard gazebo picket fence

I gathered up a bunch of stuff I already had and picked up a few more things at thrift stores. I was originally going for more of a boho look, with lots of colors, but I ended up with turquoise. Big surprise, right?

backyard gazebo blue bike and wreath

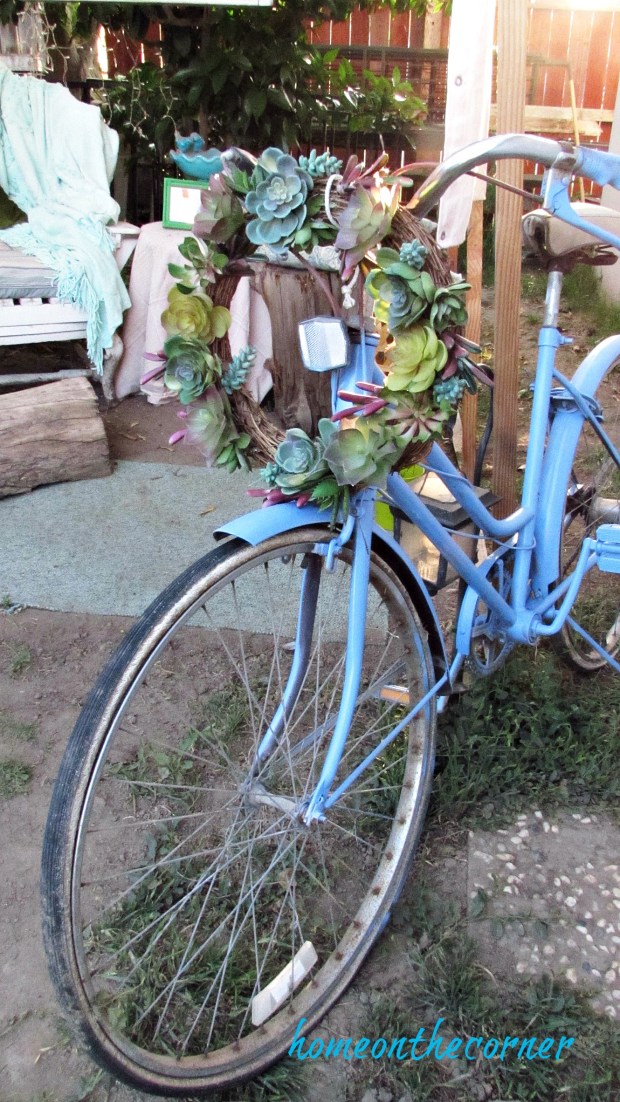
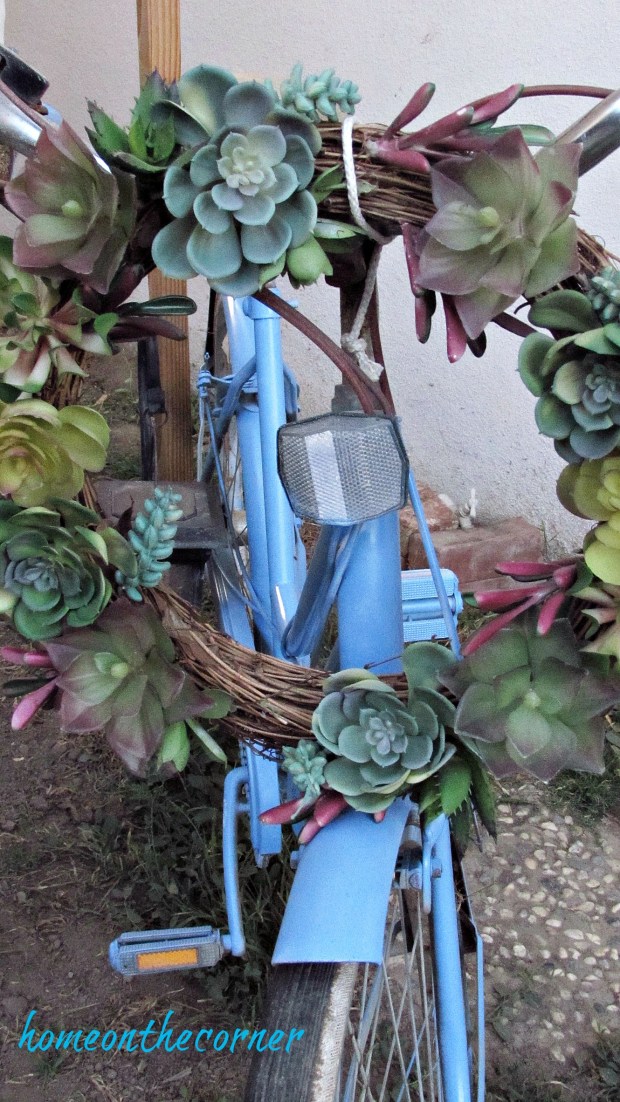
The vintage brown bike in the first photos got a fresh coat of paint. Doesn’t it look pretty! I love spray paint! I added a faux succulent wreath to the handlebars.

backyard gazebo old blue bicycle succulent wreathbackyard gazebo blue bike

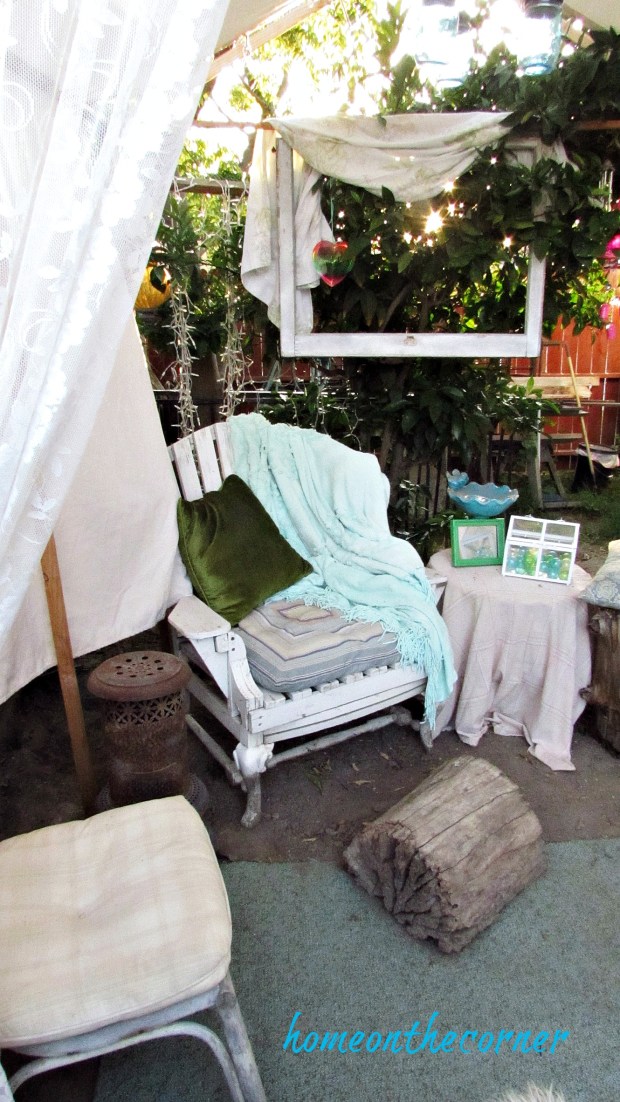
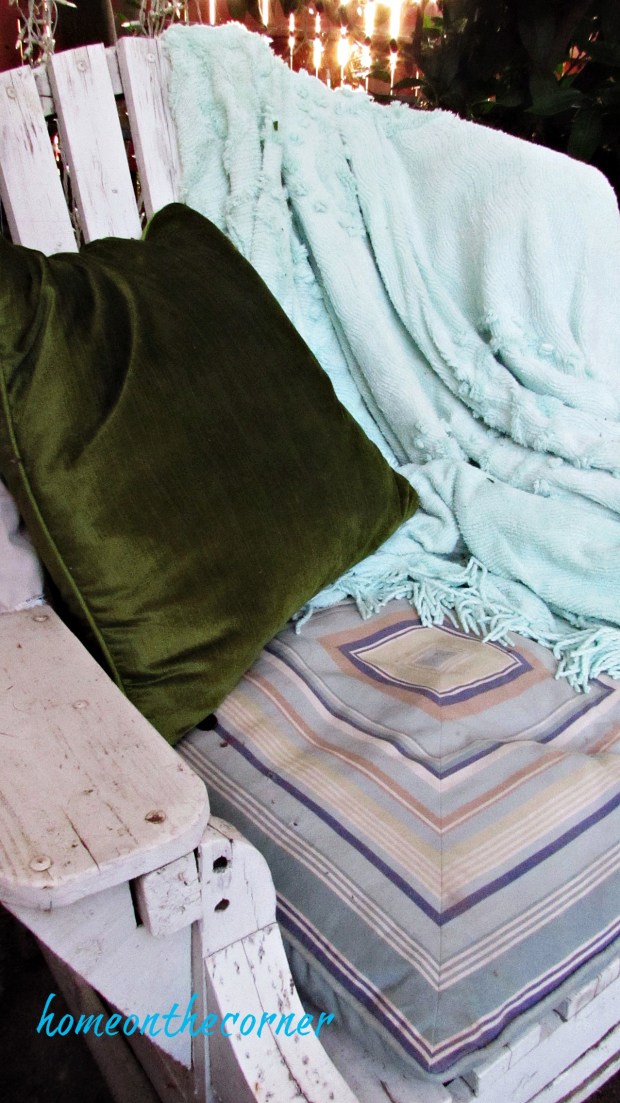
I love the lacy curtain and the green velvet pillow.

backyard gazebo chair corner old windowbackyard gazebo lace curtain sunflower

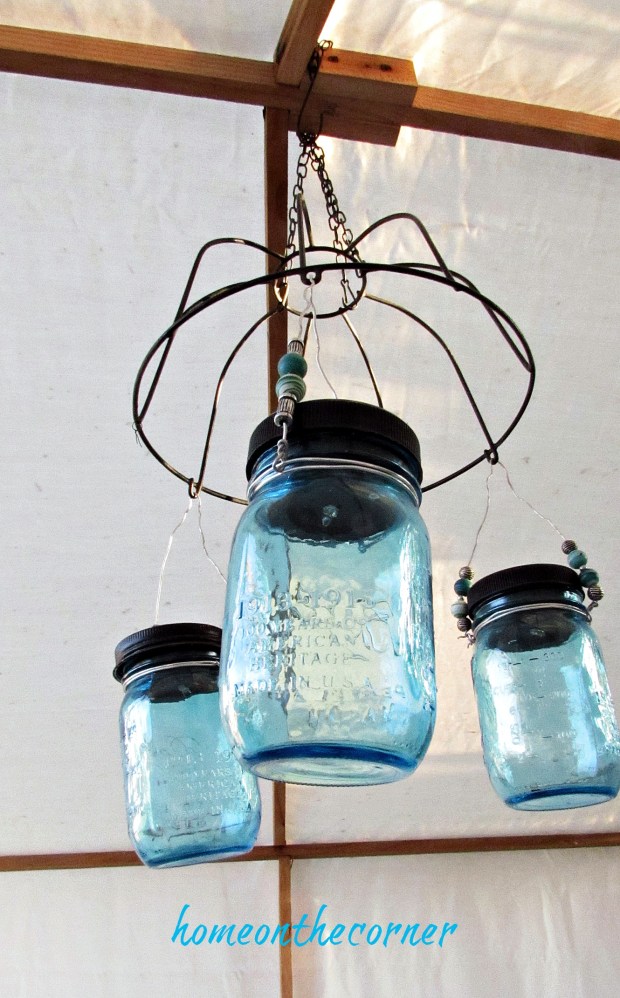
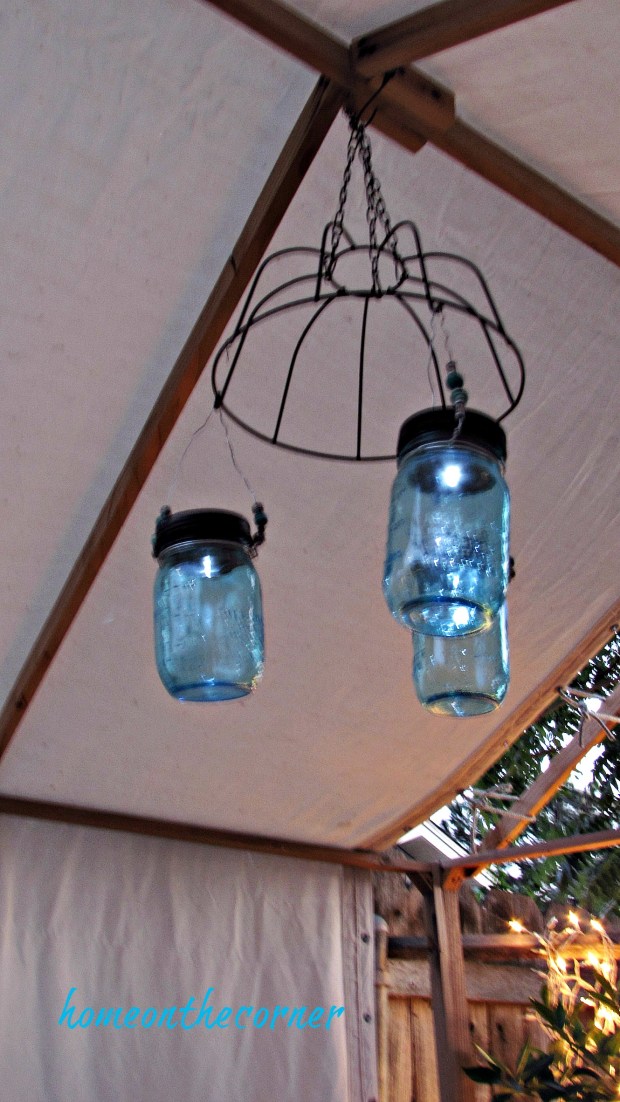
I had these solar mason jars at the old house and reused them here. I actually had kind of forgotten I had them. I was cleaning out some cupboards and rediscovered them. They work perfect on the metal planter as a chandelier.

backyard gazebo mason jar chandelierbackyard gazebo mason jar hanging lights

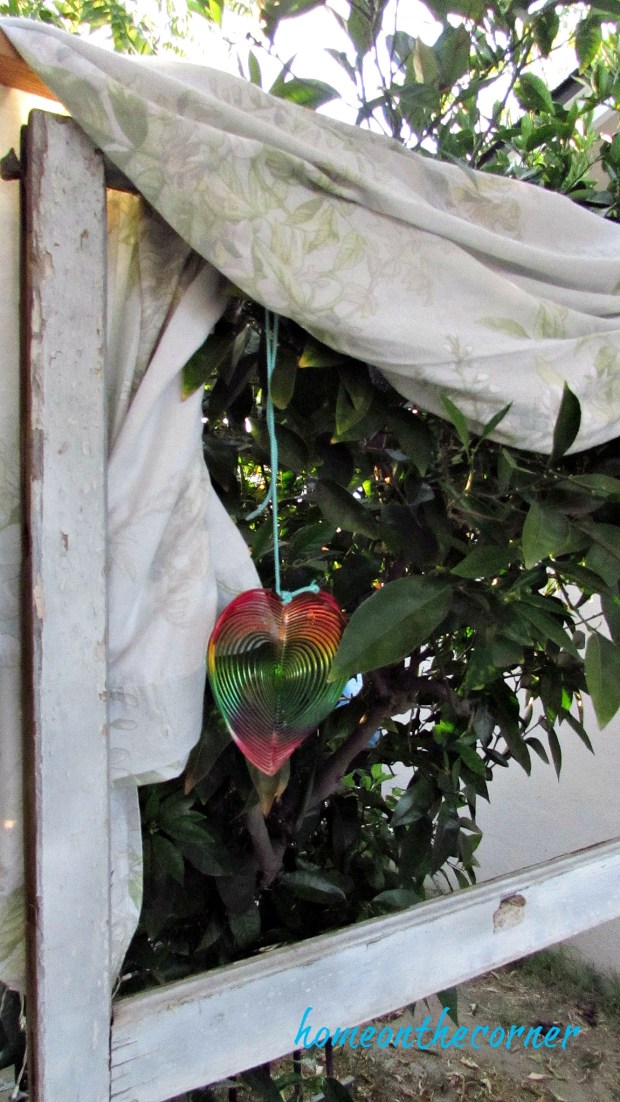
I added the chippy window to the back of the gazebo with piece of fabric over the top.

backyard gazebo old window

Ezzy loves the soft pillows!

backyard gazebo white chair and dogbackyard gazebo vintage bike and wreathbackyard gazebo turquoise and green velvet pillow

My neighbor had this stump sitting next to the house and I finally asked him if he wanted to get rid of it. Yep! Sometimes you just have to ask! I found this cool yellow lantern at a thrift store. I love how big it is!

backyard gazebo tall woven lantern stumpbackyard gazebo stump and pillow

I added a few more green and turquoise items to the small table.

backyard gazebo side table stump stoolbackyard gazebo side table mirror and baubles

I had to add a pink flamingo!

backyard gazebo pink flamingo wind chime

I would eventually like to add some gravel to the floor, but I had this small scrap of carpet and decided to use it for now.

backyard gazebo pillows, blanketsbackyard gazebo yellow lantern, metal dog, green pot

At dusk, I turn on some of the lights and it looks so pretty.

backyard gazebo with lightsbackyard gazebo nighttime mason jar lightsbackyard gazebo hanging lights and chair

I can’t wait to be able to enjoy this special space!

backyard gazebo evening view with lights

That was a lot of photos! Thank you if you made it through them all! Do you have any special spaces in your yard? I would love to hear about them. I hope you all have a wonderful week!

sunshine-and-blessings-picmonkey

Graduation Ideas

Congratulations! Graduation season is upon us and many people are moving onto to bigger and better things.  If that means going to high school, college, or your dream job, it’s a huge accomplishment to graduate.  And if you need some last minute graduation party ideas, I am here to save the day!

Here are some awesome ideas for decorating for a graduation party.  Enjoy!

Numbers

Large Photo Numbers from Play Party Plan

gradwreath6

DIY Graduation Wreath from DIY Beautify

graduation-party-decor-tissue-paper-year

Tissue Paper Numbers from Sugar Bee Crafts

Letterpress Card

Cute Letter Pressed Card from Eighteen 25

graduation-toppers-and-straws-4

Graduation Cap Topppers by Lil Luna

graduation-party-cute

Black White and Gold Party from Pizzazzerie

Colorful-Tassel-Necklaces-DIY-682x1024

DIY Tassels from Style Inked

Jenga.jpg

Memory Jenga from Must Have Mom

graduation party 2015 (7)

Peacock Themed Graduation Party from Home on the Corner

Sparkle

Casual Blue and White Beach Tablescape

Good morning! I haven’t been here for a few weeks, so it’s good to be back! The end of the year school stuff is wearing me out! But I have a few projects I’m working on so hopefully I can get them done and posted in the next few weeks!

I am really looking forward to summer and my dining room table reflects that. I love the beach look, so I decorated around that theme.

Blue and white are the perfect colors for summer! I use it along with the turquoise that I love so much. Of course, lanterns make an awesome centerpiece, especially filled with pieces of driftwood.

blue and white beach tablescape

I picked up these little glass votive holders at a thrift store for just .25! I added some sand and glitter around the edge and then placed a candle in a little more sand placed in the bottom.

blue and white dining room candles, glass floatblue and white dining room capiz shell lamp and centerpiece

I love the glass floats and have started a little collection of them.

blue and white dining room fisherman net and candlesblue and white dining room lantern with driftwood

So many of my items have been picked up from Goodwill, but are Target items. The placemats,  napkins and navy blue bags were all  purchased at Goodwill. I love that I can get new items for a fraction of the price.

blue and white dining room place setting

I added a few beach touches to my shelves too. I made the ombre’ starfish canvas a couple of years ago.

blue and white dining room shelvesblue and white dining room striped runner and nettingblue and white summer dining room driftwood lantern centerpiece

The little blue bags are great for gathering together the napkin and flatware.

blue and white tablescape blue silverware bag


blue and white summer dining room

Are you ready for summer? I  am looking forward to having time to relax and time to get some of my long list of projects done! Have a great week!

sunshine-and-blessings-picmonkey

How to Make a Wreath for $20

Hello!  This is a random post that is not a top 10, but it is a re-post.  This is the perfect DIY for summer and it’s super easy!  For $20 and 2 hours of work, you will get an awesome wreath.  Enjoy!

Flower Wreath Supplies

Things you need are a pool noodle, lots of fake flowers, tape, scissors, and some sort of statement decoration.  All of these items can be purchased from the Dollar Store, so it makes the wreath even cheaper!

The first thing you need to do it make the pool noodle into a wreath.  Just make it a circle and use tape to keep it in place.  I had to use packing tape to make sure that it would stay in place.

Then I started placing flowers.  I wasn’t sure how it was going to work exactly, but I thought that the easiest way would be to cut the wire to stick in the noodle.  So, after a little bit of work trying to figure out the easiest way to cut the flowers, it was able to get started on my wreath.

Flower Wreath Flower Placement

I went with white, pink, yellow, and orange for my flower choices and filled in the noodle as I went.  I didn’t fill in the back of the noodle because I knew that no one would see the back.  But, I worked for about 2 hours to fill the wreath.

Now for you decoration of choice.  I went with a wooden S since our last name is Smith.  I first covered the noodle with a sparkly silver ribbon so that we wouldn’t see the green styrofoam underneath.  I painted the S white so it would stand out against the silver ribbon and between all of the flowers.

Flower Wreath White Letter

After a little bit of hot glue, the wreath was complete!  And here is the finished project!

Flower Wreath FinishedFlower Wreath Close UpFlower Wreath Close Up 2Flower Wreath Closer

First of all, I love how the colors look against mom’s turquoise door.  It makes the pinks and yellows really stand out.  And I love how it looks!  The colors are so bright and pretty and they look great with the S on the wreath as well.  This wreath is even better because it only cost me $20 to make!  $20 and 2 hours of work to have the beautiful wreath, I think it’s worth it!

If you want to check out the Dollar Tree website, click on the link in the sidebar to find all of your supplies for $1!

If you decide to try this project, please let me know how it goes!  And, comment a picture of it below so we can see you beautiful creations as well!

Recycled Door Beverage Station

Good morning! Do you have anything special going on in your area? We are having some nicer warm weather now. I think we finally have the wind and rain behind us now. I will be heading to the zoo this week with our school. We have never gone as a whole school before, so that should be interesting. We are also inching closer to our second Disney vacation! This was our Christmas gift to the girls and we will be heading over next week. I’m excited to see everything going on with Pixar Fest! Today I have a previous post for you, so enjoy!

So, what does a ruined door and a few pieces of wood make? A Beverage Station! I saw this idea last year on the blog, Finding Home, and knew I wanted to make one!

DIY Upcycled Outdoor Beverage Bar Station

Upcycled Outdoor Beverage Bar Station-Finding Home

Almost 2 years ago, one of the houses in my neighborhood had a fire. Nobody was in it at the time and it had a lot of damage. Later, it was gutted. I found this door in the alley after the fire. It had some slight burn marks, lots of soot, and some cracks in it from being broken down, but I took it anyways. One mans trash…right?!

Door and Wood

Here you can see the door, sort of. We had to put a couple of braces on the areas where it was cracked and fill in places with spackle, but paint will cover that later. Here’s another view.

Another view

I used old cupboard knobs for feet. I wanted it a little above the grounds so it wouldn’t sit in any water and get rotten. The knobs are attached to the bottom shelf of the station.

Knob feet

I bought the spindles at a craft show last summer, just for this project. It only took a year to get to it! I took a piece of shelving and my husband screwed it into the spindle. We did this for all 4 of them. We also screwed the spindles into the bottom shelf.

Attaching the spindles

Here are the two shelves and the spindles, all attached.

old door beverage bar-homeonthecorner

We added another deeper shelf above this one for large containers of drinks. I was going to add one more small shelf on top, but I had this old metal piece from a screen door, so I hung that on instead. I screwed cup hooks in the door and just hung the metal piece. I can always change it later if I so desire!

All together

Now for the fun of painting! I borrowed a neighbor’s paint sprayer and sprayed on primer after covering the spindle legs with paper. The sprayer worked great, but when I went to try it for the paint it wouldn’t work!! Not sure what happened, but I had to brush paint the color on. I used the Barely White from Lauren’s room (trying to use what I already have).

Primered

And here it is! All freshly painted! I added the metal piece back on and I also painted the shelf with chalkboard paint. I figured I could label the drinks or food when I place it on the shelf! I also remembered I had an old doorknob and hardware. I spray painted them black and added them where the old deadbolt had been.

It's Finished!

I added some old signs and other decorations for now.

Old Signs

olddoorbeveragebar5

Old Door Beverage station-homeonthecorner

One More View

I can’t wait to be able to use this! We plan on using it as a ‘Candy Bar’ for Haley’s upcoming graduation and drinks for other parties and get-together’s. I’m excited to see how many different ways this can be used!

Here are a few updated pictures. I now have this piece in my entryway. I painted the legs white and added a black metal box under the shelf. I love decorating it for each season!

painted entryway decor

Travel theme entry way

christmas 2017 entryway silver and gold welcome

Have you ever recycled something old into something new? I would love to hear about it! I hope you all have a great week!

sunshine-and-blessings-picmonkey

amazon affiliate