Yes, You Can Make Your Own Lanyard!

And it’s so easy!!! These would make great Teacher gifts for all those who have worked so hard this past year. The nice thing about making your own, is you can customize it any way you want!

You are going to need:

  • 11/2 inch ribbon
  • Heat and Bond and iron
  • ‘D’ ring and hook
  • Sewing machine or fabric glue

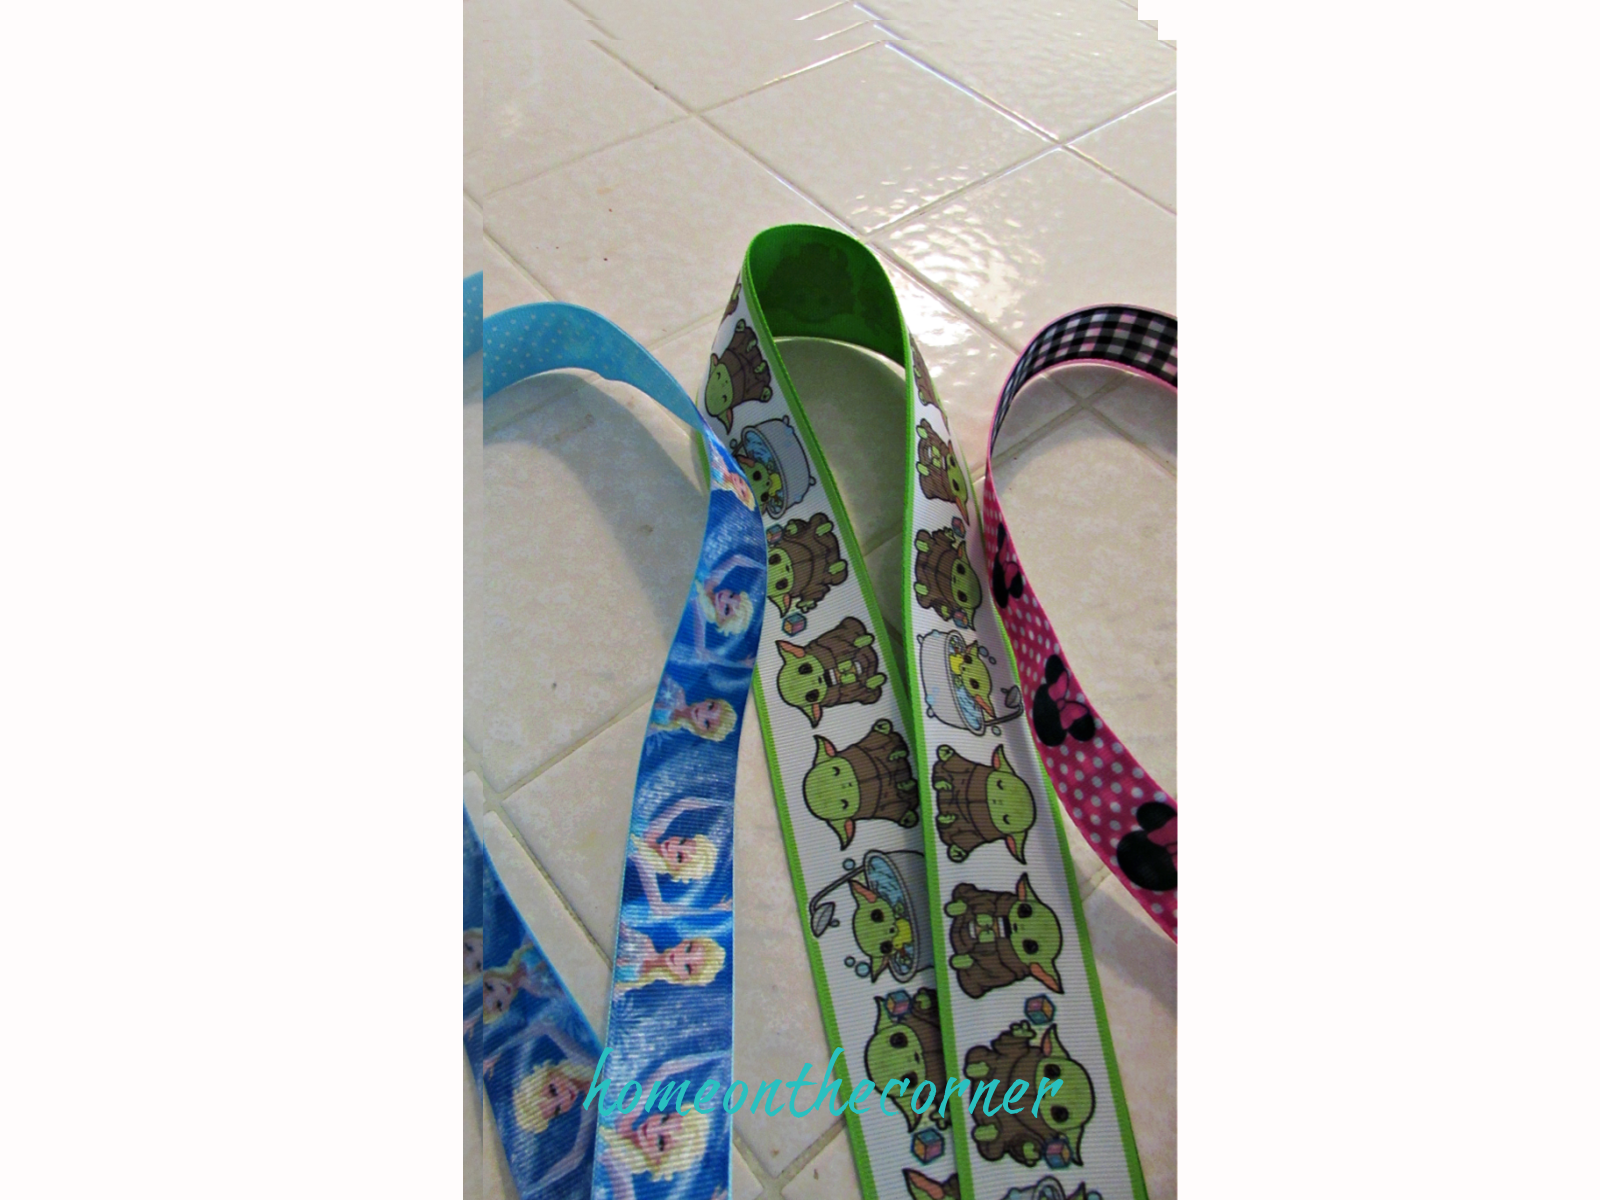
The first step is to find some cute ribbon! That’s not hard to do! I found two coordinating ones. I actually ordered the Star War and Yoda ribbon from Etsy, but I have bought several from Michaels and Hobby Lobby. I like the 1 1/2 inch the best, but 1 inch would work also. Cut your ribbon in 1 yard lengths.

Here is where you have a couple of choices of ways to attach you ribbon together. I used Heat and Bond. You could always sew the ribbons together or use fabric glue to attach them. I cut a piece the same length of the ribbon.

I laid the Heat and Bond on each edge of the ribbon and ironed it on. Follow the directions on the package. I ironed over each side slowly to make sure the glue is bonded well.

Once the ribbon has cooled peel off the paper backing.

Lay the other ribbon on top and iron the two together. Again, I iron over it slowly to attach the two ribbons together.

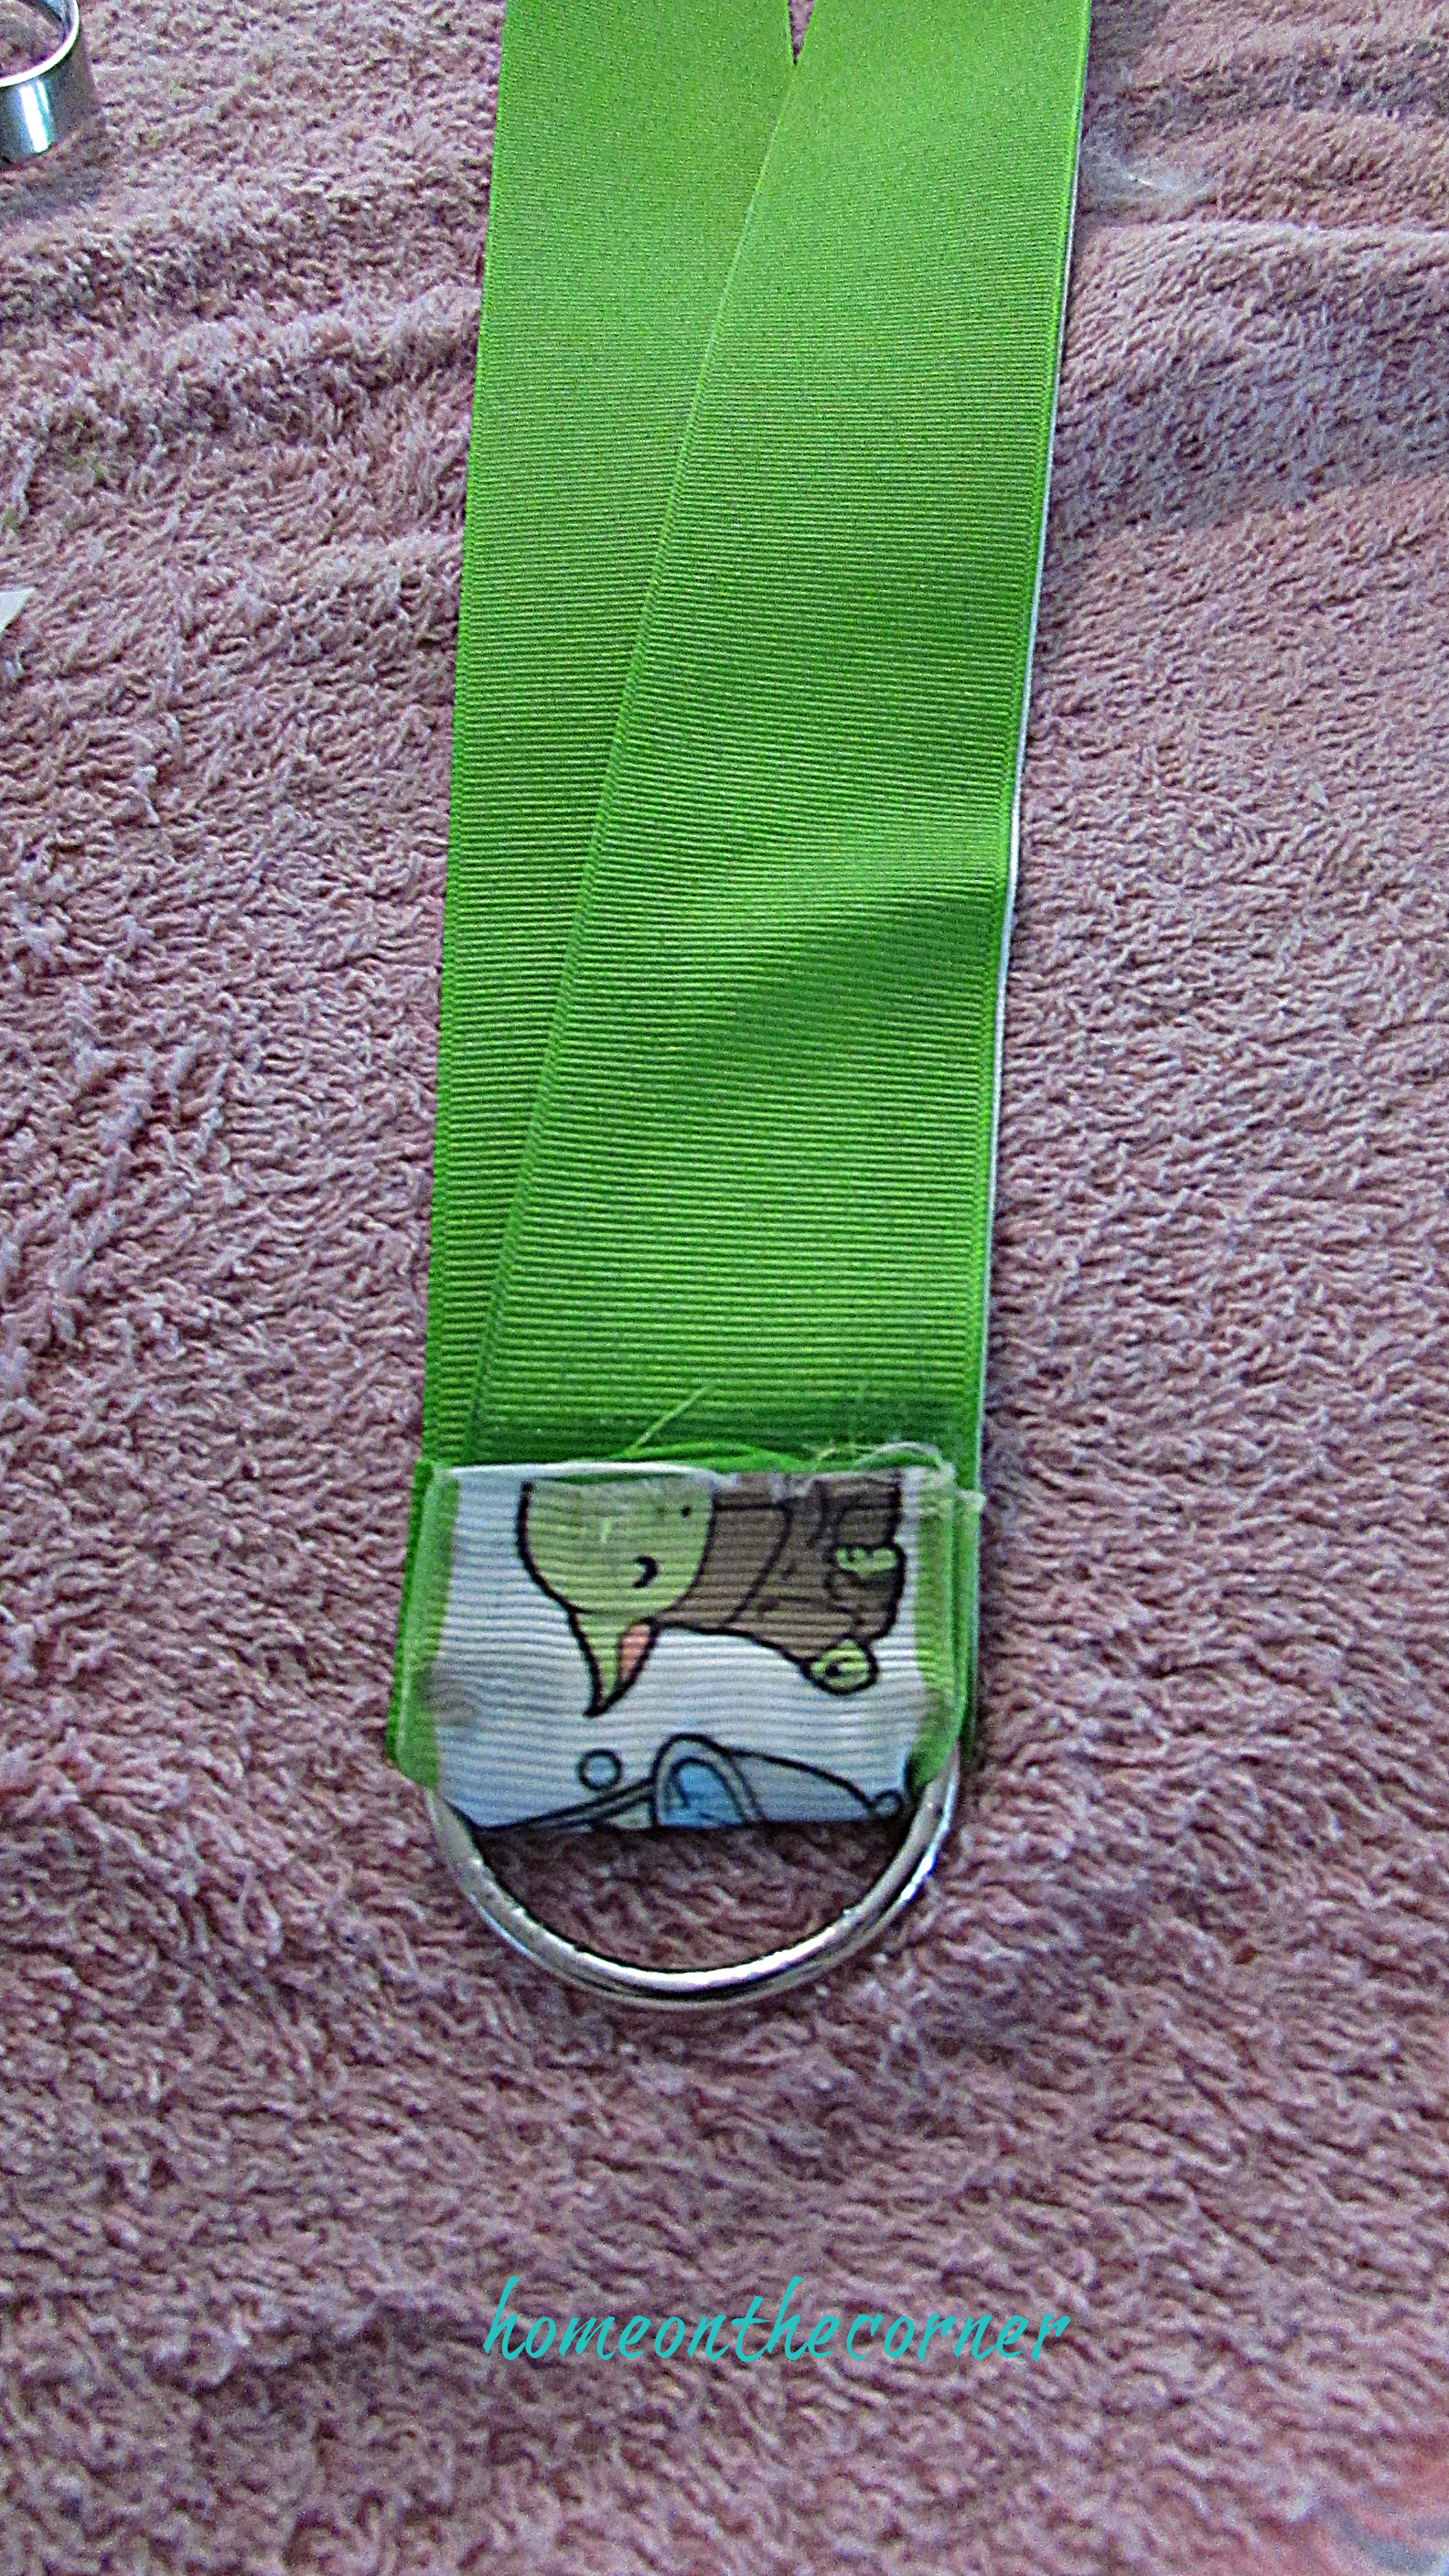
Once the ribbon has cooled, lay the ribbon flat. At the ends, place the back side on top of the front side. It kind of looks like an exclamation point.

Slide a ‘D’ ring over the end of the ribbon.

I ironed on another small piece of Heat and Bond on the bottom of both pieces of ribbon and ironed them together.

I also used a little bit of fabric glue to just make sure the pieces wouldn’t come apart. I have also sewed some of the ends, which makes it a little neater.

Here are a few of the others I have made.

Do you see something similar about them? Haha! I am selling these at the vendor fairs with Lauren while she sells her Disney trading pins.

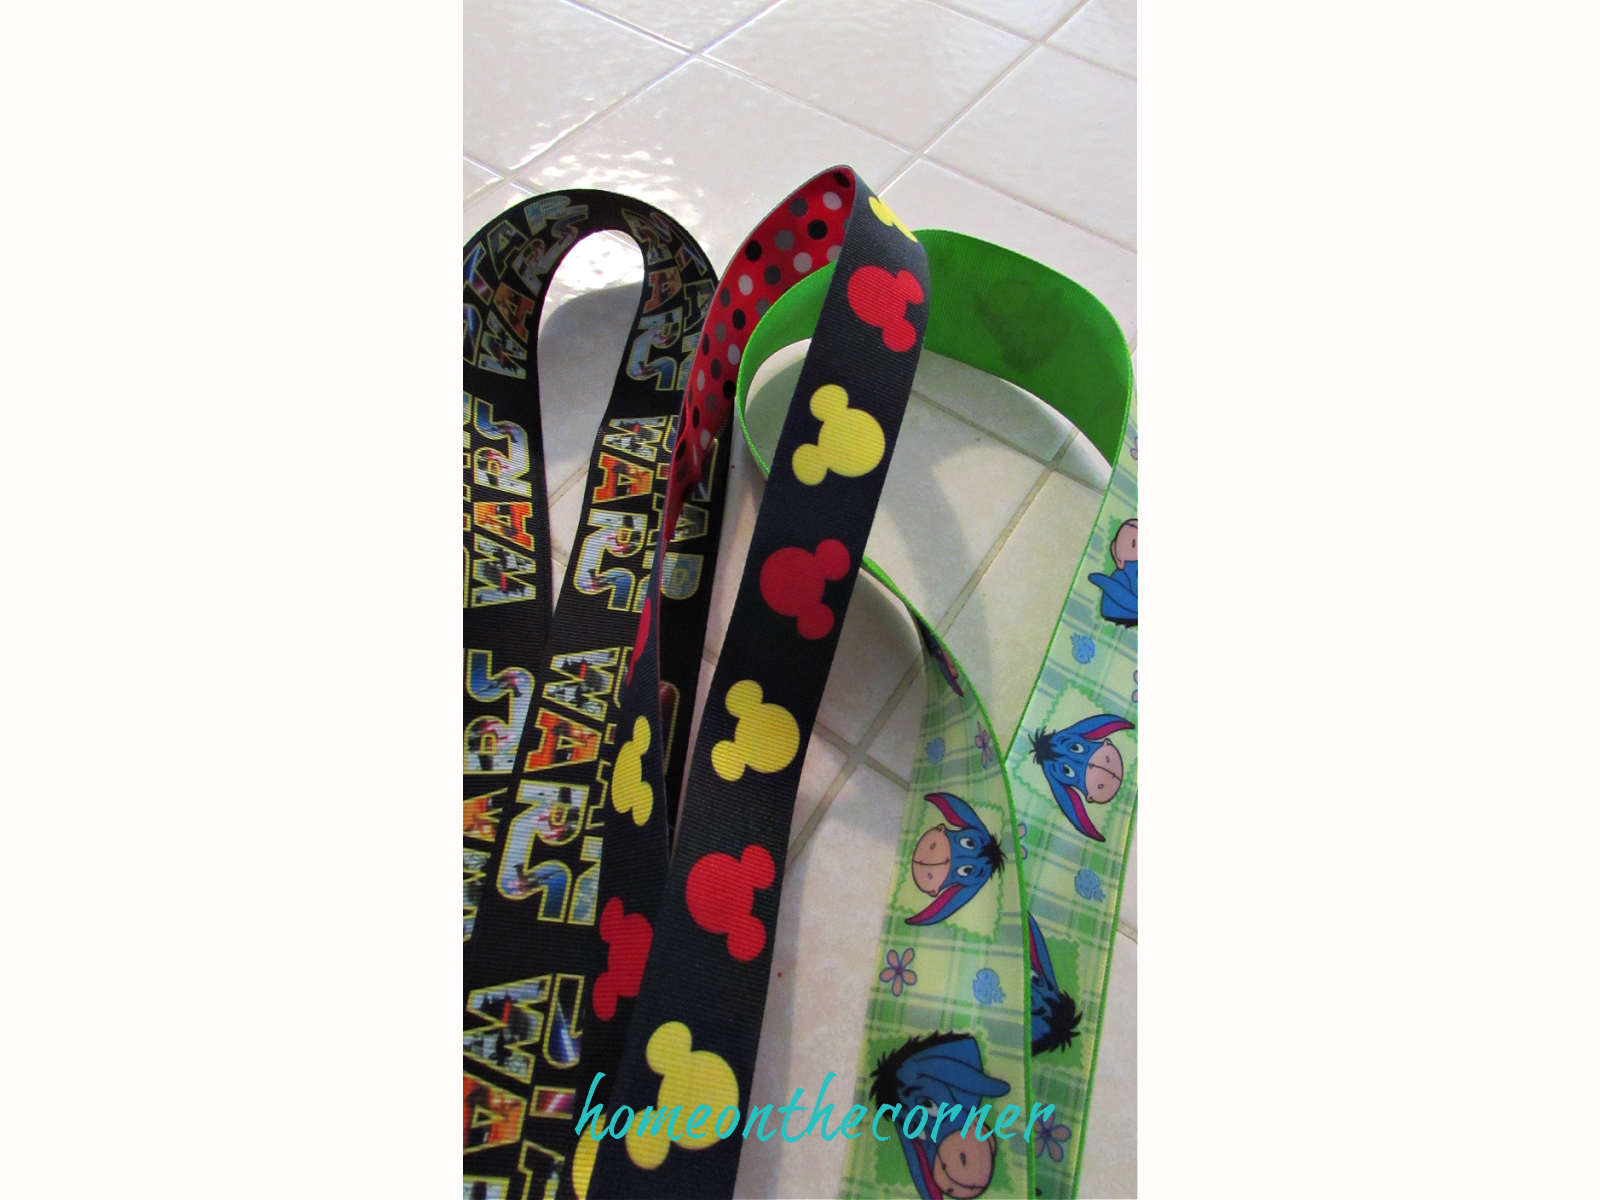
When I was a teacher, I wore these every day! They sure come in handy!

I would love to know if you try this out! Let me see what pattern ribbon you use! Have a great day!

Easy St. Patrick’s Day Art

Good morning! I was hoping to have this out earlier today, but that just didn’t happen! But this is such an easy project, you can definitely finish it in time for St. Patrick’s Day! Also, it could easily be changed for other holidays, like Easter, which is just around the corner!

I started out with an old canvas I had. This actually had a picture on it and I painted it, but picking one up from the store is super easy. I also had some burlap squares on hand.

I cut the burlap a little larger than the canvas so that I had enough burlap to wrap around the sides. I did iron my piece too. 🙂

I used Elmer’s Craft Bond, which is a spray to attach my burlap. I sprayed it on the front and sides of the canvas and then laid the burlap on top and smoothed it out.

I folded in the corners as tight as I could and used hot glue to secure them.

Now I have nice smooth surface!

I dug through my fabric and found two green ones I thought would work. You could also use scrapbook paper or a thick wrapping paper.

I printed out two different sizes of shamrocks I found on a Google search. Then I cut them out and laid them on the burlap until I found the way the right layout.

I used chalk to trace around the shamrock onto the fabric and then cut it out with fabric scissors.

I used the spray glue to attach the shamrocks and then pulled out my buttons to add some accents to my shamrocks. I played around with them a bit, starting with green and gold, then some yellow and finally decided it needed a little bit of black to really stand out. If the button is the type with a shank on the back, I cut it off with wire cutters.

I used tacky glue to attach the buttons, layering some on top of each other and setting others into little groups.

I placed it on my mantle with a few other spring items.

What do you think? Pretty easy, right? I might even make a few more for other holidays, I hope you have a great week!

Let Me Introduce You To My Town-Hanford Mall-Part 2

Last year, I found that Walmart was selling the game Hanfordopoly. It’s like Monopoly, but for my town. Well, I had to buy it! Then Lauren and I went around town and took pictures of each of the places on the game board. It was so much fun! I can’t wait to introduce you to our sweet little town and some of its history.

If you haven’t read Part 1, click here.

Today I am introducing you to the Hanford Mall. Our mall was built in 1993, after our old mall fell into disrepair. As you can see, we have some national chain stores, but we also have some smaller local stores inside the mall.

A little interesting tidbit-I worked at Big Five Sporting Goods for 7 years from the time they opened the store. I even helped set the store up at the very beginning! This mall was a big deal! There is an 8 screen movie theater, a food court and many different types of stores typical of a mall.

I’ve seen many stores come and go from the mall. Many I shopped at for my kids when they were small, like Mervyns, which JUST happened to be right next to Big 5. Also Forever 21 when my kids got older. It was a huge store that had taken over for a local department store, Gottschalks. Now Forever 21 is gone and the space has been divided up into small stores. Sears was also one of the anchor stores and now it sits empty. Our big stores now are Ross, J.C. Penny and Kohls.

I know the mall has struggled in the past and now again during the pandemic. But I think it will always be a great place to shop, or meet up with friends, or have a good meal. Do you have an indoor mall in your town? Is it large or just a small one like this one? I would love to hear about it! Thank you for coming by!

Let Me Introduce You To My Town-Part One

A Fun Way to Use an Old Frame

Good morning! I have a new project for you today! Lauren and I have been participating in some local vendor fairs and virtual fairs. She has been selling Disney Trading Pins and I am making boards to display the pins on. It’s been fun selecting all the different colors and characters. Of course, this doesn’t have to be done with Disney characters, but anything you like! Let me show you how!

I started with a frame from a thrift store. It doesn’t matter what kind of picture or if the frame is scratched. I like to look for frames that are a little different or have a design in them. I liked this oval one, because the curved ones are a little harder to find. This frame is just a plastic material.

The first step is to take apart the frame. Throw away the glass (unless you have another awesome idea to use it for!). I keep the back. It is good to use for tracing on the cork board and also to give extra support to the whole thing in the end. Make sure to keep any screws too.

Be sure to wipe off and clean your frame before painting. Then decide what color you want to use. I love the Rustoleum 2X Spray Paint. Since this frame is such a smooth surface, I used a primer first to give the paint something to grip. Once the primer was dry, I sprayed 2 light coats of the green.

This is where your back piece come in handy. I bought this corkboard from Hobby Lobby. I laid the back on top of the cork board, traced around it and then cut the cork with scissors. Depending on the thickness of the cork, you might have to use a razor blade. I found that 1/4 to 1/2 inch cork is the best. I really just depends on how thick your frame is and how thick of cork will fit inside and still be able to get the back of the frame back on.

For this board, I picked Tinkerbell. I looked up Tinkerbell silhouette in Google and then picked the one I thought would be easiest to cut out, without to much detail. If the design is too detailed, it’s difficult to be able to cut it out cleanly.

Once the design is cut out, place it on your corkboard. It might help to tape it down if you are afraid the paper might move too much. I used black acrylic paint to fill in the design.

I use a small brush that is pretty flat on the end. I start by daubing around the edge of the design and then I go back and fill in the whole design. Be sure to hold down the edges of the paper as you paint, so the paint doesn’t leak under. You may have to go over some of the edges with a small brush to smooth and even them out.

Doesn’t she look cute?! I love the bright green!

I’ve been making quite a few of these lately. Here are a couple of others. You can see that I used all different size frames and colors.

Princess crown…

and small oval.

These are fun to paint and the designs are endless! What would you put on yours?