Sweets for the Sweeties

Hi everyone! February is almost here and hearts are everywhere! My co-workers and I have a Secret Sister exchange every year for the week of Valentines. It’s a lot of fun and a great way to get to know someone a little better and create a nice work environment.  We fill out little forms about our likes and interests, then pick names and the week before Valentines Day, we secretly leave little gifts for them.  So, I always try to come up with something special and homemade, at least for one of the days.

My girls and I went to Starbucks this past week and Haley bought a sandwich that came in this cute little box.  I asked her to keep it so I could try to make it pretty! The first step was picking out some Valentine paper. I had these on hand, but you can find lots of different prints and styles at craft stores. I also used a paper cutter, since I can’t cut a straight line at all!

IMG_2363

I cut the paper long enough to fit around the sides of the box and overlap the front and back a little, plus go into the inside of the box.

IMG_2366

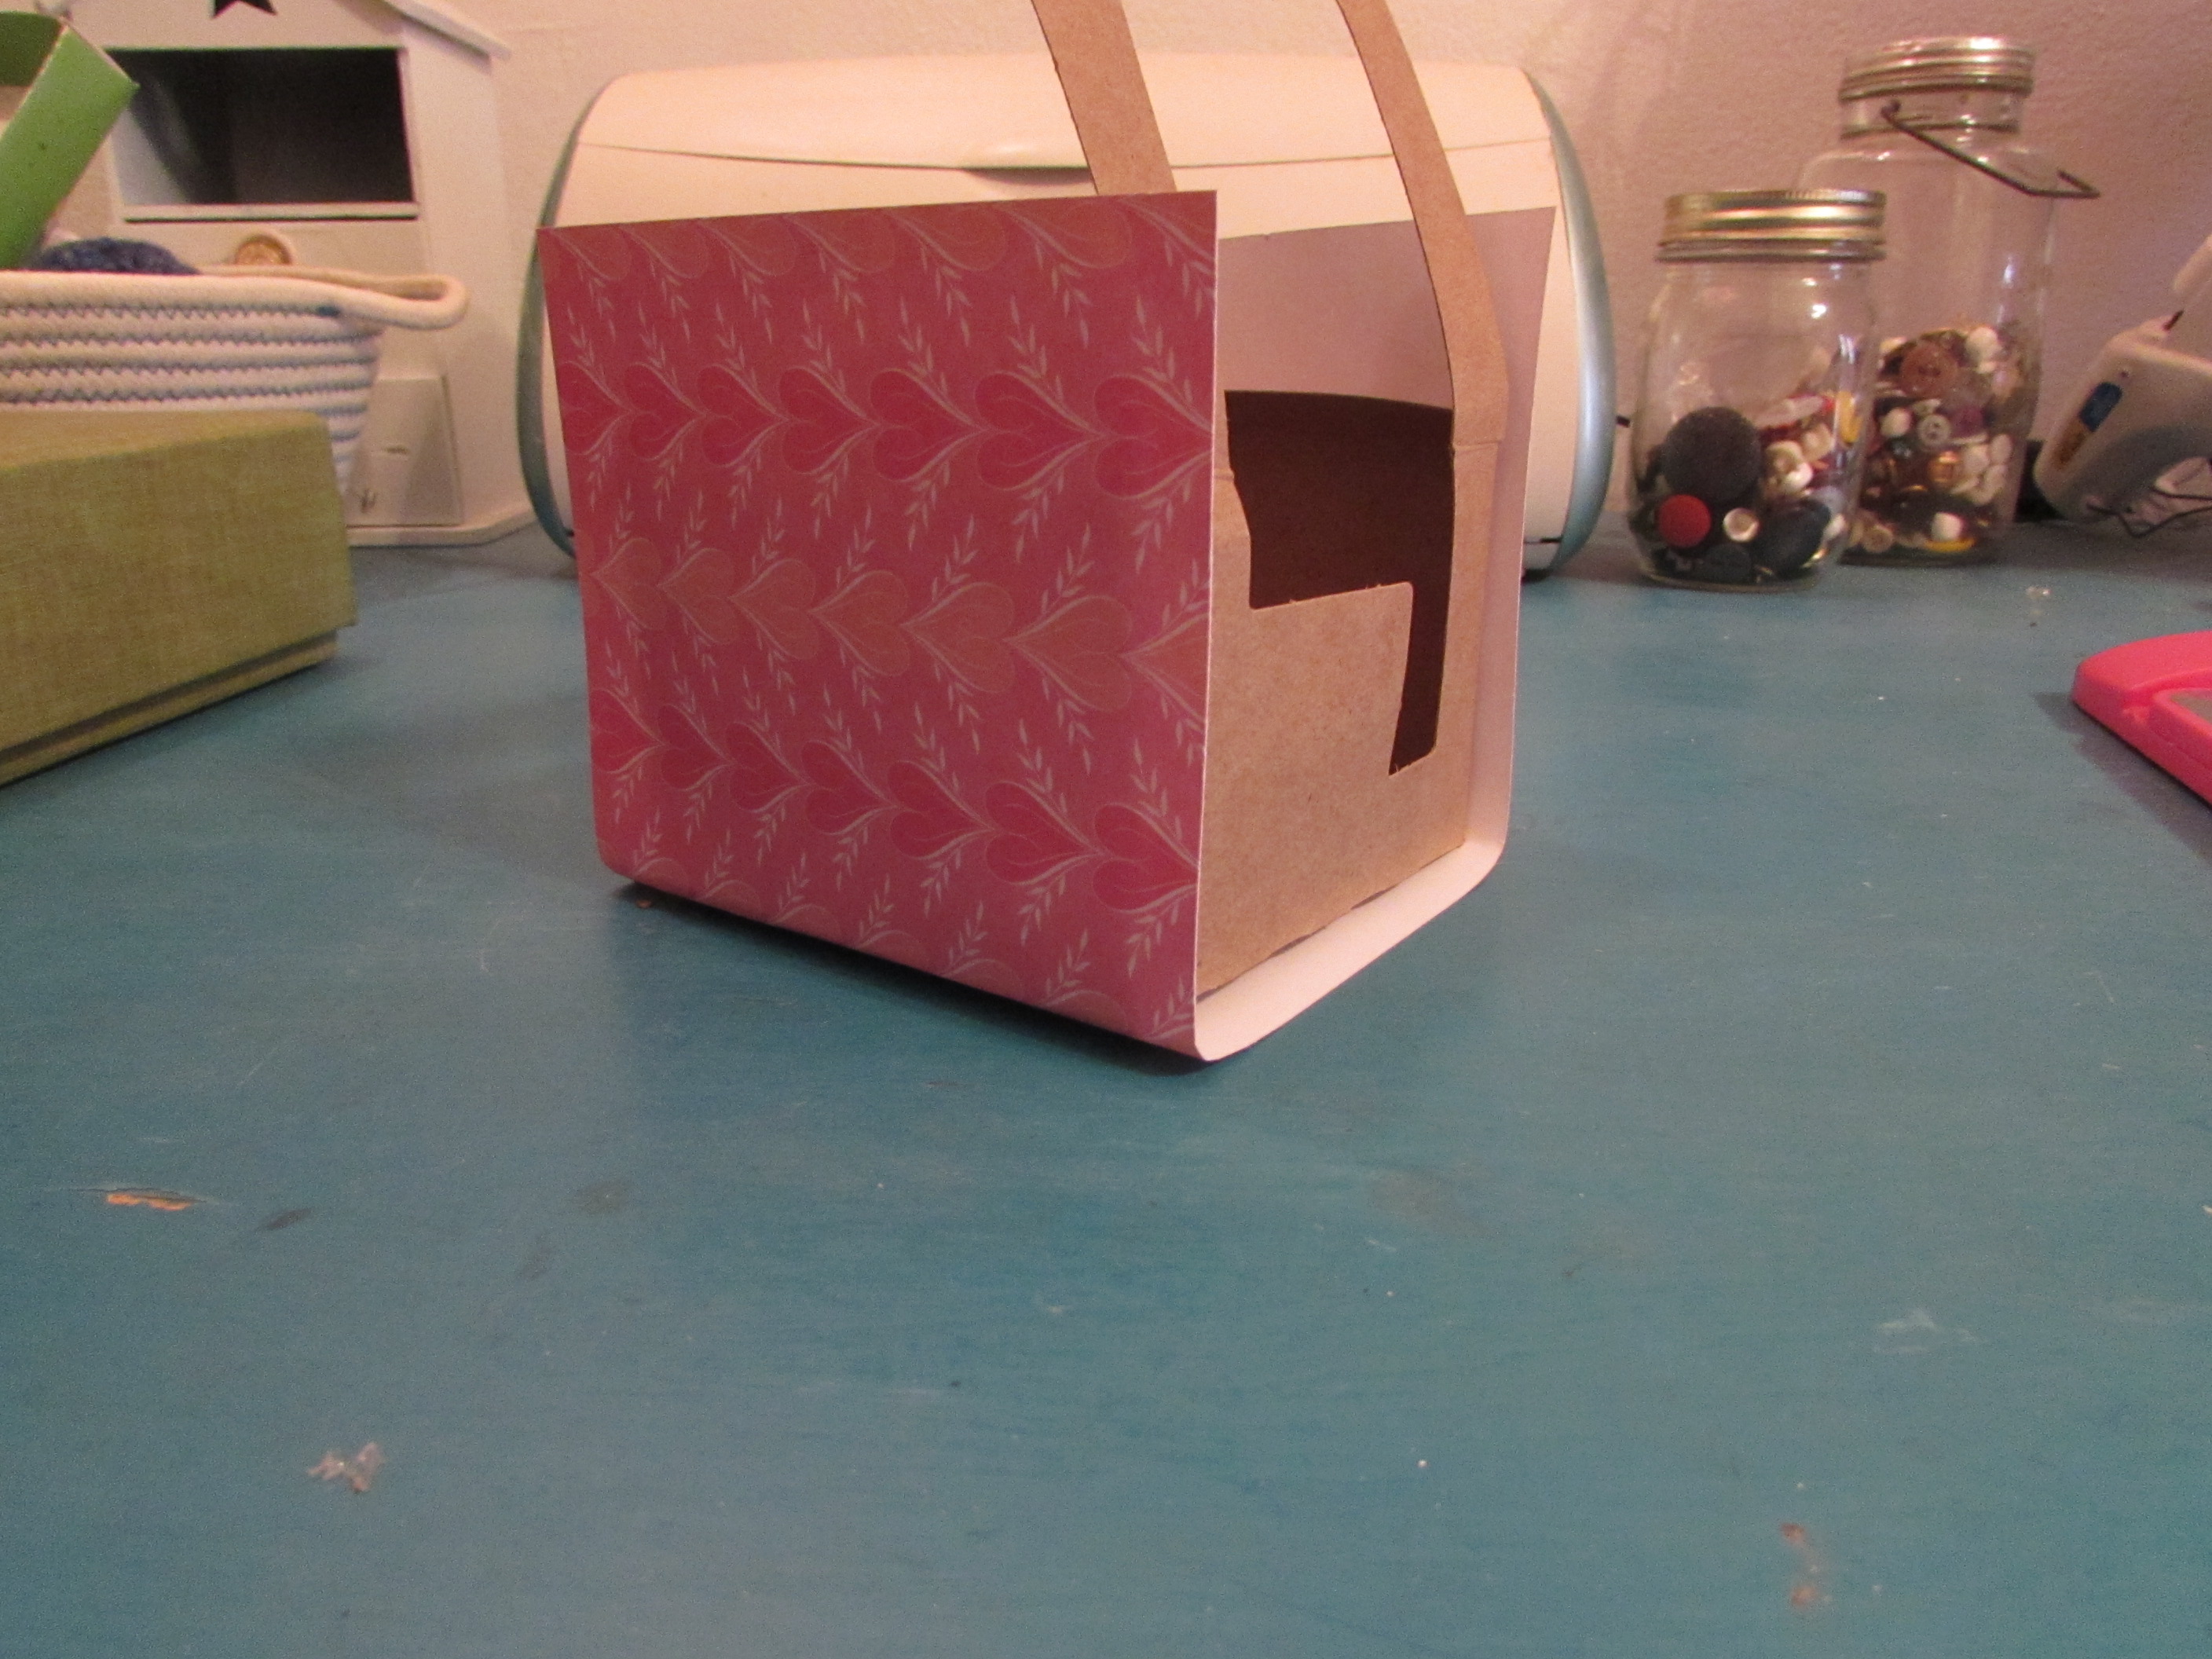
I glued the sides on and then cut a slit in each corner, diagonally from the corner of the paper to the corner of the box, so I could fold the paper around and into the inside of the box.

IMG_2367

Cut off the triangle that is left after folding. Glue down all your edges.

IMG_2368

IMG_2370

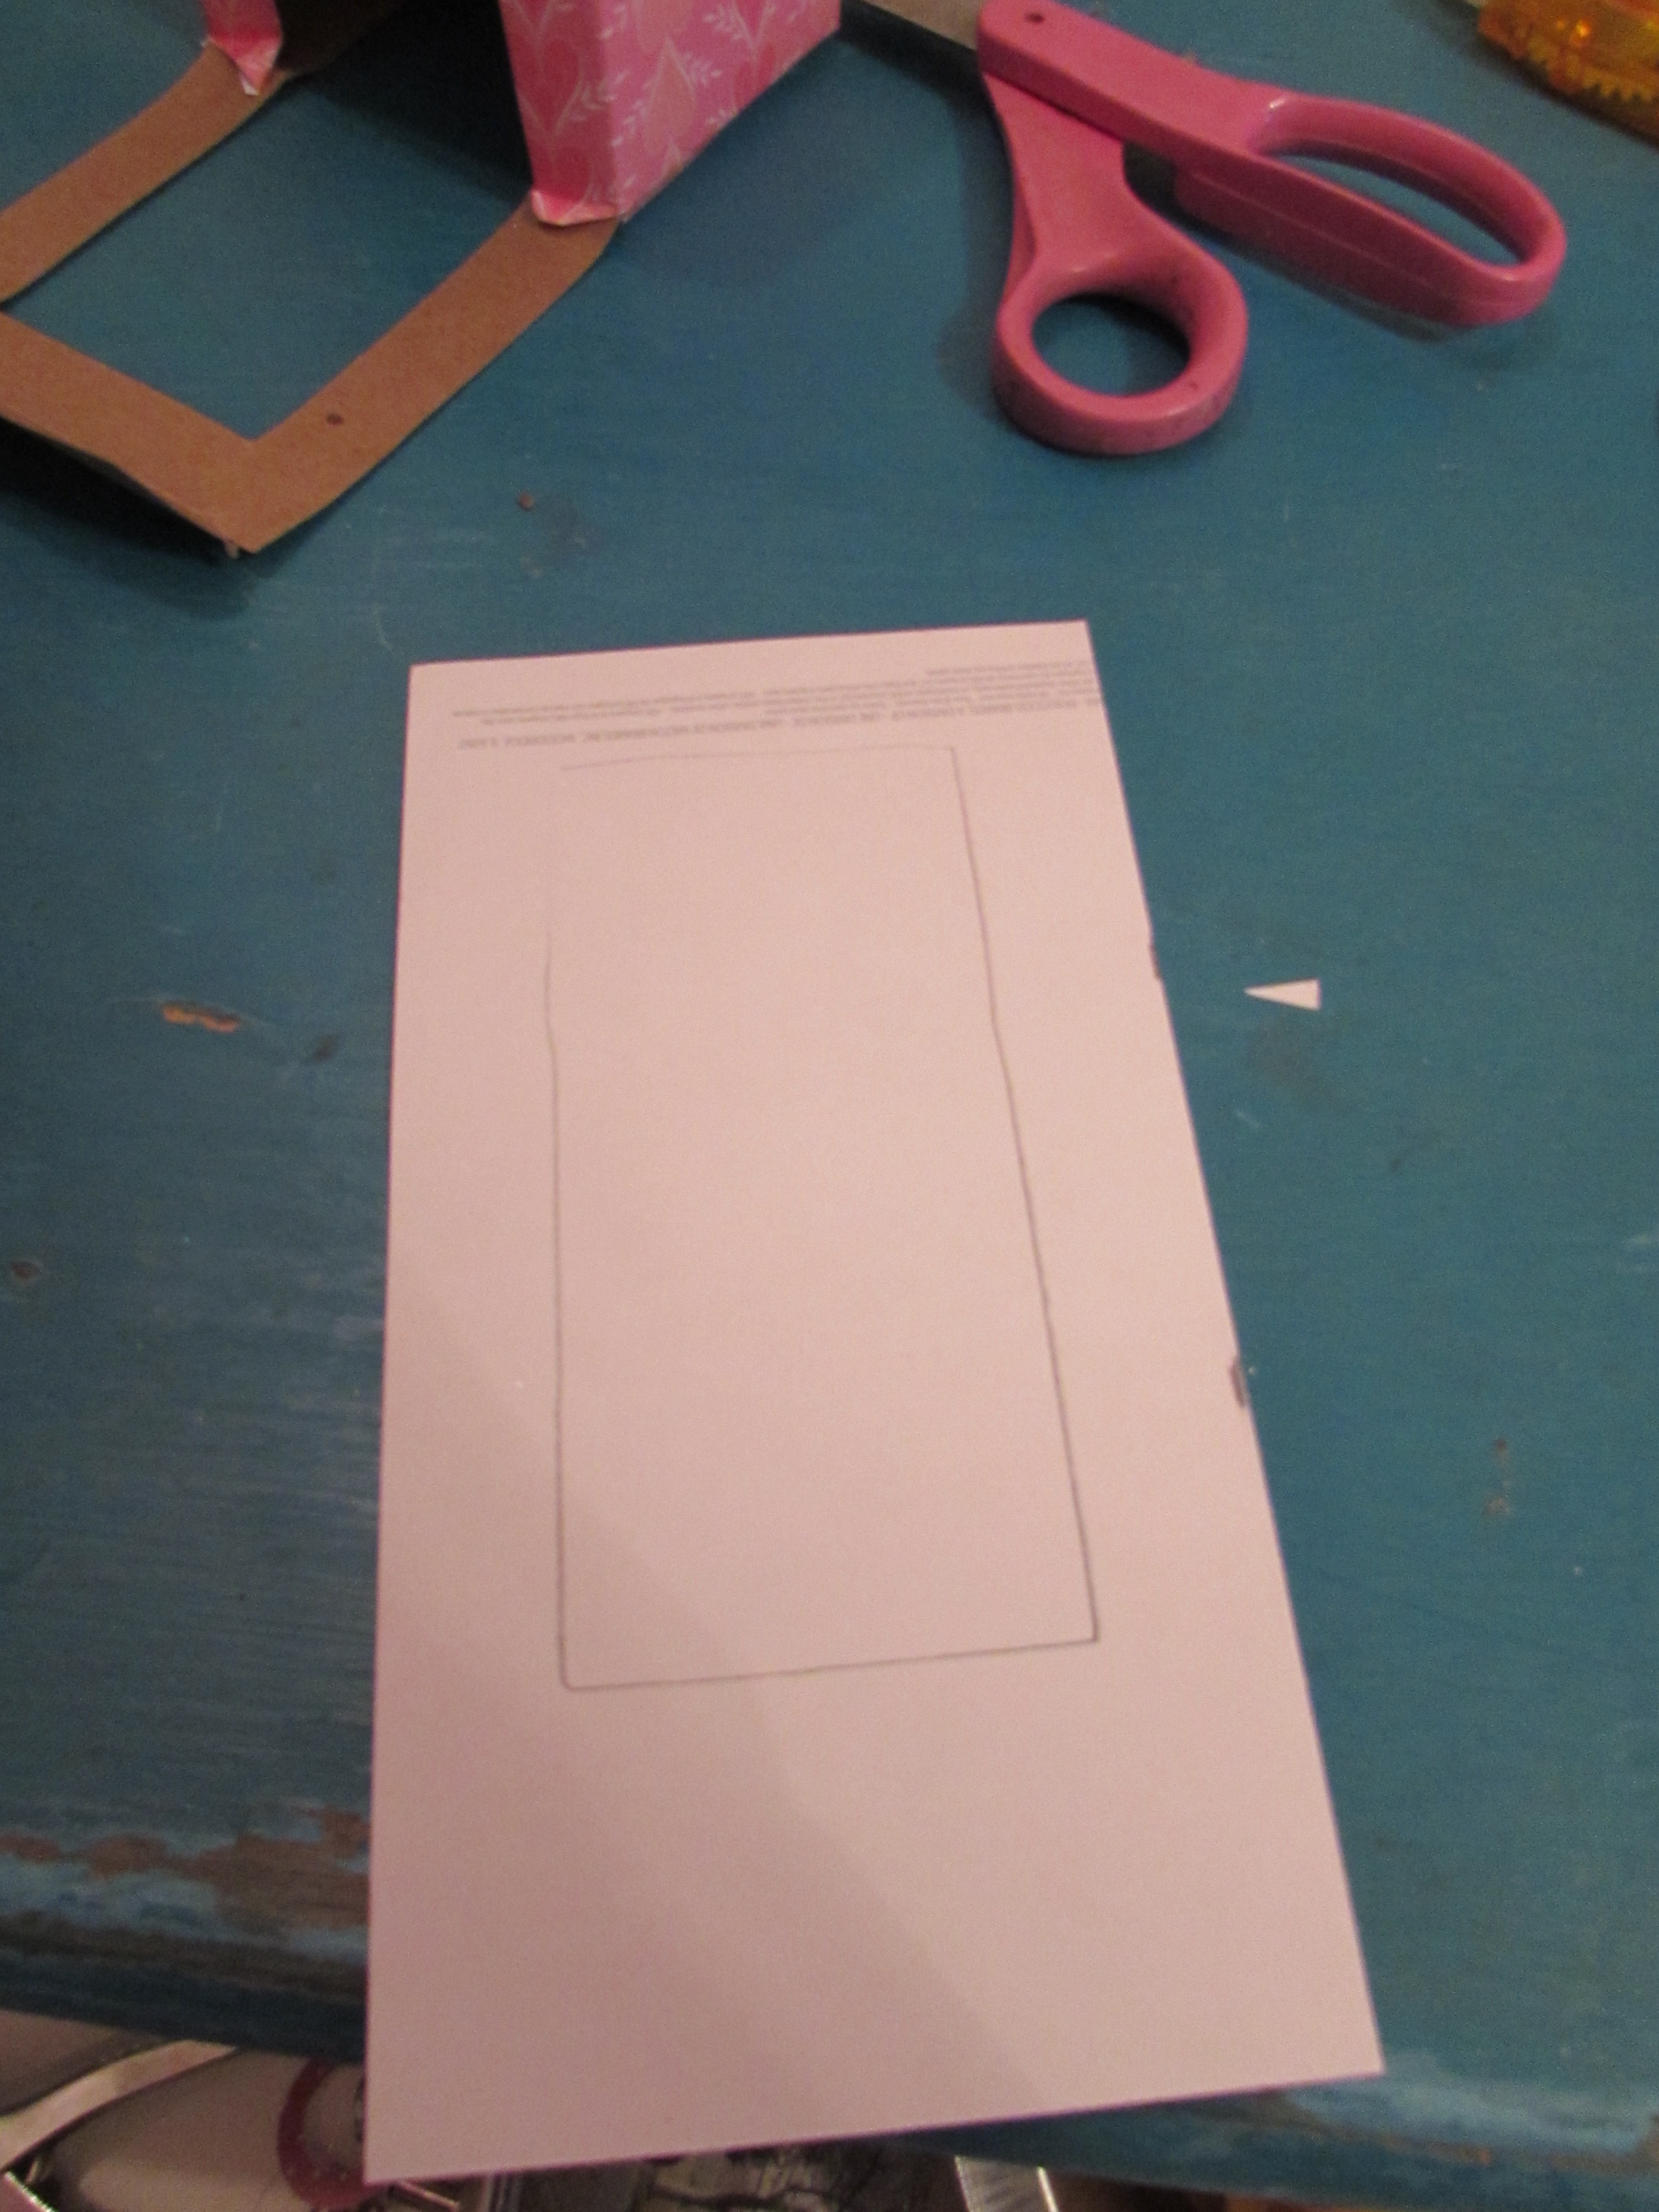
Now measure out another piece of your paper to fit over the back, front and lid of your box. I laid mine on the paper and marked with a pencil how wide the piece needed to be. Cut this out.

IMG_2371

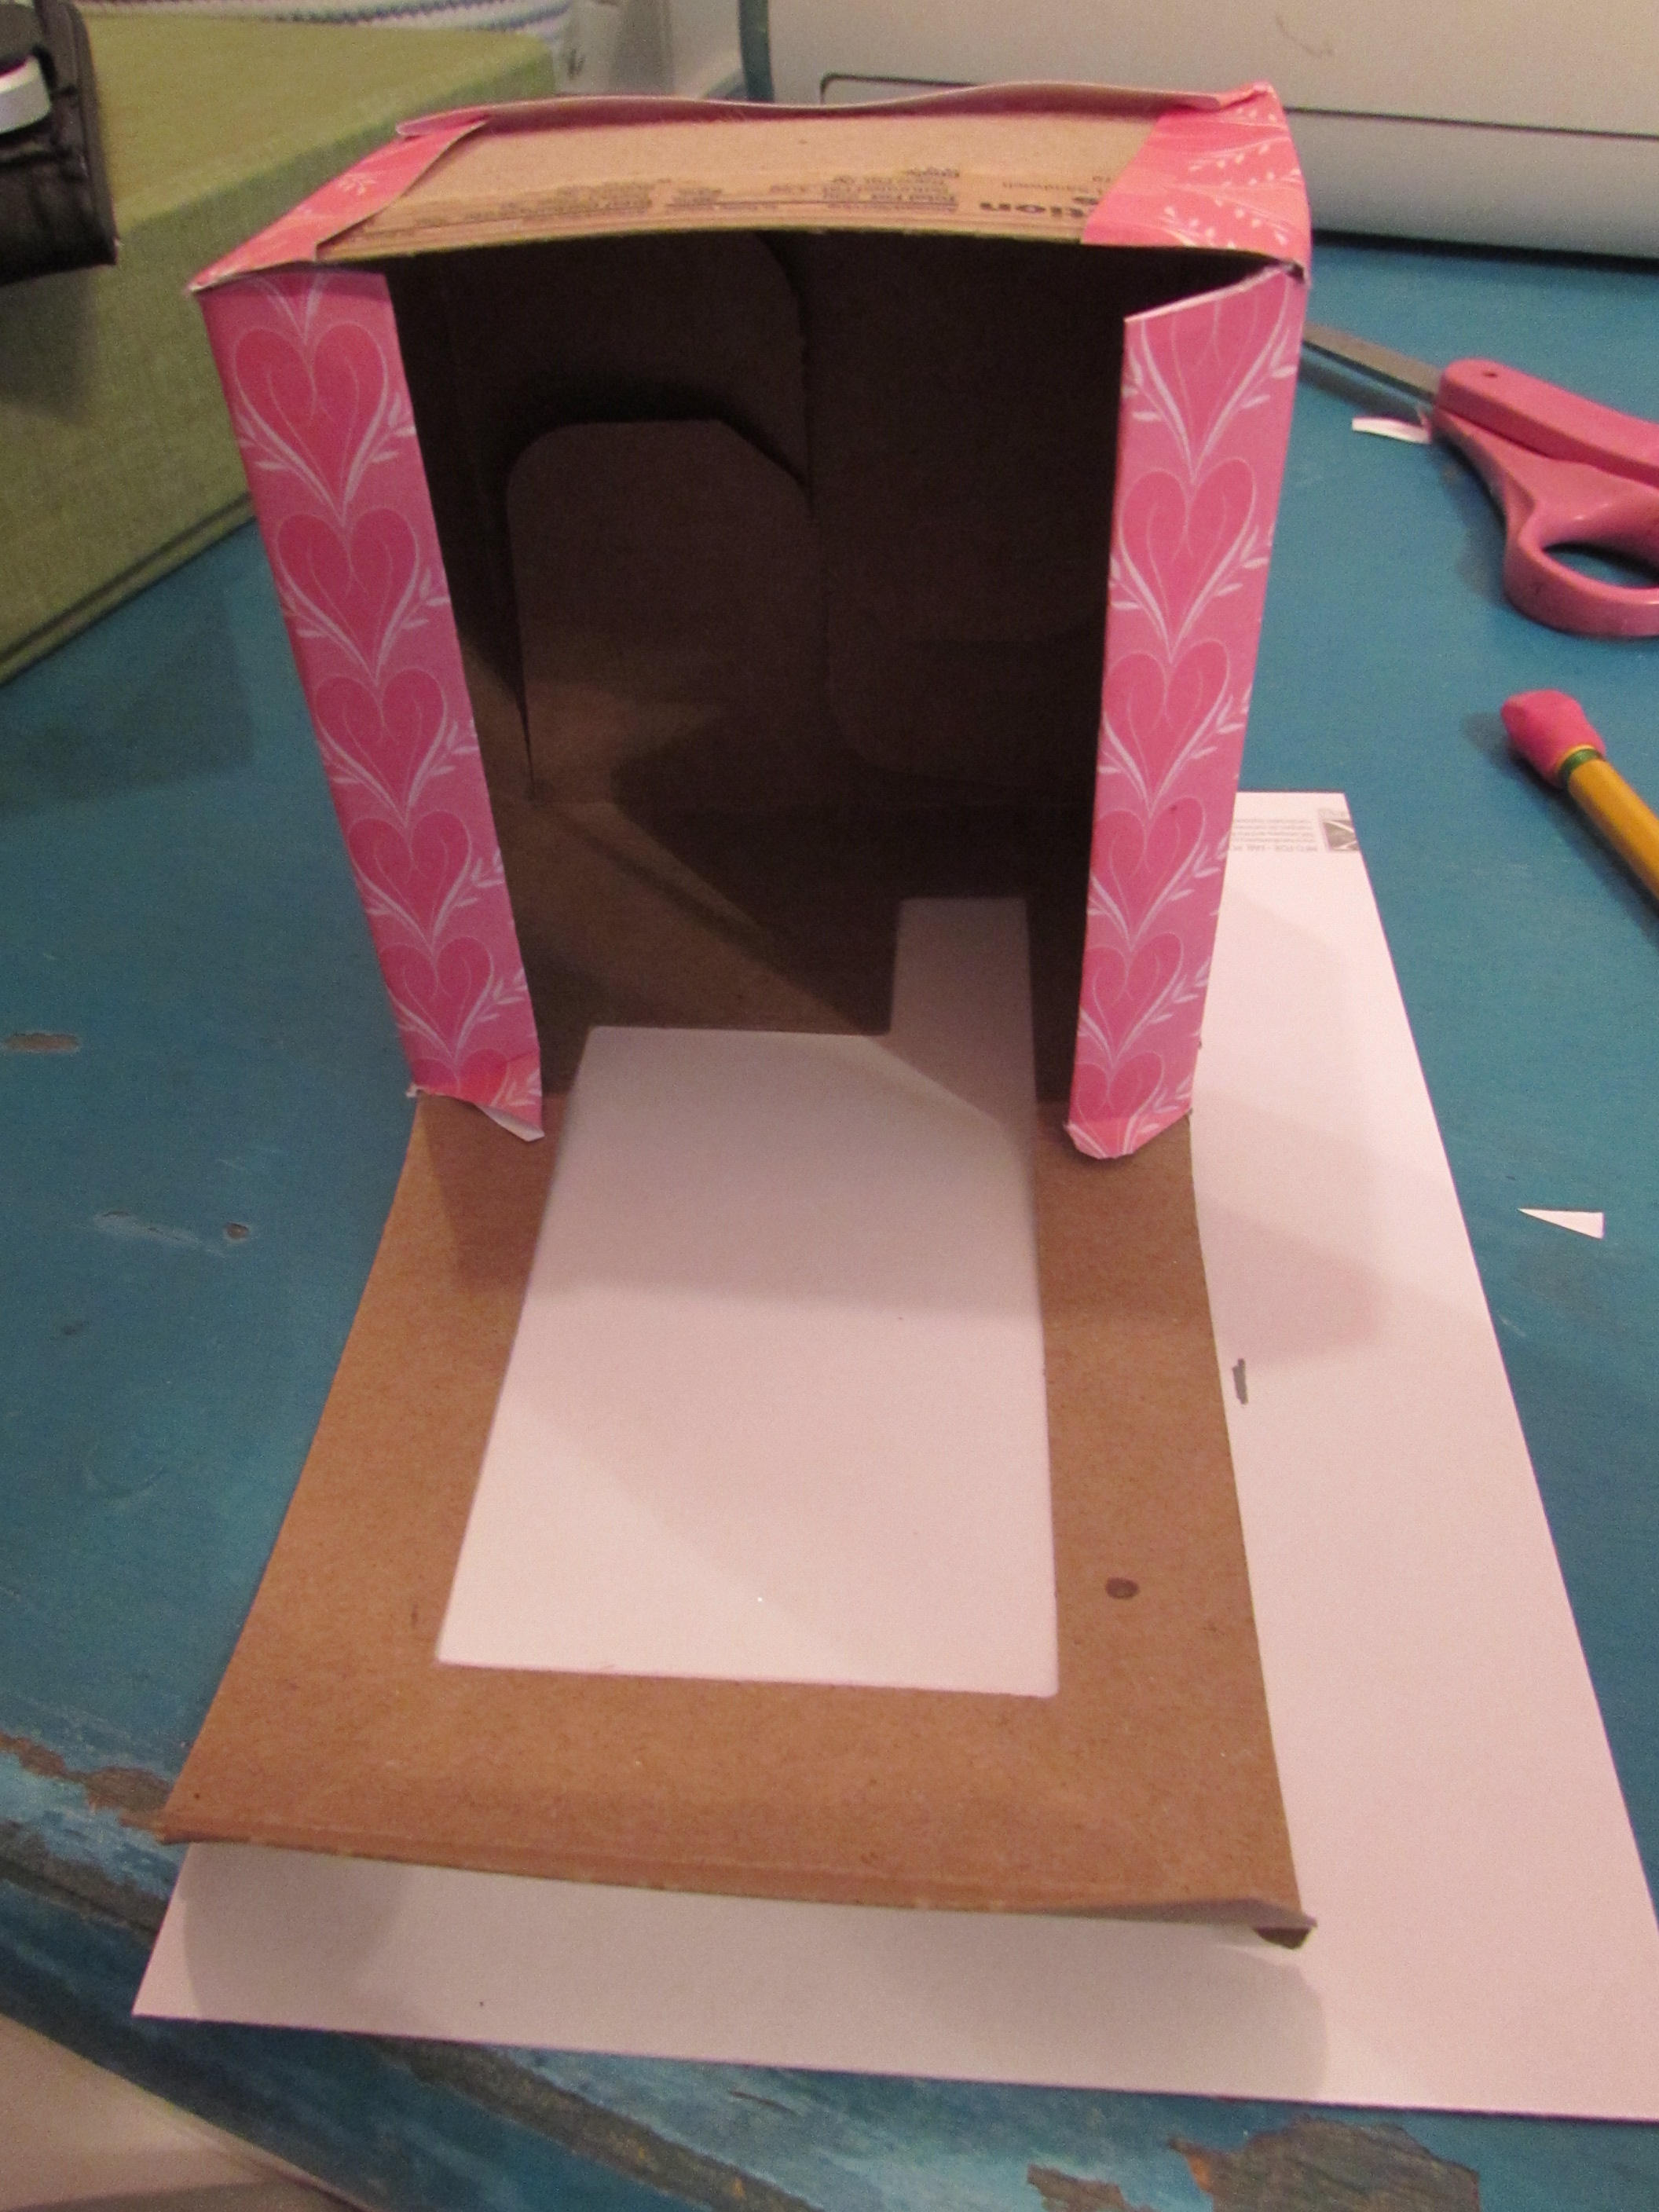
I cut off the little square that was on the bottom corner of the box opening and then traced the opening on the back side of the paper I just cut.  Cut the rectangle out so it will match the opening on the box.

IMG_2373

Once the opening is cut out, wrap the paper around the box, gluing in place.

IMG_2374

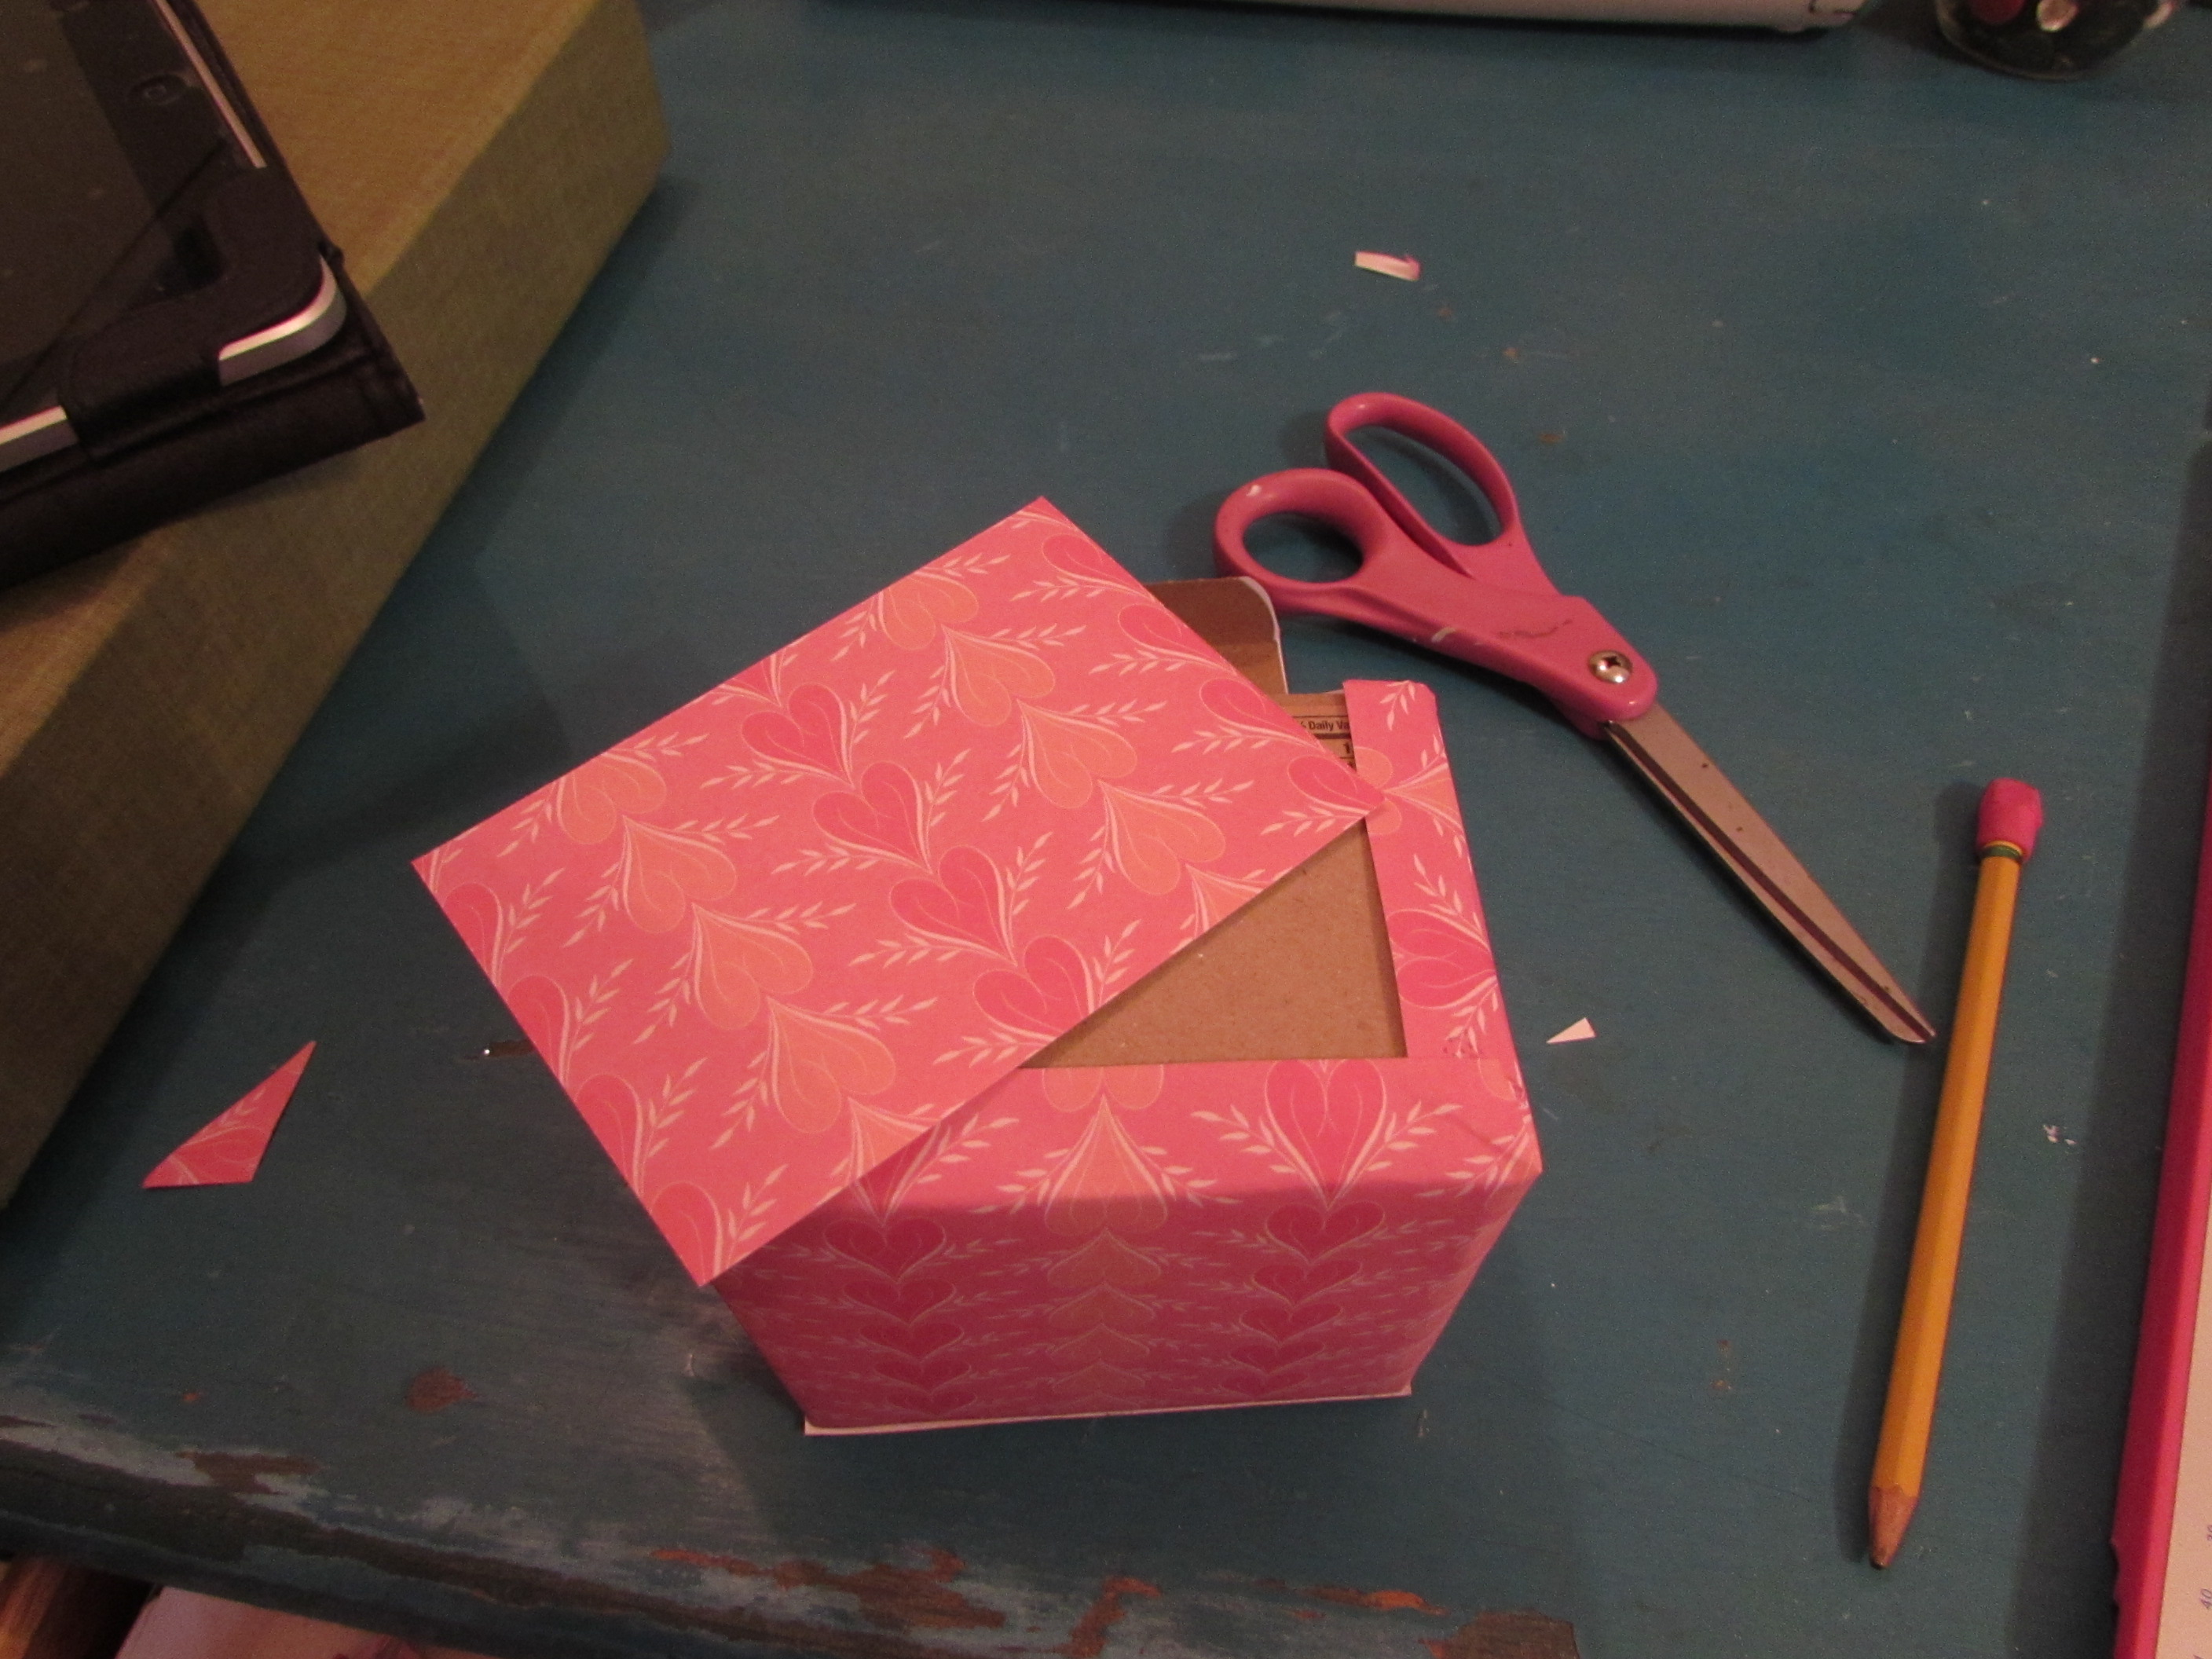
All nice and pretty! Now to add an embellishment.

IMG_2375

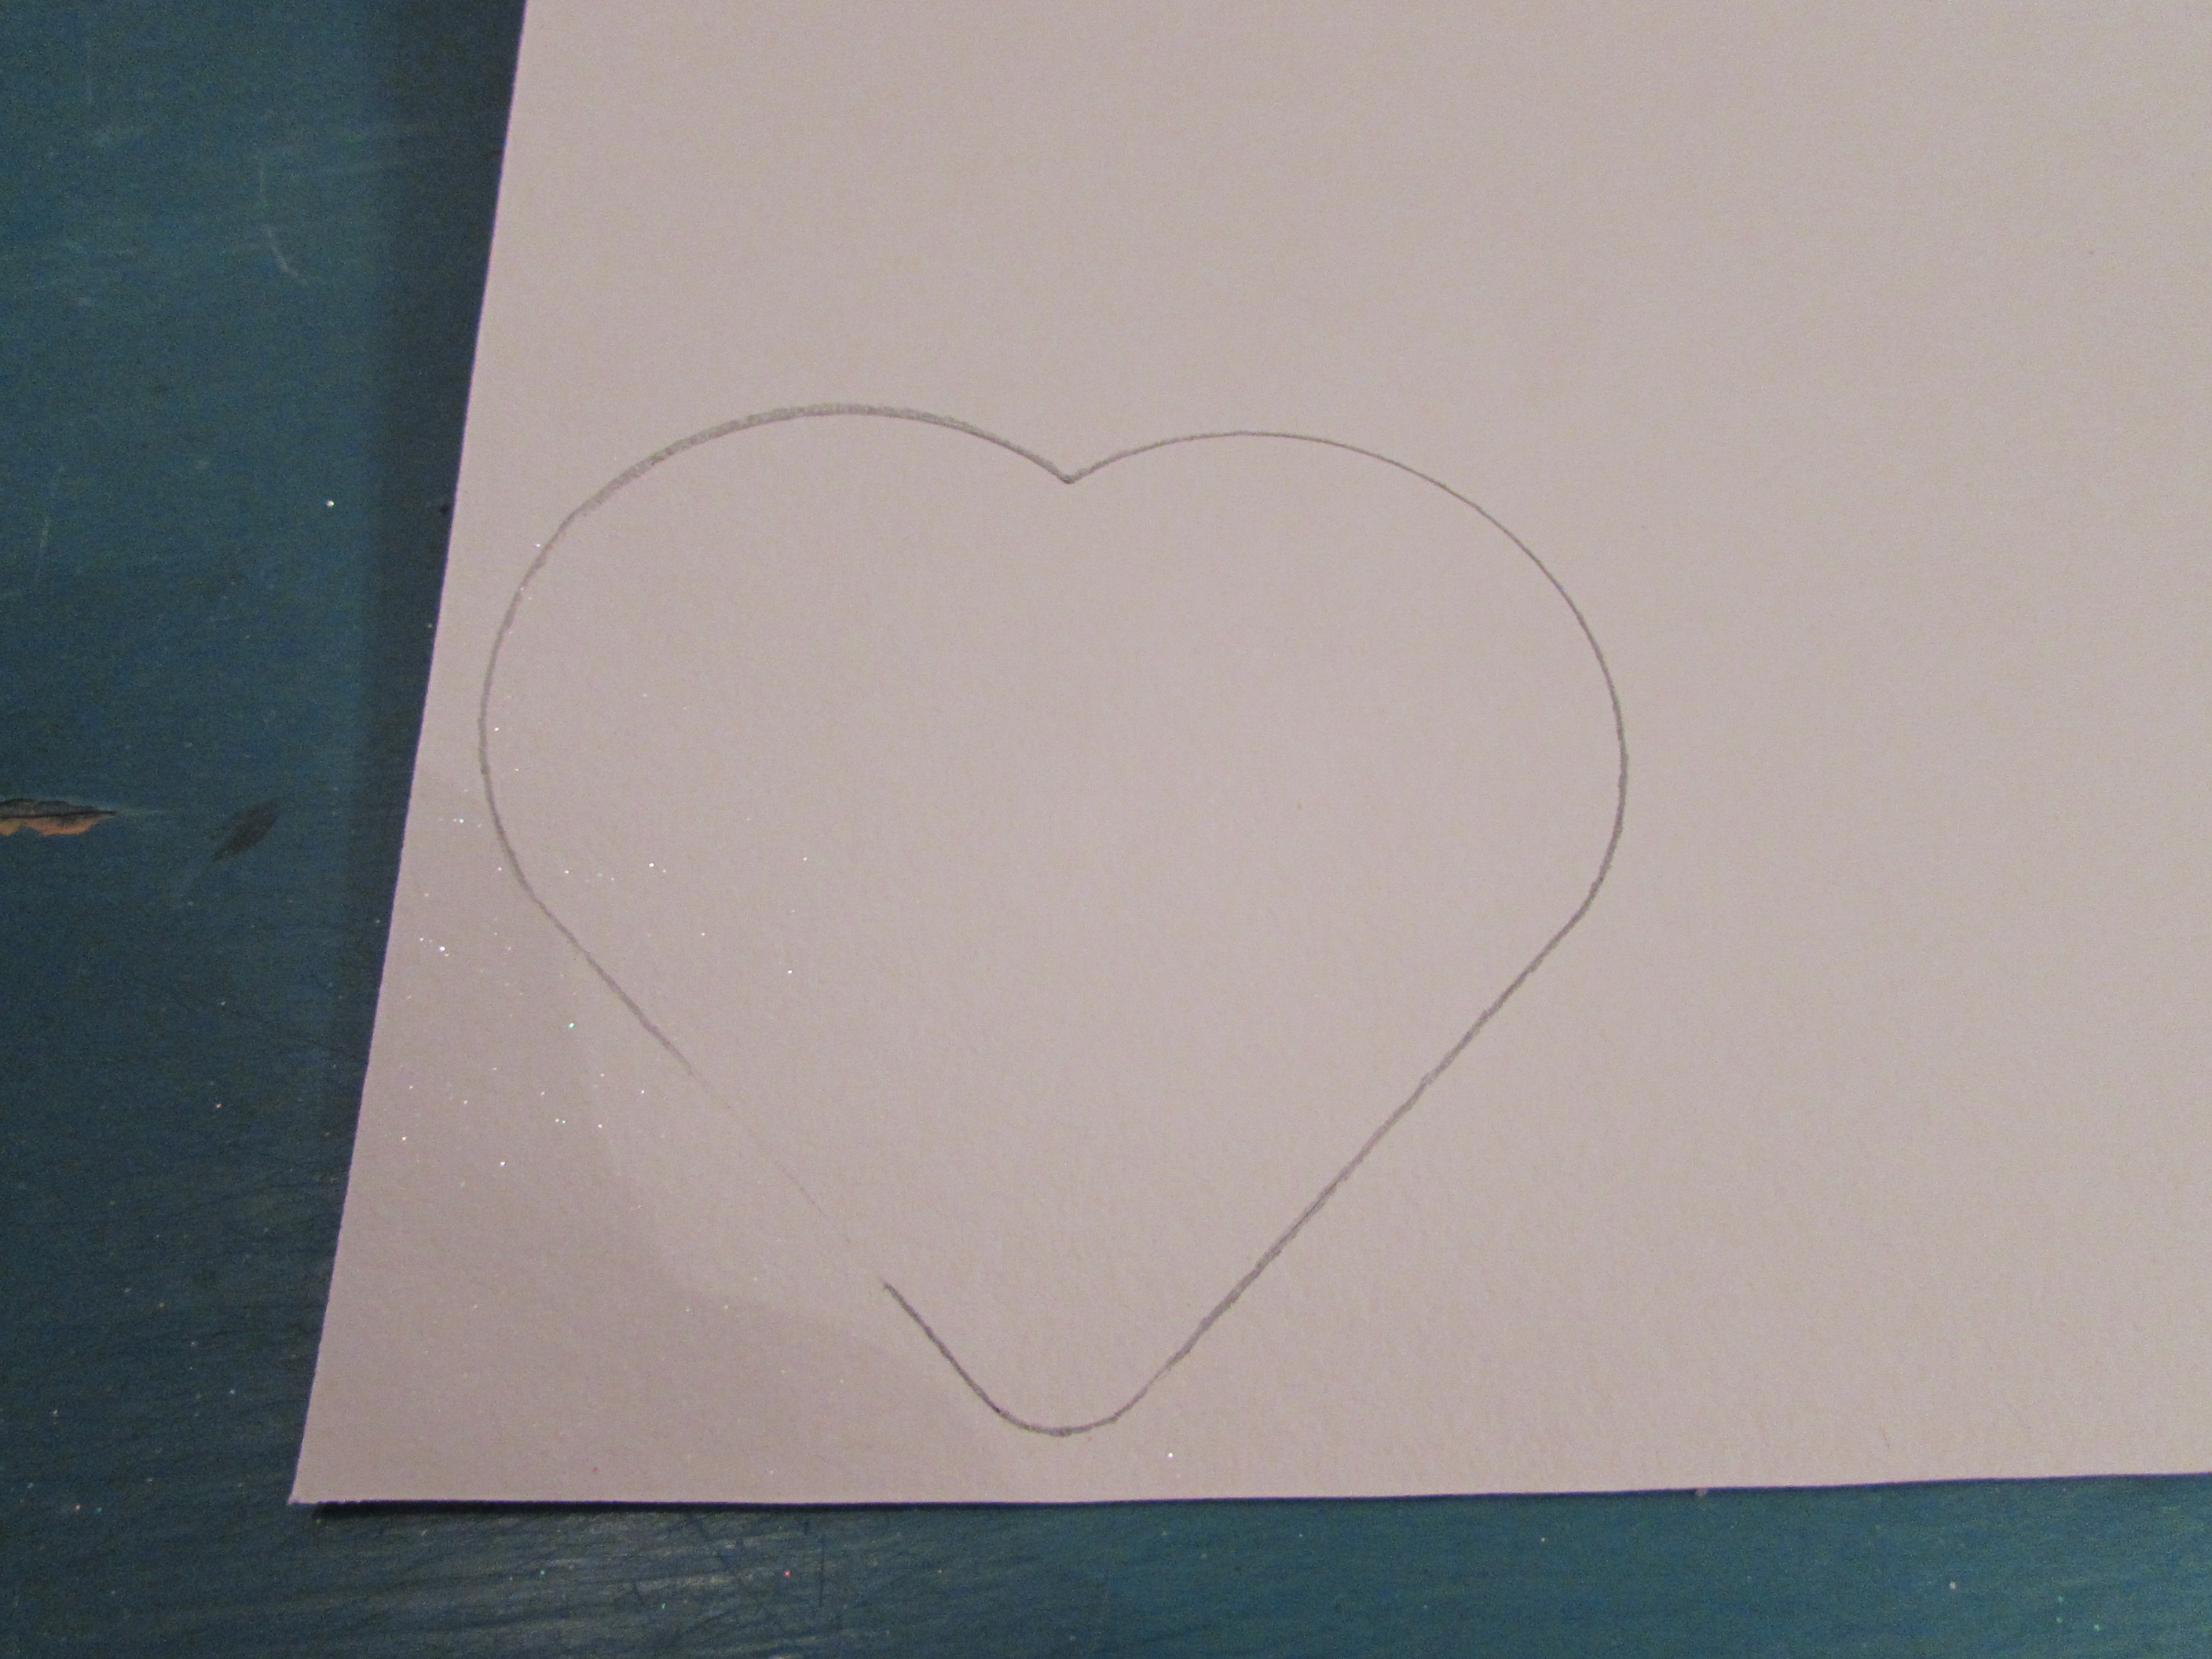
I cut out one large heart in white glitter paper and a smaller heart in pink glitter. I glued the small one on top of the larger one and then glued them over the opening on the front of the box.

IMG_2376

Ta da! All pretty and ready to add something sweet! I added a little bit of pink and white polka-dot tissue and a yummy chocolate chip bar is nestled inside.

IMG_2377

IMG_2378

IMG_2379

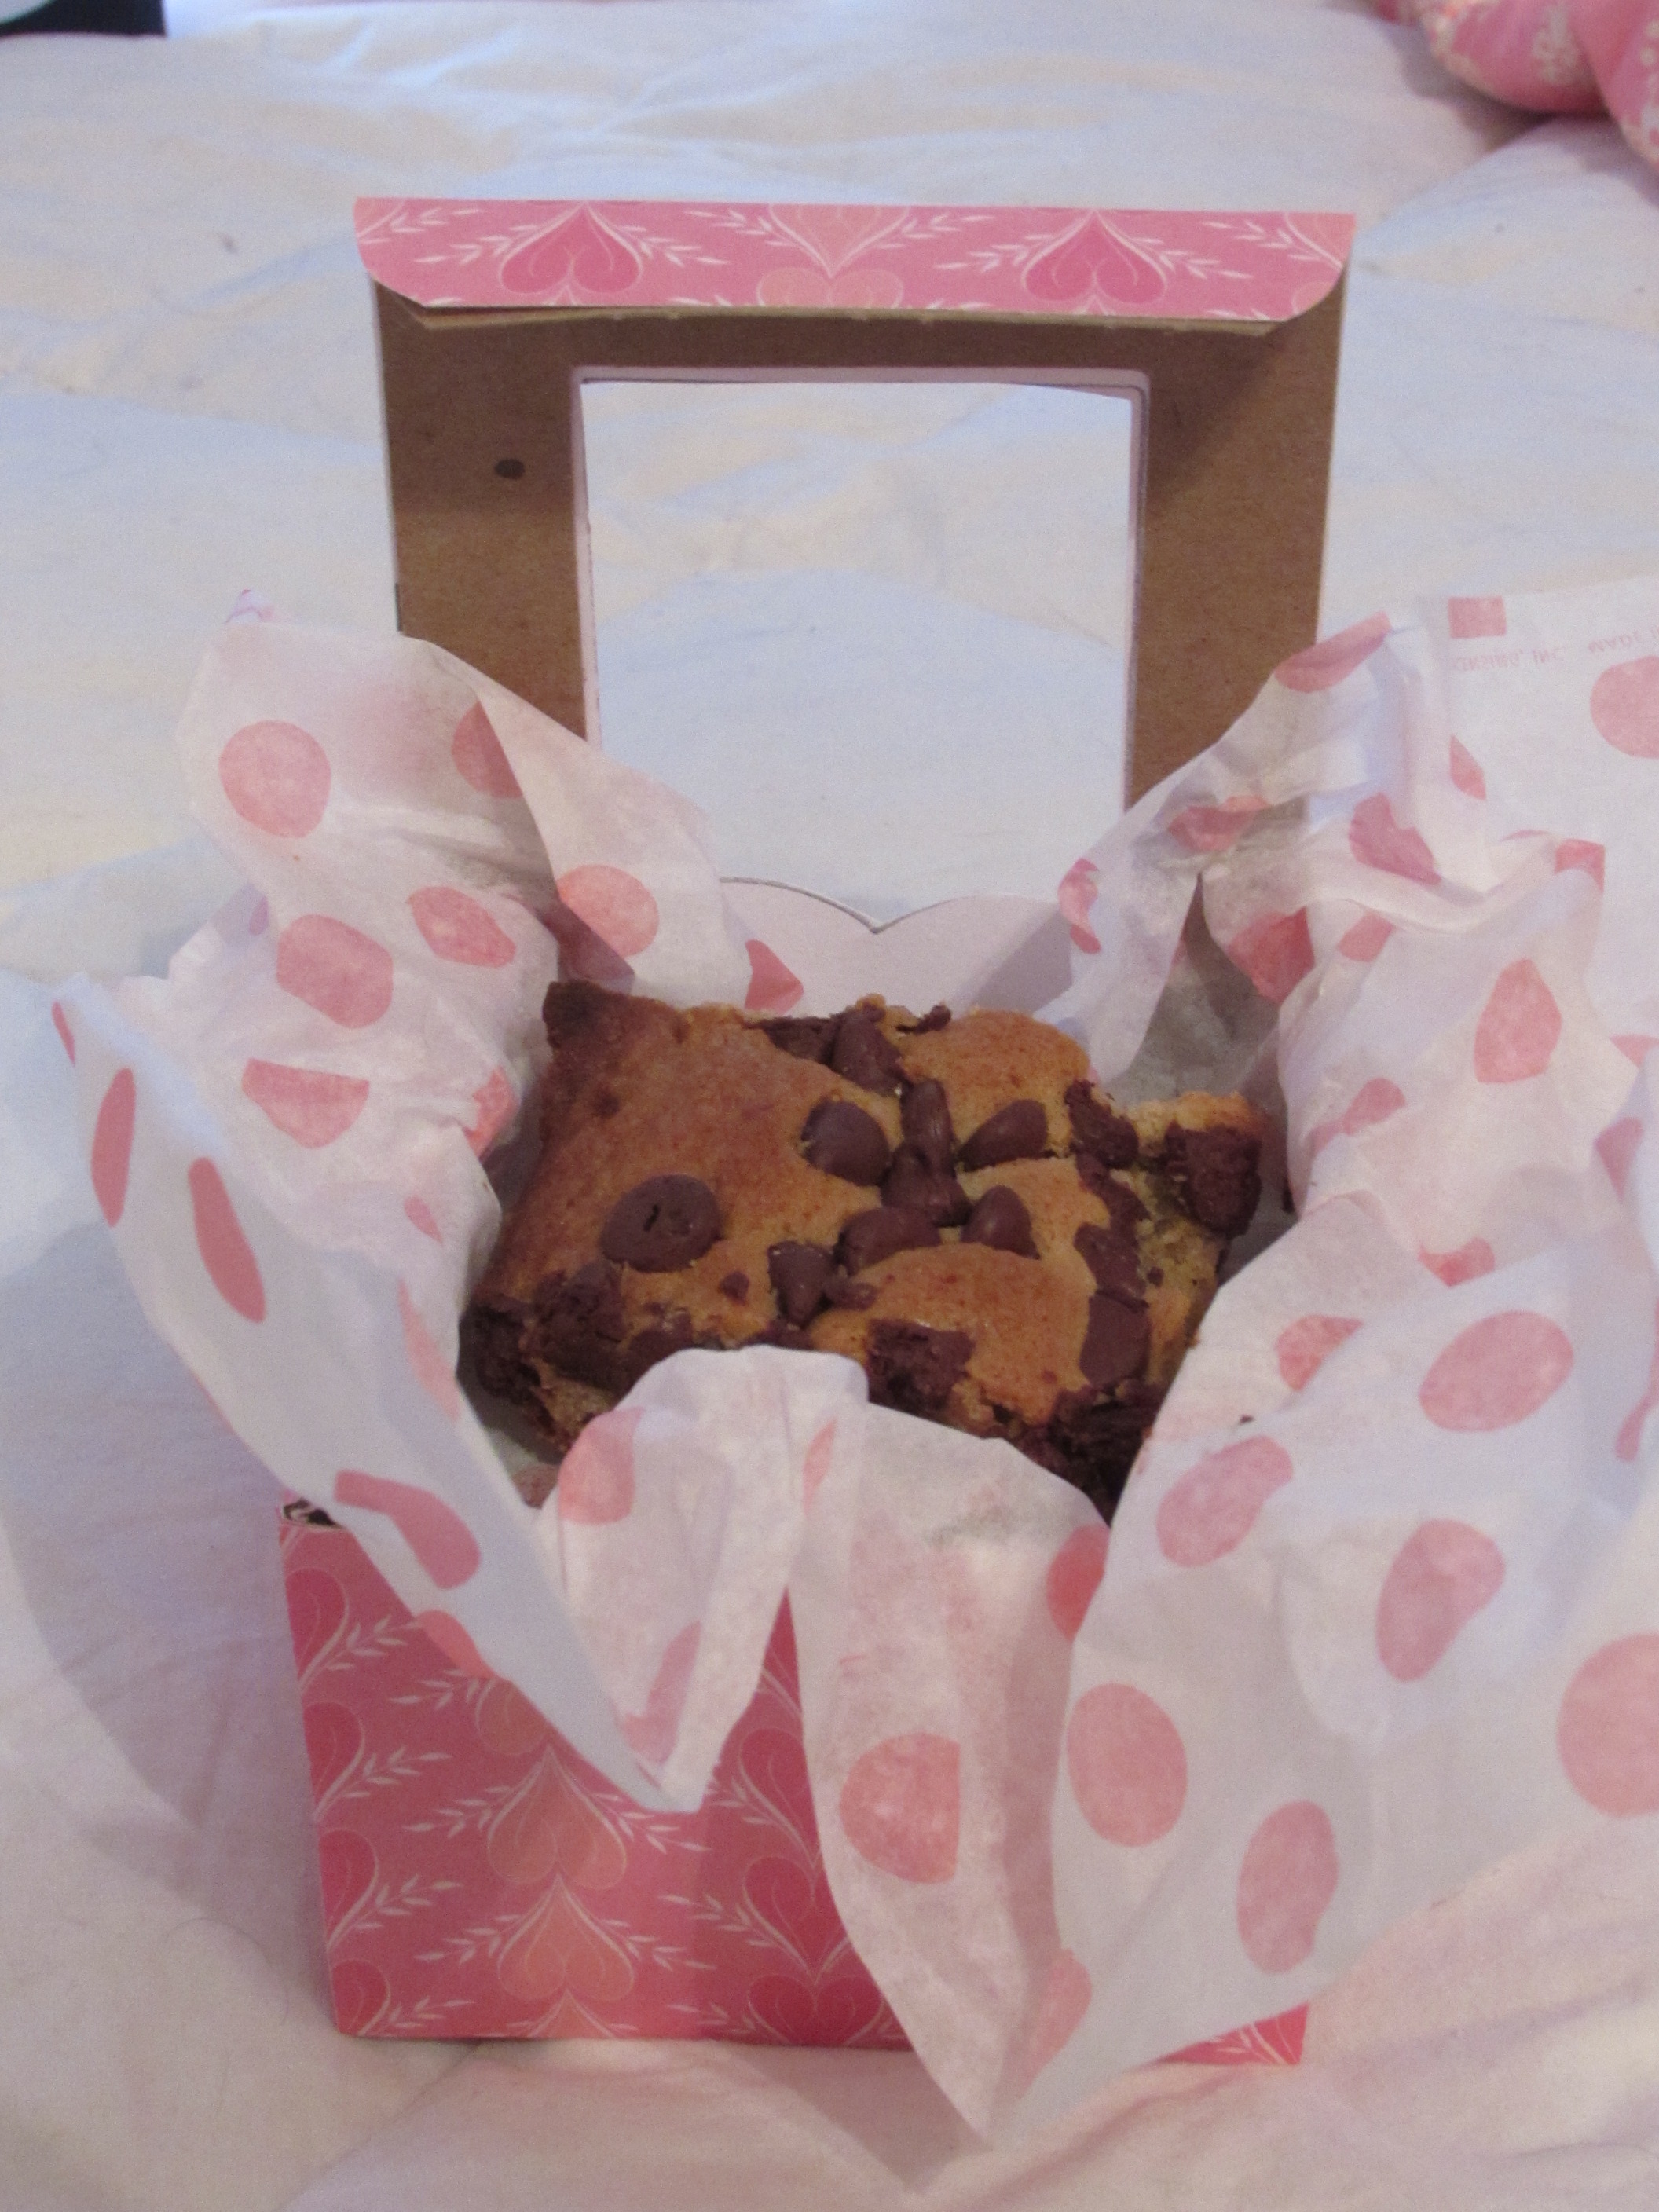
I will make some decorated heart shaped sugar cookies to give to my Secret Sister when the time comes, but this sure looks delicious!!

I tried to explain the cutting as well as I could, but it does sound a little confusing so please email me if you have any questions about the directions. Have fun!

Sunshine and Blessings,  Pam

THE NEW LIFE OF A CHAIR

This is the story of a chair.  A chair that we don’t know its whole life story.  A piece of furniture that isn’t a huge statement piece or something that people would awe over if they found it at a yard sale.

Unless…that person was me.

IMG_2284

Before the Extreme Makeover

It was just another Saturday when my mom and I went on another one of our journey’s to the local garage sales in town.  We were just about done when we stopped at one more place.  And at this garage sale, was this little chair.

This chair was nothing special.  It was just a wooden folding chair.  But, it had a past.  We will never know what it went through before I bought it, but what I know is that now it is safe.  It is in my care and I will now make sure that it lives a good life as a chair.

IMG_2286

The seat doesn’t look too good at the start of the project.

This chair had a few nicks and scratches, but overall it looked pretty good.  It folded well, it was comfortable, it was a chair. When I saw this chair, I knew that I could give it a new life.  When it came home, I gave it a good sanding down to make it more even on all of the surfaces.  I was able to get some of the nicks out of the wood, but because of the condition of the chair, I planned on painting it instead.  I knew that I was going to paint it white because that would go with anything.

IMG_2318

The new finish on the chair.

The white looked amazing!  This turned the sad chair that didn’t have a bright future into a chair with a lot of hope.  This chair now looks like it belongs in a house and someone should sit in it.

Except that it doesn’t have a cushion…yet.

I picked a black and white fabric from my miniature Joann’s store to use as the cushion.  It is a universal fabric that doesn’t only fit with one style.  This fabric would make a wonderful cushion on this lovely chair.

IMG_2391

This fabric is universal so it can be used in any room

I took an old chair cushion that we had in our newly organized shed and cut it open to use the padding that was inside.  After cutting it down to size to fit on the seat of my chair, I added my fabric to cover the seat.

I did something tricky with the cushion.  When I was putting the cushion on the chair, I stapled the fabric on the front and back of the seat.  I did this so that the cushion was semi permanent.  Once I put the padding under the fabric, I was able to hot glue the other two edges down to the seat so the fabric was now hidden and stuck on chair.

And Voila!  The chair now has a new life!

IMG_2395

The finished product! A breath of fresh air

The chair now has a new life that it can live.  Love was poured into giving this chair a new life and it turned out beautiful.  It took a little time, but it was totally worth it.

Now…to find it a new home in mom’s house…

Love, Lauren

BEGINNINGS

Hello everyone! We are new to blogland and would like to welcome you here! We are a mother/daughter team and hope to share with you our projects and lives throughout the year! We hope you enjoy!

Since it’s a new year and we all have our goals and resolutions and things we want to accomplish this year, we decided to start off the year with an organization post. I(Pam) love to have things organized and in order. It just makes me feel so much better!

IMG_2316

Sheesh! This is bad! Our messy and unorganized shed.

We all have that one place in our house that we know needs our attention.  A child’s playroom with toys strewn about, a kitchen with three days worth of dishes sitting on the counter, or the laundry room with six piles of laundry waiting to be done.  But for us, the place that needed the most attention (today!) was the shed.

We have no garage, no basement, no attic. Old toys, Lauren’s things she didn’t need in her apartment, waiting projects, craft show items and summer items are stored in this shed. The things that we are not using are put into the shed to be used later.  But when is later?  Or is it never?

The first step to organizing the shed was to have a shelf built so we could store tote boxes easier.  We were tired of piling the boxes and having to pull them all out to get the bottom box.  With the help of the man of the house (husband/dad Steve), a shelving unit was built out of scrap wood and old table tops.  Thankfully, we had enough to build the shelves without buying any extra wood. Love that!

IMG_2317

There is finally some space! and a floor!

The second step was to clear out the shed.  We took everything out of the left side of the shed where the shelf was going to be placed. We got rid of what we no longer wanted and put some things in boxes for better storage.  Bigger items were on the right side of the shed so we just left them there for the time being.

We then ran into a problem!  The legs of the shelf were too long.  We couldn’t get the shelf in the door, so we had to make an emergency call.  “Steve!  Grab your saw and make these shelf legs shorter!”  Within a few minutes, the legs were made shorter and the shelf cleared the doorway.  After the shelf was placed in the shed, the boxes and other items were placed in their new homes.

IMG_2320

The left side of the shed with the brand new shelving unit that we built to help organize the mess.

When we started putting our things back in the shed, we started with boxes that had things we didn’t necessarily need right now.  Things like dishes that Lauren didn’t need at the moment, an old Barbie house that we don’t use, and an American Girl bed that didn’t fit in the bedroom anymore.  All of these went on the ground, under the bottom shelf because they aren’t something we need right away.

Next, we started to fill the shelves with the boxes of items that we use at craft shows.   All of these were placed on the middle shelves closer to the door so they are easier to access.

The top shelf was filled with miscellaneous items. Lauren’s golf clubs she doesn’t use much, chair cushions that are for summer , and our Easy-Up.  It is much easier to access these things when we want to use them.

IMG_2321

The right side of our clean shed.

We left the right side with our bigger items, like a table and chairs and many cushions that we don’t have a use for yet.  Thankfully, everything stacks and fits together pretty well.

We finished filling the shed with our bikes and our wagon. It still looks very full, but at least we know where everything is and can access it easily.  And now…our clean shed!

IMG_2322

We can finally walk into the shed without pulling everything out!

We are so glad that we did this at the beginning of the year. It feels great to accomplish a big project like this. Organization can be hard and time consuming, but once it is done, it feels so good!

Love, Lauren and Pam