How to Have a Harry Potter Potluck

Hello everyone!  I hope you have been having a good week so far.  I know I said last Saturday (sorry it was late) that I had been stressing over a potluck at work and I am here to show you what I did!

So it started 8 weeks ago.  I was given the task of being the Headmaster (aka Professor Minerva McGonagall) for the potluck.  Basically, I was going to be the person in charge of everything.

Well if you know anything about me, I take these things very seriously.

So the first thing I did was separate everyone into their houses.  I took everyone’s name’s and put them in a name randomizer to randomly put them into the 4 houses, Gryffindor, Hufflepuff, Ravenclaw, and Slytherin.  I also gave all of the department leads a different role as a professor and my fellow front desk receptionists a different ghost.  All of these people who were given roles were the only people allowed to give points to their house or the other houses.

House Assignments

So each person received a letter explaining what was happening.  The letter stated that people could receive points by taking quizzes, answering trivia questions, and overall being a good employee.  It was a great way to get people involved in the game and have fun.

Announcement

I took each of the letters and dyed it with tea.  It was a lot of work to paint the tea onto each piece of paper along with baking them in the oven to seal the dye.  It also gave the paper a bit of a old feeling because it was hard and curled on the edges.  I then rolled up each letter and tied it with a ribbon to show which house the person was in.

rolled up letter

And then the games began!  There were trivia questions that people could answer for 5 points and 4 separate quizzes people could take for up to 100 points.  Let me just say that there were a lot of cheating Slytherin’s who where coping the quizzes off of each other.  Oh well, it was all just for fun.

This went on for about 6 weeks with everyone vying to be the best house.  When it all came to a close I counted up the points.  Now, people received beads which were worth 5 points toward their house.

Can you imagine how long it took me to count 3000 points in beads for 1 house alone???  It wasn’t too bad, but it got annoying really quickly.  But in the end, the points were as follows.

4th-Ravenclaw with 1440

3rd Gryffindor with 1895

2nd-Slytherin with 2740

1st Hufflepuff with 3350

Congratulations to Hufflepuff!  Now according to the Pottermore website, I am a Hufflepuff.  But in the game, I was a Gryffindor.  So, I was happy if either team won.

And then it was time to decorate.  I bought some things from Dollar Tree that would work with the Hufflepuff colors, yellow and black.  I bought some tablecloths, candles, trays, jellybeans, and streamers.  I also used the black and clear jewels and the clear jar that I received from Oriental Trading Company to help with the decor.  I made some signs that showed off the house points so people could see who won the tournament.  And, I made a poster for different awards, like funniest quiz and most mischievous.

But before I could decorate, I wanted to make it even more special for people.  I wanted to make all of my coworkers a wand.  Unfortunately it was fake, but it was still fun.

Except for the looks I got from the workers at Panda Express when I asked for 8 pairs of chopsticks when I only bought 1 item.  Yeah…good times.

I found a tutorial on Facebook which told me how to make a wand.  So after following that and using lots of hot glue and paint, I had my wands for people to take.

And then it was the day before the party.  I set up some of the stuff, but not everything.  I got some help from my coworkers and the place looked like it was fit for Hogwarts.

And here are the pictures!

Newspaper wall

We had these awesome brick walls in the storage unit we have at work.  So of course I used it!  I copied some recipes from the Unofficial Harry Potter Cookbook to hang up on the wall and found some front pages from the Daily Prophet (the newspaper in the books).  I also printed out some yellow lightning bolts to hang up and lay around.  The small sign in the middle that says ‘Did You Have Fun?’ was the trivia sign that we put questions on every other day or so.  And finally across the top were my ornaments.  Yes, I collect the Harry Potter Christmas Ornaments from Hallmark and used them to line the top of the wall.

Ornaments

Awards and Points

This was the food table/other decor table.  I hung the two posters up so people could read them as they were plating their food.  But the table was the most impressive.  I had 6 of the 7 books (I don’t know where the 7th one went), 3 more ornaments, my fake Bertie Botts of Every Flavor Beans, the wands, 2 small pop vinyls, and the food.  I was very happy with how the table turned out!

Wands and Jelly BeansVoldemort OrnamentMore Ornaments

PS-all of the ornaments make some sort of noise or music.  It was fun to hear people pushing the buttons to listen to the music.

And finally the small table that desserts went on.

Boots and Hat

Okay, I know shoes shouldn’t be on the table, but they are my Hufflepuff boots and it seemed fitting.  I also found a witches hat in our storage unit at work, so I obviously had to use it.  The boots are awesome because they have the crest of Hufflepuff on the outside and the traits of a Hufflepuff on the inside.

So that’s it!  That’s how I decorate the lounge.  It was so much fun and we had a great time eating until we almost exploded.  Hopefully you enjoyed reading about my potluck can I can almost guarantee that there will be another one in the future!

Sparkle

DIY Driftwood Sailboat

Good morning! Can you believe February is almost over? Spring should be right around the corner. We have been having some really chilly days, but it looks like things are beginning to warm up. Yay!! I don’t like the cold. At. All. I am all about summer. Which brings me to today’s DIY!

A few weeks ago I showed you my Driftwood Mirror. I have lots of driftwood left, so I came up with another project for some of my pieces.DIY Driftwood Sailboat Title

I have seen these around Pinterest and decided it was time to make my own. I was trying to decide what fabric to use for the sails, when I remembered several vintage hankies I had. I really hadn’t done anything with them, so I decided this was a perfect project for them. The worst part was having to cut them. Eee. That was a little difficult, but the result turned out great!

Here are the supplies:

  • piece of driftwood
  • skinny sticks (from my yard)
  • fabric
  • thread and needle
  • eye-screws
  • hot glue

driftwood sailboat supplies sticks, hankies, driftwood

First you need to pick your piece of driftwood. Don’t worry if you don’t live near the ocean, I even found driftwood on Amazon! I included some links at the bottom of the post for your convenience.  I picked ones that weren’t too long, but were a nice rounded shape. They also need to be able to sit flat on a surface. I drilled a small hole in the center of the top and hot glued the stick into the hole. This will be the mast of your sailboat.

driftwood sailboat supplies

I also drilled a tiny hole near each end of the driftwood. I screwed in the eye-screw. This will help hold the sail straight once it is attached.

driftwood sailboat mast

I cut out triangles from the fabric. I used the stick for my measurement. Nothing to exact (of course) :). I used a straight edge for the part by the stick and a straight edge at the bottom. The other side is slanted to make a sail. Once I had my pieces cut out, I hot glued the point to the top of the stick. This held it in place while I stitched the bottom corners on.

I used a needle and thread to attach the bottom corner to the stick and the other corner to the eye-screw. Once those were attached, I was able to peel loose the glue and move it higher or lower on the stick, depending on where the sail was tight and straight.

driftwood sailboat vintage linen

I love the look of the vintage hankies with the driftwood! The perfect summery touch!

driftwood sailboat vintage linen starfishdriftwood sailboat vintage cloth lace

The embroidery and lace is so pretty. I’m glad I found a way to show them off a little.

driftwood sailboat triodriftwood sailboat linen hankies

Can’t you just see those sails billowing in the wind out on the ocean?

driftwood Sailboat displaydriftwood sailboat coastal display ocean

I added them to my faux mantle for now. I placed a few seashells around them and a white lantern to finish out the looks. The window and chalkboard pretty much stay in the same place and I decorate around them. They make the perfect backdrop to my other decor.

driftwood sailboat 3 of a kind

I still need a few more ideas for my driftwood, and now I need to add ideas for vintage hankies too! Thanks for stopping by today! I hope you have a wonderful week!

sunshine-and-blessings-picmonkey

amazon affiliate

How to Get Yourself Organized

Hello!  Before we get started, I must say that I feel completely unorganized while writing this post.  I have been working (slaving) over decor for a potluck that my work is having and kind of forgot about this…sorry.

But next week you will see how I decorated!

So here are some helpful tips on how to get organized.

folding-sheets.jpg

Apparently I am not the only one who has absolutely no idea how to fold a fitted sheet.  Angela Says helps us all figure out how to properly fold that stupid sheet.

03-clear-plexiglass-containers-for-storing-food

Man I wish that I had this much food in my fridge that it needed to be organized.  My fridge is just random sodas and leftover pizza and milk.  Lots of milk.  I also traveled through about 5 separate blog posts and don’t know where this picture came from.  Sorry.

More Yarn

Any yarn lovers out there like me?  Here’s an old blog post from us about how to organize your yarn supply.

cordless-drill-organizer-with-drawer-900x744

THIS IS LITERALLY IN MY DAD’S GARAGE!  Mom saw this a while ago and showed my dad who built it.  It’s awesome! Her Tool Belt gives you the full DIY on this cool project!

MAILFEAT.jpg

I really like this mail organizer.  I would pick some different fabric than this, but DIY Projects tells us how we can make our own.


I wish this was my closet!  It is so clean and organized and looks super nice.  Just A Girl and Her Blog shows us how to organize our closets to make it perfect for us.

bookshelf

How cute is this bookshelf?  it can totally help organize your books or other knick knacks to show off.  Tara Michelle Interiors shows us how she built the perfect shelf for organizing.

1a7d504a12e42fdf67efc08c450176d6

I think this looks so pretty.  And I have a bunch of nail polish that I don’t use, so this would be perfect!  Also, the original source isn’t available anymore which is sad.

jewelry mirror frame

Do you ever have so much jewelry that you just don’t know what to do with it?  Why not hang it on a mirror?  Click here to see how we organized our jewelry!

Sparkle

Rainy Day Roundup

Hello everyone!  Before you move onto reading this post, I have some disclaimers.

1.  There are only 5 ideas this week (sorry).

2.  These are mostly ideas for you to do with your kids.  I figured they would need the ideas.

3. It hasn’t rained at all in California so I do not know if any of these actually work, but I think they are cool!

Enjoy!

batman harry craft 2

Superhero Handprints by Messy Little Monster

rainy-daze-activity-jar-finish

Rainy Daze Idea Jar from How to Nest for Less

diy-hallway-laser-maze-fun-indoor-activity-kids-rainy-day-easy-4

DIY Laser Maze from It’s Always Autumn

Laundry-Basket-Skee-Ball-Pin-512x1024

Laundry Basket Skee Ball from Frugal Fun 4 Boys

firework-salt-painting

Fireworks Salt Paintings from Busy Mommy Media


Sparkle

Acacia Haze

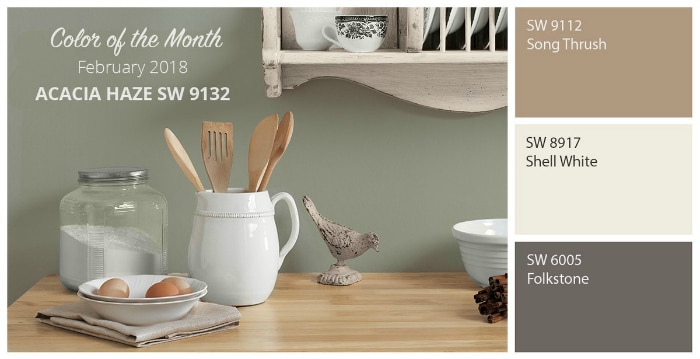
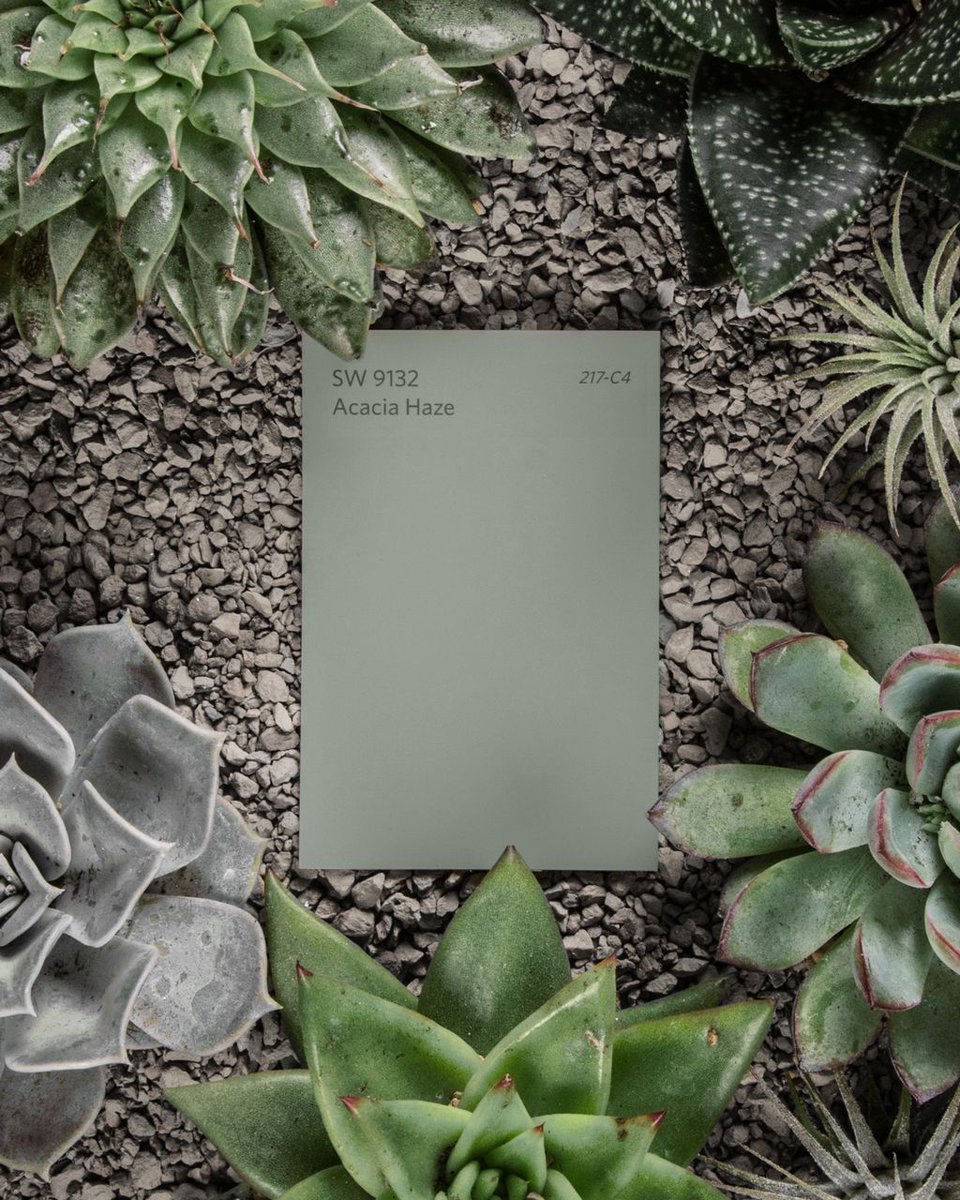
I’m back today with Sherwin-Williams Color of the Month. For February, it is Acacia Haze. This one has a greyish-greenish tone to it. Sherwin-Williams says, “Blurring the line between pastel and neutral, Acacia Haze calms and soothes like a gentle whisper. It’s an ideal color for bedrooms, reading nooks and other cherished retreats.”

26867082_1773529706286403_3085364927599214592_n

Here are a couple of accents colors Sherwin-Williams chose to go with Acacia Haze. I really like the Rojo Dust. It’s so pretty!

images_10901-D-4Aimages_10901-D-4B

It coordinates well with these other gray tones.

Image result for acacia haze

I like it in the picture below. It looks great with the farmhouse looks, but works well with other styles too.

Image result for acacia haze

Here you can see the green tone in it. I would think the color would depend on the light in the room and the other colors you put it with.

Image result for acacia haze

What do you think? Would you use this in a room in your house? What style do you think it you look great with? Hope you have a great week!

sunshine-and-blessings-picmonkey