DIY Dog Costumes for Halloween!

Hello!  How is everyone doing this week?  We’ve been having some wonderful fall weather here! We usually don’t have much of a fall, so this is a welcome change. On Saturday night, our little family went to a corn maze and had so much fun! We actually were able to find all 12 checkpoints and only got lost a couple of times.

This week we are looking forward to Halloween (it is only a couple weeks away if you weren’t aware).  And we are taking a look at some Halloween costumes for our furry friends!  Now, my cats would think that it’s the worst thing in the world to be dressed up in a costume, but other people will dress their pets up for each Halloween.  So here are some ideas for you if you have decided to dress up your pet but you don’t have any ideas.  Enjoy!

This Ty Beanie Baby swing tag costume is easy to make and adorable on pets but can also be a great costume for their humans, too. I'm loving this for the Howloween Pet Parade!

This is so simple, but so cute!

Ty Beanie Baby Tag from Dream A Little Bigger

Lion Costume.jpg

My Maggie would look perfect as a lion!

Lion Costume from Instructables

hostess cupcake dog outfit

Yummy! I’m actually dressing mine up as snacks this year, so this one might be a possibility.

Hostess Cupcake from Sew Doggy Style
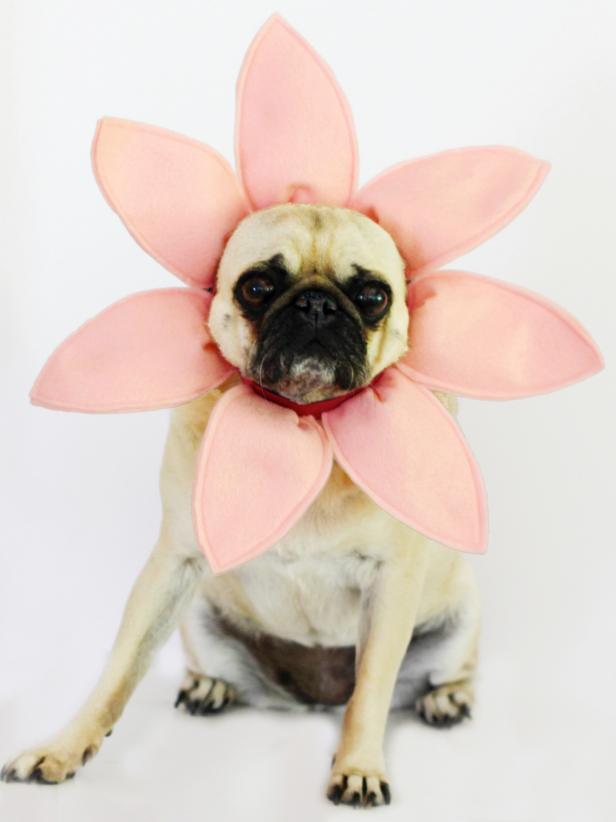
Flower Costume.jpeg

Aww! So sweet!

Flower Costume from DIY Network

dinosaur jackets


For this one, you can use a jacket you already own and just add felt to the back!

DIY Dinosaur Jacket from Crafty Carmen

DIY Smores costume.jpg

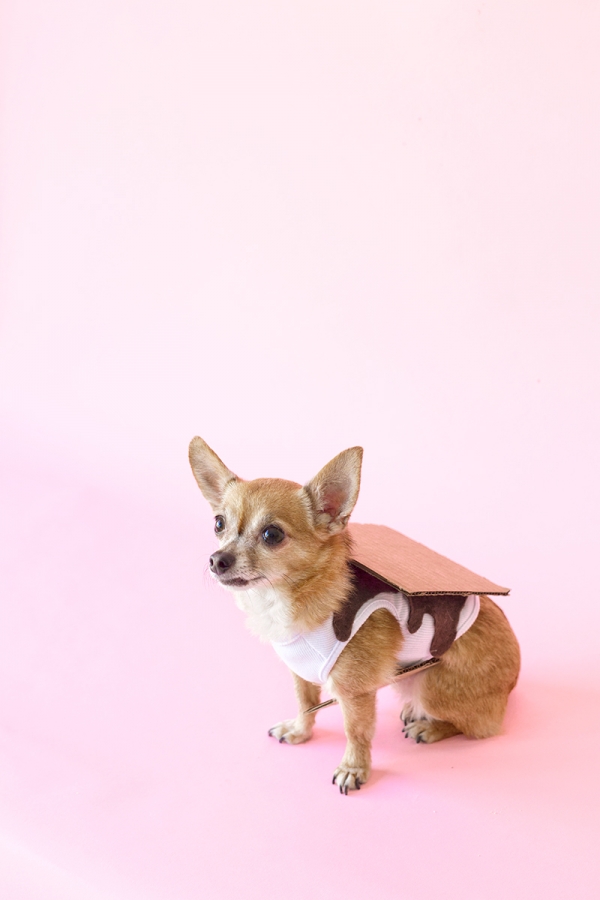
Here is another snack costume. She looks good enough to eat!

S’mores Costume from Studio DIY

luffa-dog-costume-outside.jpg

Wouldn’t this be cute on some little tiny puppy? It would be all loofa!

Loofa Dog Costume from Crafts by Courtney

diy pirate.gif

Argh Matey!

Pirate Costume from Luigi and Me

sven costume.jpg

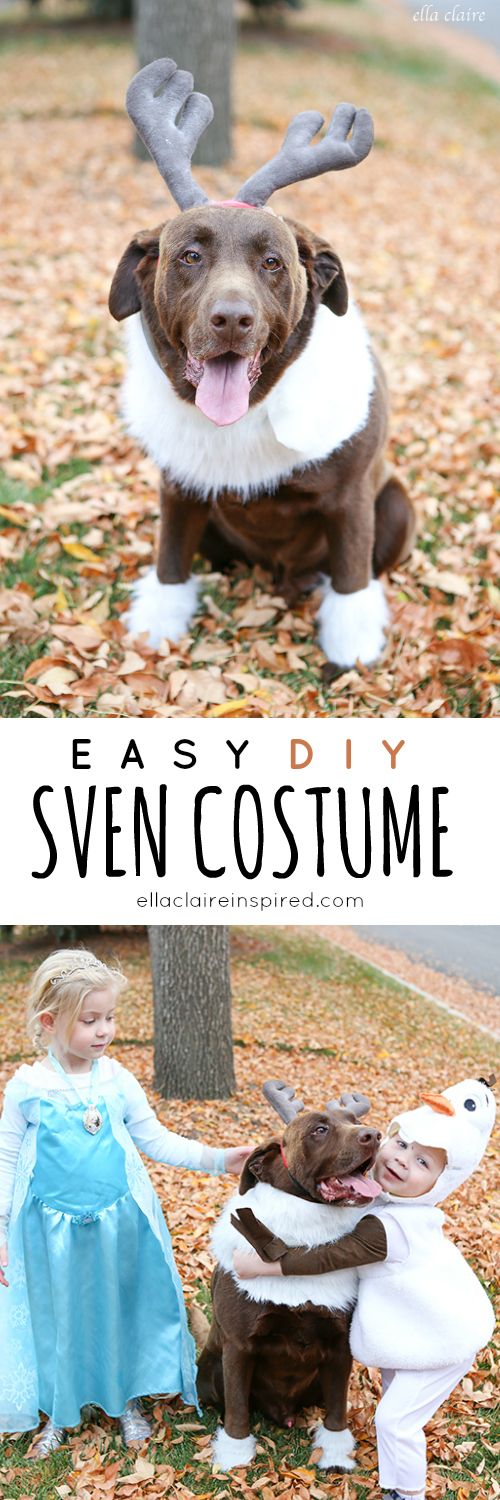
Perfect addition to your little Elsa and Anna!

Easy Sven Costume from Ella Claire Inspired
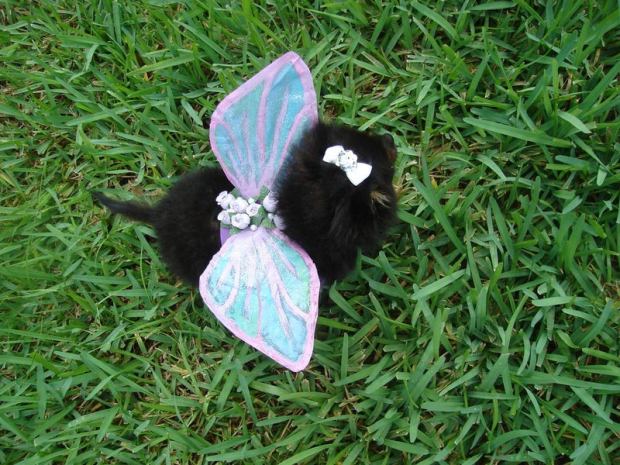
Puppy Fairy Wings.jpg

Soooo Cute!!!

Puppy Fairy Wings from Instructables

I hope you all have a safe and happy Halloween!

Sparkle

Day of the Dead Hoop Wall Hanging

Good morning! It’s October! Fall is coming quickly! I hope you have been safe and are enjoying some fall weather where you are. I think of all of you every day and pray for you and your families. I love having you come by and visit! Thank you!

I have another Day of the Dead, or Dio de la Muertos craft idea today, but this could be easily adopted to other holidays or colors. Think fall colors with pumpkins or even Christmas with ornaments. So many ideas!

I started with an embroidery hoop, chunky yarn, silk flowers and Day of the Dead sugar skulls.

I cut several pieces of each color of yarn and then started tying them on the bottom of the hoop. I folded the yarn in half and laid it over the hoop.

I took the two loose ends of the yarn, wrapped them around the back of the hoop and then thread it through the loop.

Pull the yarn tight to form the knot. Keep adding yarn for as far as you want it to go.

I added four strings of each color that I was using.

I trimmed the bottom of the yarn to make it a bit more even.

I hot glued three flowers on the hoop over the knots of yarn.

Then I took three skulls and glued them to the top of the hoop. I chose two white ones and one with color.

This is such a simple little craft! It’s perfect to add to my other Day of the Dead items- shadowbox, Ofrenda.

I have this in my entryway right now, but I will move most of it outside to my Ofrenda just before Halloween. Have you ever decorated with Day of the Dead items or put together an Ofrenda? I would love to hear about it!

Dio de la Muertos Shadowbox

Good morning! We finally had a cool off!! The smoke is disappearing, there is a small breeze and the weather is beautiful! I’m not sure how long it will last, but I will enjoy it while I can!

Have you started thinking about fall yet? I added some neutral decor, so not too fallish yet, but I couldn’t wait to make something to add to my CoCo and Dio de la Muertos Ofrenda table.

I found this small shadowbox at a local thrift store. I originally bought it for something else, but the pieces I was going to add to it were too big. So after wandering through the 99 Cent Store, I was inspired by all the Day of the Dead decor. The first step was to paint the shadowbox black. Of course, I used spray paint. 🙂

It was difficult to find items small enough to fit into the spaces, but I was able to find a couple of skeletons, cat salt and pepper shakers, and brightly colored flowers. Then I went through my scrapbooking paper to find paper for the backgrounds.

I cut out a piece of heavy weight paper to cover the heart at the top of the house. Then I covered that paper with floral and polka-dot paper.

The skeletons were actually the little solar things you put in your window and they dance, but I cut off the bottom part and then hot glued the skeletons into the top section of the house. I also added some turquoise rhinestones.

I cut the flowers off the stems and then glued them around the top edge of the house. You can see the rest of the paper that I chose for each square too. The black and white toile paper reminds me of the Haunted Mansion at Disneyland.

I had to add a dog to the box and because he was a little bit bigger he got the middle spot. I also gave him a black velvet bow.

One of the black cats was added to a spot with a pretty pink flower on its collar.

I had this paper stamped with the lock already in my stash and then added the key and the rhinestones.

I couldn’t find another small item, so I made this little sombrero out of felt, ribbon and trim.

I found the little dollhouse chair at the Dollar Store, spray-painted it black and glued the skeleton onto the seat.

I added it to the other items I already had on my entryway table. I will be sharing the the Dio de la Muertos hanging next week.

I hope I can find more shadowboxes and create different ones for holidays and seasons. I think one with pumpkins and little trucks would be so cute!

Thank you for stopping by today! Hope you have a great week!

Happy Labor Day plus a Fall Roundup

Happy Labor Day to all those in the U.S.! I hope you aren’t having to labor too hard! This is the unofficial start to fall for most of us, so I thought I would share some of my past posts with you. Hopefully you will find some inspiration! Just click on the picture to be taken to the original post.

Pumpkins and Peacock Feathers Tablescape

I loved this one! The colors are so pretty for fall!

Dollar Tree Fall Rake Makeover

This is a great way to recycle an old garden tool and make it something pretty for you porch or patio.

Living Room Fall Tour

This was my very first fall tour! It’s funny how many of these decor items I still use! You don’t have to buy all new items for the season. You can re-use what you have, just in different ways.

Welcome Fall!

I had forgotten about this tablescape! I love how this turned out! I have these same plates on my table today!

Bringing Fall to the Back Porch

I really enjoyed decorating the back porch. It was such a pleasure to look out the back door and seeing the pumpkins and flowers.

Thrift Store Pumpkin Makeover

I always find ‘treasures’ at the thrift store, but they don’t always look quite the way I would like. I gave this one a little makeover!

Neutral Decor Book Page Mobile

This is a cute and simple project and you could use so many different items to make the leaves. I used book pages, but you could use paper or silk leaves like I did below, or even magazine pages.

Falling Leaves Door Hanging

I had all the items I needed for this project, but you can find similar items in your yard and the Dollar Tree.

Decoupage Pumpkin with Maps

This is another quick and easy project to do this fall. Again, you can use any type of paper to cover you pumpkin and personalize it to what you like!

I hope you enjoyed this round up! Happy fall!

How To Make Your Own Dried Flower Mickey and Minnie

Good morning! I hope everyone is safe today. I am in California with all the wildfires, but we are safe where we are. There is just a lot of smoke everywhere plus the heat. I know most bloggers are already putting out there fall decor, but it’s hard to think about when it is still so hot! I will probably wait for fall until September.

Today I am going to show you how I dried flowers and formed them into Mickey and Minnie! You know how I feel about Disney! I had never dried flowers before, and it is so easy!

I went into my yard and cut a few different types of leaves and flowers from various plants. I cut some ferns, leaves, feverfew, blue potato vine, and some white petals of a flower I don’t know. 🙂

I laid out the leaves and flowers on some pieces of wax paper and covered them with another piece.

I carefully laid them in a large heavy book, between the pages. I also stacked a few more books on top just in case.

Do you like my choice of book?

I left the flowers and leaves for a couple of weeks and then finally opened up the book and took out the pieces. I don’t think you really have to wait that long, but I got busy with other things and didn’t get back to them right away. I was so happy with the way the flowers and leaves dried!

I printed out a Mickey head shape just to help me figure out the shape and size. I knew my paper would be a 5 x 7 so my printout was small enough to fit on the paper.

I started with the outline of the Mickey. I laid out the pieces into the general shape. I didn’t glue yet, I wanted to make sure it was formed right first. Once I had the outline, I started filling it in with other bits and pieces.

I cut the fern into small pieces and also took some of the petals off the flowers to fill it in. Once I was happy with how it looked, I started gluing the leaves and flowers onto the paper. I glued on the base pieces and then added a few more on top to feel it in. I also added a couple of large flowers for a bow for Minnie.

I bought a couple of 5 x 7 black frames from the Dollar Tree to hang the pictures in.

I hung them in the guest room, aka Haley’s room, aka the Disney room.

I’m not sure why I thought this would be so complicated, but it was pretty easy! I can think of so many other shapes to use this technique on.

Here is my other Disney wall in the room. I have been collecting ears each time we visit Disneyland and hang them in a black frame. I love this gallery wall!

Thank you so much for coming by today! I hope you have a great week-end!

Here are some other Disney posts you might enjoy!