

Good morning! Welcome to the 2019 Ornament Exchange! I’m so excited to be participating again this year! It’s such a great way to find other bloggers and some new friends. Thank you Erlene for putting this all together! Look at all these great ideas! You can click here to go back to the blog hop and link up your own ornaments!

This year I was partnered with Morgan from Charleston Crafted. She has some of the cutest ideas and the cutest little boy! I love her style and enjoy following all the diy’s her and her husband work on. Please go over and take a look at her blog!
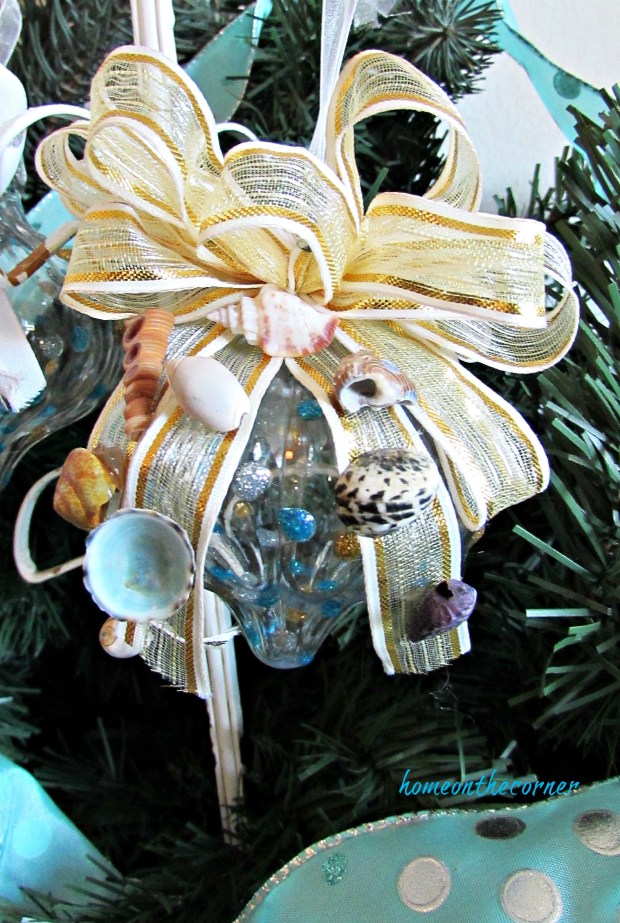
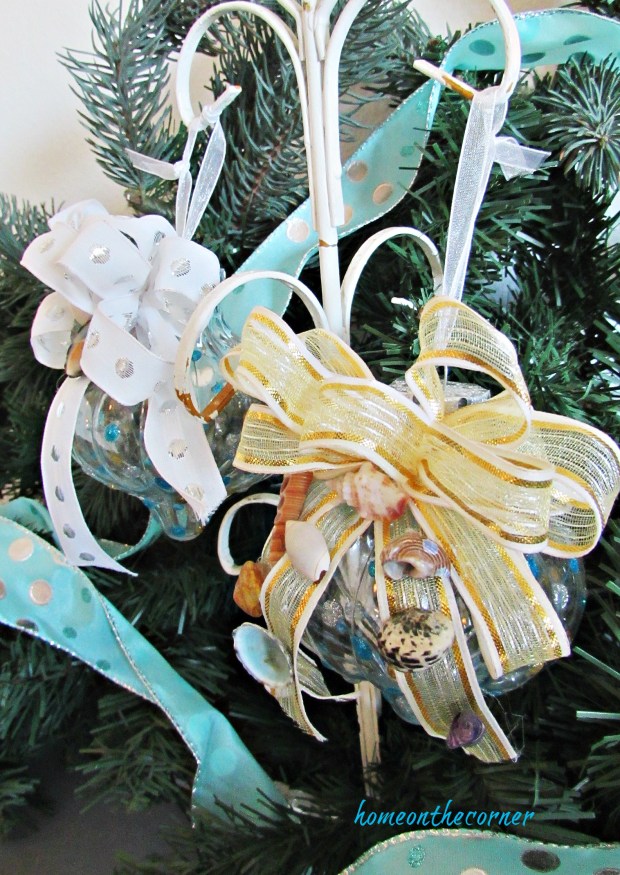
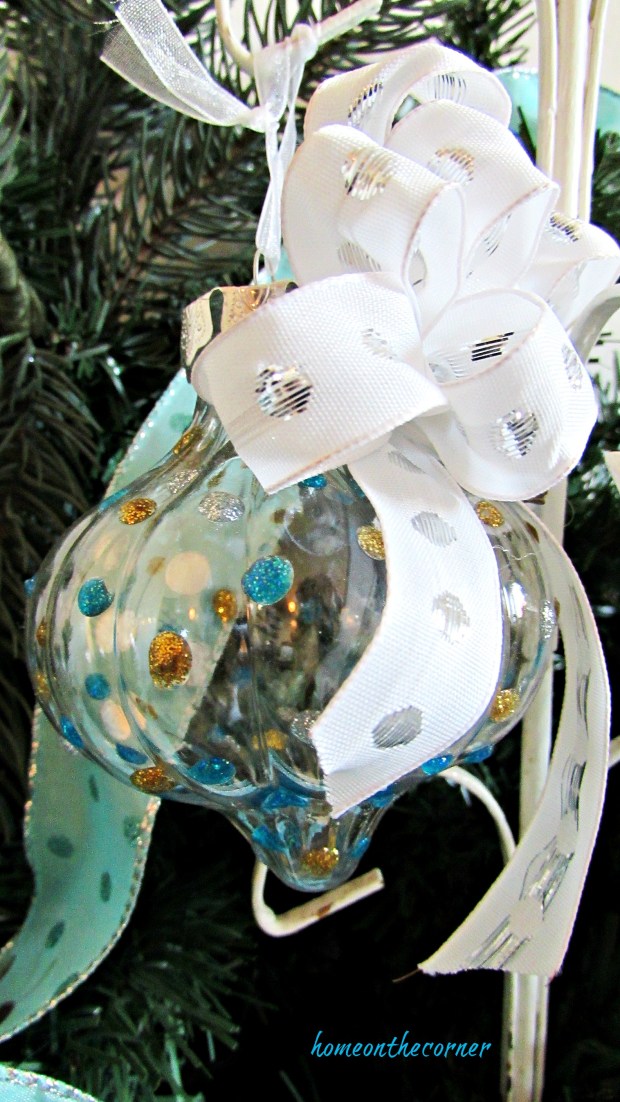
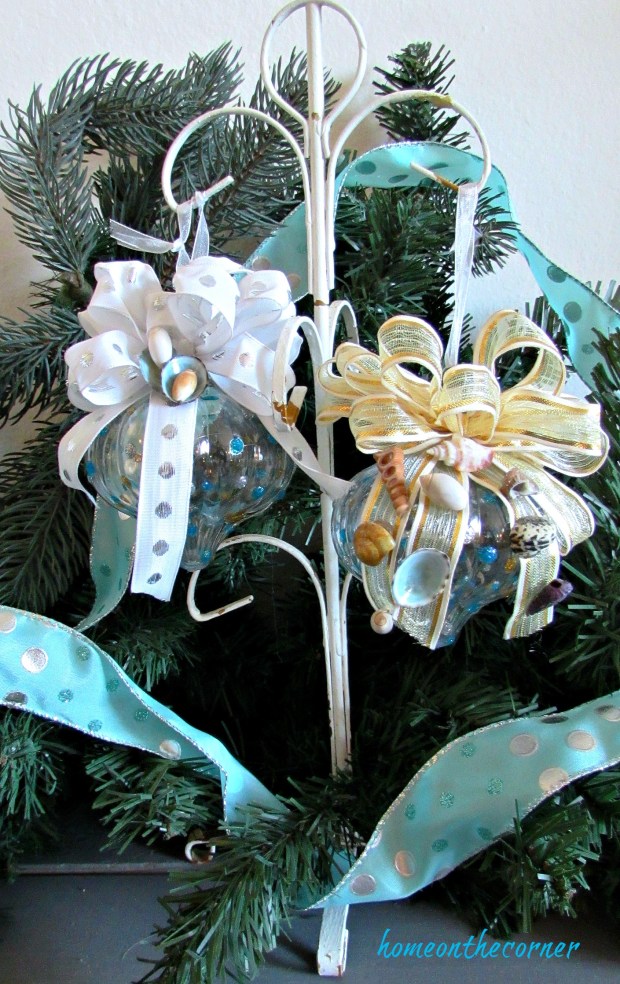
Morgan enjoys the coastal style just like I do, so making her an ornament for her Christmas tree was easy! I started our with these clear ornaments. I found the smaller ones at the Dollar tree and loved the swirly design.

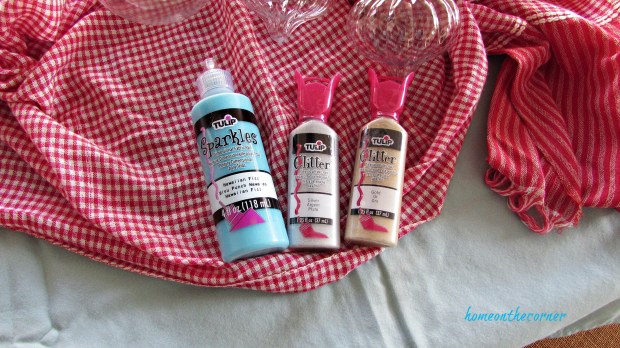
I bought some glittery paint to add to the ornaments. I knew these would be the perfect colors for Morgan.
I practiced making dots first on a piece of paper. I didn’t want to mess up the ornaments!

I used a cup to balance the ornament on and once one side was dry, I turned the ornament to paint the other side.

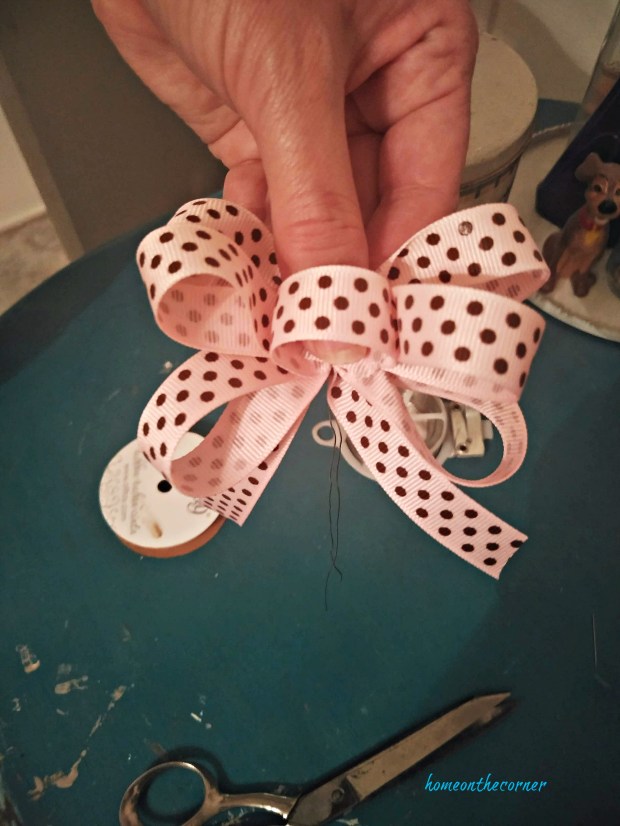
While the paint was drying, I made bows for the top of each ornament. I learned to make bows years ago when I took some florist classes. They aren’t too difficult, but do take a little bit of practice. If you want really nice looking bow, use wired ribbon. It makes any bow look perfect! Here are the steps for making your own bow:
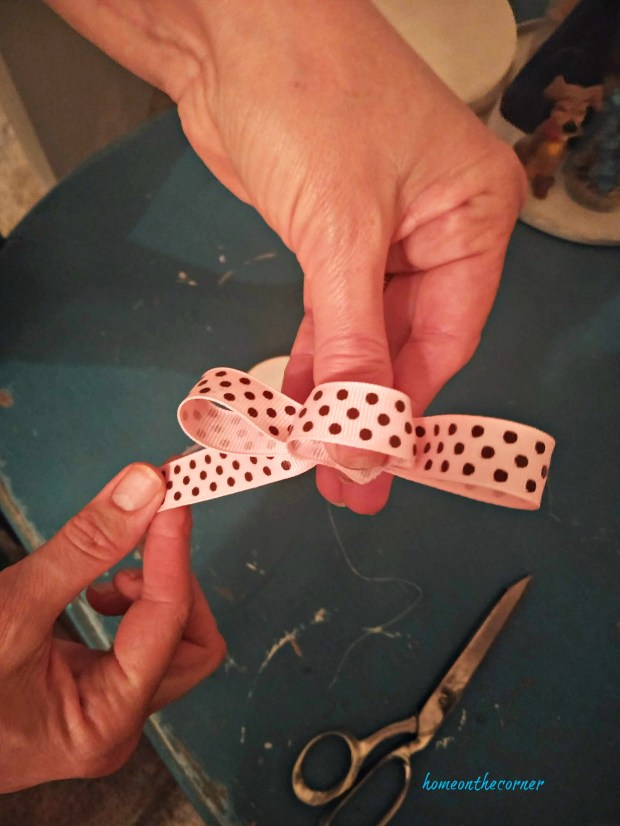
!. Start with a small loop of ribbon. This will be the center of your bow.
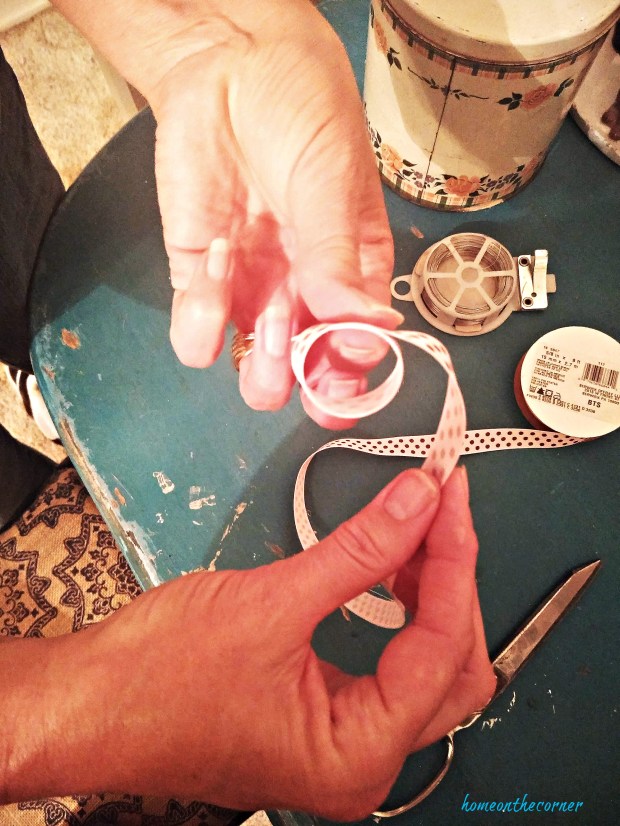
2. Twist the long piece of the ribbon on the back of the loop.
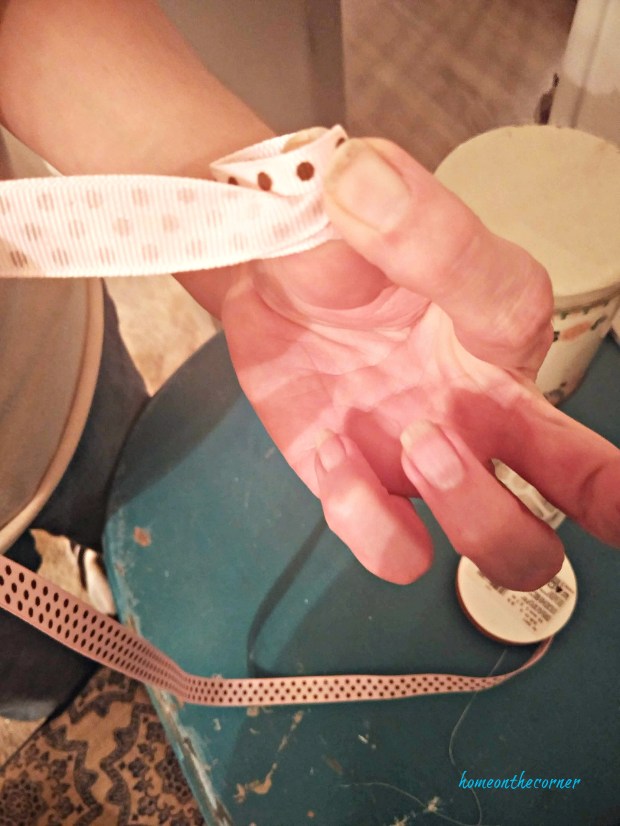
3. Taking the long piece, twist the ribbon into another longer loop on one side. When you bring it back to the middle, twist it again and make a loop on the other side.
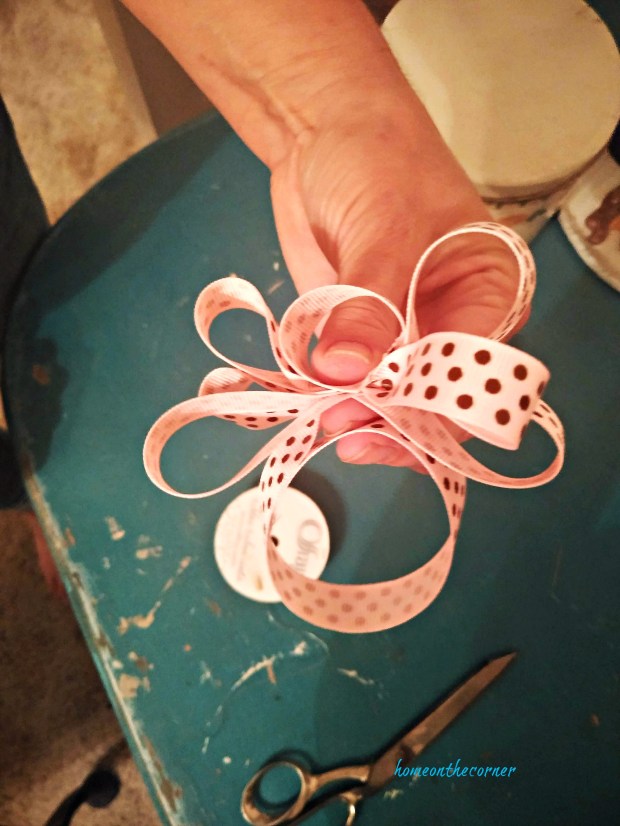
4. Keep making loops on each side of the center loop and keep twisting the ribbon on the back.
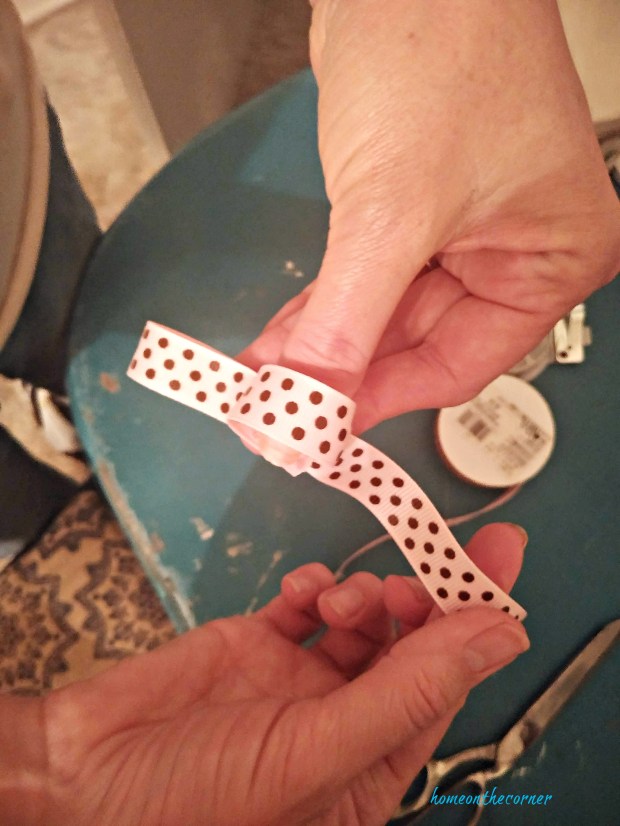
5. Once you have as many loops as you want on each side, make one more loop around the bottom. You can also leave extra so you will have 3 tails on the bottom.
6. Cut a small piece of wire (easier done before you start :)), slide half the wire through the middle loop.

7. This part takes a little practice. The wire should go between your two first fingers and them squeeze the two ends of the wire together under the loop.
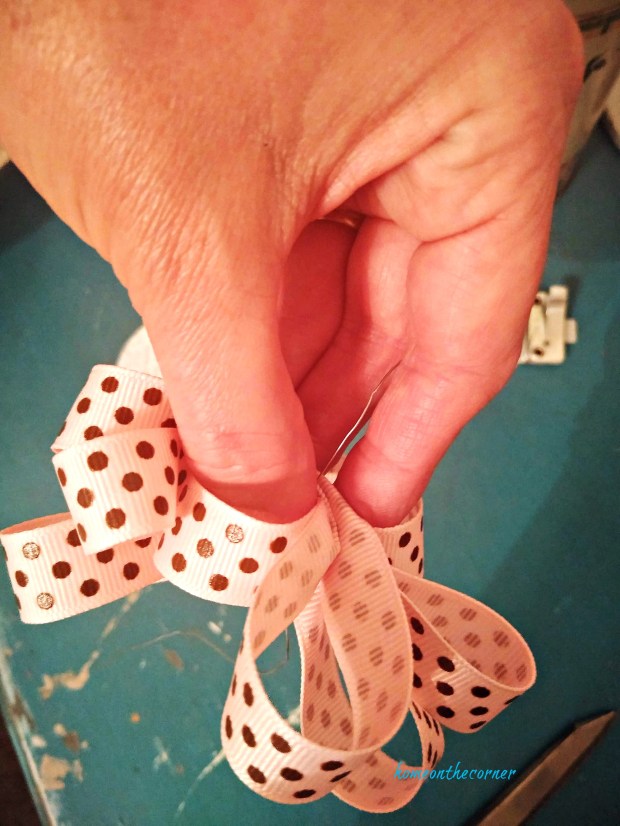
8. Once the wire is together, twist it tightly around to secure the bow.
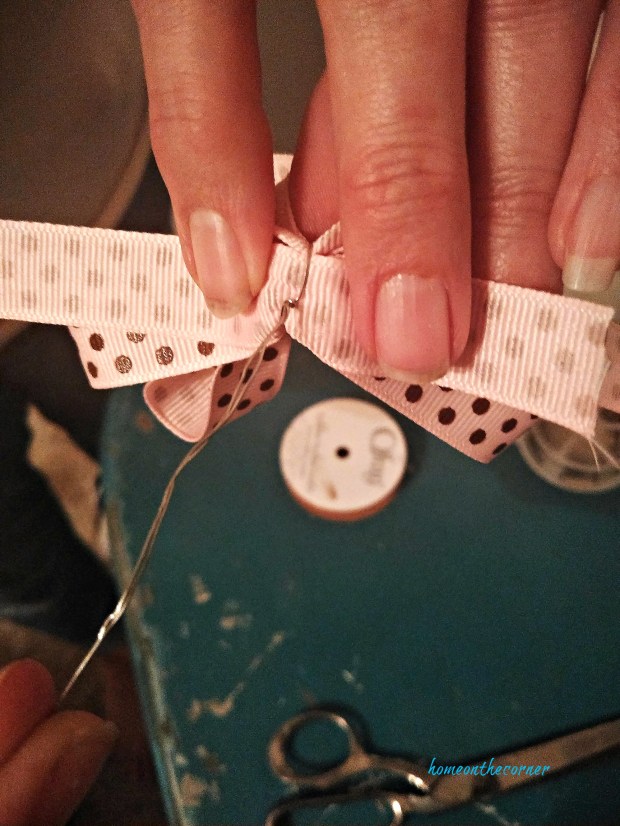
Fluff up each loop and cut the long tail loop and you have a bow! Did you know if you cut ribbon on a diagonal, it won’t fray?
Here is a video too that might make it a little easier to understand.
I used silver and gold ribbon, tied them into bows and glued them to the top of each ornament. I also glued some seashells onto the ribbon, just to make it look more coastal.

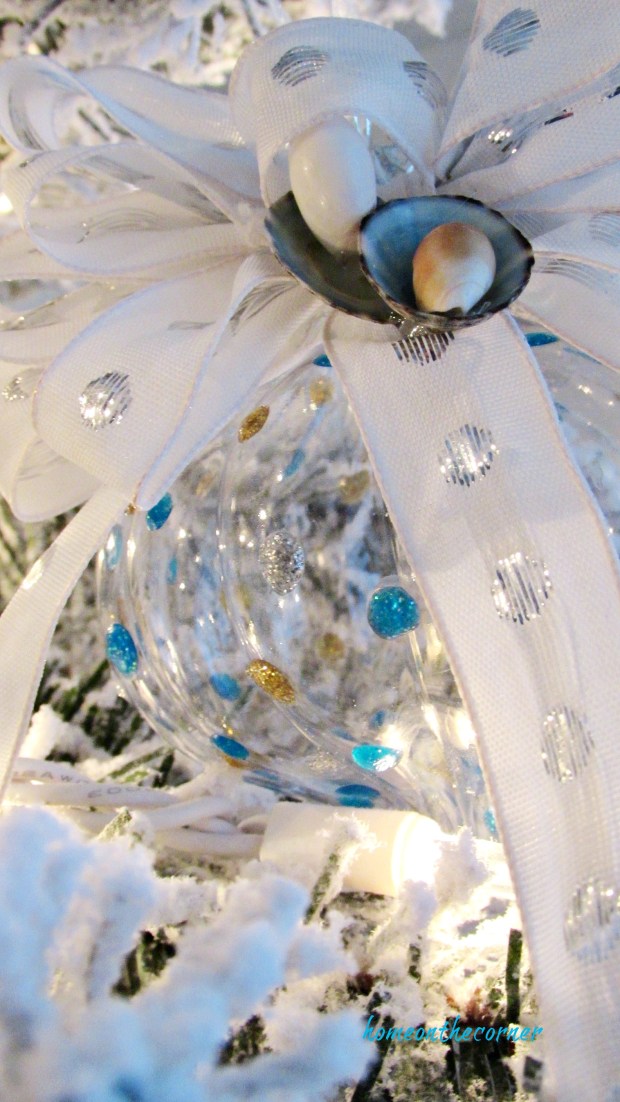
They look so pretty when they sparkle with the lights from the tree.

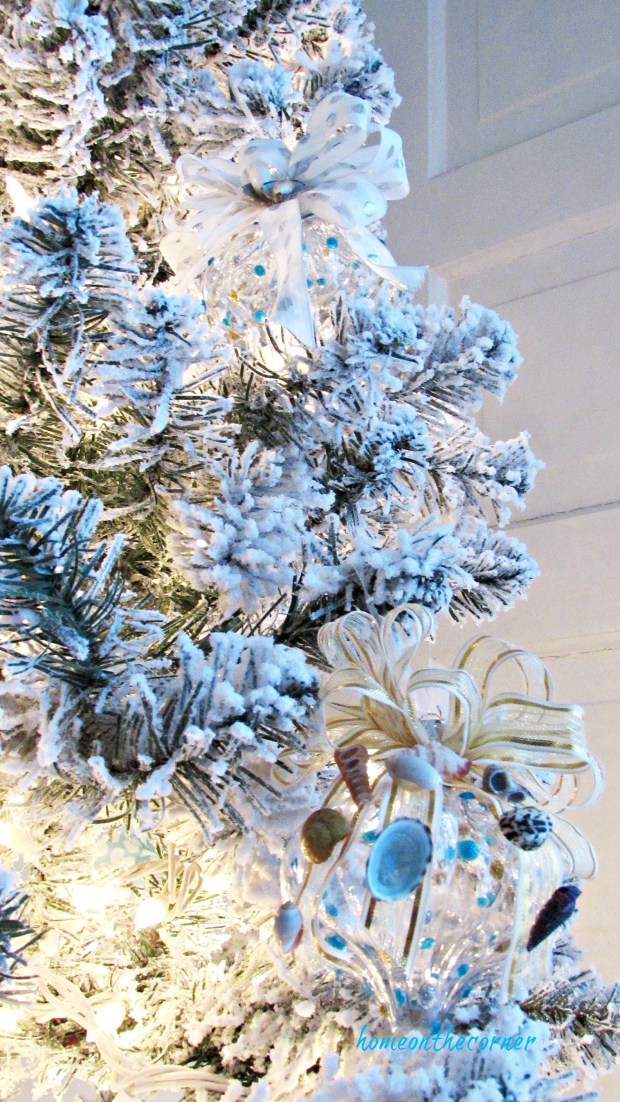

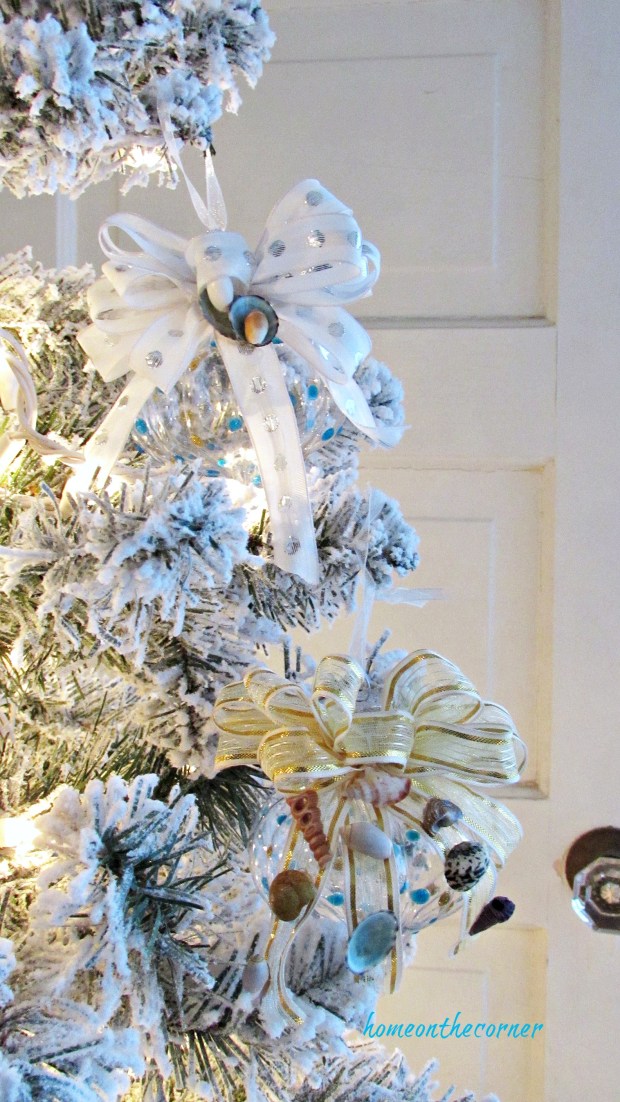
Since the ornaments were a little hard to see on a white tree, I took a few pictures with green pine too.


I loved making these and I think they turned out so good. Thank you Morgan for your ornament too! I will be sharing it soon! Be sure to go back and link up your ornaments too. I would love to see them! I hope you all have a wonderful holiday season!


