Seashell and Driftwood Ornament

Good morning! I have an exciting post today! I am taking part in MyPinterventures Ornament Exchange! (Thanks Erlene!) I believe this is the 4th year I have participated in the exchange and it’s fun to see what all the other bloggers come up with for their ornaments and see what your partner made for you!

driftwood and seashell ornament title

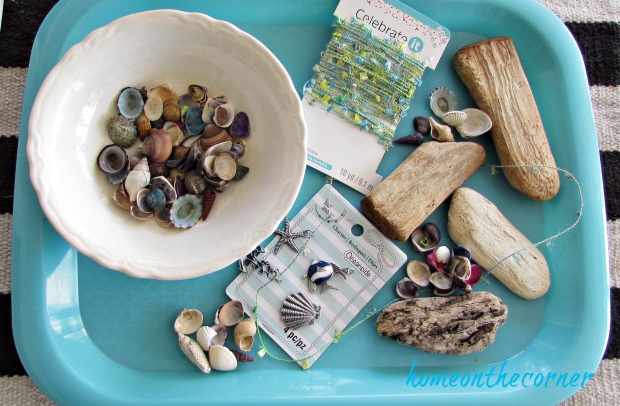
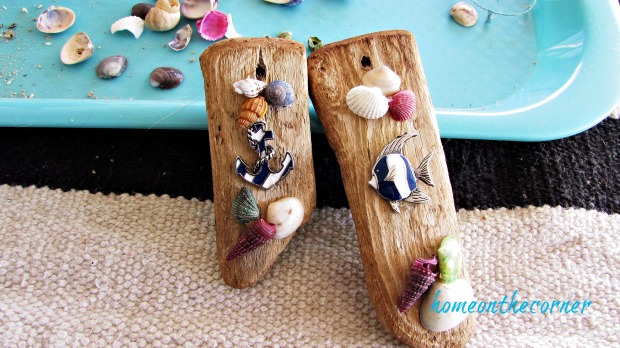
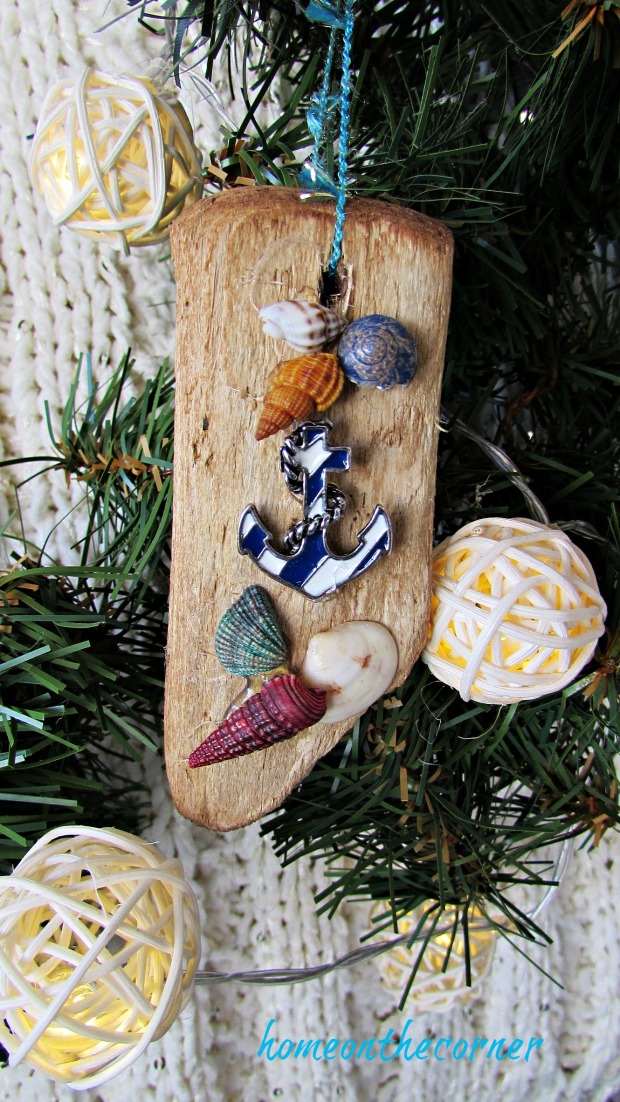
I was partnered with Michelle from Coastal Bohemian. Of course, coastal always works for me! I picked up the driftwood from the beach this past summer and I bought the small seashells ($2.99) and charms ($1.99) from Michaels. I already had the pretty string from another project. Other than those pieces, I just needed my drill and my hot glue gun.

Ornament exchange Supplies

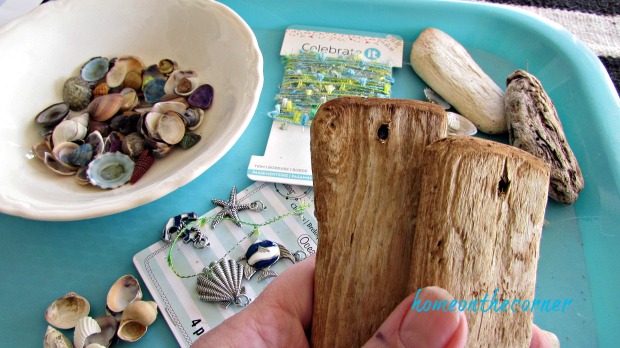
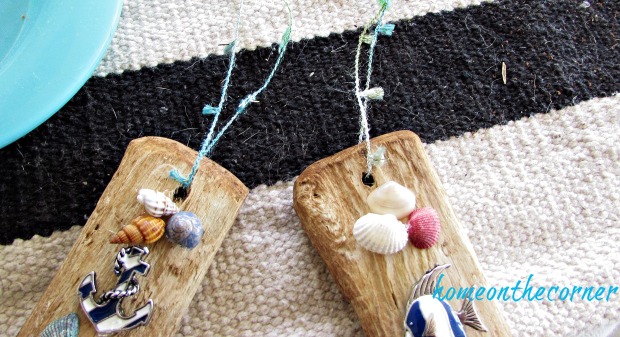
I started out by drilling a hole in the top of each piece of driftwood, so there would be a place for the string. This was pretty easy since the wood is so soft.

ornament exchange driftwood ornament

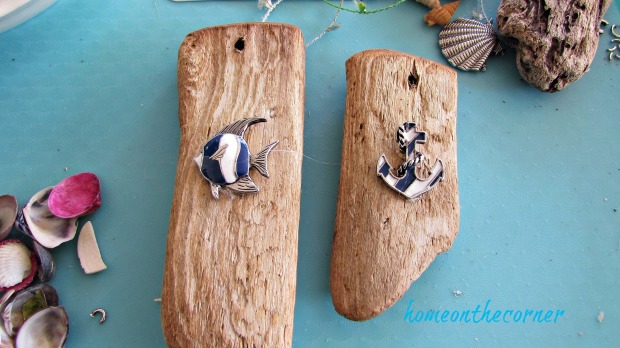
I picked which charms I wanted to use and snipped off the ring at the top with wire cutters. I used hot glue to attach it to the driftwood.

ornament exchange coastal fish anchor

I played around with different placement of the seashells, trying out different colors and sizes. Once I was happy with it, I hot glued them into place.

ornament exchange seashells driftwood seashore beach

The last step was to tie a piece of string through the hole so it could hang from the tree.

ornament exchange seashells, ribbon hanger

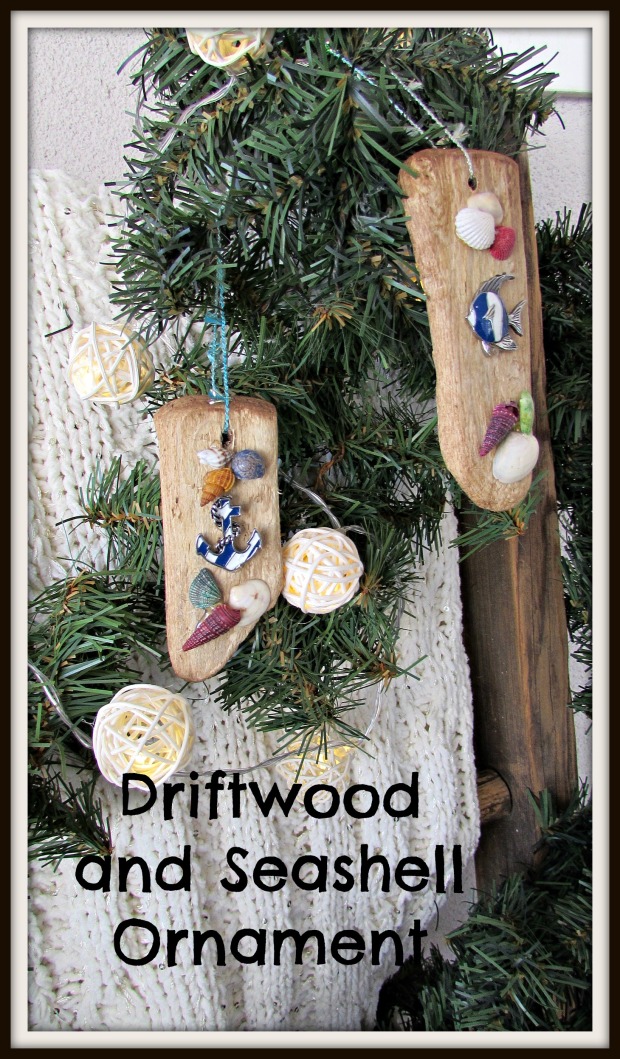
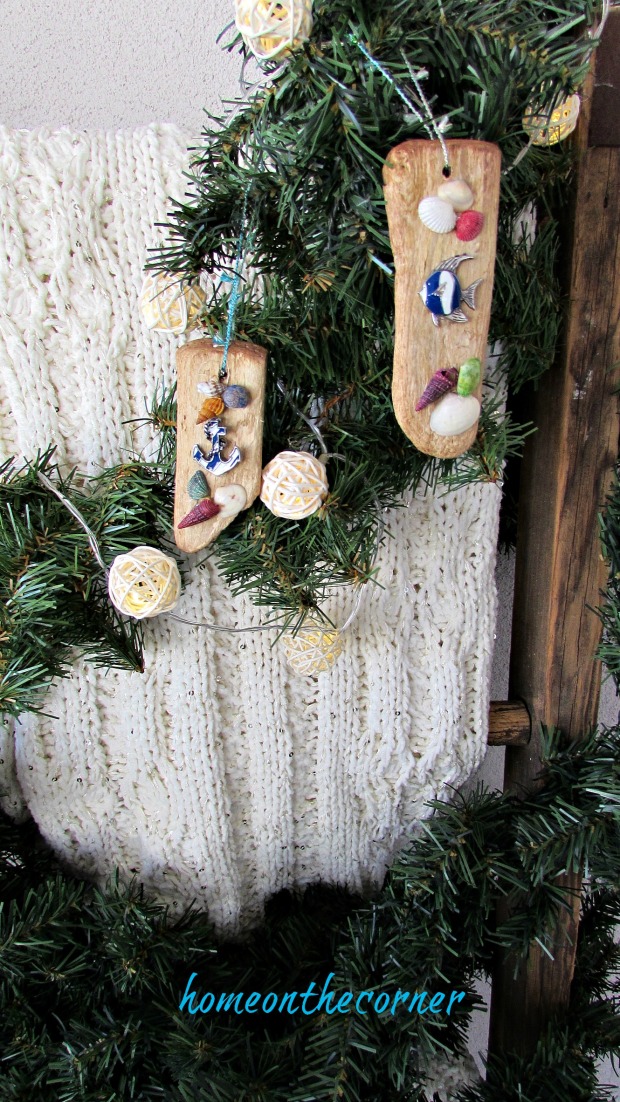
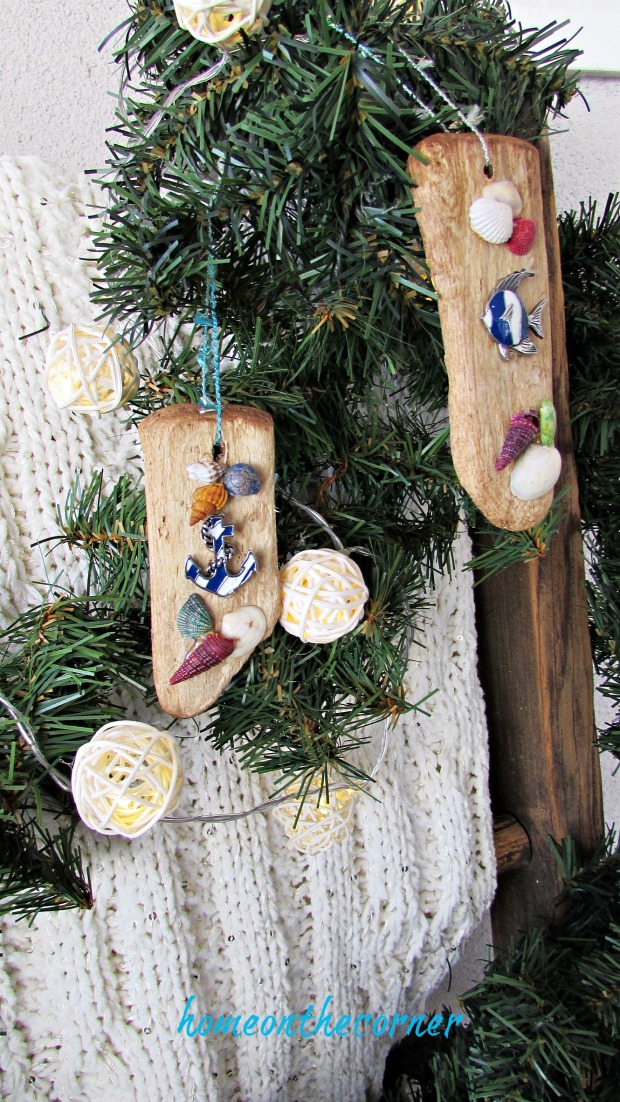
They turned out so pretty! I’m going to make a couple of extra for my own tree too.

ornament exchange driftwood ornament seashells

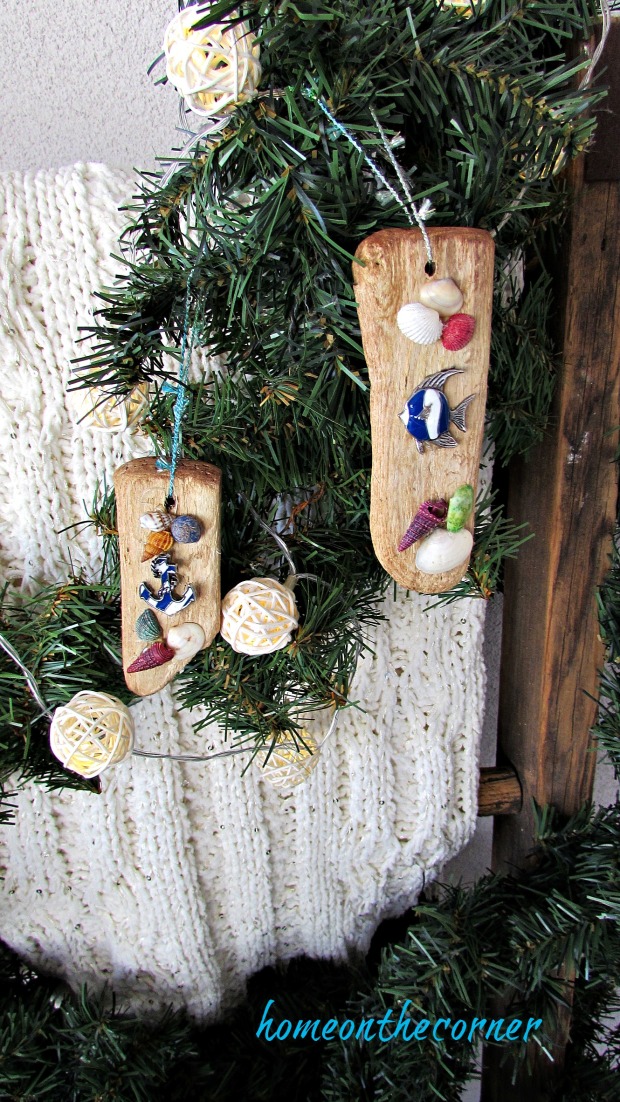
I hope Michelle enjoys hanging these on her tree as much as I enjoyed making them.

ornament exchange angel fish

ornament exchange driftwood anchor

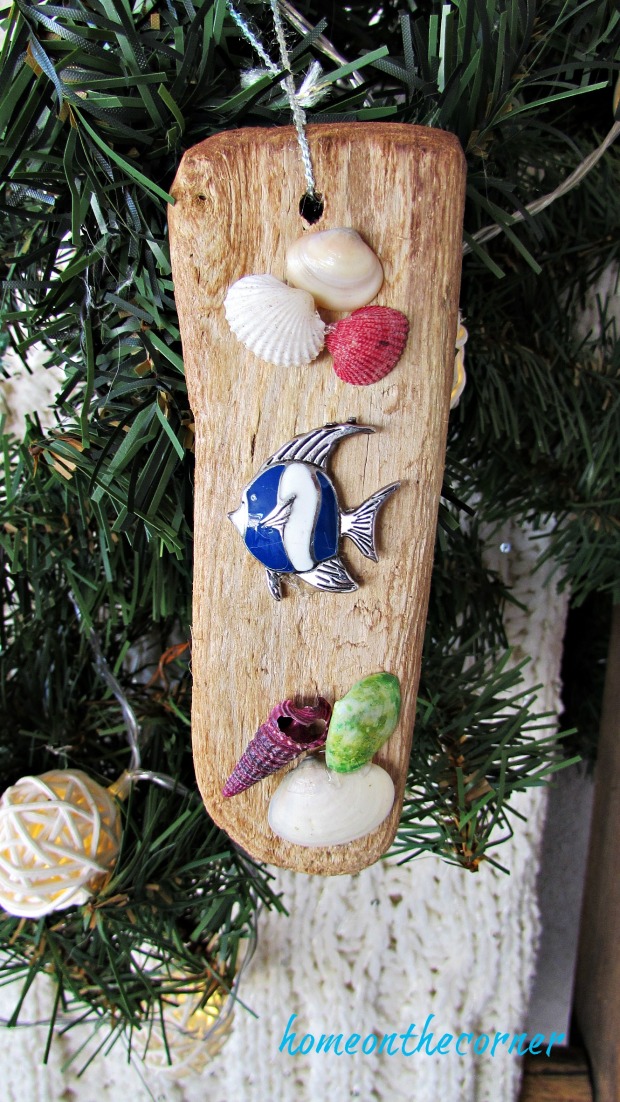
The pretty colors and seashells immediately take me back to the beach.

ornament exchange fish, anchor blue, turquoiseornament exchange driftwood beach shells anchor

Thank you so much for stopping by today! I hope you take time to go visit the other bloggers and see their ornaments too! If you would like to add your ornament how-to to the link party, go here.

sunshine-and-blessings-picmonkey

Meowy Christmas!

IT’S ALMOST CHRISTMAS!!!!!!!!!  WHO’S EXCITED!!!!!!!!!

Not me…definitely not me…

Before we actually get to Christmas I wanted to show off some pictures of my Christmas kitties!  These first two I took myself.  And it will be quite obvious haha.

Amelia Pink ChristmasTarget Pink Christmas

I love their “backdrop”. I added so many pink Christmas items that I had and they looked so cute with it.  Amelia (the calico) looks absolutely thrilled since I had to change the lighting like 5 times before I got that picture.  I think she was losing patience.  And Target (the tuxedo) was trying to get to the treats that I had in my hand.  She usually does things for treats (main word usually), so obviously she wanted them as I was shaking the bag to get her attention.

And I also took them to work to get pictures done as well.  If you don’t know, I work at a pet hotel in the local area where we can take our pets to work.  How cool is that?  We also get a small discount on all of our picture events which means I most definitely paid for their Christmas pictures.

Amelia ChristmasTarget Christmas

They both look scared out of their mind!  I don’t take them to work that often, so that’s number 1.  Number 2, they normally just stay in their room no in the lobby where the pictures were taken.  And number 3, they just don’t like their pictures taken.  But I Love Them!  The pictures…my love for the cats is questionable sometimes.

I’m kidding I love my cats.

So that’s it!  I hope you enjoyed looking at my cats and laughing at their dismay in their photos.  I hope you all have a Merry Christmas and we will see you next week!

sparkle

Star Wire Ornament

Hello everyone!  Here is a post from last year. Hope you enjoy!

This is a super simple project that my mom and I put together with the short amount of free time that we have had.  Hope that you enjoy!

First of all, gather your supplies. You will need 2 gauges of wire, 20-24 gauge and a thicker one, around 18 gauge. You also need your cookie cutter and wire cutters.

Star Wire Ornament Christmas 2016

Start by making a loop at the end of the thicker wire. I used a pencil and wrapped around it. Secure the end by wrapping it back around the wire.

Star Wire Loop Ornament Christmas 2016

Now you can wrap the wire around the cookie cutter. I ended up wrapping twice, just to make it stronger, but once will probably be enough. You want to be able to push it into the corners and around edges.

Star Wire Wrap Christmas Ornament 2016

Once it is wrapped, secure it by wrapping around the part where the loop is. Then you can remove it from the cookie cutter. Cut off any excess with the wire cutters.

Star Wire Outline Christmas Ornament 2016

Now for the fun part! Start wrapping wire around the star shape. This is where you use the thinner wire. I just kept wrapping around all different ways until I felt like it was finished.

Star Wire Wrapping Christmas Ornament 2016

This will look so pretty on the tree! You could pick different colored wire too, like copper or gold.  I tied a sheer white ribbon around the top. I did try with with a heart shape too, but it didn’t have enough edges to keep the wire in place. Too bad, because it would have looked really cute :(.

Star Wire Finished Christmas Ornament 2016


wire star ornament sheer bow

star wire ornament on tree

Aren’t these cute?  They are so simple and are a quick and easy project.  Hope that you all have a wonderful week before Christmas!

sparkle


Festive Paper Christmas Tree Garland


Christmas Tree Garland 3 Trees 2017

Good morning!

I have another craft for you today. I made this one a while back and I am just getting it posted. I see all kinds of garlands out there today, but this is definitely one of a kind!

Here’s what you need:

  • scrapbook paper
  • buttons
  • string, twine or ribbon

I started out by picking out some scrapbook paper that I liked and ones that coordinated together. I have quite a bit on hand, but there are so many pretty ones to choose from at the craft stores. You can make a garland in any color combination you like.

Christmas Tree Garland Papers 2017

I drew some trees freehand, but didn’t really like how wonky they turned out, so I ended up tracing some others from a pattern I found online. I made 2 trees from 7 different papers, for a total of 14 trees.

Christmas Tree Garland Sketches 2017

These look a little more normal! 🙂

Christmas Tree Garland Cutout Trees 2017

After cutting them all out, I used a hole punch near the top. Then I went through my buttons and picked the ones that I thought looked best with each color tree. The buttons with the shanks on the back worked best.

Christmas tree Garland Buttons 2017

I placed the shank of the button through the hole and then threaded the gold wire through the button. I twisted the wire so the button wouldn’t slip out. I left a couple of inches between each tree until I had the garland as long as I wanted.

Christmas Tree Garland Stringing Through Button 2017

I did end up using the wonky trees too. I had enough star buttons to use one on each tree and hung it on the headboard in the guest room.

Christmas Tree Garland Wonky Trees 2017Christmas Tree Garland Wonky Trees Headboard 2017

I used the other trees on the foot-board in the master bedroom. I like how it adds just a little touch of Christmas to the room.

Christmas Tree Garland Footboard 2017

I used it this year in my guest room too! Here’s the post if you want to take a look!

Christmas in the guest room cupboard

Thanks for stopping by today!

sunshine-and-blessings-picmonkey

I’m Dreaming of Even More Pink Christmas’s!

Hello everyone!  I hope you are all preparing for Christmas!

And I have been thinking about NEXT Christmas….yeah I know.  I am already getting ideas for my Christmas decorations for next year and I’m thinking that I might get a pink tree.  And decorate with pink!  It will be beautiful!

No…is it too much?  Maybe.

But in the spirit of Christmas I wanted to show off some of my inspirational pink trees!

shabbychictreasures

Shabby Chic Treasures

jadorelexiecouture

Jadore Lexie Couture

Couldnt find

Unfortunately, the website for this tree doesn’t exist anymore.  But OMG it’s amazing!

home dit

Home DIT

Love the Day

Love the Day

I could easily go through and post about 1000 pictures of pink Christmas trees, but I promise I’ll spare you for today.  I hope you enjoyed these beautiful trees and are ready for the pinkness next year!

sparkle