Springtime Concrete Painted Planter

How is everybody holding up? Going stir crazy or getting things done around the house? I hope everybody is well. We are still doing good over here on this end!  Is it springtime in your neck of the woods? We have had some absolutely beautiful weather here! We had some much needed rain this weekend and now back to sunshine again. This type of weather makes me want to get outside and enjoy it. It also makes me want to start planting again. I love the look of freshly dug up dirt and the wonderful flowers and plants put in the ground.

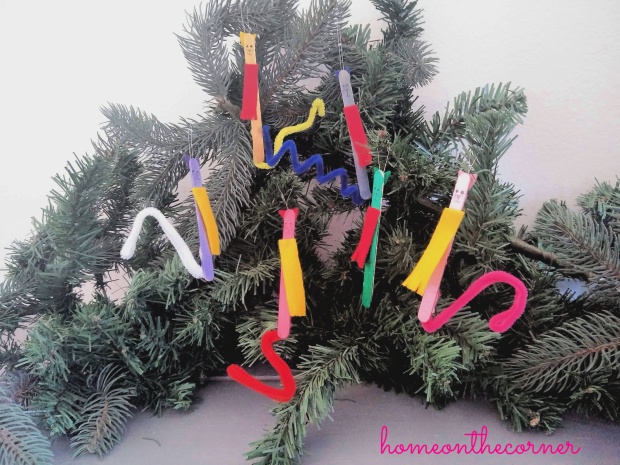
I posted this several years ago and it always seems to be popular. So, I figured this would be a good project to keep you busy!

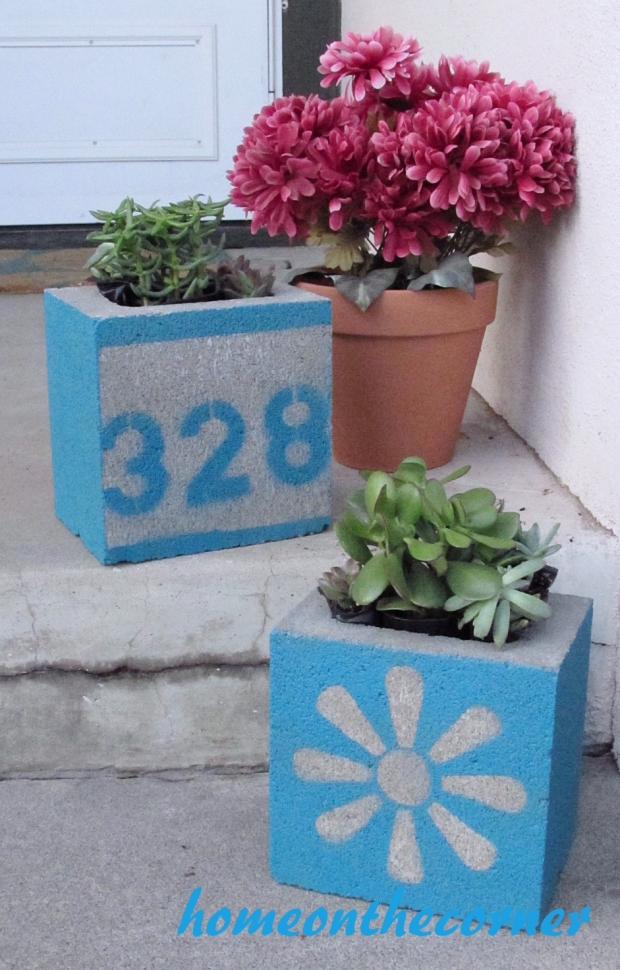
I decided to make a new small planter for my front porch. Well, actually two of them-one with my address and one with a fun graphic flower. I found these over at Lowes.com/LCI-concreteplanter. I am not affiliated with Lowes, just thought this was a fun project for spring.

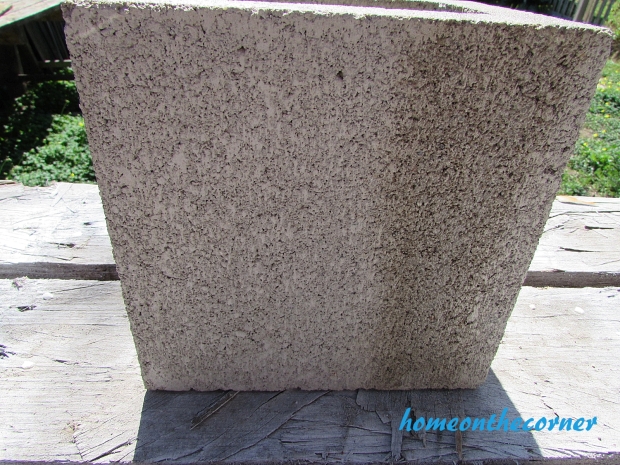
I started out with 2 of the concrete blocks and a can of Rustoleum Mulitcolor Textured Spray Paint. I used a color that was very close to the color of the block. This will help seal the concrete so the other color won’t leak through when you spray your design. I first cleaned off the block with a wire bristled brush and then wiped away the dust.

Concrete painted planter

I sprayed the whole block with the spray paint. Here is the right side painted and the left is not. You can see how closely they match. Perfect!

concrete painted planter textured paint

Have you ever heard of a Xyron Sticker Maker? I use the refills for my scrapbooking. It is perfect for all the little letters I cut out on my Cricut. Just run the letters through it and then place them on your page. I thought I would give it a try for this too.I printed out the design-you could use your Cricut or find a design you like online-cut it out and then ran each piece through the Xyron.

concrete painted planter xyron

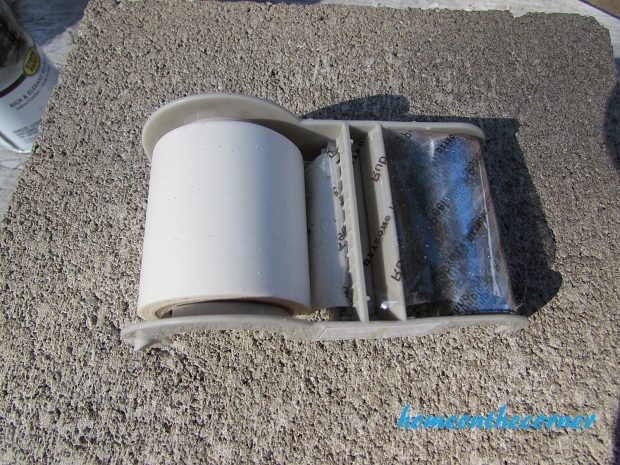
Once each piece had the sticky stuff on the back , I placed it on the concrete block.

concrete painted planter stencil

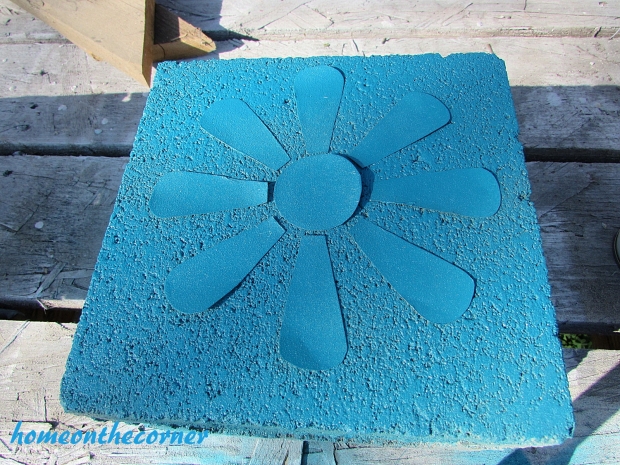
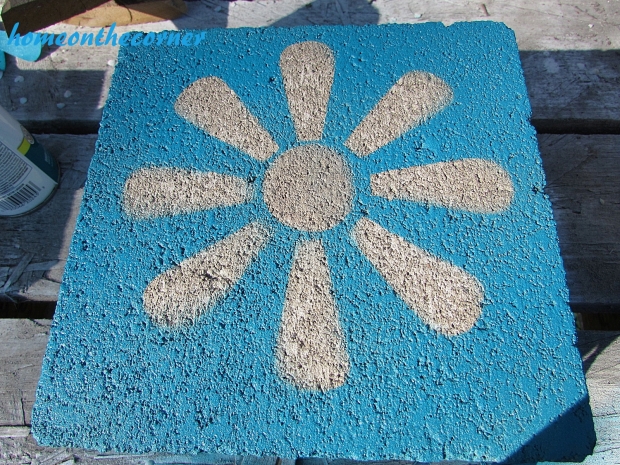
Then I spray painted over the whole thing. I painted all the sides too. I did have to keep pushing down my pieces to make sure the paint didn’t get underneath, but they did okay. I used 2 coats of paint.

concrete painted planter lagoon spray paint

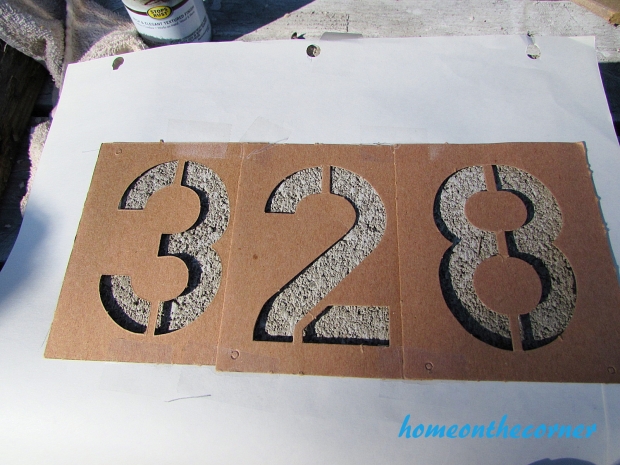
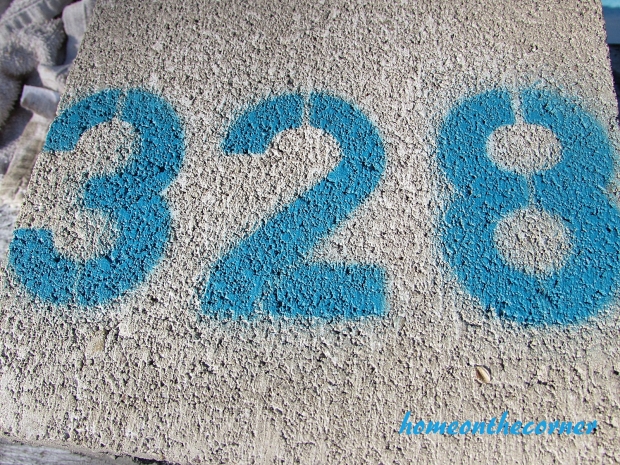
On my second block, I decided to put my address numbers. I painted the whole block with the textured paint and then laid out some stenciled numbers. I covered the rest of the block with paper so the paint wouldn’t cover the rest of the block.

concrete painted planter number stencil

Then paint!

concrete painted planter numbers lagoon spray paint

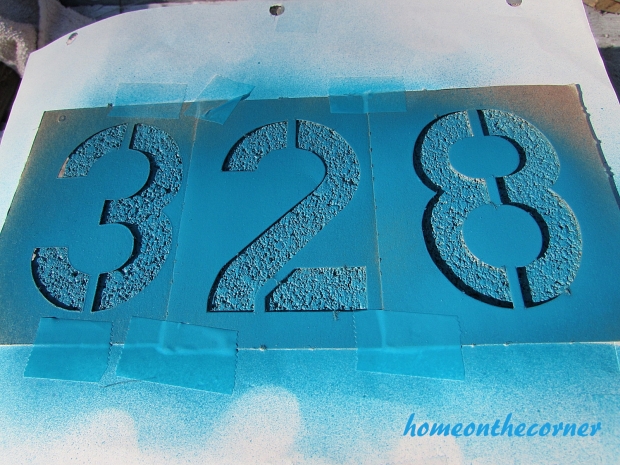
I sprayed some sealer over the whole thing since it will be sitting out on my porch.

concrete painted planter flower stencil

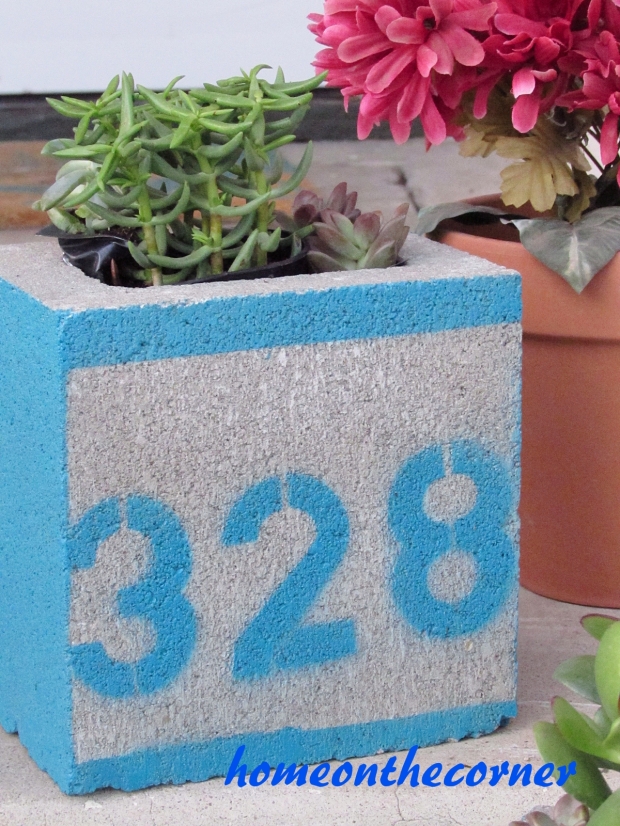
This one looked a little plain, so I did add a blue stripe along the top and the bottom.

concrete painted planter address number

I added some succulents and placed them on my front porch. I left the plants in the pots for now, until I can figure out a way to keep the water from all draining out.

concrete painted planter front porch

concrete planter stencil succulents

concrete planter painted address

3 years later and I still have these blocks and they look great! I would love to see what designs you come up with!

sunshine-and-blessings-picmonkey


DIY Valentine Ombre’ Wooden Heart

Good morning! It’s the last week of January already! Valentine’s Day is coming quickly. I posted a few ideas last week too. Here is the link in case you missed it. I have another simple Dollar Tree craft for you today.

This post also contains affiliate links and I will be compensated if you make a purchase after clicking on my links.

 Dollar Tree

I found this unfinished heart at my local Dollar Tree. I had the pink and white paint on hand but they do carry paints at the store too. I also picked up some valentine ribbon and a couple of plastic heart necklaces.

I started out by picking my paint. I picked white and two shades of pink. I put each color in a pan. I knew I wanted to paint the heart ombre’, so I started with white at the top of the heart.
wooden heart dollar treewooden painted heart pink paintspainted heart white ombre'

Next, I used the lighter pink while the white was still wet. I blended the white and pink together where the colors met and then continued adding the pink down the heart.

painted heart white and pink ombre'

Lastly, I added the dark pink, using the same technique as above.

wooden heart white and dark pink ombre'

Once the paint was dry, I penciled in the word love.

wooden heart pink ombre' love

I went over the letters with hot glue and then laid the bead necklace on top of the glue. I did small sections at a time so the glue wouldn’t dry. I just snipped the necklace when the letter ended and then started the next one.

wooden heart beads love

There had been a small piece of twine to hang the heart with, but I decided to use a piece of Valentine ribbon instead. I drilled the holes a little larger to fit the ribbon through and then just knotted it in the back.

wooden heart hanging bead lovewooden heart plaque sign pink ombre'

I also bought the scarf and fortune cookies at the Dollar Tree. The cute little bird came from Target after Christmas, but the pink looks great for Valentine’s Day!

wooden heart pink mantel valentinewooden heart ombre' pink and bird

Do you decorate for Valentine’s Day? I like just adding a few little touches on my mantle. Have a great day!

sunshine-and-blessings-picmonkey

Gifts to Print for You!

Good morning!  I hope everyone is ready for Thanksgiving!  I cannot believe that it is tomorrow!  I still have some baking to do before the big turkey day, so I better get going on that…

74482917_2464544100482180_1095391847901036544_n

Welcome to the 5th annual 12 Days of Holiday Ideas event, hosted by Shirley of Intelligent Domestications  and  Erlene of My Pinterventures Between Nov. 11th and December 6th there will be hundreds of new ideas shared by over 55 Co-host bloggers! 

Go here to see our kick-off collection of Holiday ideas as well as all of this years talented participating DIY and Foodie Blogs. Download this years November and December calendars with all of the topics and dates so you can make plans to watch for ideas!

We are hosting a BIG GIVEAWAY from our Sponsors this year! Be sure to scroll all the way down for more information and to enter to win!

This blog post is about printables.  We have 4 different printables for you today and I hope that you enjoy them.  They were fun to make!

The first printable I have is actually from a previous blog post for the 2019 Christmas Blog Hop post.  This printable is a Christmas To Do Coloring Page.  This is a cute Christmas tree with ornaments on it.  Some of the ornaments have Christmas activities that you can do and others are empty to put your own Christmas activities in.  Click on the link below to download the printable and use it yourself!

Christmas To Do Coloring Page (1)

Christmas To Do Coloring Page

The other printables that we have are all gift tags.  There are three different kinds of tags for your Christmas gifts.  There are blue circular tags that fold over so you can hide the to and from on the inside.  The second tags are pink (my favorite) with cute little pink Christmas trees on the front and the third ones are silver with little black reindeer.  These are all easy to punch a hole in to tie a ribbon through it.

Gift Tags 1

Gift Tags 1

Gift Tags 2

Gift Tags 2

Gift Tags 2

Gift Tags 3

Gift Tags 3

And that’s it!  It’s not very much, but we enjoyed putting this all together.  I know I personally will be using the Christmas To Do List because it’s a great way to keep my Christmas organized.  And I will definitely use the pink tags for all of my Christmas gifts.  Let me know if you are going to be using any of these for your Christmas!

Sparkle

MEET OUR SPONSORS who have generously donated fabulous prizes for the Big Christmas Giveaway!

DecoArt  winner will receive a prize package valued at $100!

Dixie Crystals/Imperial Sugar winner will receive a Keurig Coffee Maker valued at $100!

Oriental Trading winner will receive an OrientalTrading.com gift card valued at $200!

Cabot Cheese winner will receive a gift basket of Cabot products valued at $75!

Burlap Fabric winner will receive a prize pack of products valued at $50!

Zulay Kitchens winner will receive one Milk Frother and a Lemon Squeezer valued at $21

It’s Home To You winner will receive one wooden Santa sign valued at $65

12 Days of Holiday Ideas Event Sponsors 2019

Giveaway begins Nov. 8, 2019 and ends Dec. 6, 2019. Winners will be notified by December 13, 2019. Sponsors will ship each prize to the winner. There will be a total of seven winners, one for each prize. Drawing is by random selection using the Rafflecopter widget. 

Must be 18 to win. Open to U.S. residents only.

a Rafflecopter giveaway

You are invited to the Inlinkz link party!

Click here to enter

A Clowder of Christmas Cat Ornaments!

Good morning!  How was everyone’s weekend?  Mine was crazy busy, but it was fun.  I celebrated one Thanksgiving already and I ate so much food!  I basically had to be rolled out the front door to my car that’s how much food I ate.  But it was a wonderful day with family and I wouldn’t change anything.

*This post is sponsored by DecoArt.  All opinions given in this blog post are my own.*

75553026_2464544027148854_6362497069768245248_n

Welcome to the 5th annual 12 Days of Holiday Ideas event, hosted by Shirley of Intelligent Domestications  and  Erlene of My Pinterventures Between Nov. 11th and December 6th there will be hundreds of new ideas shared by over 55 Co-host bloggers! 

Go here to see our kick-off collection of Holiday ideas as well as all of this years talented participating DIY and Foodie Blogs. Download this years November and December calendars with all of the topics and dates so you can make plans to watch for ideas!

We are hosting a BIG GIVEAWAY from our Sponsors this year! Be sure to scroll all the way down for more information and to enter to win!

Today we are showing you how to make your very own ornament!  And I promise, this isn’t super complicated.  It can be done in one afternoon if you wanted.

Now as some of you may know, I have 2 cats named Target and Amelia.  I love my crazy cats and I have cat ornaments that look like them.  But, I knew I wanted some other cat ornaments for my Christmas tree to spice it up a bit.  So I am here to give you instructions on how to make your own cat ornaments!

Things you need:

-Popsicle Sticks

-Paint

-Pipe Cleaners

-Colored Felt

-String

-Hot Glue

-Sharpie

Step 1: Paint the Popsicle Sticks

Decor Art Paint 2

This step is pretty self explanatory, but it’s still the first thing I did.  I used the awesome paint from our sponsor DecoArt!  DecoArt is one of the sponsors for the 12 Days of Christmas and they graciously sent us 8 different paint colors to use to our hearts content.  They are also part of the giveaway at the bottom of the blog posts so make sure to check that out!  We appreciate them sending us the paint and sponsoring this blog post!

My personal favorites are the pink, red, and dark blue.  The darker colors covered the popsicle sticks really well, but I had a bit of trouble with the silver.  It didn’t show up on the wood, so I would suggest using it as a top layer to add some sparkle on your project.  The light green was okay but it was kind of streaky so I was not a fan of that one either.  But I painted the sticks to prep them for step 2.


Step 2: Make your Pipe Cleaner Tails and Glue to the Popsicle Stick

I tried to match the pipe cleaner to the correct paint but unfortunately I didn’t have purple or dark green, so I used colors that looked good together.  I tried to make my tails look a little different so my cats had some character.  Here is what my blue tail looked like!

Popsicle and Pipe Cleaner

I did have to bend the tails just a smidge so that way I could glue it to the Popsicle stick, but it didn’t hurt the tail at all.  I put a small amount of glue on the Popsicle stick so that I could stick the two pieces together.

Pipe Cleaner Tail

Here’s all of my cats with their tails!

Cats with Tails

Step 3: Draw a Face on your Cat

I used a fine point sharpie to draw a little face on the cat, but you might be able to use a regular sharpie on a bigger Popsicle stick.  I drew two little eyes, a nose, a mouth, and 3 whiskers on each side.

Cat Face

Step 4: Glue a String Loop to the Cat

You can do this step a couple different ways depending on how you want to hang your cat ornament.  I took a bit of thread and hot glued it to the back of the head side of the cat.  You can use twine or even an ornament hook if you wanted, but you will need some hot glue to hold it together!

Step 5: Make Ears and Scarves out of Felt

Originally, I was going to end here.  But I didn’t think the cats looked quite right without some tiny ears and some cute scarves.  So I cut some felt that matched my cat bodies to make some tiny little ears and some red and yellow felt for some wintery scarves.

Cats Almost Done

Step 6: Admire Your Cute Kitties!

Finished Cats 1

I think they turned out so cute!  I now have a clowder of cats for my Christmas Tree which will be perfect to add with my Target and Amelia ornaments.  I hope you enjoyed this cute tutorial and thank you to DecoArt for the paint!  See you on Wednesday for the next blog post!

Finished Cats 2Finished Cats 3

Sparkle

MEET OUR SPONSORS who have generously donated fabulous prizes for the Big Christmas Giveaway!

DecoArt  winner will receive a prize package valued at $100!

Dixie Crystals/Imperial Sugar winner will receive a Keurig Coffee Maker valued at $100!

Oriental Trading winner will receive an OrientalTrading.com gift card valued at $200!

Cabot Cheese winner will receive a gift basket of Cabot products valued at $75!

Burlap Fabric winner will receive a prize pack of products valued at $50!

Zulay Kitchens winner will receive one Milk Frother and a Lemon Squeezer valued at $21

It’s Home To You winner will receive one wooden Santa sign valued at $65

12 Days of Holiday Ideas Event Sponsors 2019

Giveaway begins Nov. 8, 2019 and ends Dec. 6, 2019. Winners will be notified by December 13, 2019. Sponsors will ship each prize to the winner. There will be a total of seven winners, one for each prize. Drawing is by random selection using the Rafflecopter widget. 

Must be 18 to win. Open to U.S. residents only.

a Rafflecopter giveaway

You are invited to the Inlinkz link party!

Click here to enter

Hundreds of Christmas Ornament Ideas!

Welcome to the 2019 Ornament Exchange Link Party! It’s my fourth year of the blogger ornament exchange and you’ll find hundreds of DIY ornament tutorials and inspiration. This link party runs from November 14th through December 14th, so make sure to come back to add as many of your own handmade ornament tutorials before it closes!


This year, we have 38 talented bloggers hosting the handmade ornament exchange link party! The rules of the challenge were simple: create a handmade ornament for $15 or under, create a tutorial (all tutorials are linked below), and ship the ornament off to a new home!

2019 Ornament Exchange Long

ORNAMENT EXCHANGE LINK PARTY HOSTS

My Pinterventures •  Create and Babble • 2 Bees in a Pod
 Across the Boulevard •  Elle Marie Home  • Faeries and Fauna
Home on the Corner • This Autoimmune Life • Our Unschooling Journey
Domestic Deadline •  Inside the Fox Den • Intelligent Domestications
Cookies, Coffee and Crafts  • Munofore •  Rosewood and Grace
Raggedy Bits • Christmas Tree Lane •  Making Manzanita
Mom Home Guide • From Evija with Love •  Red Cottage Chronicles
Coastal Bohemian • Our Crafty Mom •  Girl, Just DIY! •  Pixel Maven’s Retreat
Prim and Propah •  Purple Hues and Me • Farm Girl Reformed • Eye Love Knots
Keys to InspirationCharleston CraftedSparkle Living
Interior Frugalista  • Love My Little Cottage •  My Family Thyme
Crafting a Family  •  All Things New Again  •  Just a Little Creativity

Ornament Exchange Collage 3 Blank (1)

You can see the ornament I created for my new friend Morgan, here.

DIY Turquoise, Silver and Gold Coastal Ornament

turquoise ornament white and silver bow

I can’t wait to see what you have all created! Link up you ornaments below!

2019 Ornament Exchange Link Party

Share your handmade ornament tutorial on the link party below ⇓⇓ Add as many ornament tutorials as you like until December 14th. 

You are invited to the Inlinkz link party!

Click here to enter

sunshine-and-blessings-picmonkey