How to Make a Rustic American Flag

Hello! Hope everyone is doing well! We are coming to the close of school with our preschool graduation this week and then next week is the last week. I am so ready for some vacation time! I would love to get some more projects done! Lauren and I plan to work on updating the blog this summer and there are other exciting things in the works! Stay tuned!

I have been wanting to make a flag like this for a long time. I figured since Memorial Day is next Monday here in the states and 4th of July is coming soon, this was a good time. I originally was going to use pieces of molding, but that never happened so I decided to use some pickets I already had. Another free project!!

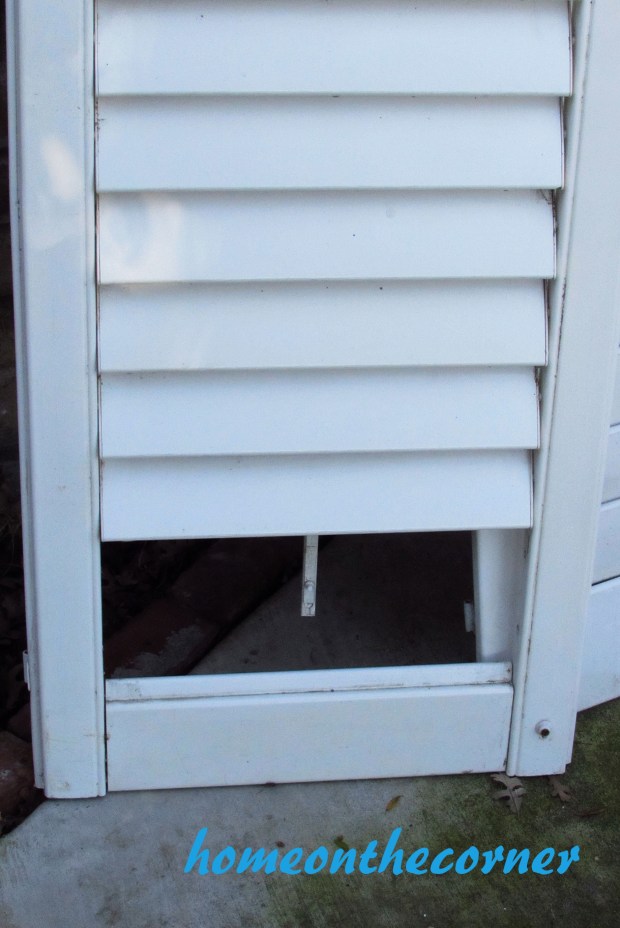
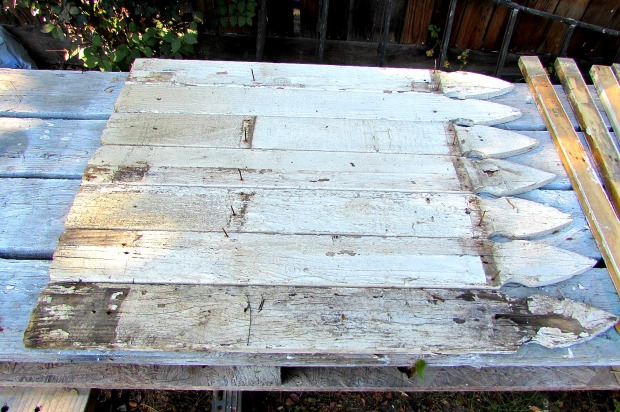
We had gathered some pickets from a neighbor a couple of years ago when he took down his fence. I have used them for a potting table and also a little side table. I wasn’t using the small table anymore, so I took it apart and used the pieces.

picket american flag title

Steve removed the nails from each of the pieces, than I gave each one a good scrubbing.

Picket fence flag pickets

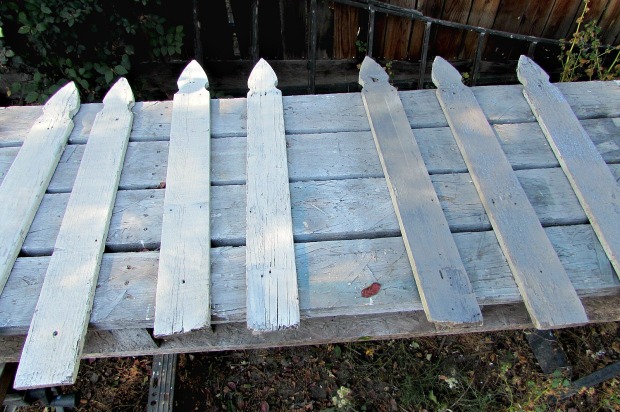
I painted 4 pickets antique white and 3 pickets grey. I didn’t cover them too thoroughly, just enough to freshen them up.

Picket fence flag grey and white pickets

I took one of the squares from the table that was taken apart and painted it blue. After the paint dried, I sprayed a little bit of turquoise over the top and then sanded it down.

picket fence flag blue square

These pieces also came from the table and they were attached to the back to hold all the pickets together.

picket fence flag back brackets

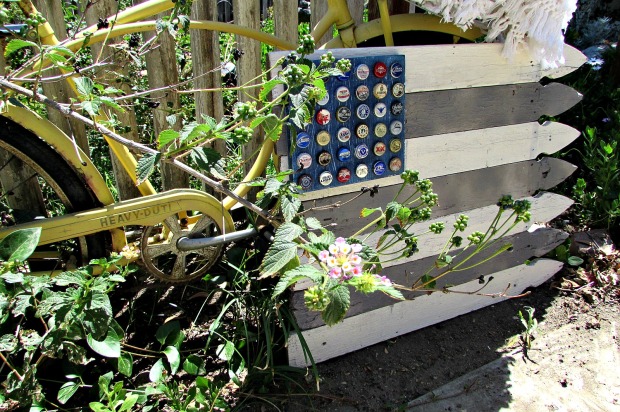
Here is the front with the blue square attached.

picket fence flag layout

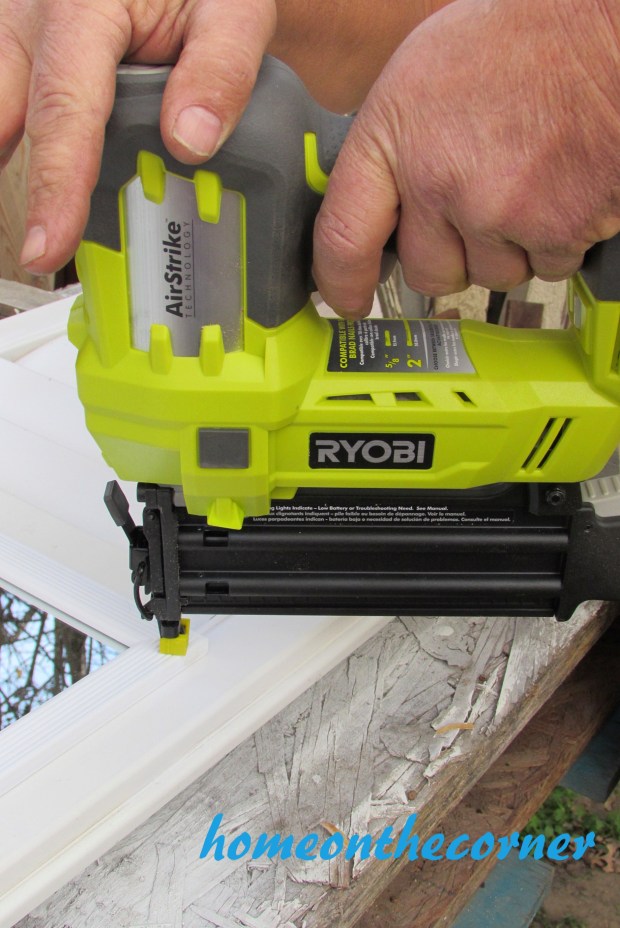
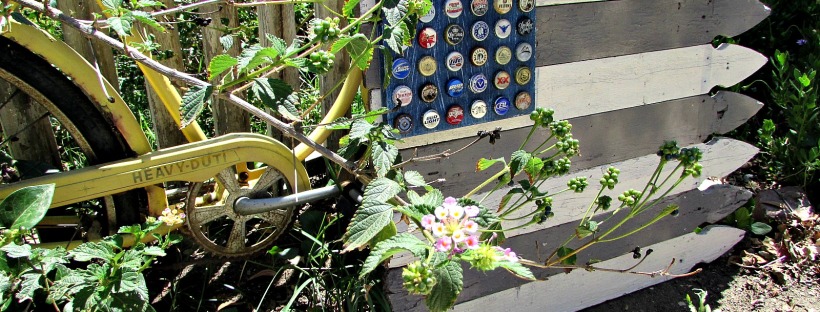
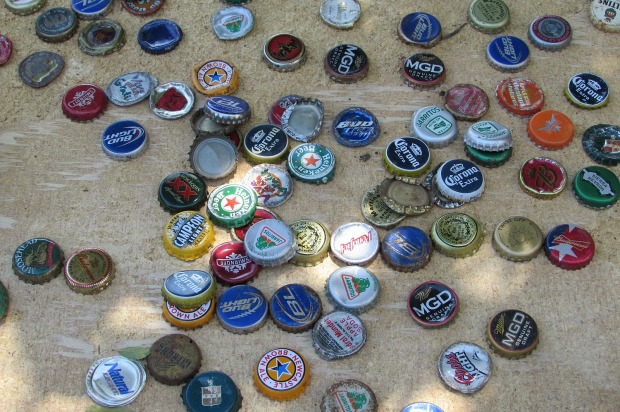
Here is my bottle cap collection! My girls and I have collected these for years while taking walks around the neighborhood. We have an alley behind us and there are always treasures to be found.  The girls and I picked out caps with blue, gold, silver and a little bit of red. We tried to get them all different and then placed them on the blue square in random order. I used my nail-gun to attach them.

picket fence flag bottle cap stars

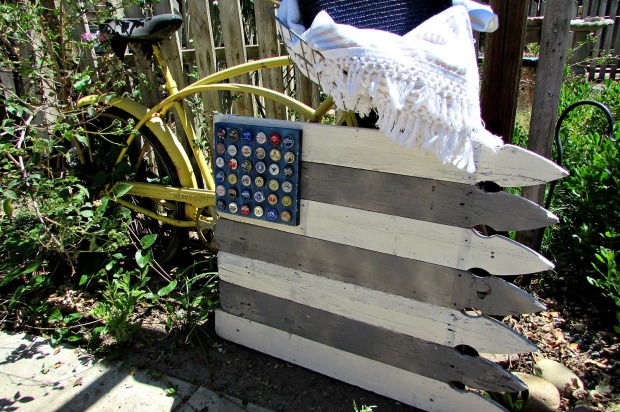
All done! This was such a simple project to put together and I love how it turned out!

picket fence flag neutral colors

I don’t really decorate with red, so I tried to keep this as neutral as possible.

picket fence flag with bottle cap stars

Picket fence neutral american flag

picket fence neutral flag with bike and blanket

picket fence american flag with bottle cap stars

I hope you all have a wonderful Memorial Day weekend and have some time to relax!   Here a couple of other posts you might enjoy!

july tablescape simplicity                I want this!!!

Sunshine and Blessings


Fabulous Finds and Fashions-April 27, 2016

Hello!  And welcome to another edition of Fabulous Finds and Fashions.  I don’t have anything fashion worthy, but I do have a fabulous find!

I got a new car!

full cube

I have been saying for a while now that I wanted a new car (or a used car, but new to me).  I had a 2003 Hyundai Sonata that was getting to the end of the road.  It still ran and it was a good ride, but I was getting tired of getting out of the car.


I know, this sounds like a very odd reason to not want a car.  But when you are 5 foot 10 and have to crouch to get into the car, it gets tiring after a while.

So I wanted a car that was taller and I wanted something newer, like 2010 or newer.  And the car I was looking at was the Kia Soul.  I thought that they were absolutely adorable and they were the perfect size for me.  They were taller than my Sonata and had a lot of space to carry my stuff in.

trunk

So much trunk space!

And by stuff I mean my coworkers when we go to lunch.

The search was on to find a new car.  2 weeks ago, I had the day off from work and I was in town with my family.  Haley and I went on the lookout to find me a car!  But…it didn’t go so well.

We went to a car lot where we know the owner.  They had a 2012 Chevy Equinox which is the car my grandparents drive.  We took it for a test drive and it was really nice.  But, it wasn’t my favorite.  It felt a little too big for me compared to my Sonata.

So we passed on that one.

And then we went to the car lot that mom and dad bought their Dodge Journey from.  And they had a 2012 Nissan Cube.  And it was adorable!  Haley and I looked at it for quite a while.  And even when she had me look at a different car, I always went back to the Cube.

logo

So this past Saturday, mom, dad, and I went to look more in depth into the Cube.  We got in the car and realized that the seats were extremely comfortable.  And there was soooooo much more space than anticipated.  And it was even cuter on the inside than the outside.

And we took it for a test drive.

steering wheel

And I fell in love.

Like, got 3 block and I was ready to take it home.

But, there was a 2007 Ford Escape that was at the lot that was a nice looking car for a cheaper price with less miles that was in a nice condition.  And, even though I loved the Cube, I wanted to give the Escape a fair chance.

And I got 3 blocks and knew I wanted the Cube.

keyless entry

Keyless entry and Press a Button to Drive

So, we turned around and went back to the dealership…where I signed for the Nissan Cube.

And I am so glad that I did because it is an awesome car.  It has so much storage space (you know, for all of my coworkers lol), it is tall and I don’t hit my head on the roof, and it is so much fun to drive!  To be honest, I smile every time I drive it because it is so much fun.

So, yep.  That’s my fabulous find for the week.  It may not be super exciting for everyone, but I love it!

PS. There are lights that shine in the footwells.  It comes in multiple colors, but these are some of my favorites!

sparkle

Teen to Adult with a Little Bit of Paint

Hello!  I must apologize for this post being late.  It was not intended to be late, but unfortunately it happened.

So, Haley had this TV stand in her room for the longest time.  It was purchased at a yard sale for $5 and she covered the drawer and the sliding doors in duct tape, which was perfect for her room when she was younger.

TV Stand Before 2TV Stand Before 1

But now, it’s been sitting on our patio for a few months.  And as I am going to be moving into a house instead of an apartment in the summer where I will need more furniture, it was perfect for me to redo.

The first thing I had to do was take all of the duct tape off of the drawer and doors.  It was actually a lot easier to peel the tape off then I thought it would be.  I had to really work to pull the edges up, but pulling the tape off was pretty easy.

TV Stand Tape

And of course, the animals had to help.  Kiara…that was for painting, not for sitting.

Kiara

So this is what the drawer and the door looked like originally.  They were a pretty grey color, but I was going paint them white.  I only painted one coat of white because I wanted it to have a bit of a weathered look.

TV Stand Drawer

TV Stand Doors

I then went to paint the the actual TV stand.  I went with Navy Blue Rustoleum paint and covered the whole stand.  That included the top, sides, and a few pieces on the front.  It covered really nicely and I love the shine that comes off of it in the sun.

And here is the finished product!

TV Stand Final 1TV Stand Final 2

I love the nautical look and think that it’s going to look great in my living room.  It turned out better than I expected with all of the work that went into taking the tape off.  I like the colors together and know it will be used someday.  Thanks for coming by!

sparkle

The Easy Way to Make a Shutter into a Mirror

Time seems to go so quickly. We will be celebrating our 1 Year Blogiversary in just a couple of weeks. Amazing!

Do you ever feel kind of overwhelmed by all there is to see on the internet, places like Pinterest and Facebook? I know I do. There are so many ideas out there and so many pretty designs, it is hard to know where to begin or even decide what you like! There is so much out there that I like. I like the neutrals, but I also like the turquoise seaside look.  Do I want farmhouse or coastal? So then I have to decide if I want every room to have that look or just some of them. When I see other houses where they use neutrals, I love how they can move things from room to room and it still works. I don’t know. I guess my look is always evolving. But I do know right now, I am liking white. I have always liked shades of white, but when my kids were younger, I had lots of color. Now I am trying to go with more white and then add different colors with accents, such as pillows, blankets and decorations. Now you get to join me on this crazy ride!!

My first project this year is a full length mirror for my room. I had one on the inside of my closet door, but when I went through and decluttered, I hung jewelry there instead. Then the mirror broke when it got moved. After Haley repainted her room, I inherited her mirror. I had it just standing on the floor in the corner and would move it when I needed it. It’s actually the mirror in the first pictures, but guess what? It broke too! 2 mirrors broken! Does that mean bad luck for me? They were both in 2015, so will 2016 be okay? Anyways, I knew I wanted to do something nicer with mirror and I had either a door or a shutter to work with.

door to mirror pieces

I ended up using the shutter because the size fit better with the mirror. I’m sure the door will show up sometime here on the blog! I took the frame off the mirror and as much of the cardboard as I could. This is probably what caused it to break. It didn’t have enough support.

door to mirror back side

The shutter I had was missing a couple of the slats at the bottom. My husband took the whole slat piece off the bottom and turned it over so the missing ones were in the middle and will be covered by the mirror. Smart thinking!

door to mirror shutter

The next thing to do was clean the shutter and buy a new mirror!

door to mirror missing shutter pieces

Alrighty, I’m back. The shutter is clean and the mirror I found had a white frame, so I didn’t have to frame it myself. I’m all about making it easy!

door to mirror shutter painted

After lining everything up, we got to use my new Ryobi Airstrike gun. I actually won this from another blogger! I was so excited about this! Sure makes it easier than hammering nails! We nailed it near the edge so it wouldn’t crack the mirror. We don’t want to break 3 of them!

Door to Mirror Shutter Nailgun the edges

Here it is! I’m so glad to finally have a full-length mirror in my room. I’ve been moving the old one all over, trying to prop it up and other various moves to see what I am wearing!

door to mirror full view

Hi Ezzy!

door to mirror ezzy in the mirror

I really like how this looks in my room.

door to mirror top half

And it could be used in any room!

Thanks for joining me today! See you next time!

Sunshine and Blessings

Gold, Silver & White Rustic Glam Table

Hello! Are you ready for Thanksgiving Day? What do you usually do to celebrate? We will be going to my sister’s this year and eating lots of good food! I’m sure there will be some football watching, maybe some board games, and good naps. Sounds about right!

I’ve been slowly doing some decorating, but I did manage to get my table ready to go. I decided to go with a gold, silver and white theme this year. Kind of Rustic Glam. I picked up a few things that worked perfectly and put it all together.

Dining Room Christmas Tablescape 2015

The day I took the pictures was a beautiful sunshiny day. It didn’t quite give the cozy and warm feeling of the holidays, but it gave great light for the pictures! I used a white tablecloth and a white scarf with silver sparkles for a runner.

Dining Room Christmas Tablescape 2015 White and Gold

I started out with silver chargers at the ends of the table and then layered on white plates. I found some lovely grey napkins at Home Goods. I wrote names on a piece of wood and attached it to a wooden napkin ring. I used the flatware from Oneida that I received as wedding gifts many years ago.

Dining Room Silver Place Setting 2015

The other place setting have a gold charger, but the rest is the same.

Dining Room Christmas Tablescape Gold

I layered items on top of a wooden tray I picked up at Goodwill. I love using trays for centerpieces. It contains everything, plus you can just pick up the whole thing to move it out of the way. I found the sparkly burlap tree at Target and the sequined starfish was from Kohl’s several years ago.

Dining Room Christmas 2015 Candy Dish

This serene deer came from Goodwill too. I thought he was so pretty and he works perfectly on the table.

Dining Room Christmas 2015 White Deer

The tiered dish is from my MIL and this is the first time I have used it on my table. I added some ornaments that came from Target and some sweets for after dinner.

Dining Room Christmas 2015 Ornaments

I fell in love with this bird when I saw it! I knew it must come home with me! I bought it a friend too. It sits at the other end of the table. The arrow and feather garland was a must-have too. It just called out my name!

Dining Room Tablescape 2015 Natural Bird

The mercury glass jar was from Haley’s graduation and I picked up some sticks from my yard and spray painted them white. Then just plopped them in! I also added a little green with some cut evergreen from my yard.

Dining Room Christmas Centerpiece

I really like how this turned out this year. I usually use a lot more color, so this was a bit of a challenge. It really looks beautiful at night with the candles and tree lights glowing.

Dining Room Christmas 2015 Overhead

I hope you all have a Blessed Thanksgiving! Enjoy a day of family and friends and food!

Sunshine and Blessings