Turquoise & White Spring Tablescape

Just one more week and it is officially spring!! We have definitely been having the ups and downs of spring weather over here. We have one day of rain and then later in the week we are wearing shorts! I am so looking forward to wearing more springlike clothing. I’m getting tired of my winter stuff!

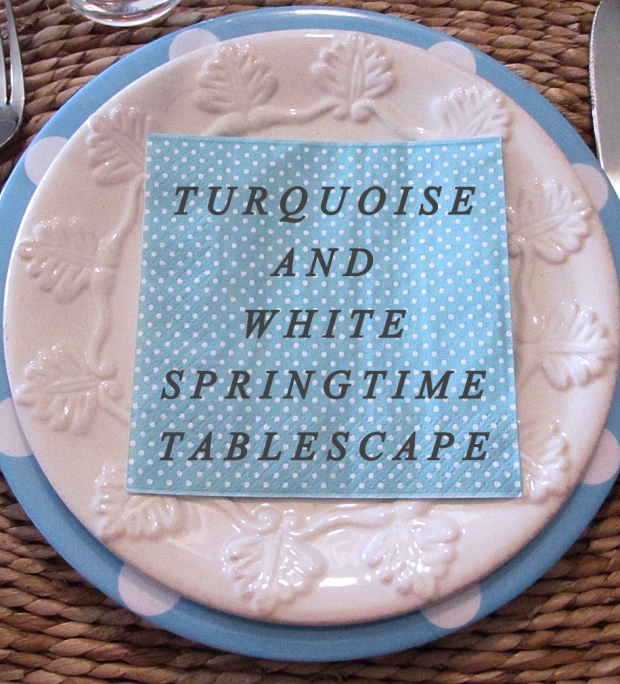
I always have fun coming up with new ways to decorate my table for the seasons. The table we use was my grandparents. We refinished it many years ago, before we had kids, but it really needs another refinishing or painting. Because the top has seen better days, I use a tablecloth over it and it is usually this white one. This way I can do any color scheme I want. Of course, it usually includes turquoise!

turquoise and white spring tablescape title

I layered a burlap piece with black fleur-de-lis over the tablecloth. This was a piece from Lauren’s stash. I placed a wooden tray in the middle and filled it with springtime goodies.

turquoise and white spring tablescape 2016

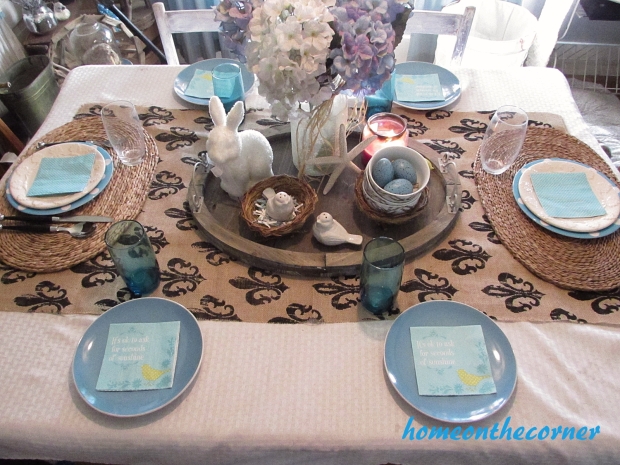
Hydrangeas in a lace covered jar…

turquoise and white spring tablescape centerpiece

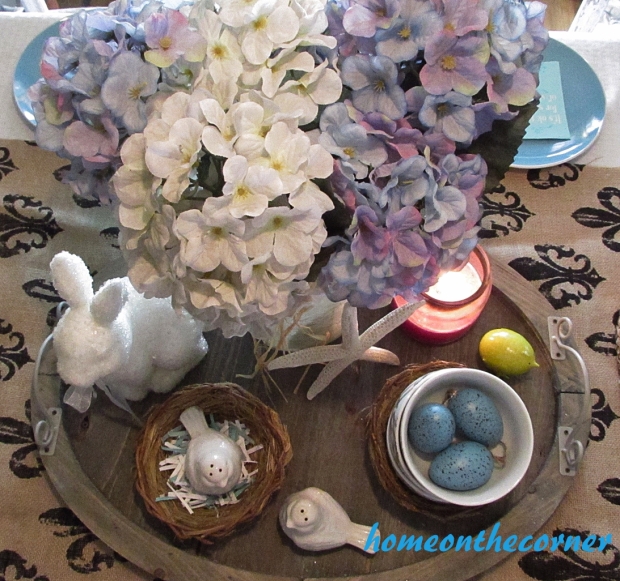
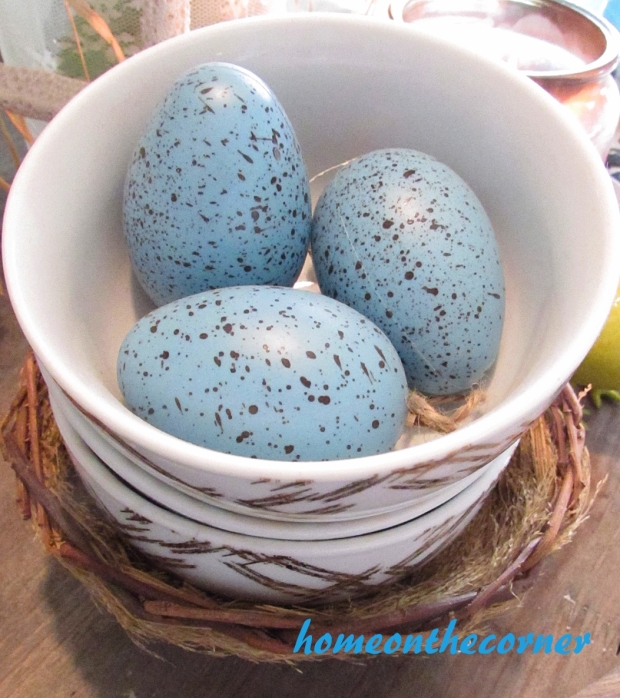
Blue speckled eggs in gold and white bowls…

turquoise and white spring tablescape blue eggs

A white sparkly bunny…

spring centerpiece bunny

Pretty white bird salt and pepper shakers.

turquoise and white spring tablescape birds

I set the place-settings at the ends of the table a little different than the sides. For the side seats, I just added a turquoise plate with a pretty napkin. I will show you in a bit where the rest of the items are stored.

truquoise and white spring tablescape plate and napkin

For the ends, I first placed a rattan place-mat and then added turquoise plates with white polka-dots and a pretty white one on top. The napkin is also turquoise and white polka-dots. A little secret-it’s the same as the other napkin, just the other back side!

turquoise and white spring tablescape plates and disney flatware

Did you notice the flatware? I have had these for quite awhile and don’t use them very often, so I thought I would pull them out and let them be used. I love the little touch of whimsy!

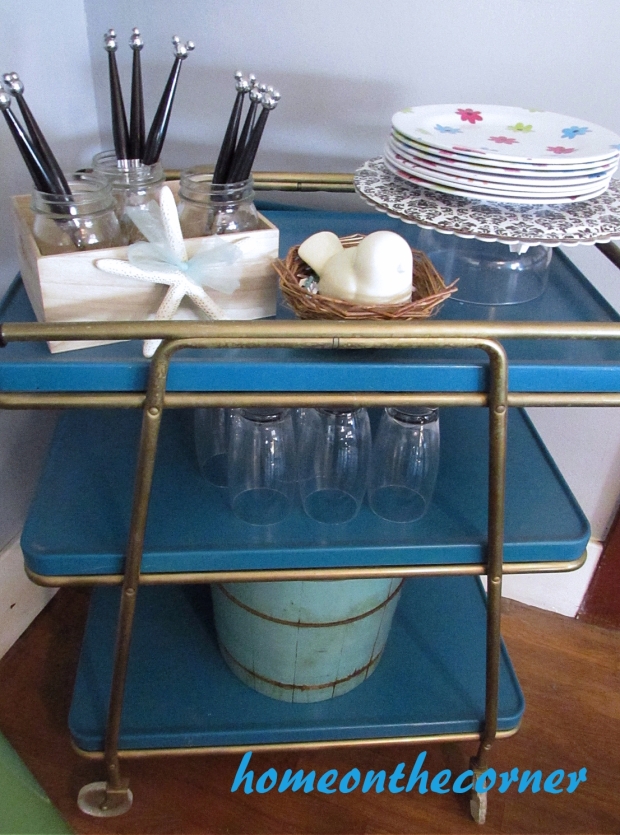
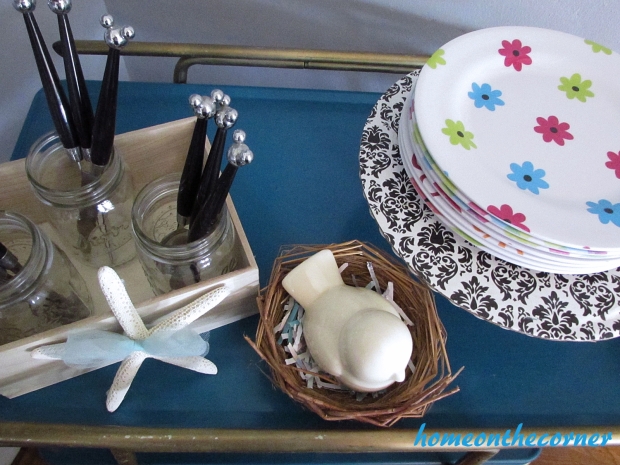
I transformed my hot chocolate bar into a self-service bar. I have more plates, flatware and glasses for easy access. Just add the food and it is all set to go!

turquoise and white spring tablescape bar cart

turquoise and white spring tablescape bar cart top

I love being able to change things up and I especially love decorating for spring! If you would like to take a look at last years table, here it is. Just beware-the pictures are not very good! Can we say blurry?! Here is Lauren’s table too. Hope you have a spring filled day!!

Sunshine and Blessings

Styrofoam Easter Eggs

So, this project started when I was walking through the 99 cent store.  And to be honest, I love shopping at the 99 cent store.  I can go and buy dog treats, Arnold Palmers, lunchables, spatulas, mixing bowls, and stuff for your car all in one spot.  It’s like a lesser version of Walmart!

While shopping through the 99 cent store, I came across some Styrofoam eggs that could be used for decorating for Easter.  And then I saw some smaller eggs on Kabob sticks.  And I thought, what if I put the smaller eggs in the larger egg to make an arrangement?

And then I bought the supplies!

supplies

I bought two of the bigger eggs, one package of bigger eggs on sticks, and two packages of the smaller eggs.

eggs

I split all the eggs into two separate piles.  There were four big eggs in each arrangement and ten smaller eggs in each arrangements.  I knew that the biggest problem was going to be the long Kabob sticks.  So as I went along, I broke off the sticks to make them shorter and easier to stick into the large Styrofoam eggs.

And here are the end results.

Finished Eggs 5Finished eggs 1Finished Eggs 2Finished Eggs 3Finished Eggs 4

So…I’m not completely happy with how they turned out.  I like all the colors worked together, but it didn’t go exactly as planned for how the eggs looked once they were in the giant eggs.  I had a completely different idea of what they would look like when they were done, and this isn’t what I had in mind.

But other than that, it was a very simple project to do for Easter.  I only spent $5 creating this, but you could spend a little more if you wanted to add more egg Kabobs (or whatever they are actually called), go for it.  This is what I made with what I had, but I might go back and buy more egg Kabobs to fill in the arrangement.

sparkle

Fabulous Finds and Fashions

Hello! I have a few things to share with you today. I little bit of finds and a little bit of fashion!

I am not sure where this deer came from, but he is so cute! I knew I wanted to use it for a jewelry dish. I was at a thrift store last week and didn’t see any plates I thought would work, but then I saw one of the employees start to empty a cart full of dishes. I wandered around the store a little more and then came back and there was the perfect plate! White with little gold dots. I brought it home and then spray painted the deer gold and glued it on.

finds and fashion deer and plate

The perfect little accessory for my dresser!

finds and fashion gold deer jewelry holder

These next two outfits were designed around the shoes. My daughter bought these for me a couple of years ago for my birthday. Of course, I had told her to go get them!! Anyways, they are a little more difficult to wear because of the stripes, but I think I found a couple of cute ways to wear them.

First I went a little more nautical or patriotic. A white t-shirt, red pants, denim jacket and a white and red anchor scarf. I even have a red and white striped purse a picked up from a yard sale several years ago.

fab finds and fashions red nautical

The other outfit is a little more neutral and traditional. Khaki slacks, navy blue lace top and a navy and pink scarf. I picked up this scarf at Disneyland this past summer and haven’t had a chance to wear it yet. I love it! I love this outfit with the little bit of bright pink.

fab finds and fashions navy classic


There we go! Two new outfits for me to wear! I love putting different things together with the items I already own. I will see if I can come up with more for the next time!

Sunshine and Blessings

Corner News-March 5, 2016

It smells like rain!! Yay!! We haven’t had much rain this past month, so this is very welcome. The grass is so green, but now it needs mowed. The blossoms are almost gone from the trees, leaving behind the bright green new leaves. Lots of pretty color flowers too!

I received these sweet little flowers for Valentine’s Day from one of my students. She was so excited to give them to me!  My kitchen window is the best spot in the house for them, plus I get to enjoy them a lot!

potted flower on windowsill

I painted this little crate this week. It was just unfinished wood, so I painted it grey with a little white dry-painted over the top. The flower arrangement was created by one of my girls many years ago when they were trying to earn a badge for a girls club they were in. Of course, I still have it!

white crate and easter floral

I had this little fish tank in my classroom. I had the bowl and added the foamy fish. The kids knew the fish weren’t real, but the sure were confused about the turtle! It’s always fun to keep them on their toes!

fish bowl with turtle

Happy Saturday!!

Sunshine and Blessings

Game Piece Pictures

Do we have any gamers in the audience?  Any kind of game: board game, video game, card game.  Anyone?

Do you ever play a board game and find that there are pieces missing or there are extra pieces and you have no idea what to do with them?  Yep…me too…

Well, a while ago, I found a box of game pieces that were at a yard sale and I purchased them.  They ranged from chess pieces to checkers pieces to dominoes and colored blocks.  There were so many pieces and I wasn’t completely sure what to do with them all.

And, I figured it out.

supplies

So I started with picking my pieces and picking up some frames from the Dollar Tree and started the project.  I picked up three frames and wanted to use the colored blocks, dominoes, and wooden checkers to create my artwork.  I figured that the easiest way to make this work was to use hot glue to keep the pieces on the framework.  So, I took out the glass and added a piece of white paper on the back of each frame to get started.

Before doing all of this, I laid out the pieces on the frames to see what the pattern would be.  I started with the checkers and knew that I wanted them to be in rows and using opposite colors.  So, here is the design that I picked.

pre-checkers

I worked on the dominoes next.  I wanted to do something with the numbers lining up, but wasn’t completely sure how it was going to work out.  So, I tried a few different things before I came up with this one.

pre-dominos

Finally, I used the colored blocks.  I didn’t have a clue on what to do with all of the blocks, and then I started humming the Tetris theme song.  You know what I’m talking about.  So, I made my own version of a Tetris game.  I lined up all of the blocks to make sure that I would have enough, then started making my game.

blockspre-tetris

So, after all of this work, I started hot gluing.  It wasn’t too hard to put everything together, and it was a lot of fun to see how it all came together.

And without further adieu, here are my finished game piece pictures.

finalclose-up 1close-up 2

I think they turned out great!  I love how they look together, plus they could be separate if wanted.  And, they could be hung on the wall if I get tired of them sitting on the table.  I may use the rest of the pieces that I have to make more pictures, but I like how these look together!

sparkle