Dollar Tree Fall Rake Makeover

Good morning! It’s another hot week here in Central California. It’s hard to get into the fall spirit when it’s almost 100 degrees! It’s supposed to rain tomorrow, if we even remember what that is. I will probably take my kids out to play in it if it does!

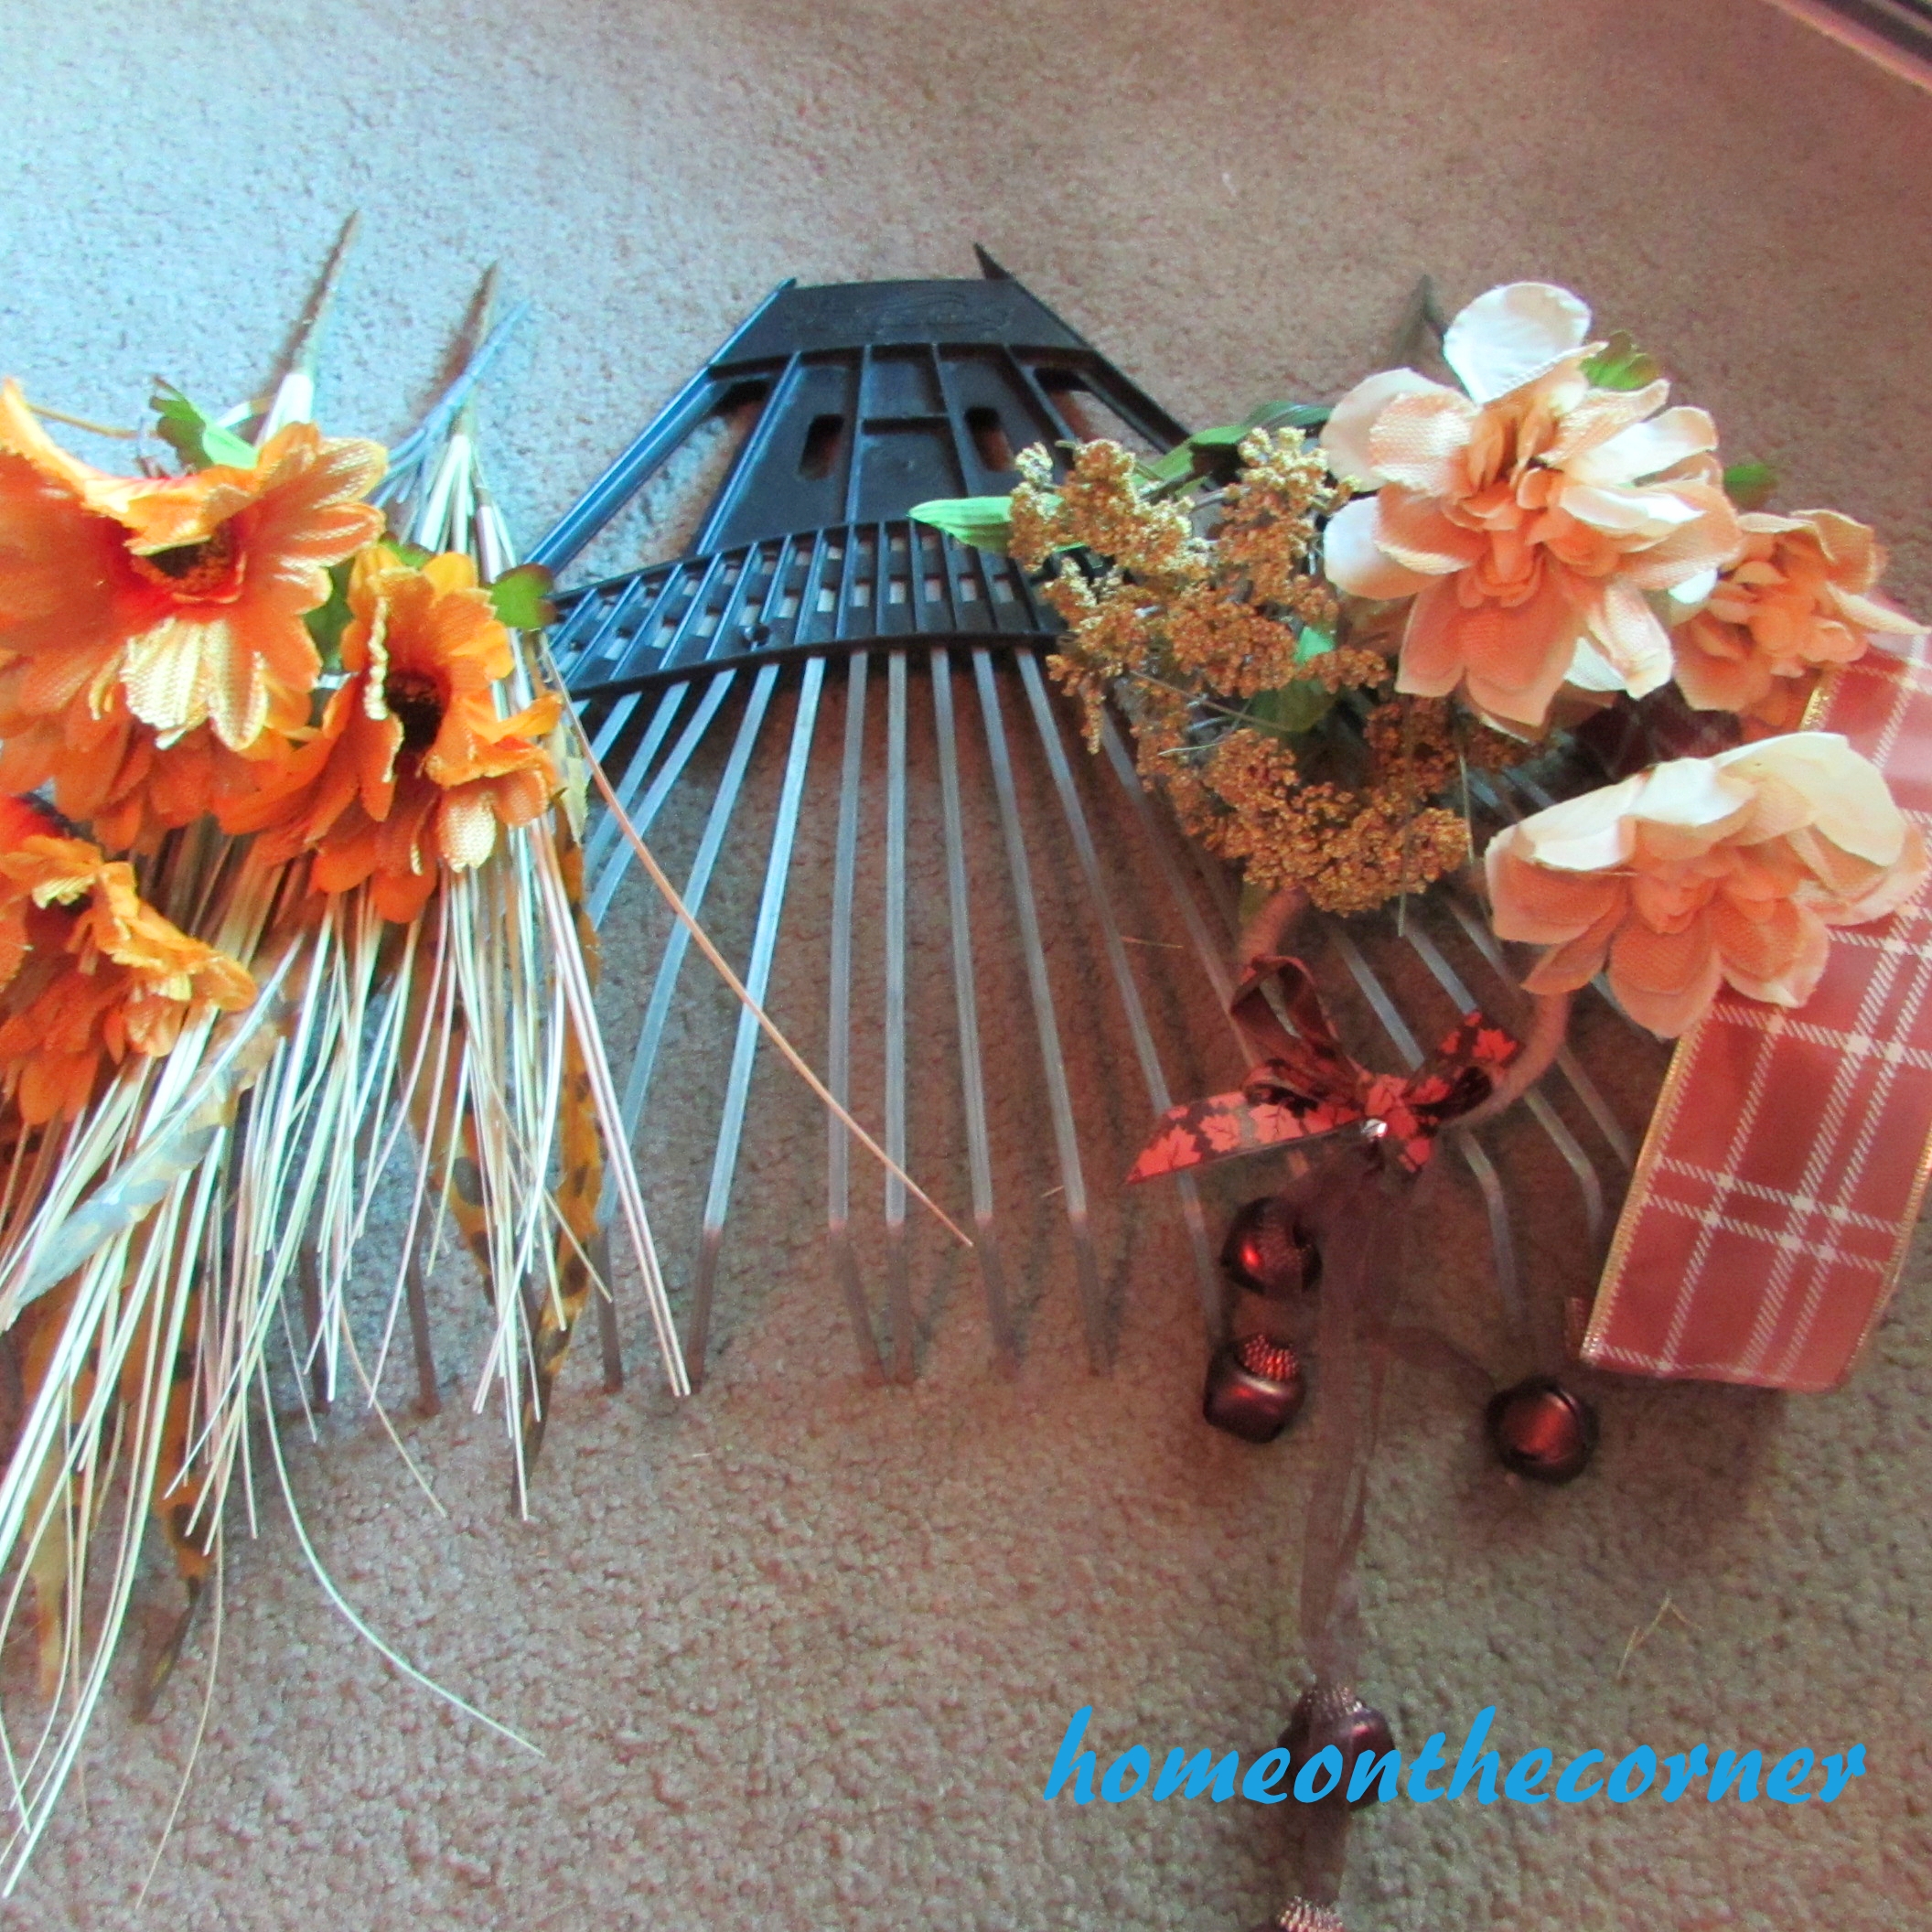
Even though it is hard to get into fall, I have made another fall craft using Dollar Tree floral, bells and ribbon. I had my husband keep this rake after the wooden handle broke. I’m sure he thought I was crazy :). I sort of forgot about it, until I saw something similar on Pinterest. I dug it out of the shed and went to Dollar Tree to by some fun little goodies. Here is what I bought: 5 stems of feathers and flowers, a string of acorn bells and a roll of ribbon.

Fall Rake Dollar Tree Makeover

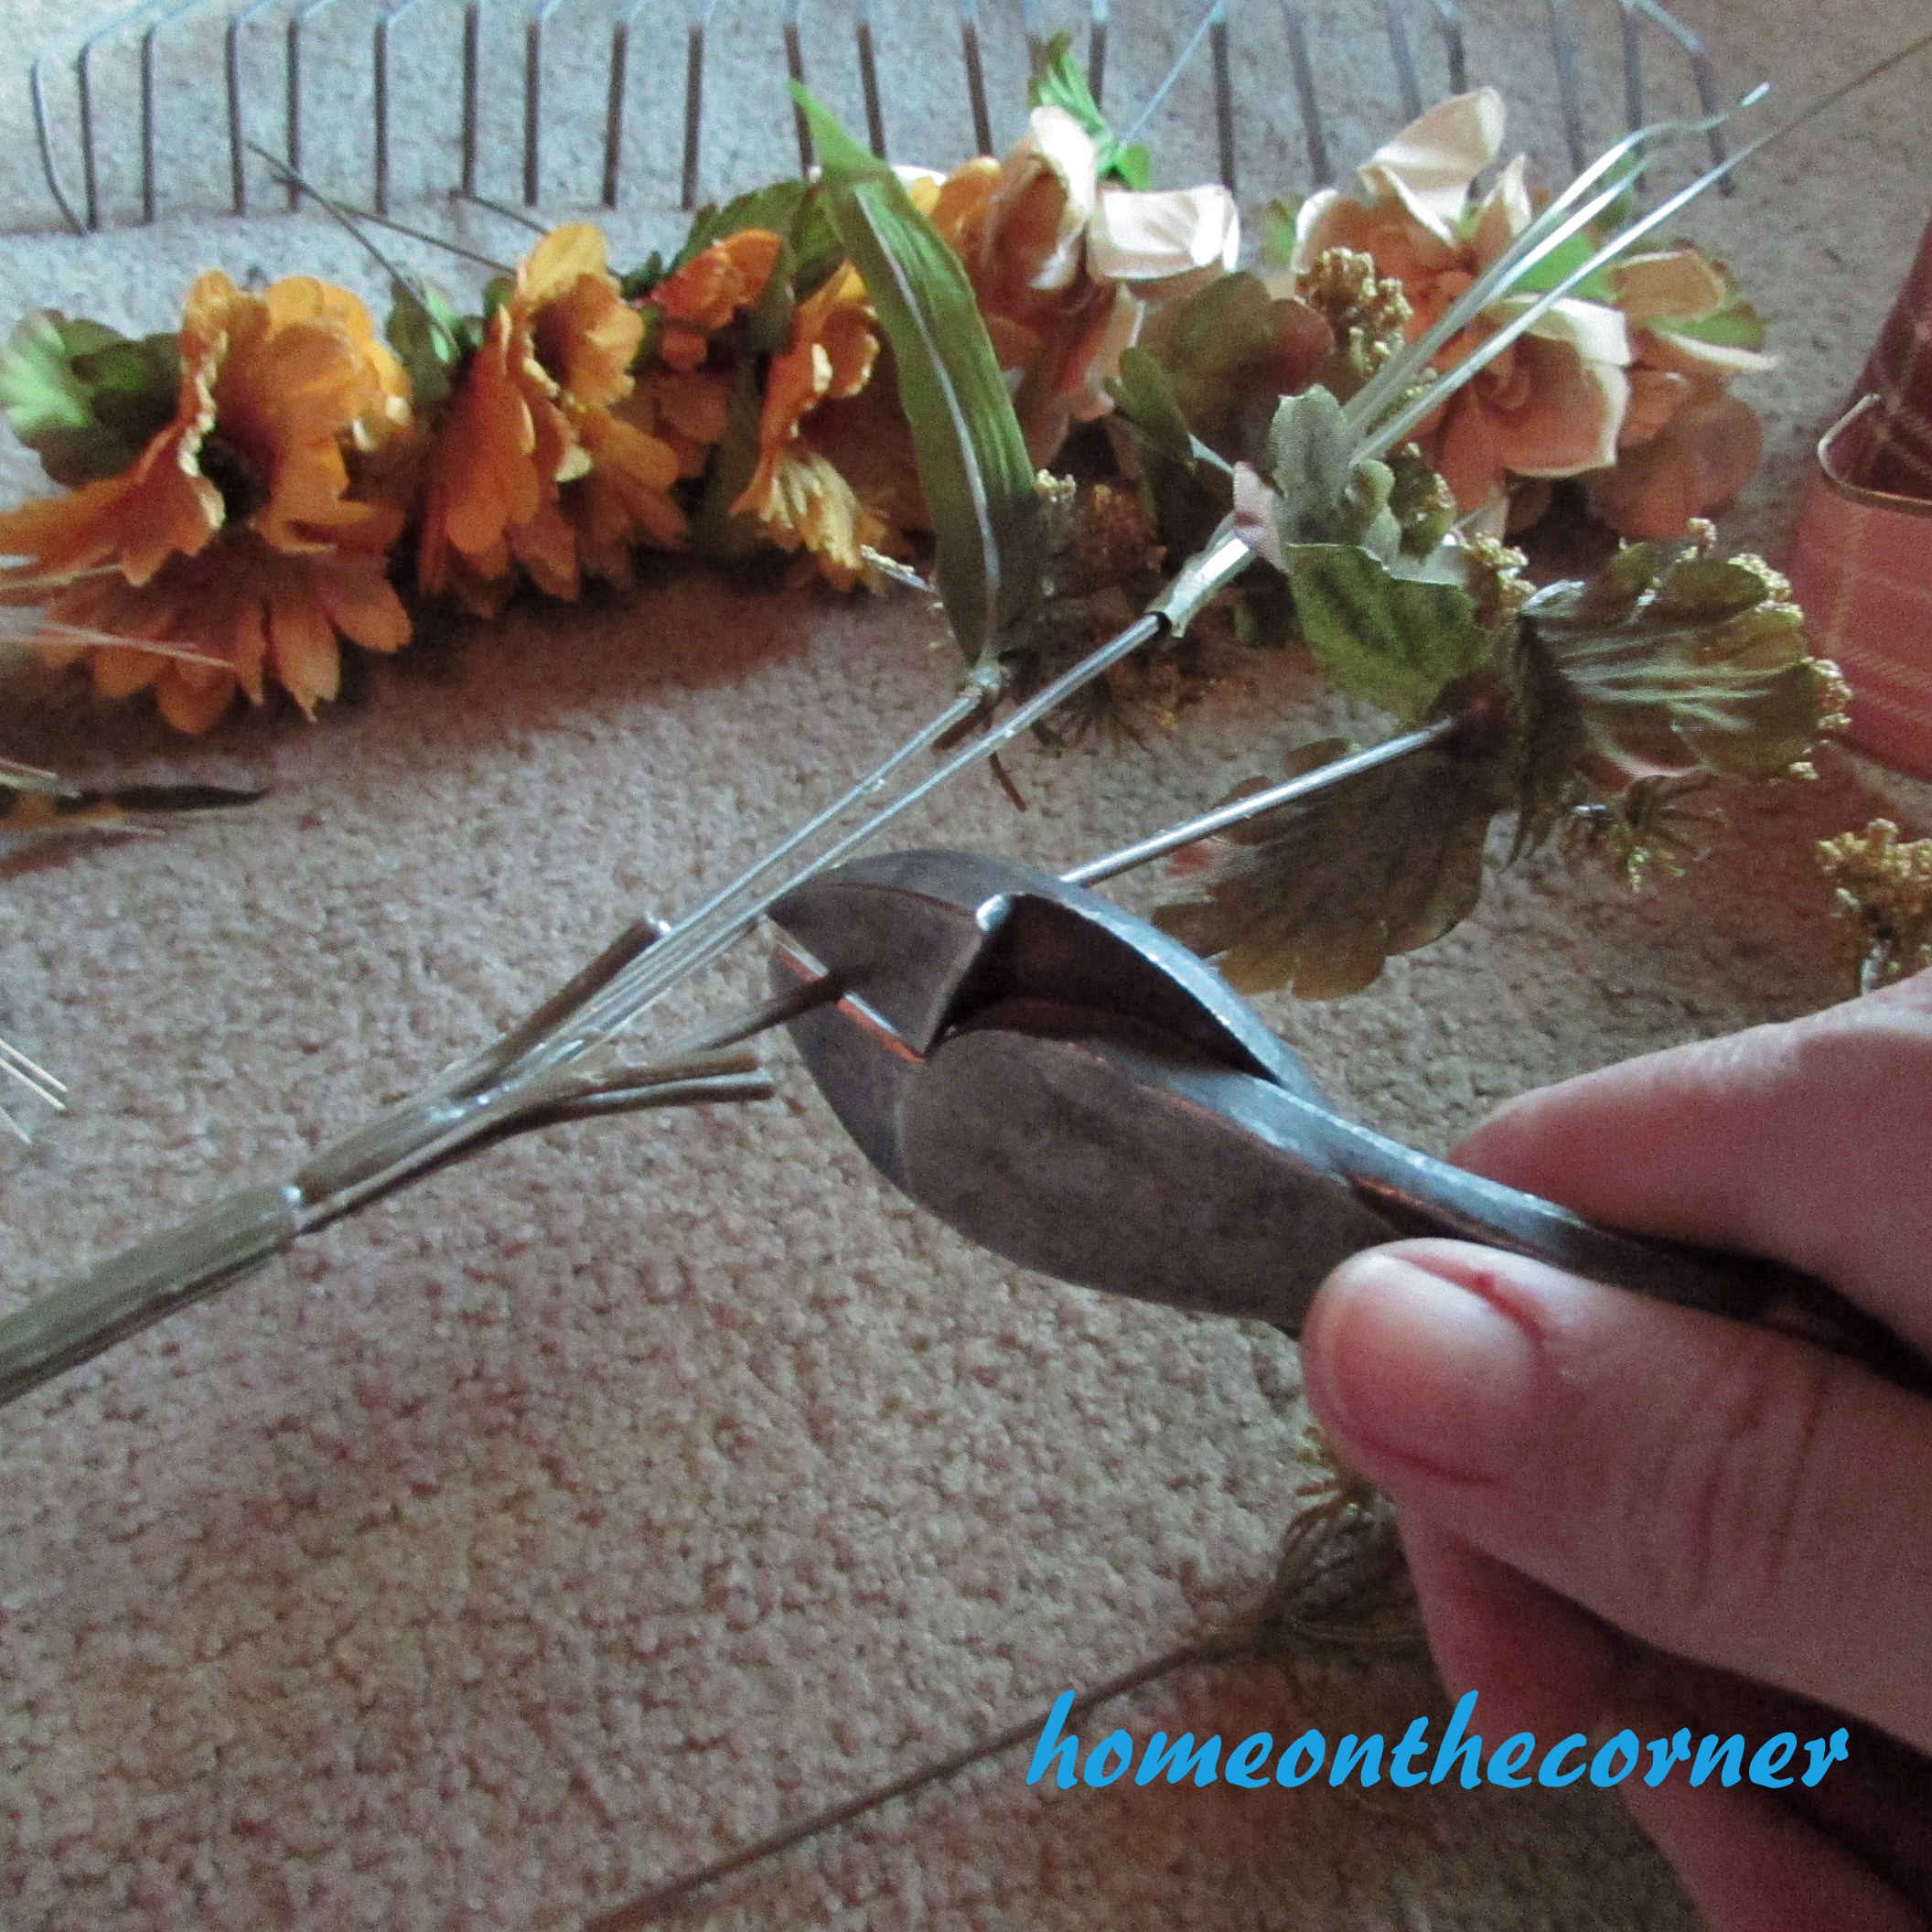
The first thing I did was to push the leaves up to the flower and then clip apart the flowers from the big plastic stem. I used wire cutters for this.

Fall Rake Makeover First step

Here is everything all separated and ready to be glued on.

Fall Rake Makeover step 2

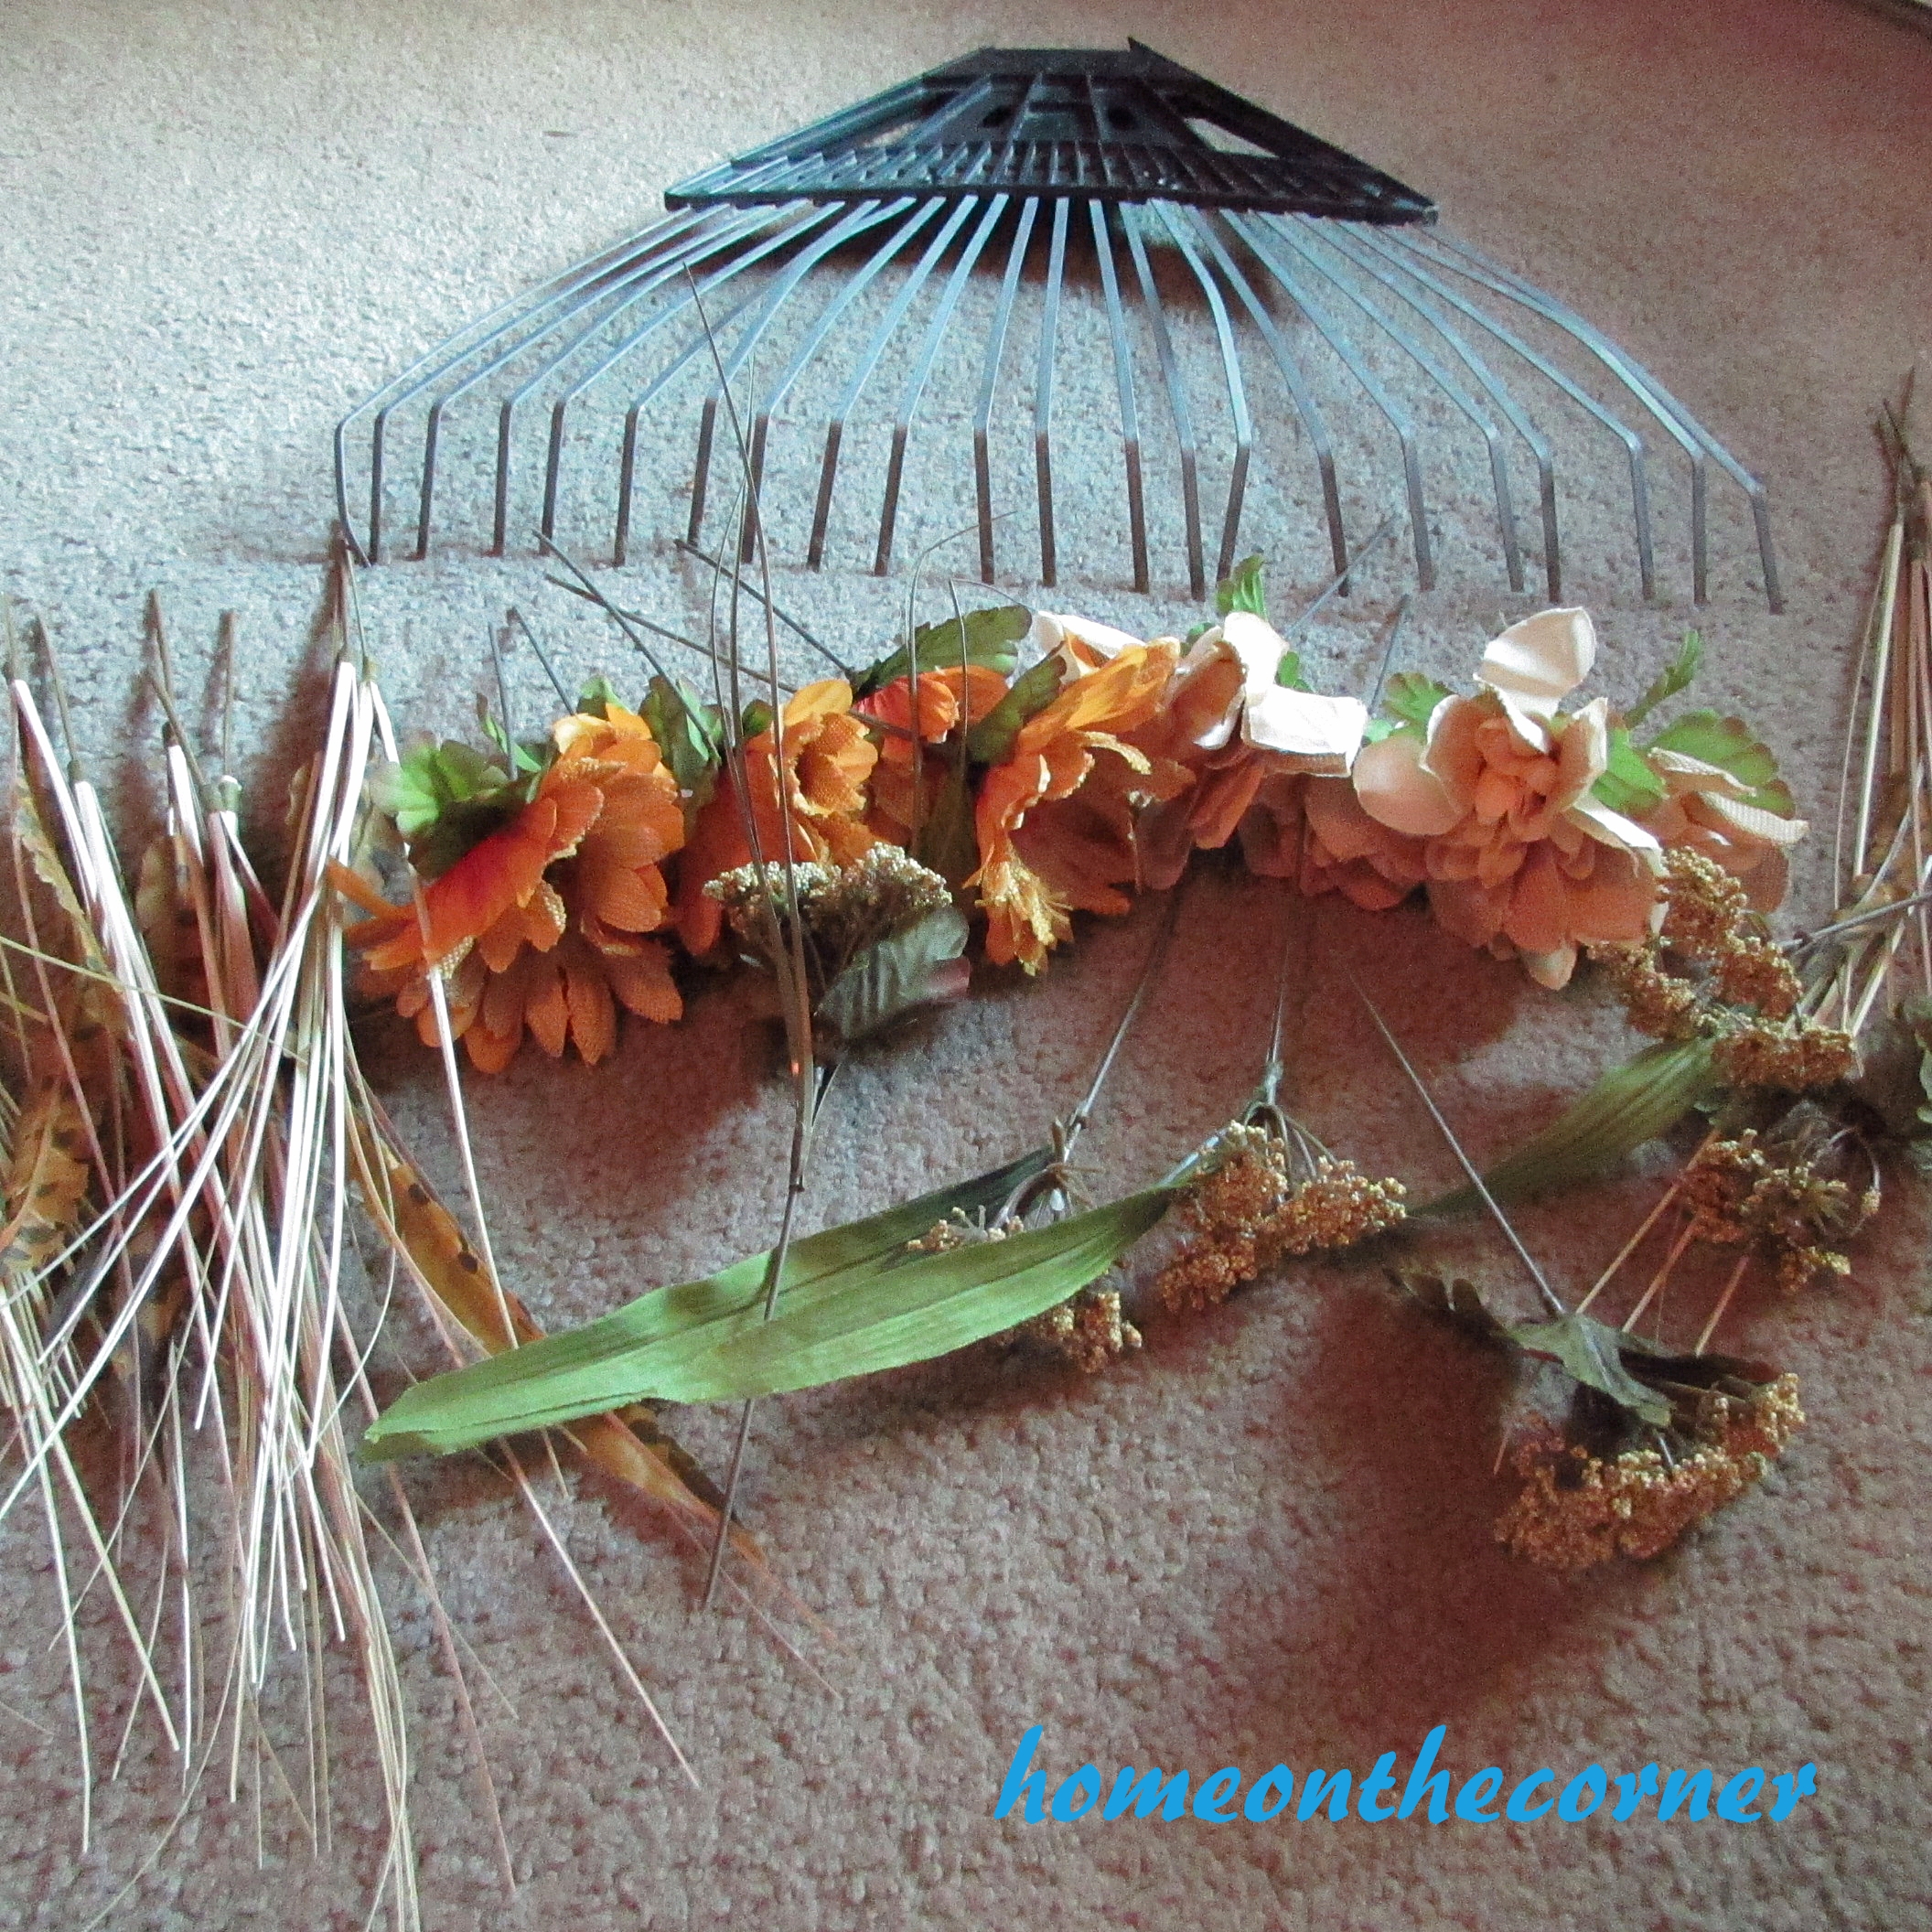
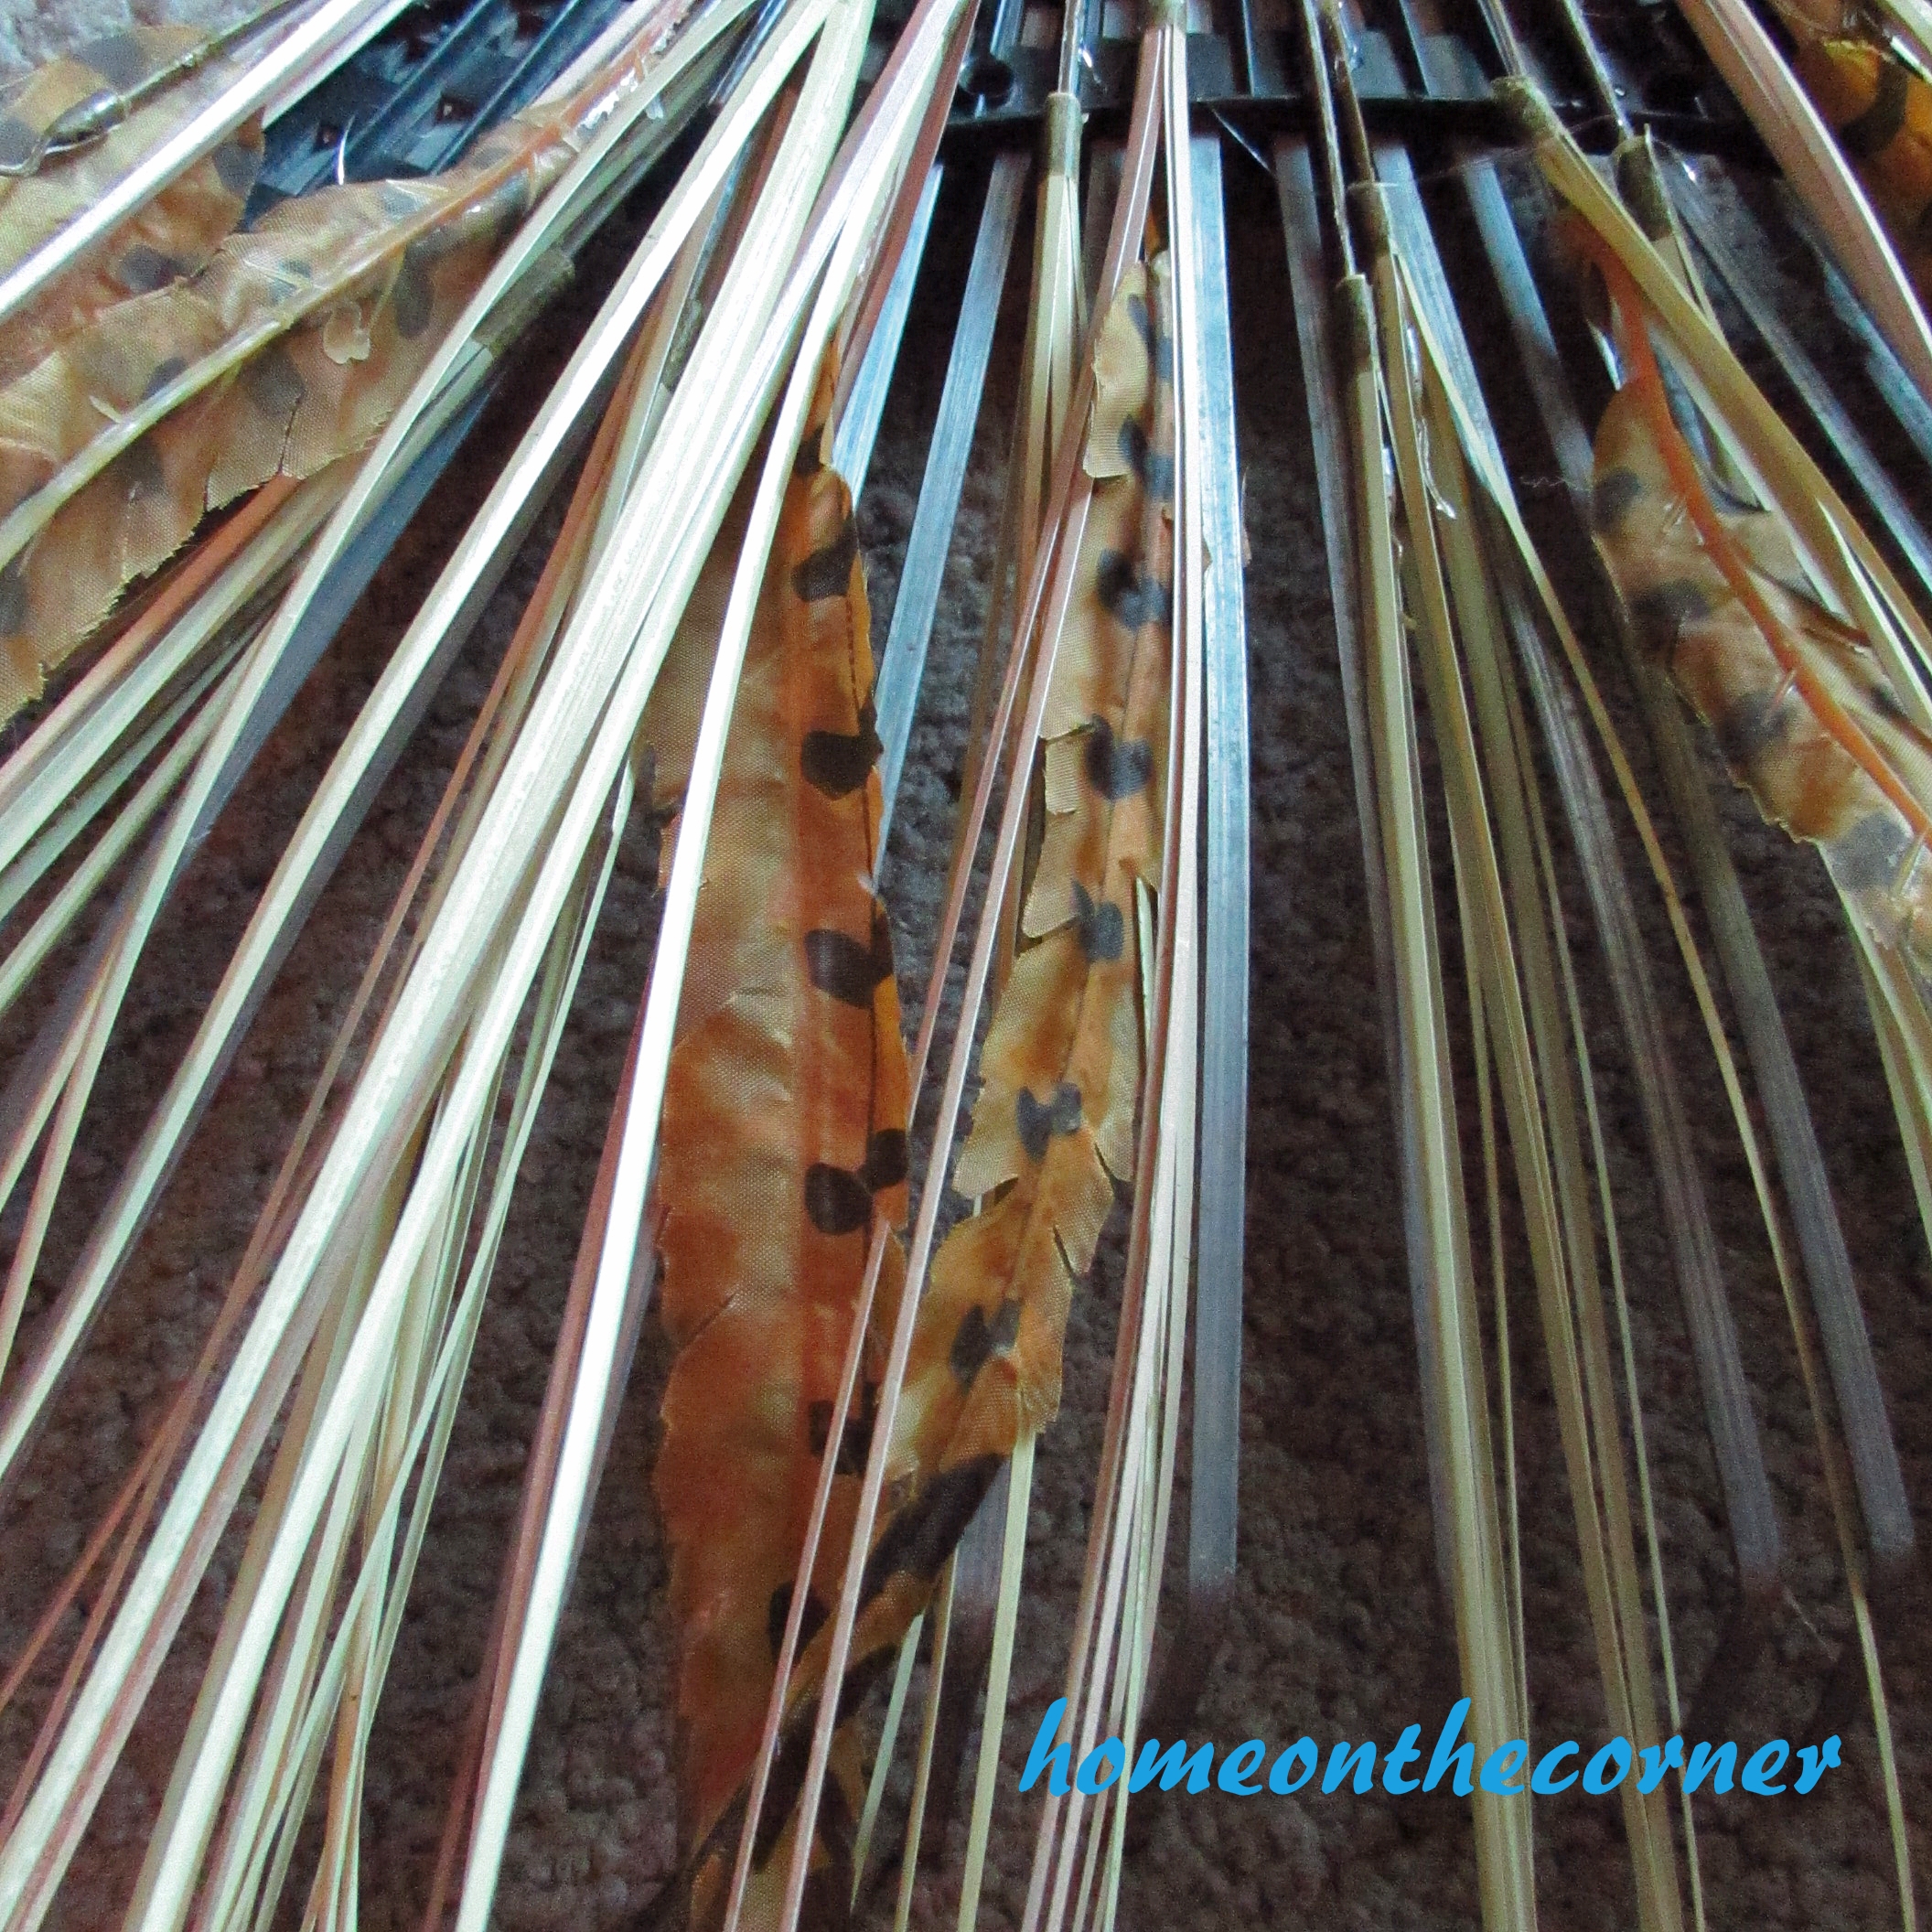
I started with the long grassy leaves. I laid them out on the black part of the rake and then hot glued them on. They don’t have to be too close together or perfect.

Fall Rake Makeover Adding Pieces

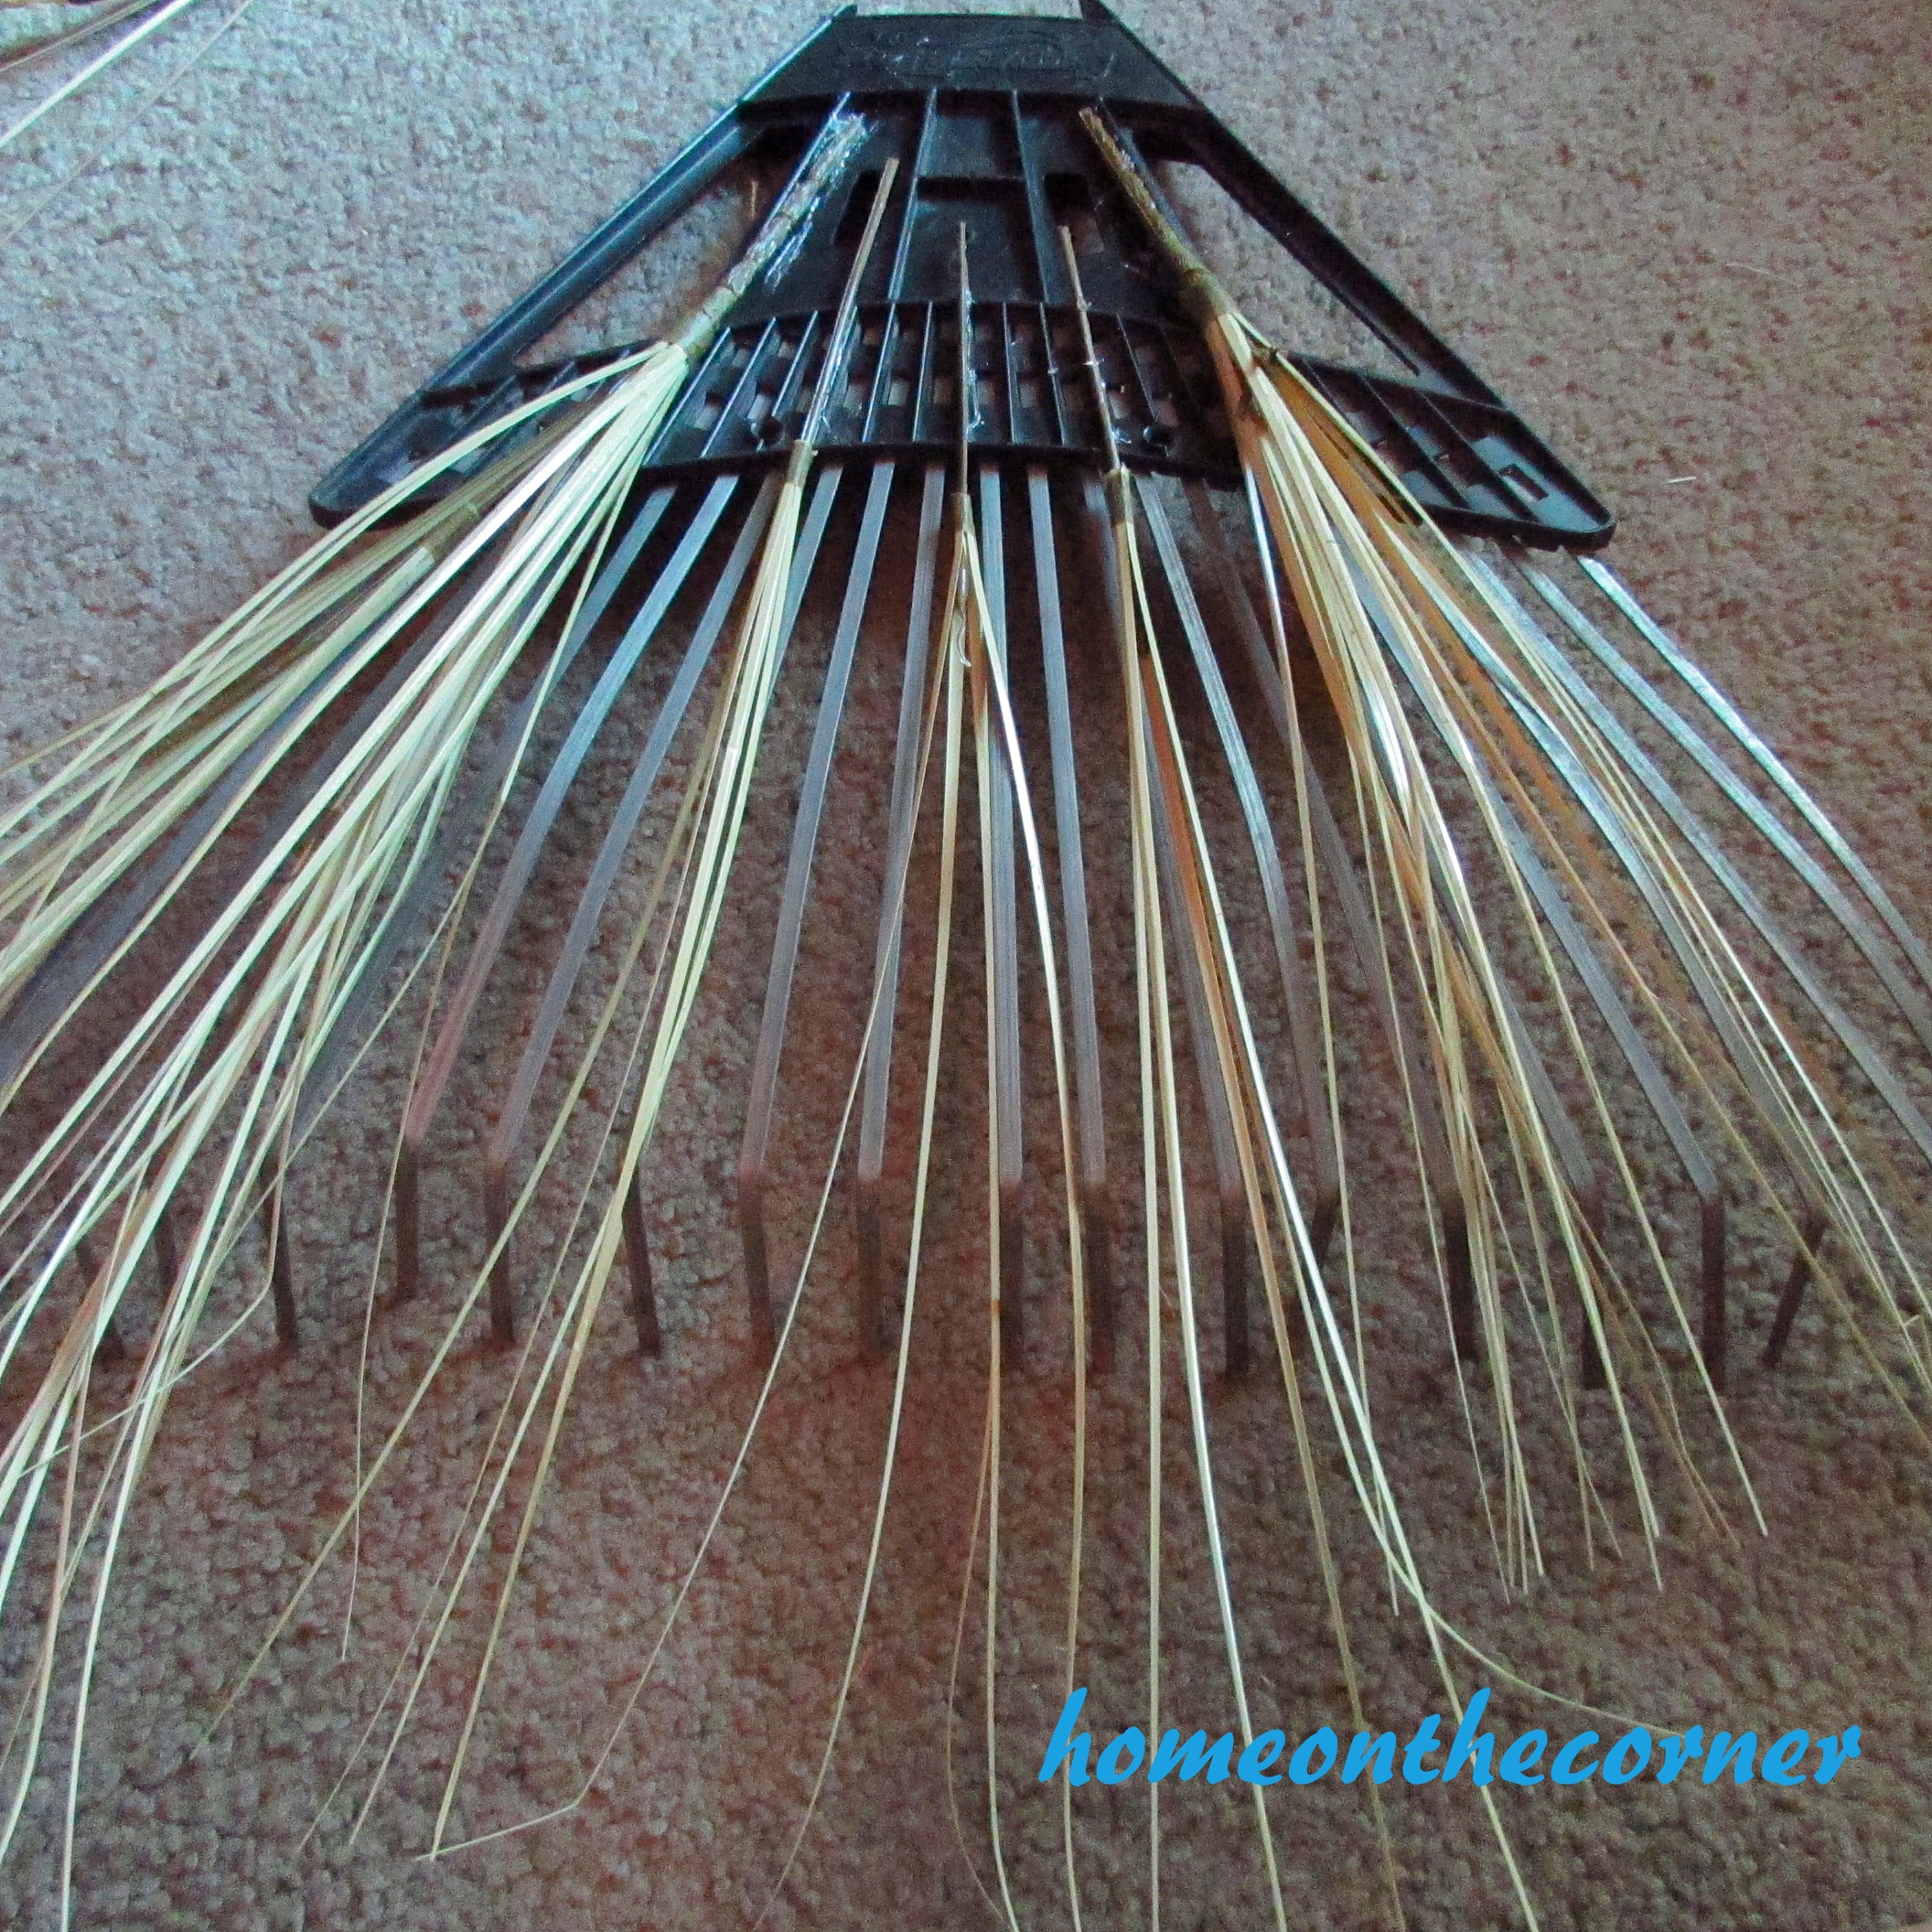
Next I filled in more of the empty places the pieces that had the feathers in them. Again, nothing has to be perfectly placed.

Fall Rake Makeover Feathers

These feathers are so pretty!

Fall Rake Makeover Feather addition

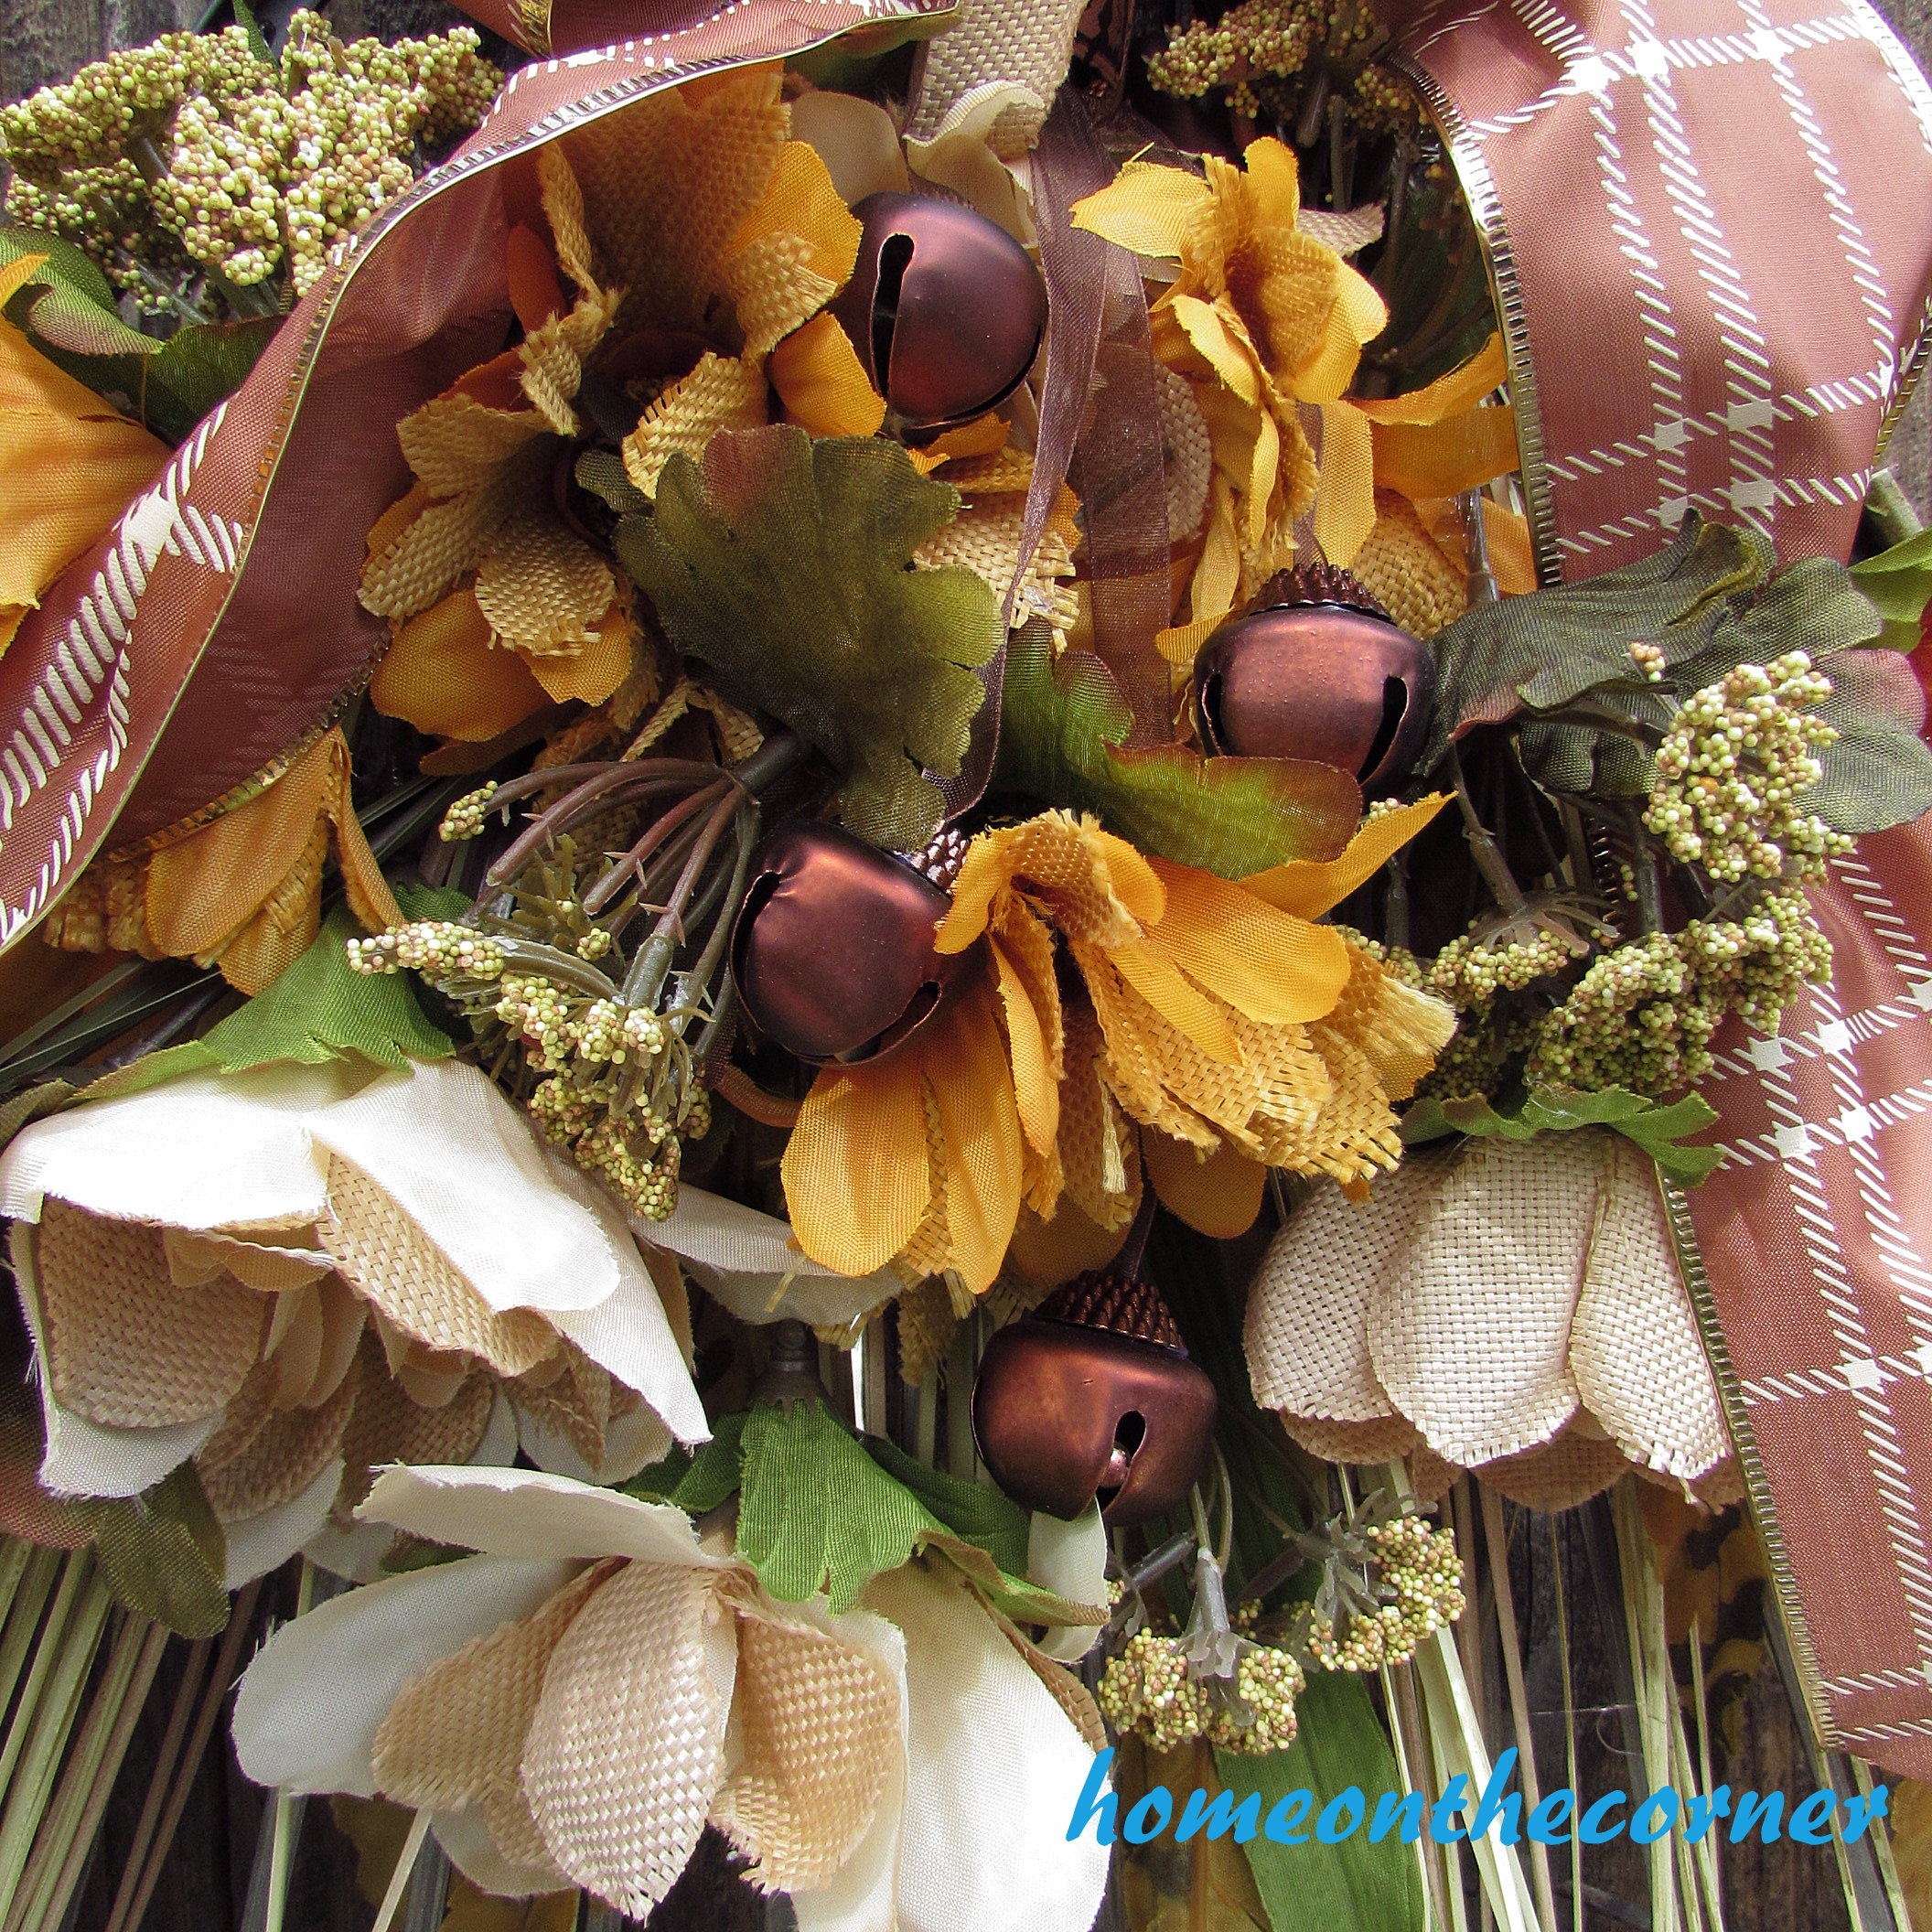
Then I took the larger flowers and started filling in on the top to cover the black plastic part of the rake. I cut some of the flower stems closer to the leaves so they would lay more flat and the others I left the longer stem. Then I glued them on randomly. Some I placed higher up and some down lower. I also added some of the filler flower in between some of the empty spaces.

Fall rake Makeover Filler Flower

After all the flowers were attached I glued the bells onto the black part and then added a big bow to the top. I don’t have pictures of making the bow. I don’t seem to have enough hands! 🙂

I love how this looks on the wooden fence!

Fall Rake Makeover Fence

Fall Rake Makeover Bells

Here it is inside too with some cute little pumpkins underneath.Fall Rake Makeover Dining Room

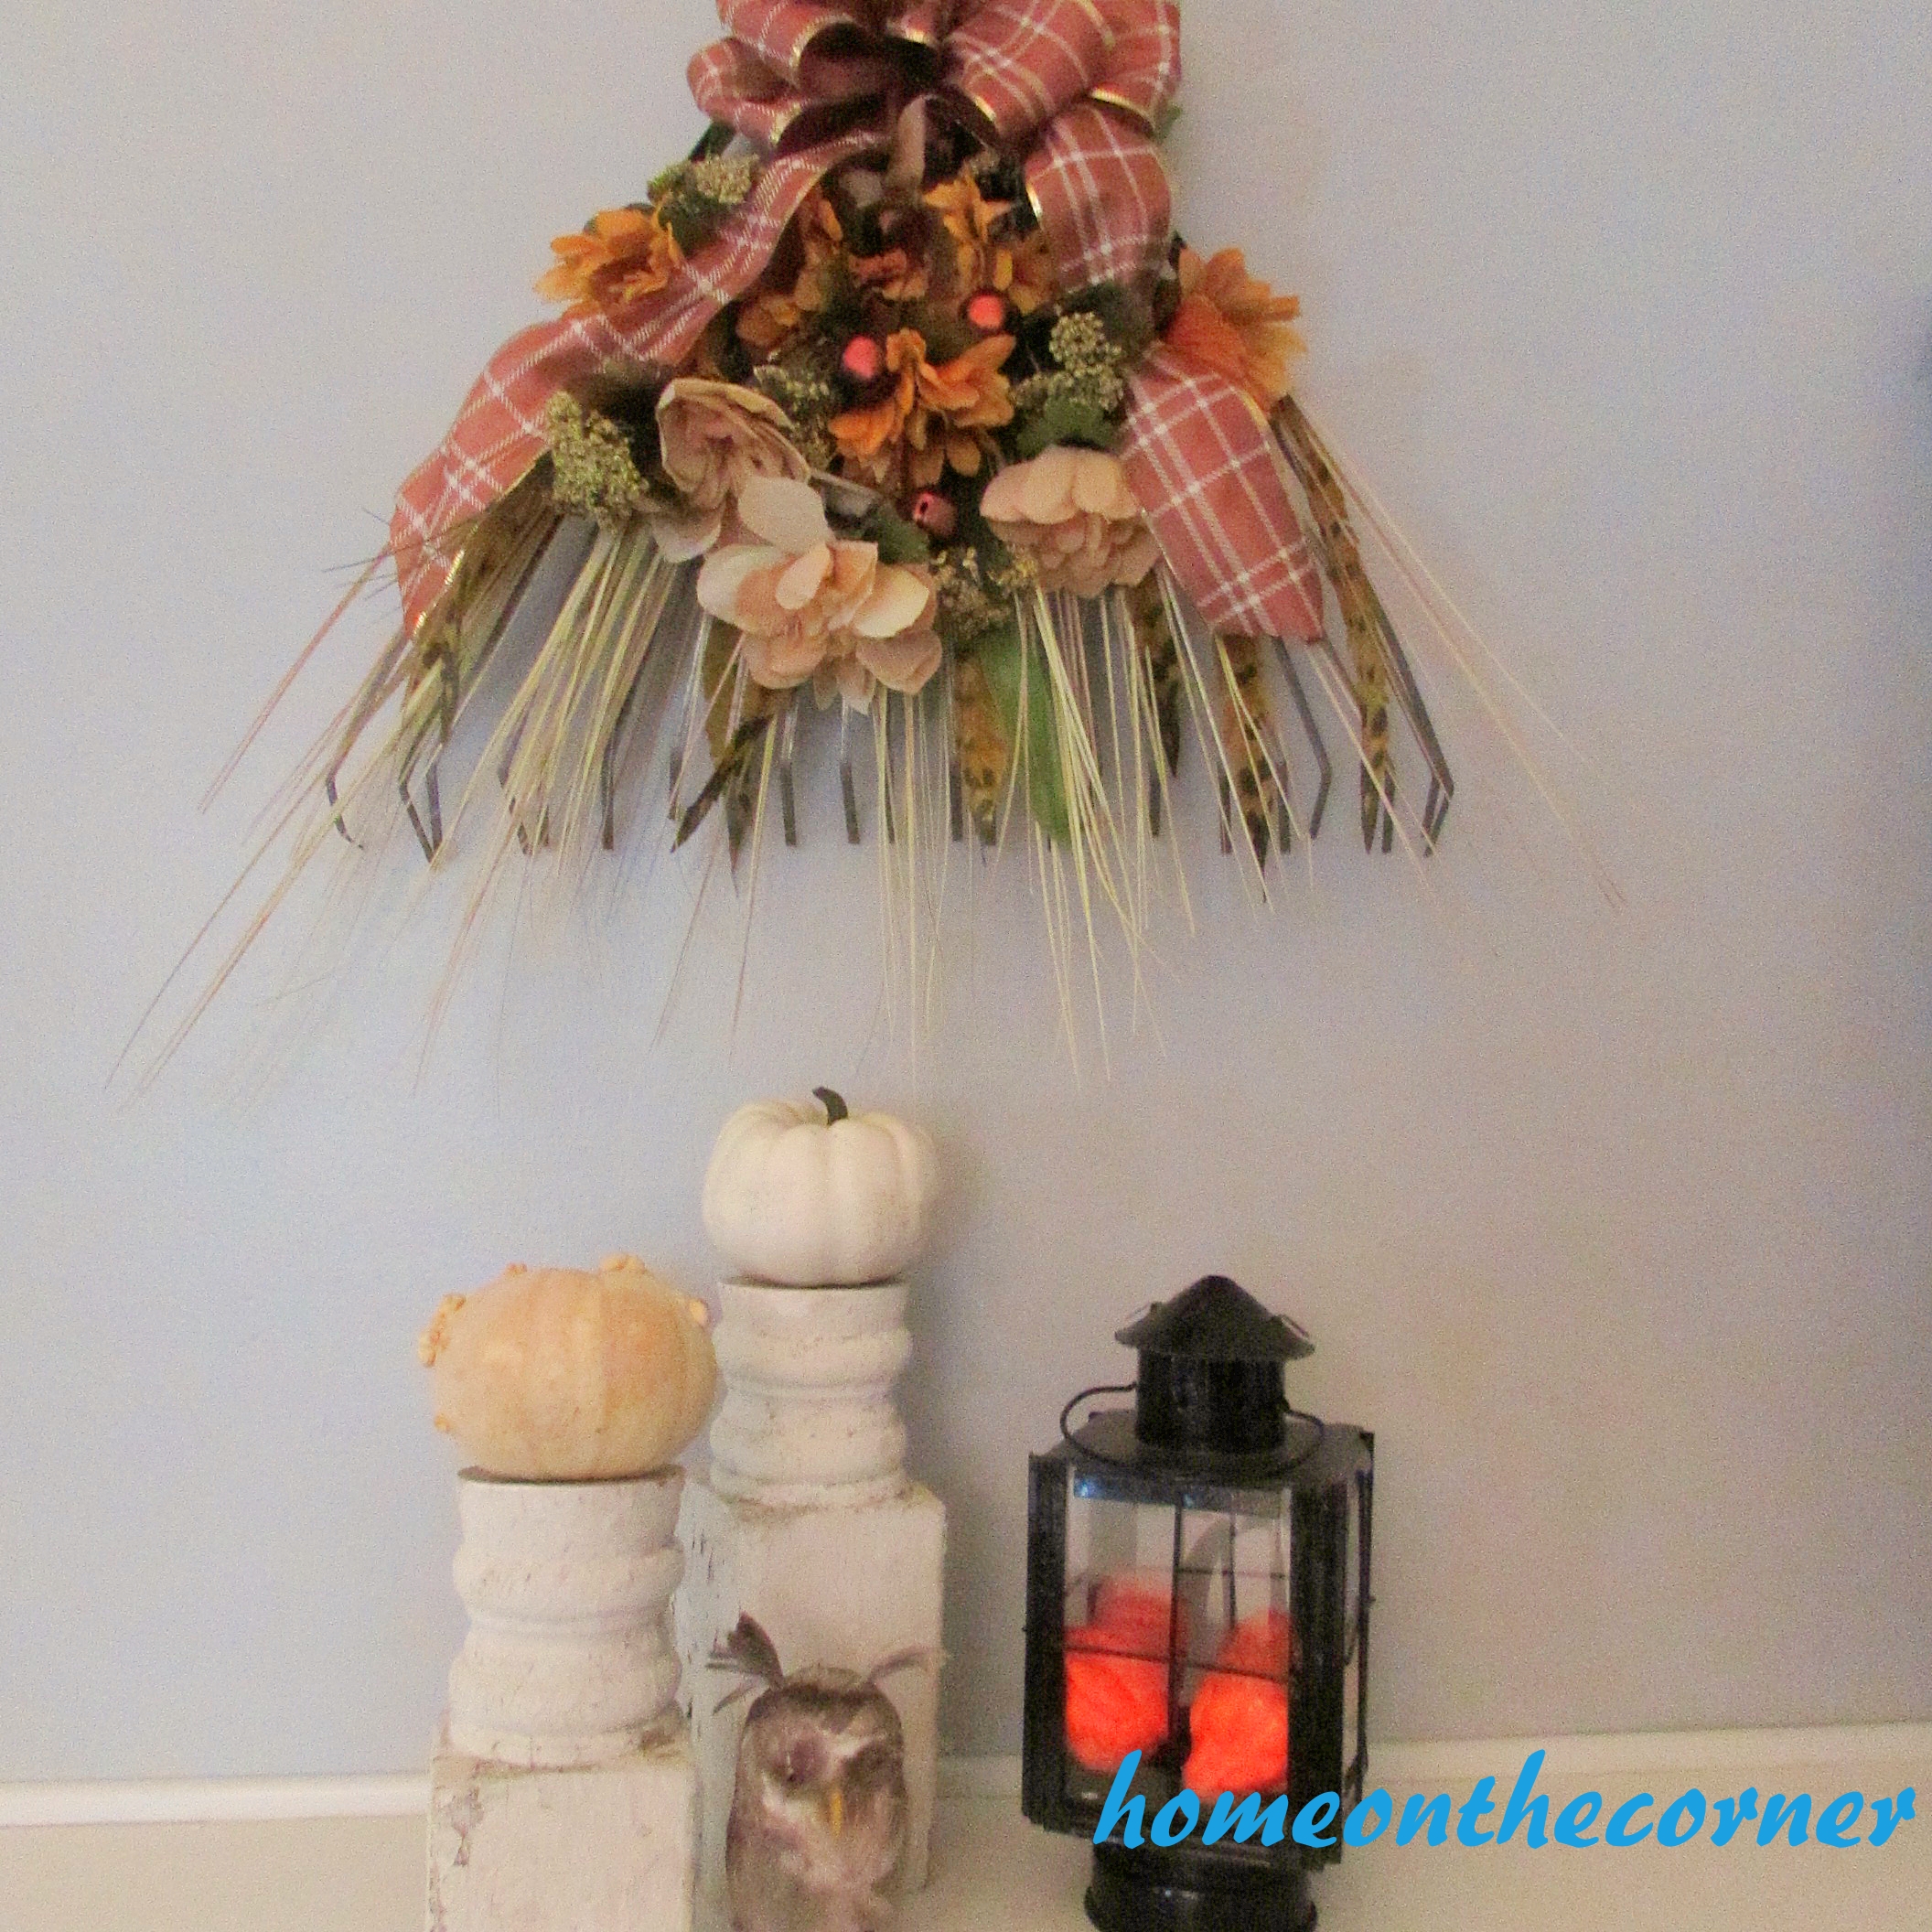
I really like it outside on the fence though!

Fall Rake Makeover Dollar Tree on Fence

Scrapbook Paper Signs

Do you ever go shopping in an arts and crafts store and see something that you absolutely didn’t need and you bought it anyway?

Yep…all the time…

Well, on a certain trip to a certain Hobby Lobby with a certain mother of mine (you know who you are), my certain mother HAD to stop in the scrapbooking aisle.  Not that I didn’t want to stop in the aisle, but it’s for the purpose of the story.  So as we looked down the aisle, we both realized that some of the 12 by 12 paper was really cute.

And that’s when I realized that I was going to purchase some of these cute pieces of paper.

I bought 2 turquoise and 2 white papers to use.  I wanted to hang them on a wall in the living room at the apartment, so I had to find something to hang them with.  So, continuing thought the certain Hobby Lobby with a certain mother of mine, we found cork board that I could put the paper on.

So the cork board came with stickers to put on the back that would attach to the wall.  I liked this because then I didn’t need any other hangers.  I then hung the paper on the cork board with gold tacks that I had left over from my push pin art.  So, with one pin on each corner, the pictures were hung on the wall.

And here’s the finished product!

Scrapbook Paper Signs

I love how the pictures look.  I know that deer and arrows are all in right now, so it worked perfectly, along with the words Love and Hello.  It looked great on the wall and I love the pop of color.  Now…if only I can get them to stay on the wall…

sparkle

Fabric Pumpkin Makeover

Happy 3 Day Weekend (for those who get one!)!  This post is late today because I am busy trying to get my house cleaned up and ready for fall!  I don’t have much time during the week, so I figured this was my time to get moving on it. I feel like I accomplished quite a bit, but I didn’t get the blog done for this morning. But it’s here now!

I found these 2 (very) bright orange fabric pumpkins at a thrift store. There really wasn’t much out yet at the stores I usually go to. I wasn’t sure what I was going to do with these, but I figured something would come to mind. I talked with the girls and we came up with a few ideas.

Fabric pumpkin makeover

I started with the small one. Haley suggested turquoise with orange polka-dots, where the dots start out full at the top and then becomes less and less. So I went through my paint stash and started with some colors that I mixed. It did not turn out as bright as Haley was thinking. So, I looked again and found some old poster paint in bright turquoise. It ended up being the perfect color! Here are my different attempts:

Much better color! I added a little more turquoise with some purple mixed in for the stem. After seeing the turquoise, my mind totally went in a different direction than polka-dots! Do you do that? Change your mind part way through a project? All. The. Time!

Small fabric pumpkin makeover turquoise

I decided to add some string around the pumpkin where the previous string was. I picked a navy blue, although it looks kind of purple.

Small fabric pumpkin makeover string

I just put some hot glue on the old string and laid the new string over the top.

Small fabric pumpkin makeover gluing

Here is a little clue to how I ended up decorating the pumpkin. These are a few of the embellishments that I used.

Small pumpkin makeover

The big pumpkin I just spray-painted with Rust-oleum spray paint in Metallic Aluminum.

Fabric Pumpkin spray paint

Then I added some glittery silver filigree washi tape that I found at Walmart. Sorry I don’t have the package to show you. I had already opened it for another project. Isn’t is pretty!

Fabric Pumpkin Makeover 3

And here is the turquoise one! Ta da!

Fabric Pumpkin Makeover 2

Haley loves peacocks and we had decorated her graduation party in a peacock theme. You can see it here. I had a few feathers left over, so it worked out great.

Fabric Pumpkin Makeover Finished

Fabric Pumpkin Makeover 5

Fabric Pumpkin Makeover 4

I just loved how they both turned out! Have been decorating for fall yet?

Sunshine and Blessings

ps. We (mostly Lauren) have been on Periscope! Be sure to follow us there to find out when we go live!

Parisian Tablescape

I have never been one to have a fancy table for a few reasons.  1: I live with other people. 2: I never sit at the table to enjoy the tablescape.  But, I have decided that I would actually put a tablescape together.

So TADA!

Parisian Tablescape

Parisian Tablescape

I used a grey scarf as my table runner to keep the table neutral and use other colors to pop.  I added a lot of Paris style items to the middle as a centerpiece.  You will be able to see the centerpiece shortly.

Parisian Tablescape

Now…I actually used my roommate Lydia’s dishes because I have red and yellow dishes.  So I had the large plate, the salad plate, and the bowl because you never know what you will need for a meal.  I added the silverware and a glass to finish off the setting.  But, to add a pop, I added a small glass bowl with a pink cupcake that my roommate Danielle had made.  Yum!

Parisian Tablescape

For the centerpiece, I used quite a few different items.  The best piece is the old film camera.  I don’t have any film for it, but it still works!  I am able to zoom, click, and “turn the film” which is fun.  I added a pink Eiffel Tower that holds my photos and a mason jar that my mom covered with scrapbooking paper and stickers for my bedroom.

Parisian Tablescape

On this side of the centerpiece, I have a mannequin jewelry holder that I bought from Ross and another small mason jar that my mom redid.  You can now see the camera from a different point of view.

Parisian Tablescape

And to finish off the centerpiece, I have this wonderful bottle of Van Ruiten Chardonnay that hasn’t been opened yet.  It is a great addition to the centerpiece and hopefully when I open it, it will be delicious.

So that is my tablescape.  I hope I can do more soon, if my roommates allow it…

sparkle

Master Bedroom Reveal

I am back today with something new! Since we are relatively new to blogland, I haven’t had a chance to show you around my house. Not that you are going to see it all, because some of it is bad, really bad. We are talking half finished or 1980’s bad! There is lots of work to be done! But I do have the Master Bedroom done…at least for now! Things are always changing-just ask my family!

This is the view from the door as you walk in. I just changed to bed to this side of the room last month. I also painted it white. It had been where the dresser is now, but I was constantly having to walk around the bed to get to anything. So far, I am liking this better.

Master bedroom 1

I bought the lamp bases from Goodwill several months ago, but they were still new with tags, from Target. My mom and I just found the lampshades last week on our shopping trip. I added a sisal basket with some seashells and a large plate with the year of our marriage. There is also a picture of the family when the girls were small. Above the table are Lauren’s senior pictures. The long denim dress she is twirling in, she made herself! It was a team effort to sew through all that denim!

master bedroom 2

master bedroom 3

Next up is the dresser. We inherited this dresser when we got married from my parents, who inherited it from my dad’s sister. We figure it is about 60 years old. My mom calls it blond wood, but I really don’t know much about it. The wicker chair is part of a set we bought when we got married.

master bedroom 5

The little set of drawers in the middle came from my Grandma. It was my mom’s and her sisters when they were little and it held their doll’s clothes. I changed the knobs on it, but left the wonderful old paint color on it. A few other touches help to add to the beach look without going overboard!

Master bedroom 6

I bought this old fabric box from Goodwill. I thought it was a hat box, but do you see what it says on the side? “Silk Longs.” It must have held somebodies silk stockings!

master bedroom 7

On this side of the bed I used a set of blue wicker drawers for the nightstand. The box is an old cigar box and then I added just a few seashells to keep it simple. On this side, I have Haley’s senior pictures.  I love the one of her holding her baby picture. So precious!

master bedroom 11

master bedroom 12

I have an extra little corner in my bedroom that was added on after the house had been built. This extra space is what sold me on the house! I have a wonderful drop-leaf table here which belonged to my grandma, along with the chair. I added a sailboat and a mirror. There is an old suitcase underneath.

master bedroom 13

Across from the table is another old cabinet. I bought this one from a yard sale from a lady who is a big collector of old things. I have placed all my quilts in here. I love how they looked all stacked up! Some are old, but other are new. I just love all the patterns and how cozy they are. I use these for all different occasions, but especially in the wintertime.

master bedroom 8

masster bedroom 9

Here is the view from this side of the room. Do you see the things peeking out from under the bed? Just a few random things that I had no other place for!

master bedroom 14

Let me show you one of the coolest secrets about this room. See this little piece of paneled wall? Well, if you pull on the hooks, it will open to reveal…

master bedroom 16

A shoe cupboard!! Do you see where Lauren got her love of shoes from! I love this cupboard! I’m sure my husband thought I was crazy, but this is the best thing ever!!

master bedroom 4

I hope you enjoyed the tour! You can check out Laurens bedroom/guest room here, my hallway and one corner of my living room here, and part of my dining room here and here. I will keep plugging along on my different rooms and one day I will be able to show off the whole thing!

Sunshine and Blessings