Decorating with the Pantone Color of the Year: GREEN!

Hello everyone!  I am extremely sorry for not posting last week.  I am so forgetful in my old age.

I’m only 22, but sometimes I feel like I’m 50 with how often I forget stuff.

Did you know that Pantone has a color of the year?  Yeah, it’s a real thing!  And this year’s color is representative of rebirth and new life.  It also represent vitality, which is perfect in the upcoming spring season.

So, the Pantone color of 2017 is Greenery!  Which, is not a top color for me, but mom decorates with it all the time.  So, I am going to show you how to add more green to her formal living room.  If you don’t remember what it looks like, click on the picture below to check it out.

sweet-something-valentines-dining-room-and-living-room

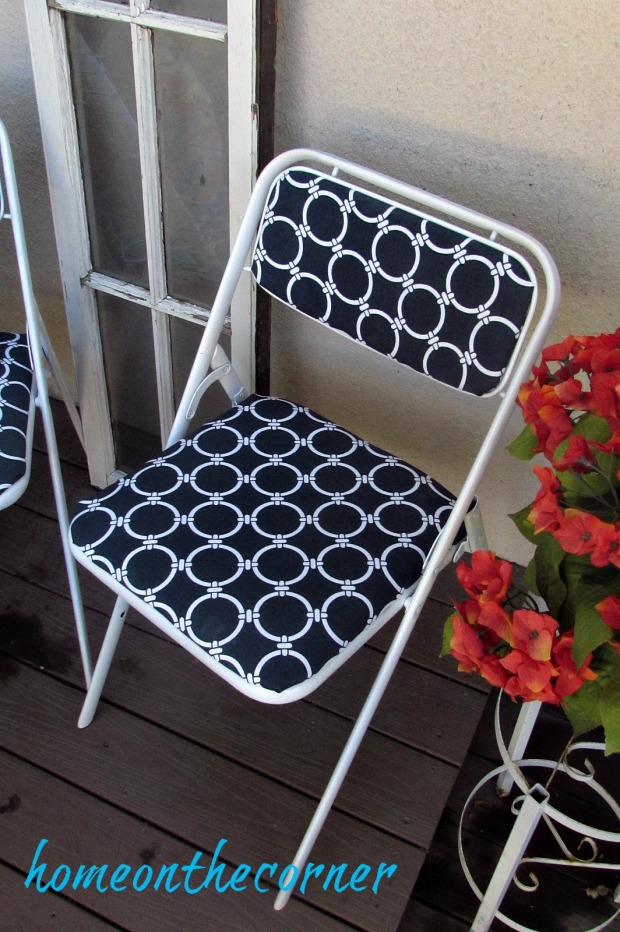
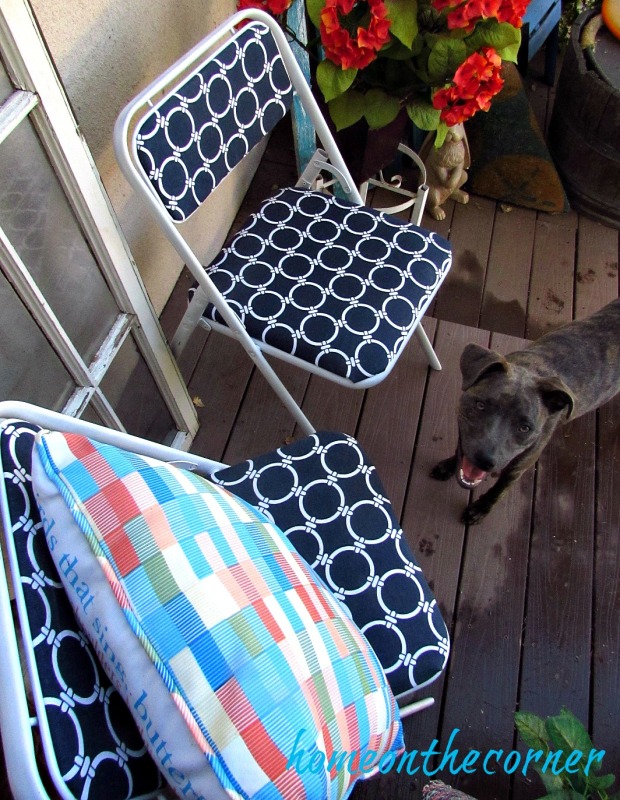
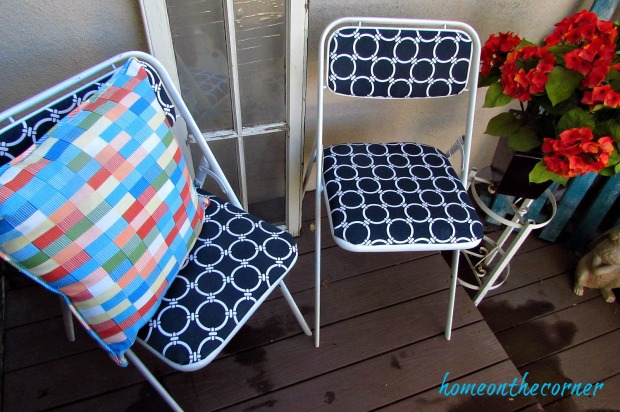
First of all, look at these awesome chairs! They are modern and chic, and I’m pretty sure they would look great in any room.  I love the modern look and they would look great with a dark wooden table.

But you know what these chairs would look great under???  How about some green lampshades!  Why not change out the blue printed lantern shades with these awesome green ones!

Now what about on the table?  How can we make these beautiful lanterns look even better and more GREEN???

something-sweet-valentines-tablescape-and-hutch

How about adding green fairy lights???  They add mystical lighting to any room.  Or, it makes it more festive for St. Patrick’s Day!

Did you know that small changes can give a room new life?  You could keep all of you white modern dishes and add something cute like this green chevron tablecloth to turn a room from ultra modern to fun and funky!

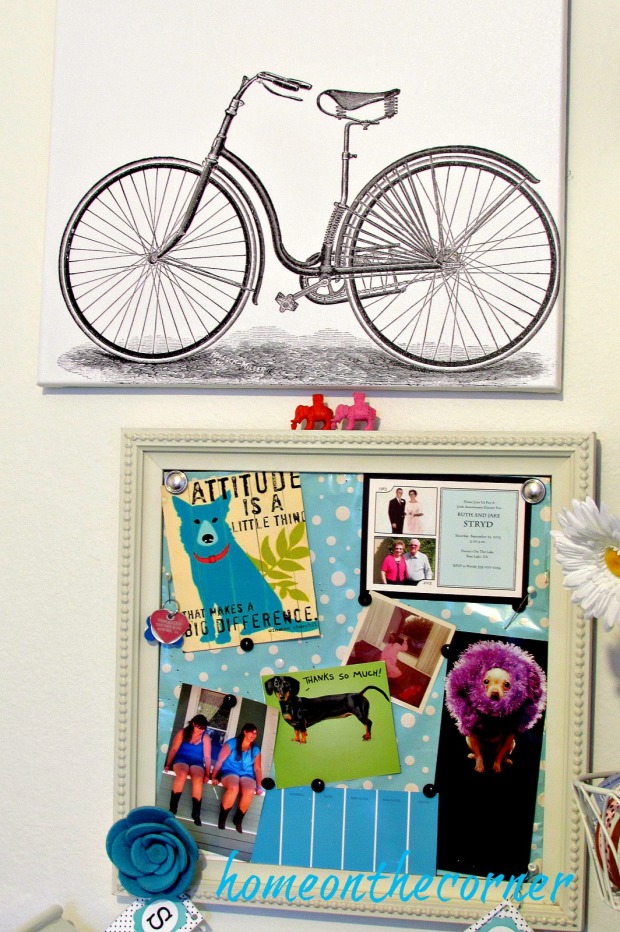
You can also change up some of the pieces that you hang on the wall to change the style of the room.  One of the things you can use to cover more space is hang a tapestry.  Here is a beautiful mandala tapestry that covers a lot of wall space.

Or you can hang a new funky wreath on your wall!  Did you know wreaths aren’t only meant for doors? You can also cut branches from your trees or bring plants in to not only bring in green, but add some other color!

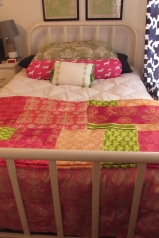
Now what about the day bed that all the animals love to sleep on?

sweet-something-valentines-living-room-daybed-red-heart-rozy

How about some green pillows?  Did you know that switching out your pillows can change up the feeling in the room?  Just changing your pillows can change the entire look of the room!


Or maybe a green quilt?

OR MAYBE you put another throw blanket to put on top of the quilt.  Did you know that adding multiple blankets makes the space look cozier and comfier?

And, how about instead of the dog sleeping on the bed, they get their own green bed???

There are so many possibilities with the color green!  I hope that this has given you lots of new ideas for how to decorate with the color green!

Do you want to still be inspired?  Check out these tropical inspired houses at https://www.elliman.com/florida .  Hope you feel more tropical!

sparkle

Guest Room Complete & Canvas Giveaway

Good morning! Hope you all had a good weekend! We had lots and lots of rain, which we do need so badly. Thankfully, it stops for awhile in between storms so the water has time to drain. And guess what!? It’s our 2 Year Blogiversary!!! I can hardly believe it! Thank you to all our wonderful followers and supporters! Obviously we couldn’t keep going if it wasn’t for all of you! You are so appreciated and we really have enjoyed getting to know you and reading all your sweet comments.

Since I couldn’t get out much, I was able to get a little more done in my house. I mostly worked on the guest room/craft room/Lauren’s room. It’s basically the same as it was at the other house, but this room is much larger. So nice! I actually have room to stretch out a bit!

*The contents of this blog are sponsored by CanvasFactory.com.*

Before we moved to our new house, I was contacted by CanvasFactory.com. They offered to send me a 16 X 20 canvas of my choice. I could either upload my own picture to be placed on a canvas or use one of their 20 million wall art prints. There are so many sizes and styles to choose from! There are canvas, acrylic glass, aluminum or collages. You can order a single print, like I did, a split canvas, or a do a whole canvas display. Plus, CanvasFactory is giving away a 16 X 20 canvas of your choice! Just enter the Rafflecopter at the end of the post. Good luck!

It took me awhile to go through the different prints they offered, but I finally decided on an old-fashioned bicycle. Even then, I had to choose between what color bicycle and what style. I finally chose black and white.

canvas-factory-old-fashioned-bicycle

The quality of this canvas is so great! The background is very white, so the black bicycle really stands out. There is even a bit of a sparkle to it!

canvas-factory-bicycle-canvas-plates-decor

Here you can see some of the great detail.

canvas-factory-detail-close-up-bicycle

Even the back is finished nicely. There is black velvet all around the back edge to protect your walls and a sturdy hanger too.

canvas-factory-black-velvet-backing

I would love to have a few more of these around! They really look nice and add a great element to your room.  Continue reading to find out how you can win a canvas of your own from Canvas Factory!

canvas-factory-craft-room-bicycle-bulletin-board

Okay, on to the guest room! Obviously, I hung this CanvasFactory.com print in the guest room, so now I will show you the rest of it. It started out as quite a mess! I really hadn’t done anything to it since we had the painting (Benjamin Moore, Simply White)done. So I unloaded everything from the desk and put it onto the bed.

canvas-factory-guest-room-makeover

Then I started with my ribbon basket. I took everything out and gave it a good dusting. I did get rid of a few rolls and then secured all my other rolls with straight pins so I wouldn’t have pieces of ribbon hanging all over.

canvas-factory-ribbon-mess-before

Much better!

canvas-factory-craft-room-ribbon-organization

What a difference a good cleaning can make!

canvas-factory-guest-roomcraft-room-makeover

canvas-factory-craft-room-desk-thread-bottles

I used the same bedding and curtains I had before.

canvas-factory-guest-bedroom-makeover-pink-blue-green

I did change up the dresser a bit though. I used a lot of the same things, just rearranged them a bit.

canvas-factory-guest-bedroom-white-dresser-mirror

I really like how fresh and clean the room is now. It feels ready to take on a new craft project! Slowly, but surely, the house is coming together. We have several big projects to tackle, and several little ones, but it’s nice to see some progress.

I have added some links to some items similar to what I have in my guest room if you are interested. I earn a little bit from each sale, but there is no extra charge for you. Thanks for taking a look!

Azar 300703 3 Tiered Round Wire Dump Bins, White

Catalina Printed Cork Board

Ball Mason Jar-32 oz. Aqua Blue Glass Ball Collection Elite Color Series Wide Mouth

Howard Elliott 2146W Dorsiere Oval Mirror, Glossy White

Best Home Fashion Room Darkening Morrocan Print Curtains – Antique Bronze Grommet Top – Navy- 52″W X 63″L – (1 Panel)

Finally, the fun stuff!  Canvas Factory was kind enough to give us a second coupon code to give out to one lucky person!  This will get you a free 16 X 20 canvas.  There are thousands to choose from and as you can tell from our experience, they are awesome!  Click on the link below to enter!  Good luck!

a Rafflecopter giveaway

sunshine-and-blessings-picmonkey

Here are some other posts you might want to look at!

Laurens Room 4     IMG_2322    IMG_2379

Master Closet Makeover

Good Monday morning! Are you off today for Martin Luther King Jr. birthday? I am! Even though I just had time off for Christmas, I still enjoy another free day. I just feel like I have so much to do at the house. It is slowly coming together. The painting is just about done, just the kitchen is left. Yay! It is so nice to see the fresh white paint and to have the house slowly getting cleaned up. I have worked in the living room the most, just because I seem to have an idea of where I want it to go :)! The other rooms haven’t really formed in my mind yet. But they will! Until they do, I have another makeover to show you.

This is the Master Room Closet. It’s not very big, but I have tried to make the most of the space.

master-bedroom-closet-makeover

Here is the before:  The bar wasn’t even hung on the rack!

master-bedroom-closet-makeover-before


We took everything out and I gave it a good coat of paint. I also took off the sliding doors and added folding doors so I could see everything better. I knew I wanted plenty of room for my shoe collection :), so I planned around the shoe organizers. I hung two bars on one side of the closet, one for tops and one for pants and skirts.

master-bedroom-closet-makeover-shirts

I also am a little OCD with my hangers. I have all my summer and winter tops in there, plus my scarves and belts.

master-bedroom-closet-makeover-full-closet

After everything else was fit to the closet, we added the shelf back in. I have my jeans and extra pj’s up there.

master-bedroom-closet-makeover-top-shelf

Down on the lower rod, I have my pants, some jackets and my shorter skirts.

master-bedroom-closet-makeover-pant-rack

And my pride and joy…my multiple shoe organizers! I bought 3 of these from Target (I had one from the old house). We stacked them and attached them to the wall so I wouldn’t have shoes raining down on my head. On the lower organizers I left out one of the dividers so I could fit my boots in.

master-bedroom-closet-makeover-shoe-rack

I just love how I can see everything at one time. I really helps me use what I have and not buy multiple items because I can’t find it or see it.

master-closet-makeover-shoe-rack-cubbies

Here’s a before and after for you:

That’s one more step to getting the house to normal! Maybe next week I can actually show you a whole room…or maybe just part of one! Hope you have a wonderful week!

sunshine-and-blessings-picmonkey

2016 in Review-The Top Posts of the Year

Happy New Year! 2017! Amazing! We hope you all had a wonderful holiday!We  want to say Thank You so much to all of you who follow along or even just stop by once in awhile to say ‘hello.’ We couldn’t keep going without all you support and encouragement for what we do. We have been missing quite a bit around here lately, but here is the reason…

2016 was a year of a lot of changes here in our household. Lauren moved twice, we moved after living in the same house for 23 years, we brought not one, but two puppies home, and we went to Hawaii! Wow! I am hoping for a little more calm in my 2017. How about you? Do you pick a word for the year or already have plans? I can’t wait to see what 2017 will bring!

For now I thought we would look back at 2016 and see what some of the top posts were for the year. Starting with number 10.

10. Blue and White Folding Chair Makeoverfolding chair makeover 2 chairs

I had been wanting to do this makeover for some time and finally found just the right fabric. I love how they turned out and it was so simple too.

9. Pallet Project Update-Plate Rack

pallet farmers market kitchen plate holder

I loved this makeover! I can’t wait to find the perfect spot for it in my new house!

8. Old Drawer Recycled to an Organizer

drawer organizer title

It’s great how an old drawer can become something useful. There are so many ideas for them.

7. Fabulous Vintage Beverage Cart

vintage beverage cart with ezzy

I picked up this cart for only $10 at a yard sale. It has great vintage charm! Its fun to decorate and use for all different occasions too.

6. 2016 Ornament Exchange

faux-deer-ornament-with-wreath

This was my second year participating in the ornament exchange and it was so much fun! I love creating something for someone else. That’s part of what Christmas is all about!

5. Upcycled Coffee Cans for Bridal Shower

coffee can makeover bridal shower with burlap

More upcycled and recycled projects. I love these the best!

4. Upcycled Old Metal TV Trays

floral metal tray styled

I was actually kind of surprised at this one, but I guess you all like the recycled projects too!

3. Springtime Concrete Painted Planter

concrete painted planter front porch

You guys…this one makes me shake my head every time. It’s such a simple project and it received so many views!! You just never know what projects are going to be popular.

2. Recovering my Outdoor Swing (I cheated a little!)

swinging chair 23

I think it was the cheating part that everyone liked! 🙂

1.A Lacy Look for an Everyday Item

Barstools 10

And our number 1 project!! Another recycled/upcycled one! I guess I know what you all like to see and read about!

It’s nice to go back sometimes and actually see everything you have accomplished over the year. It’s easy to just look at all that needs done and forget about everything you have accomplished.

Thank you again to all of you who follow along! We plan on many more projects in 2017!

sparkle

sunshine-and-blessings-picmonkey

Blue and White Folding Chair Makeover

HI everyone! Hope you are all well! School is about ready to start around here, although I have a couple of more weeks before I go back. It will all be here very soon!

I have a simple project for you today. You’ve probably already seen it done on Pinterest, but it is something I have been wanting to do for awhile and kept putting it off. But I will be hosting a bridal shower for Lauren’s best friend in a couple of week, so I figured I better get going on this! I had also found some fabric I liked at a yard sale this summer, so now I had no excuse.

folding chair makeover blue and white completed chair Title

I had these old brown folding chairs that really needed an update. They are definitely passed their era! First I unscrewed the back and the seat from the frame of the chair.

folding chair makeover

I found this tag on the bottom of the seat. I know it says model number is 1953, but I wonder if that was the date. And the price! $10.95! What a bargain!

folding chair makeover tag

Once the back and the seat were removed, I took the frame outside and gave it a couple coats of white spray paint and a coat of clear coat.

folding chair makeover chair frame

I love this fabric! It’s heavier than just cotton, and the colors are so much better than the brown.

folding chair makeover fabric

I laid the fabric on the floor, with the help of Chica, and cut out the shape, about 2 inches from the edge of the chair back. This will give me enough to wrap around and staple. I also did this for the seat.

folding chair makeover covering the chair back

I laid the chair back on the wrong side of the fabric and made sure it was centered. I start in the middle of each side and put in one staple, then continue around.

folding chair makeover staple cover
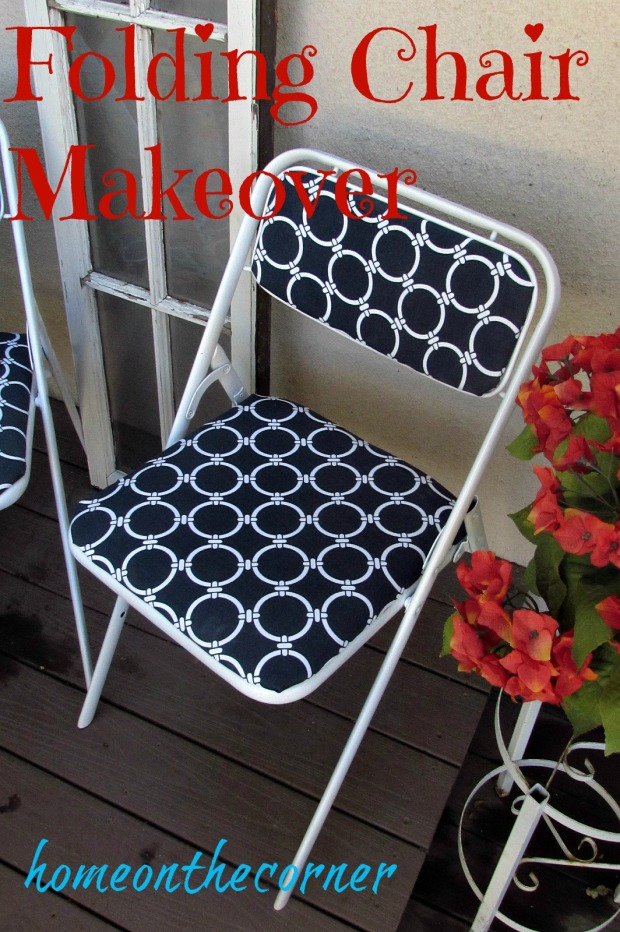
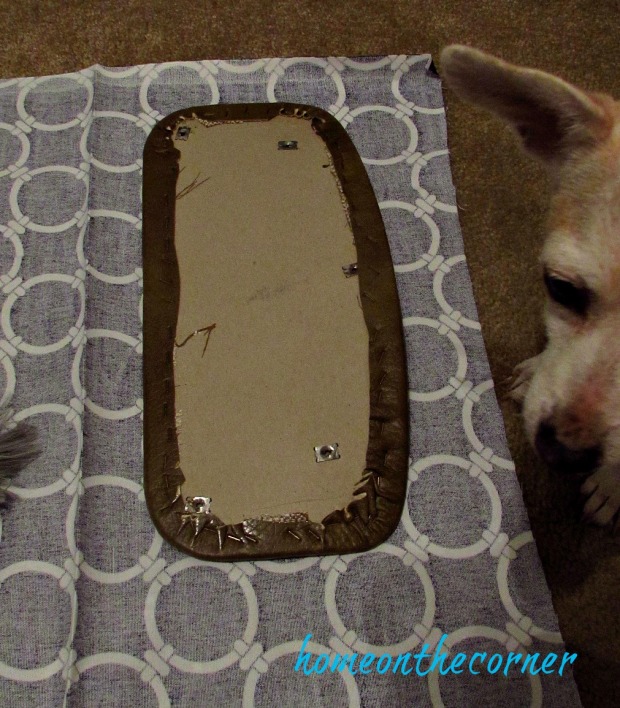
After covering the seat, it is time to reattach them to the chair frame. Pretty easy, right! Now we are ready to party!

folding chair makeover 2 chairs

I love the blue and white. It looks so crisp and clean!

folding chair makeover blue and white completed chair

Rozy says she hopes you all have a great day!

folding chair makeover with Rozy

See you on Wednesday!

Sunshine and Blessings

Here are a few other projects you might want to look at:

Sunny Days!Pink Binder Spine