DIY Dog Cross-Body Carrier

Hello! Welcome back to Home on the Corner! I missed Finds and Fashions yesterday, so today I am showing you a simple project for your special pet. I put dog in the title, but it could be for something else small like a cat or guinea pig or whatever other critter you might have!

Our dog Chica is 16, but she still likes to go places with us. The problem is she can’t walk very far. Lauren and I found this idea somewhere on the internet, but I don’t know where as it was several years ago. We were going on a long walk at the coast and knew Chica wouldn’t make it the whole way, but I also couldn’t carry her the whole time without some support. So we thought we would give this project a try and it was really easy.

We took a piece of fabric 26″ wide and 58 inches long. If you have a really small pet, you would want to go with a skinnier piece, but probably the same length.

dog-sling-carrier-fabric

I don’t know why these pictures are so blurry, but I am sure you will get the idea. Hem each side of your fabric. This will keep it from fraying when you wash it. After it is hemmed, fold it in half so it is a long skinny piece. I guess you would fold the width in half.

dog-sling-carrier-fabric-length

Then fold it again so the open ends are together. Fold the length in half. (This took a lot of thinking on my part to figure out how to explain it!! :))

dog-sling-carrier-fabric-folded

Now you are going to sew the open ends on the short end of the fabric together. When you are finished, you will have a long tube that is open along one long side.

dog-sling-carrier-sewing-seam

That’s it for the sewing! Now it is time to test it out. The carrier will go over one shoulder and under the other arm. The pouch opening should be on the top. Open it up and place the animal inside. This usually takes 2 people-1 to hold the carrier open and the other to place the pet inside. Munch had never been in one before, but she didn’t seem to mind at all! Her bottom fits right down into the pouch and she is able to sit comfortably. If your pet is in far enough, you don’t have to support them at all.

dog-sling-carrier-with-dog

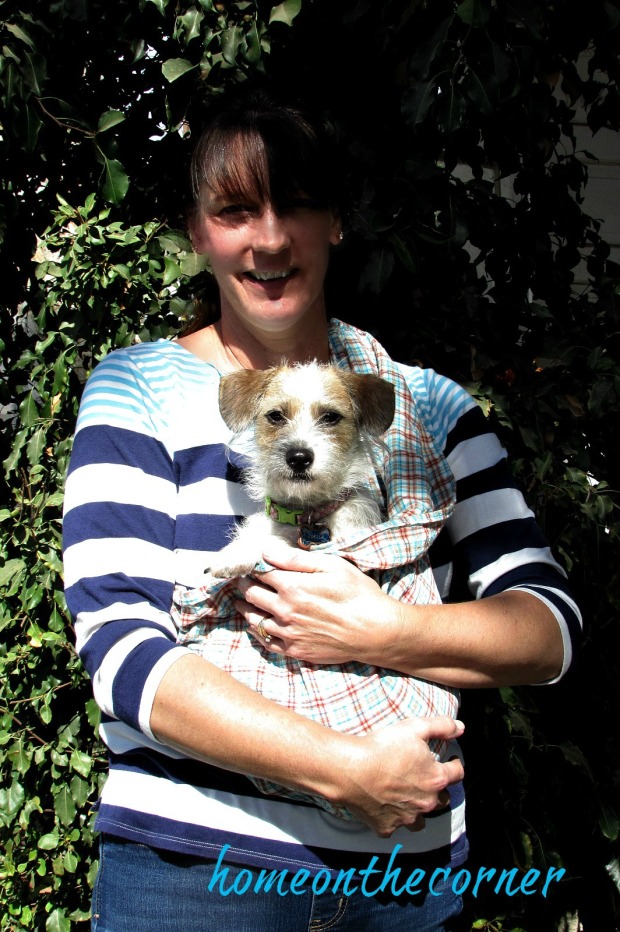
This carrier really helps to keep the weight off your back and shoulders and also helps the animal feel secure. Munch never fidgeted or tried to get out. Chica was the same way, even the first time we used it.

dog-sling-carrier-back-view

We have used this many times over the last couple of years and it has definitely come in handy, especially with an older dog.

dog-sling-carrier-dog-munch

I would love to know if you have ever tried a carrier like this and what your experience was! Let me know in the comments!

sunshine-and-blessings-picmonkey

You might like these posts too!

Copy of IMG_47622             cat box         upcycle clementine box doll bed pink dots

Falling Leaves Door Hanging

falling-leaves-title

Good morning! I have a very simple project for you today!

I already had all the supplies for this project. I found a stick in my backyard, I had twine, but you could use string or yarn, and a package of faux leaves. You could use real ones too, but our leaves aren’t turning yet, so no pretty colors could be found!

fall-leaf-wall-hanging

I started by tying a piece of twine on the stick, long enough so the stick would hang at a good length. Then I added different lengths of twine to hand downward.

fall-leaf-hanging-twine-and-stick

Next step is gluing. I used hot glue, but please be careful of your fingers! I added the leaves in random order, but about the same distance apart. I used mostly yellow and orange, with just a few red ones so they would really stand out.

falling-leaves-project-started

And that’s it!! I spent maybe 15 minutes to complete this project. The gluing took the longest, but it is really so simple!

fall-leaf-wall-hanging-done

After seeing the pictures, I though it would be so pretty to add some pretty bling and then hang it in a window so it would be sparkly. Maybe I will have to add some!

fall-leaves-with-twine-and-stick

I hope you all have a wonderful Monday!

sunshine-and-blessings-picmonkey

More fall ideas!

Basket of Fruit           fall-yellow-gold-placesetting

Adding Some Dazzle to an Old Pair of Shoes

Hello everyone!  Is it fall yet?  Because out here in California it is still 90 degrees almost all week and I could really use a rainy cold day.  Wouldn’t that be nice?????

Well, this weeks blog was an experiment for a present for a friend of mine.  I wanted to try this on something that I had before I put I worked on something and I didn’t like how it turned out.

So, I want to bedazzle a pair of shoes for my friend, but wanted to bedazzle a pair of my own shoes to see if I liked it or not.  My supplies included a pair of shoes that I drew on, Jolee’s Boutique scrapbook embellishments, and fabric glue.

bedazzled-shoes-supplies

Now, I already had the design drawn on the shoes, so I didn’t have to worry about messing up.  But, I definitely suggest drawing on the shoes before doing anything else.  It makes your job 100 times easier.

And then I didn’t know what would be easier to put the black gems on.  If I put the glue on each gem individually, or if I smeared the glue on the shoe and then stuck the gems on.  So, here’s my verdict.  Putting glue on each gem individually makes the line nicer, but smearing the glue on the shoe is much faster.

So it’s up to you what you what you want to do!  The picture on the left is glue on each gem and the picture on the right is the glue smeared on.  Don’t worry, the glue dries on clear.

And after you spend however long sticking your gems on the shoes, you will have a completed look!  Whatever you decide to put on your shoes, or whatever you decide to bedazzle, it will look awesome!

bedazzled-shoes-finishedbedazzled-shoes-close-up

I love how the turned out!  Obviously, the glue hadn’t completely dried in the picture, but it did dry completely clear and they look awesome!  I am happy with how it looks and cannot wait to compete the project for my friends present!

sparkle

Are you ready for Christmas?

Hey everyone! Did you know that Christmas is coming?! Big shock, right? Actually, we still have some time, but there are less that 100 days to get ready. Lauren and I were inspired by Paperless Post (check out some of their fun Christmas cards) to share some of our favorite Christmas memories.  Paperless Post is a design-focused site that provides online and printed invitations, cards, and stationery. Christmas cards are a big part of the holiday season. I know I always look forward to getting cards from friends and relatives all over the country. It’s the one time of year we get to catch up on all that has happened in the past year. Paperless Post asked if we could share some of our favorite Christmas memories.

Many, many years ago, when I was just 5 years old, Santa came directly to my house and visited my sister and I. We were in awe! We sat on his lap and told him everything we wanted . I even got to hold and ring his Christmas bells! I remember going to bed right after he left and listening so hard for the bells and reindeer hooves on my rooftop.

santa-at-home

Even my parents had to peek at Santa! These were published in our local newspaper back in 1973.

parents-2

Here is the perfect card to remember this event! Remember, you can order paper copies or send these online. Click on the picture to go see this card.

santa

Another great tradition is the annual family picture. Of course, our picture always has to include our doggies, and sometimes even the cats, if they cooperate.

img_5123

A photo card would be a great way to showcase your family picture.

christmas-wink

Hey everyone!  Lauren here!  When I think of Christmas, there are a few things I think of.  One of my favorite memories was when I was 5 years old (I know, long ago!).  I was a huge fan of horses and I wanted my own horse.  Well, I got a horse!

Not a real one, but a bouncy horse to ride in the house.  Haley and I had no idea we were getting a horse, but we screamed and couldn’t contain our joy when we saw this bouncy horse in the living room.

christmas-horse

Even though this card doesn’t have horses, it has reindeer, and that’s close enough right?

santa-with-elf

Another tradition my mom’s side of the family has is one person is picked as Santa to pass out of the gifts.  It is normally one of us grandkids, and we always have fun with it.  And, the gifts are passed out from youngest to oldest.  I have no idea where that tradition came from, but it’s a great tradition!

christmas-santas

Well, we hope that you enjoyed this post!  Please check out Paperless Post because they have some beautiful cards!  Remember, these cards can be sent online or by snail mail!

sparklesunshine-and-blessings-picmonkey

Corner News-September 24, 2016

Today has got to be one of the happiest days of my life!  And it isn’t even for me!

Today, on September 24, 2016 my bestest friend in the whole wide world is getting married!

Shelby and I have been friends since first grade.  So, for like 16 years we’ve been friends.  Even though we ended up going to different schools after 4th grade, we still ended up staying friends and finding ways to see each other.

I will never forget when we were younger and she wasn’t even sure that she wanted to get married.  And now, she’s getting married first!  It’s insane that this is going to be the biggest day ever for her!

Last year she asked me to be her Maid of Honor and I couldn’t have been more delighted!  I never expected her to ask me to be in her wedding party.

So, because I am busy all day today with my bestest friend’s biggert day!  Hopefully it all goes smoothly and it will be the best day ever!

Bestest Friend

Congratulations to Kenth and Shelby Veloz!