Using Vintage Fabric to Bring New Life to Chairs

Good morning!

I know I haven’t posted for a bit, but I am so happy to show you this project today! Thank you for stopping by! I am going to show you what a difference a little paint and fabric can make!

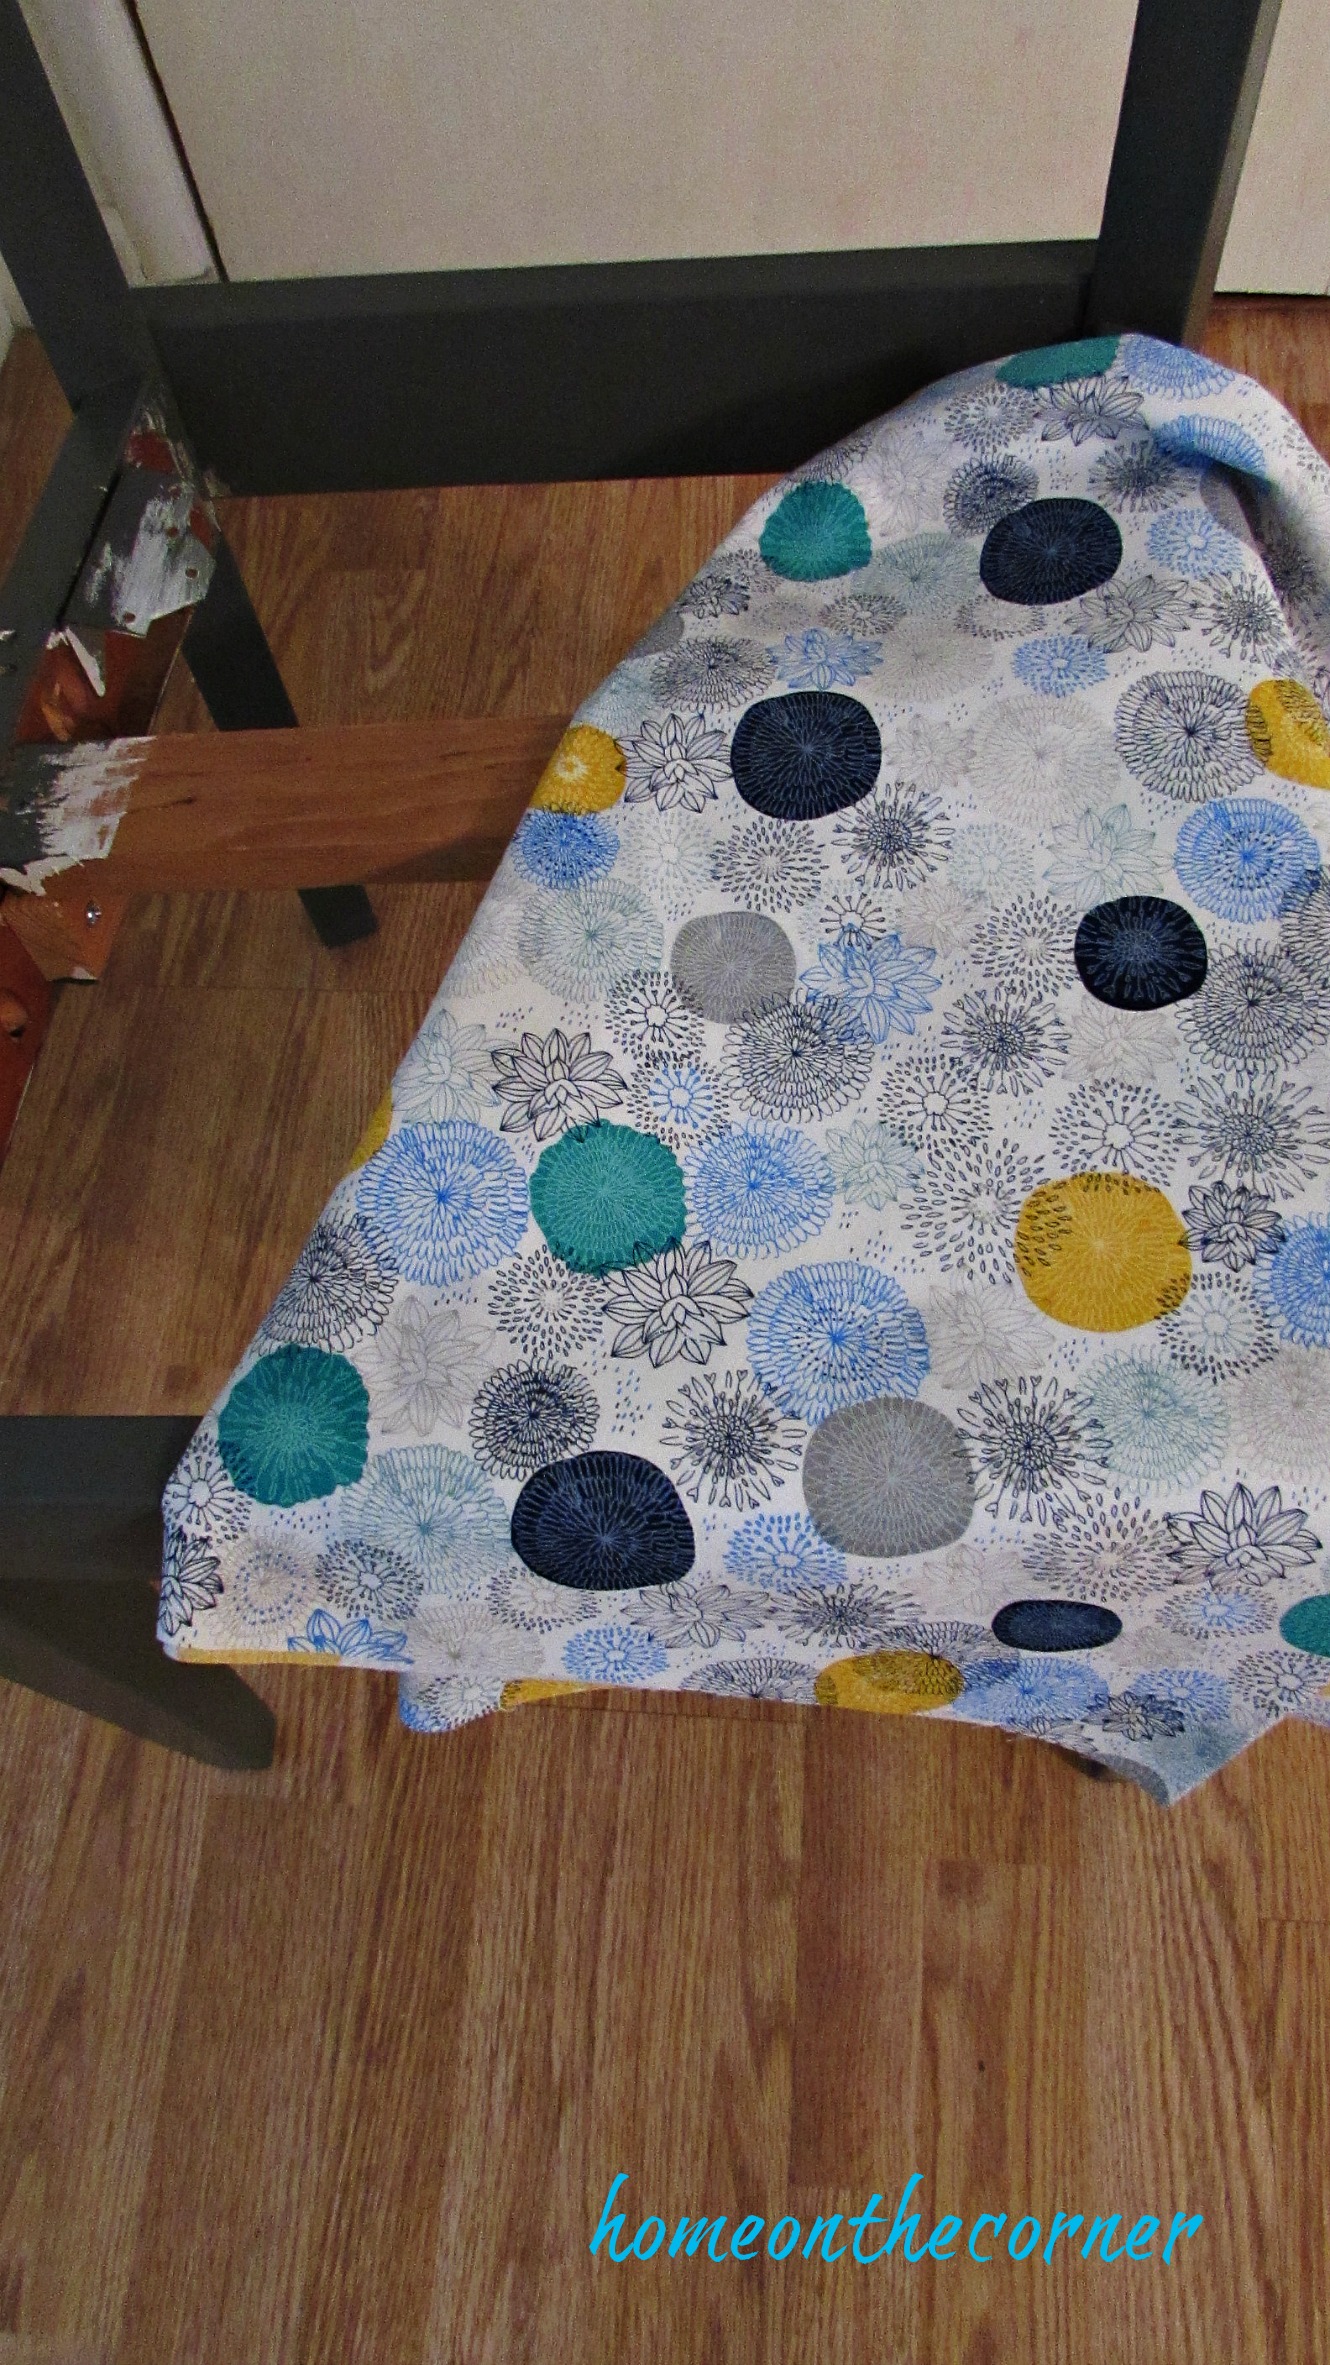
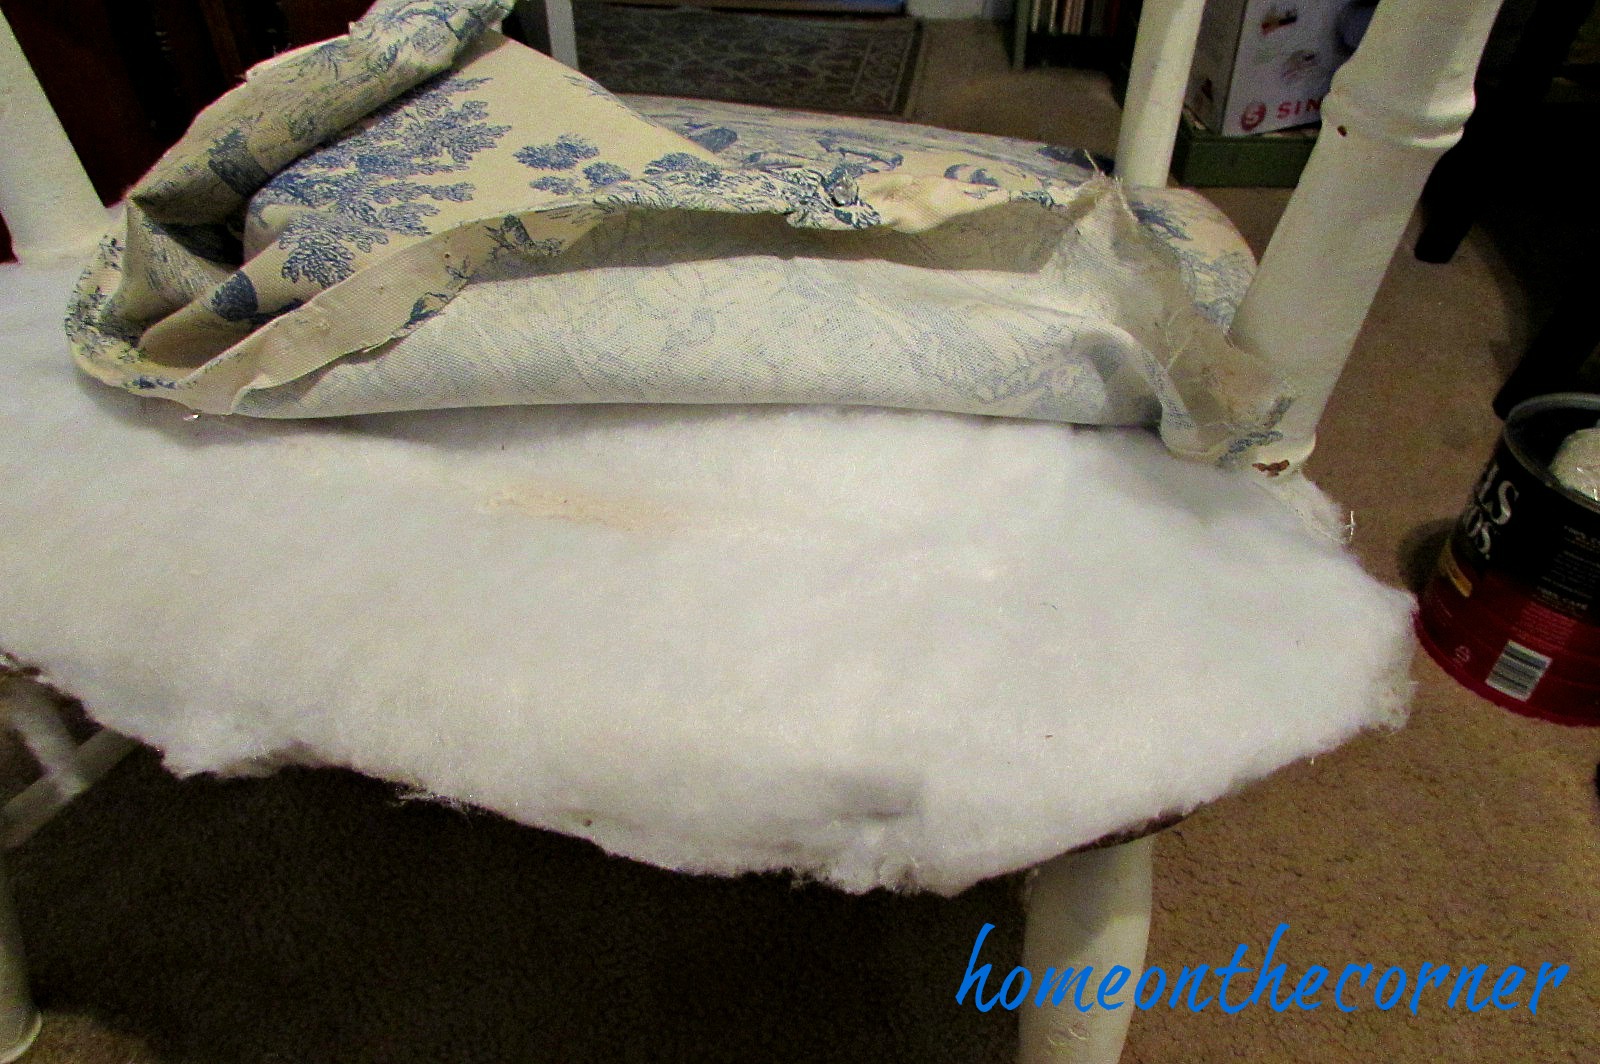
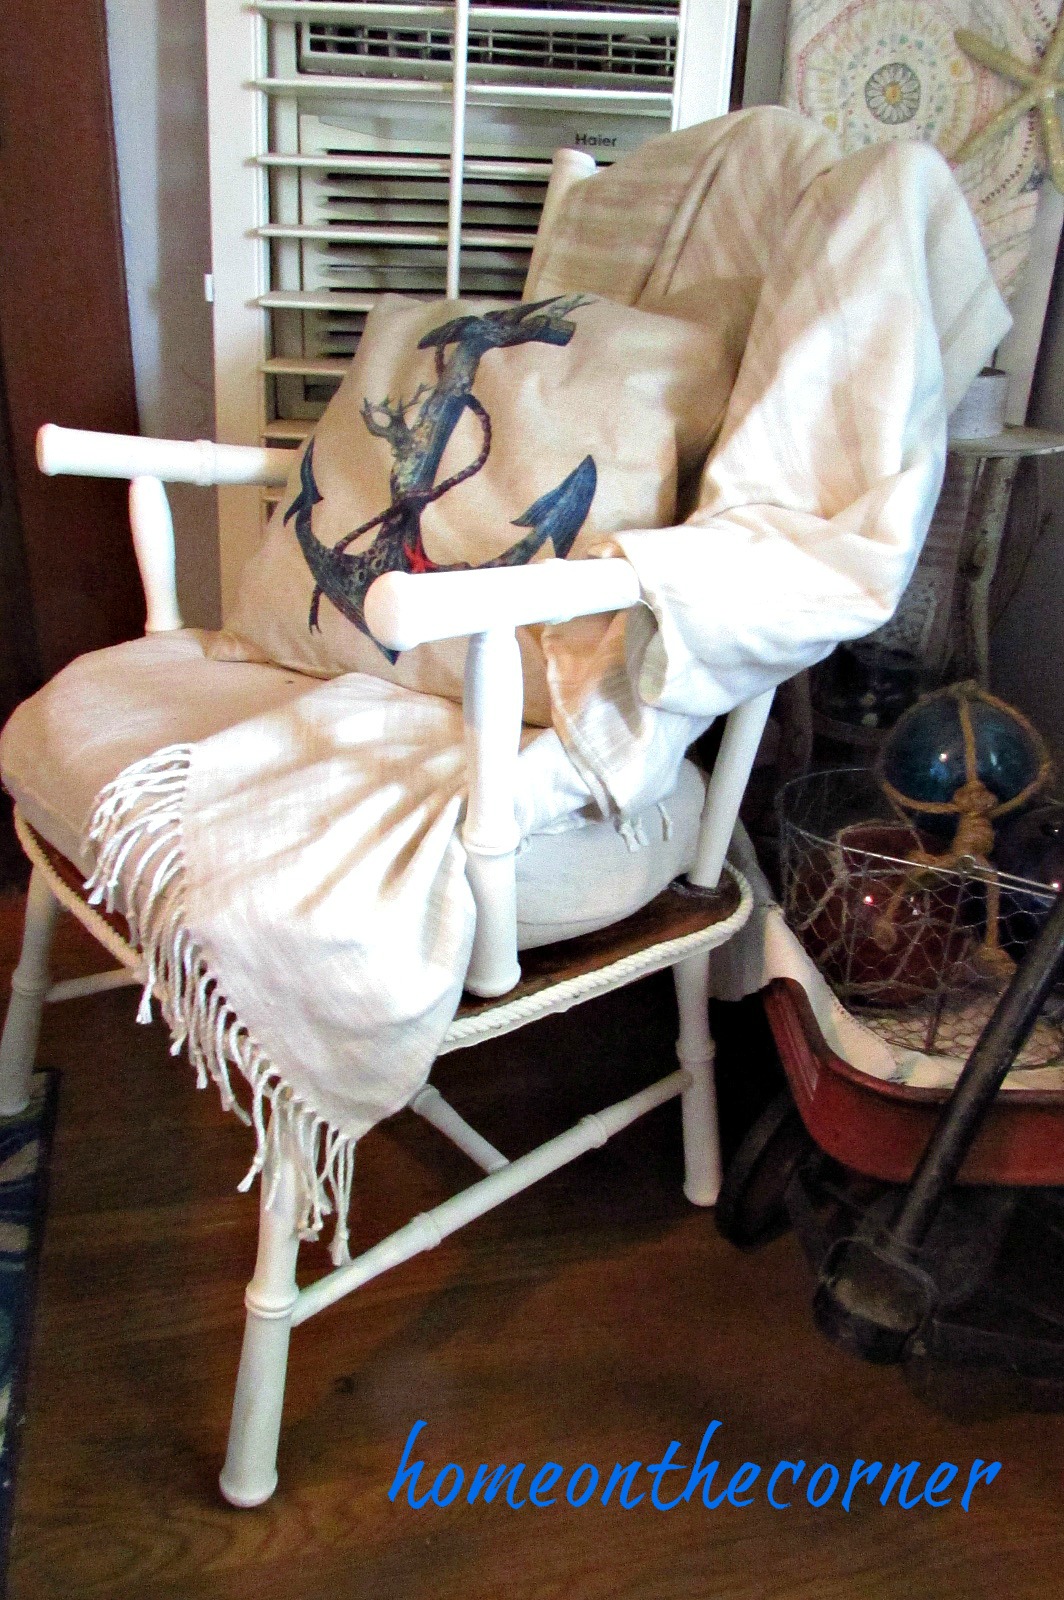
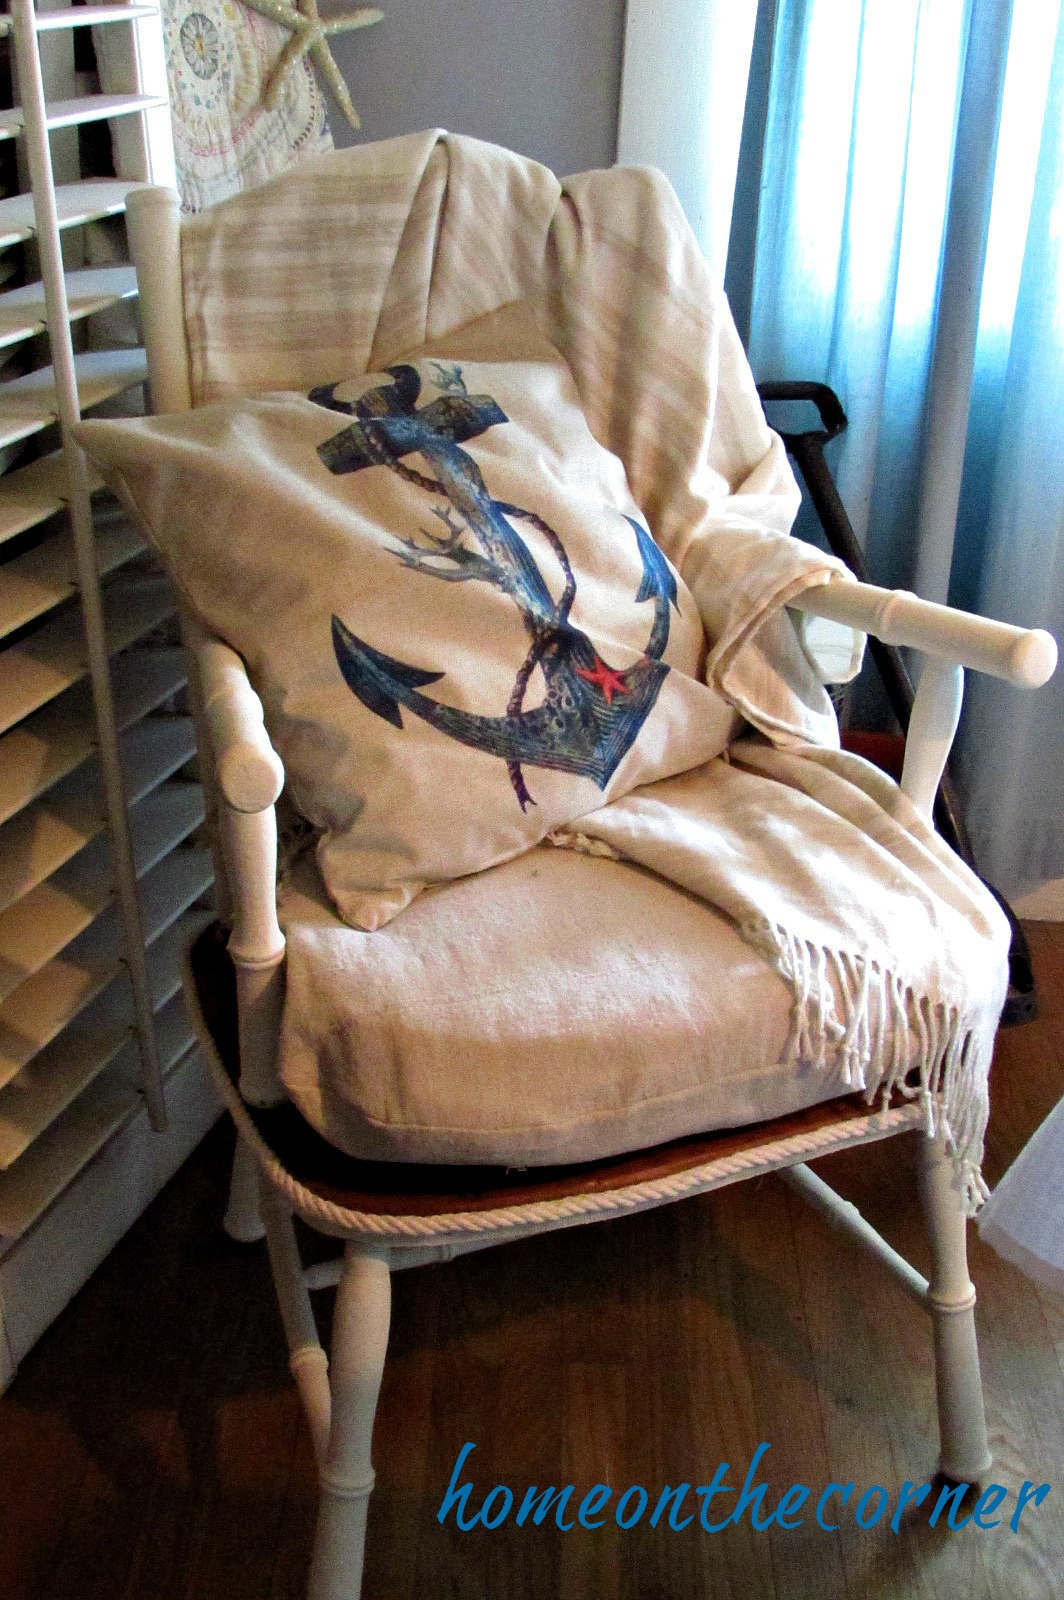
I bought these chairs several years ago at a ‘Junk’ sale. The seats were covered with burlap, but as you can see, they were very stained and dirty. I had bought some vintage fabric at an estate sale and knew they would be perfect for these chairs.

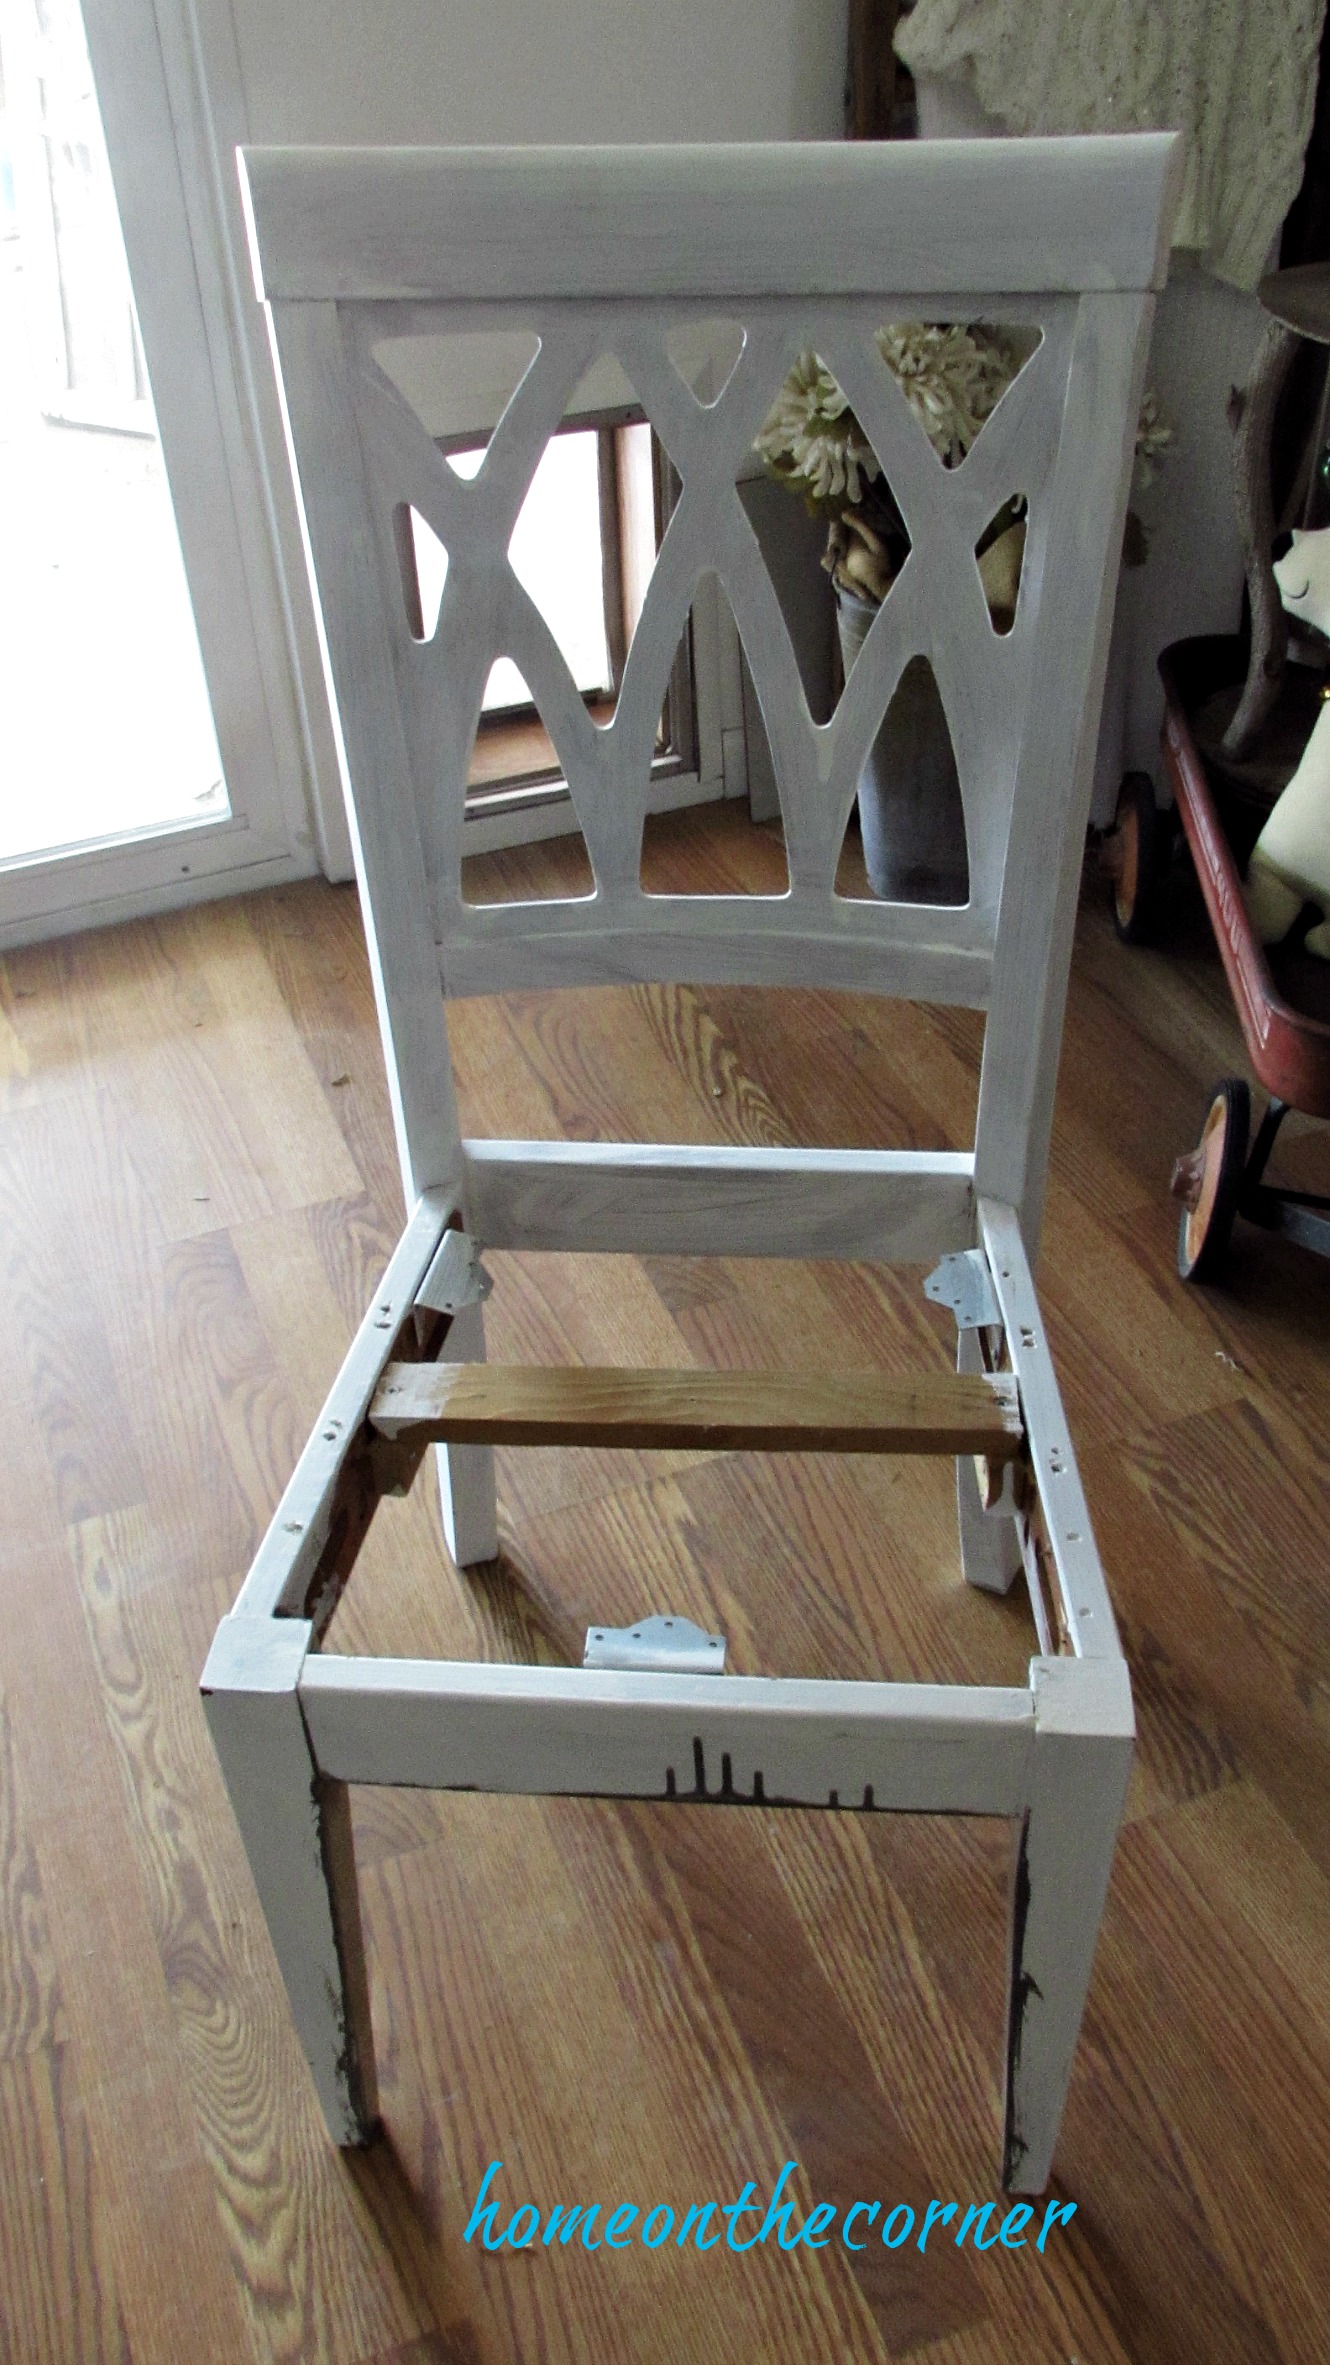
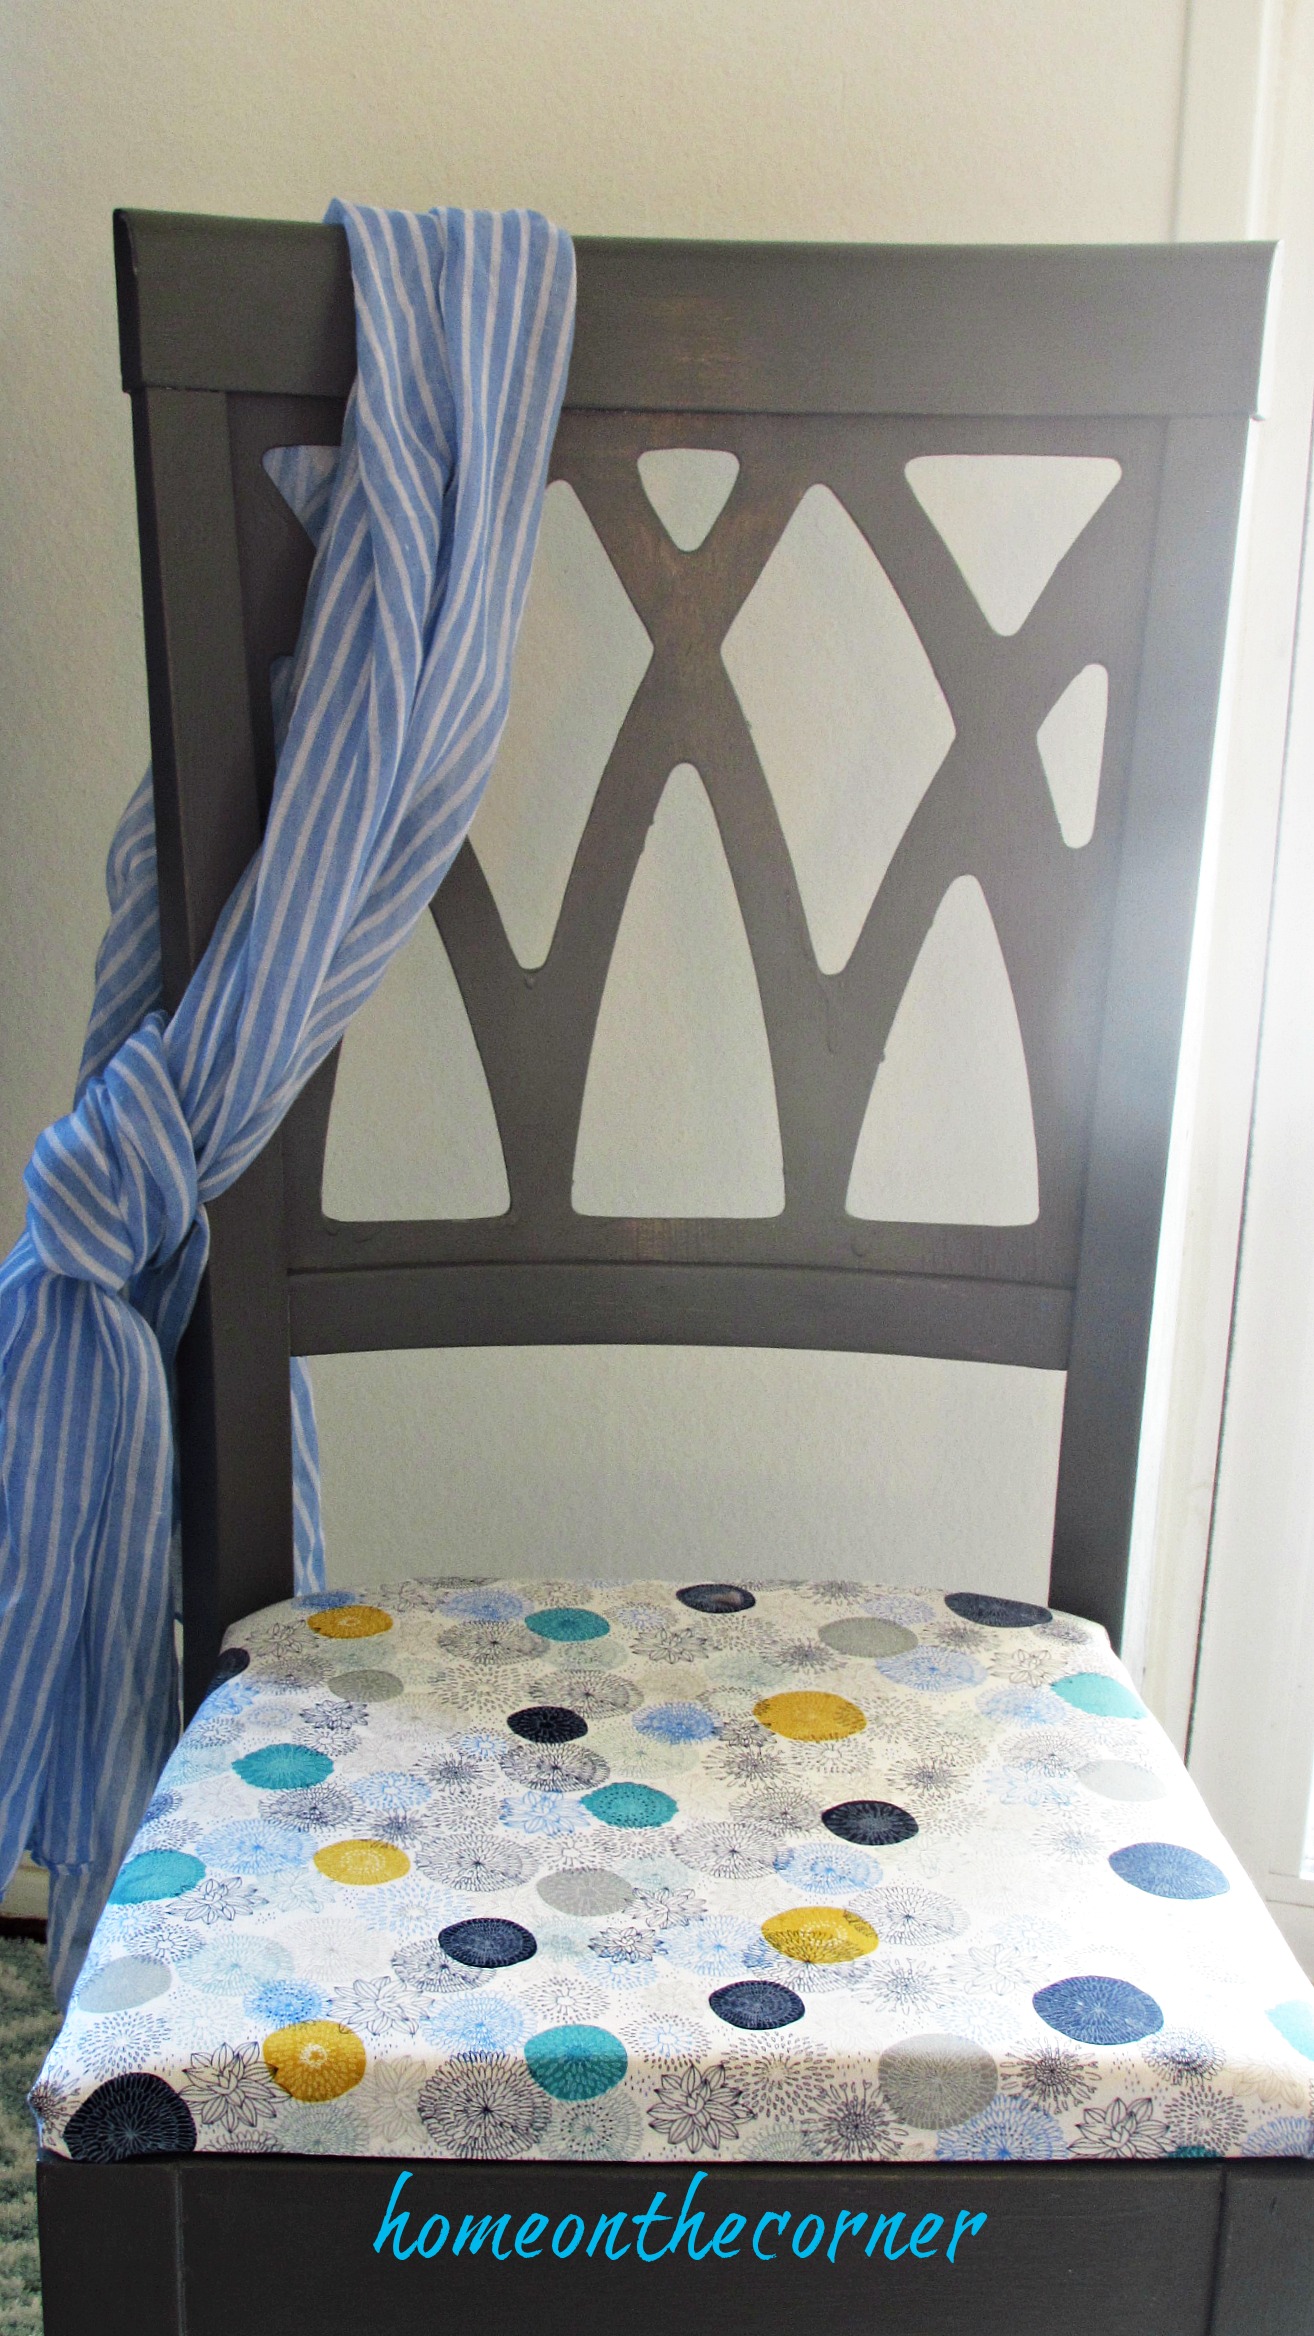
I spray painted the chairs with Rustoleum 2X white semi-gloss paint. I didn’t even take the burlap off when I painted the chairs because I knew the seats would be covered anyways.

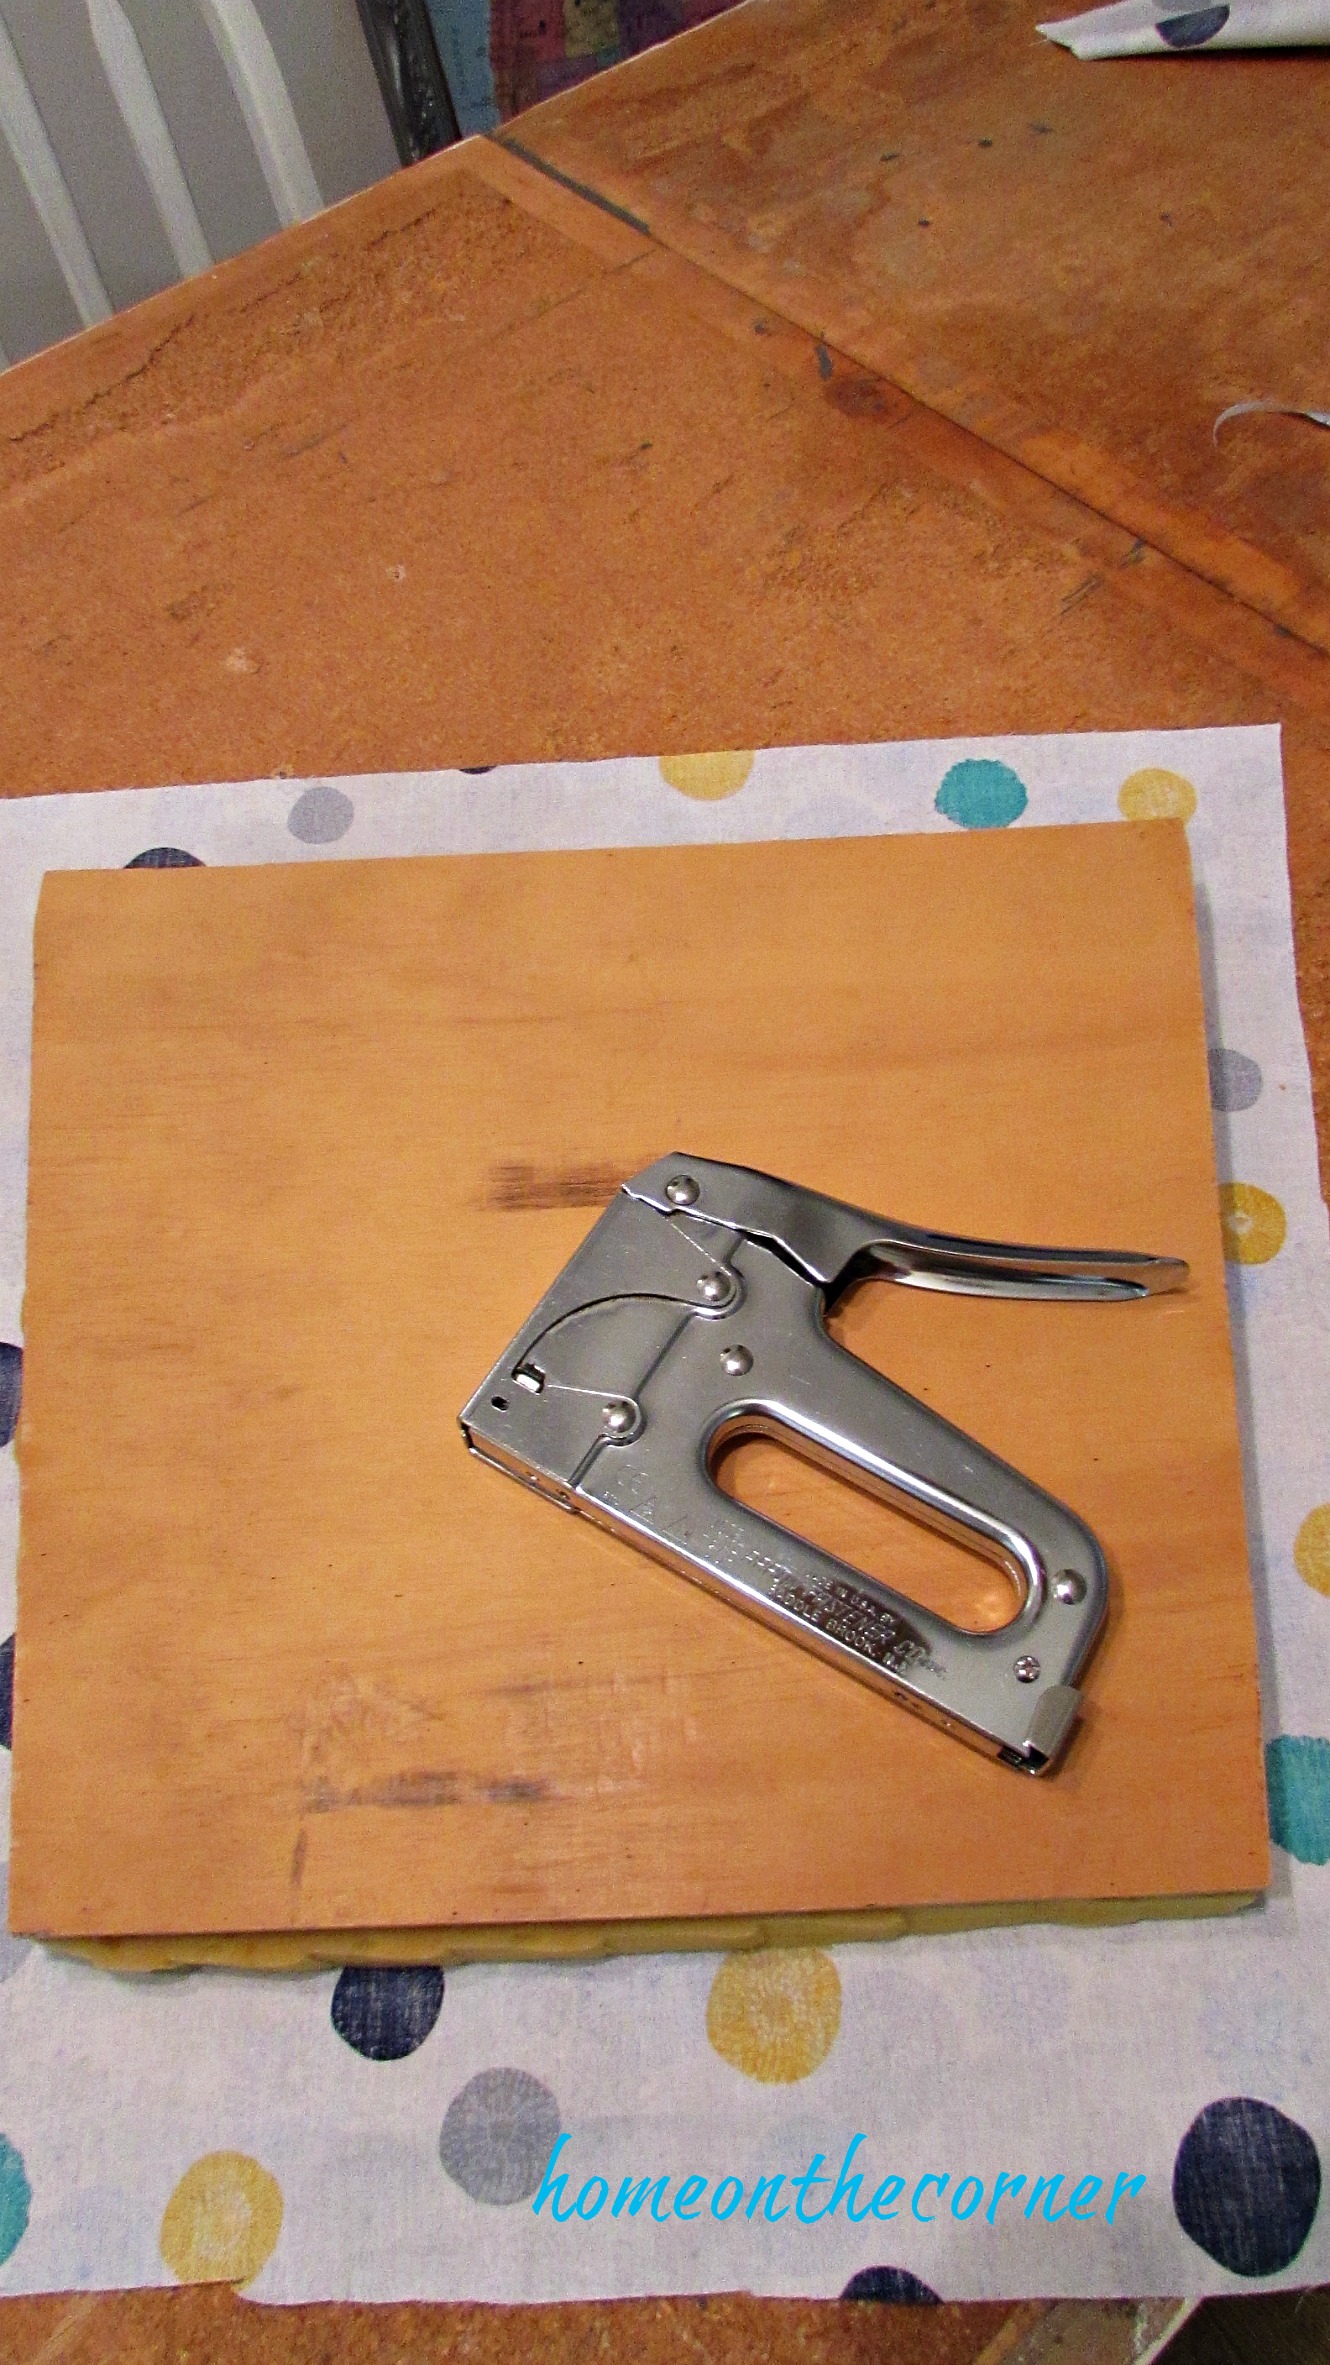
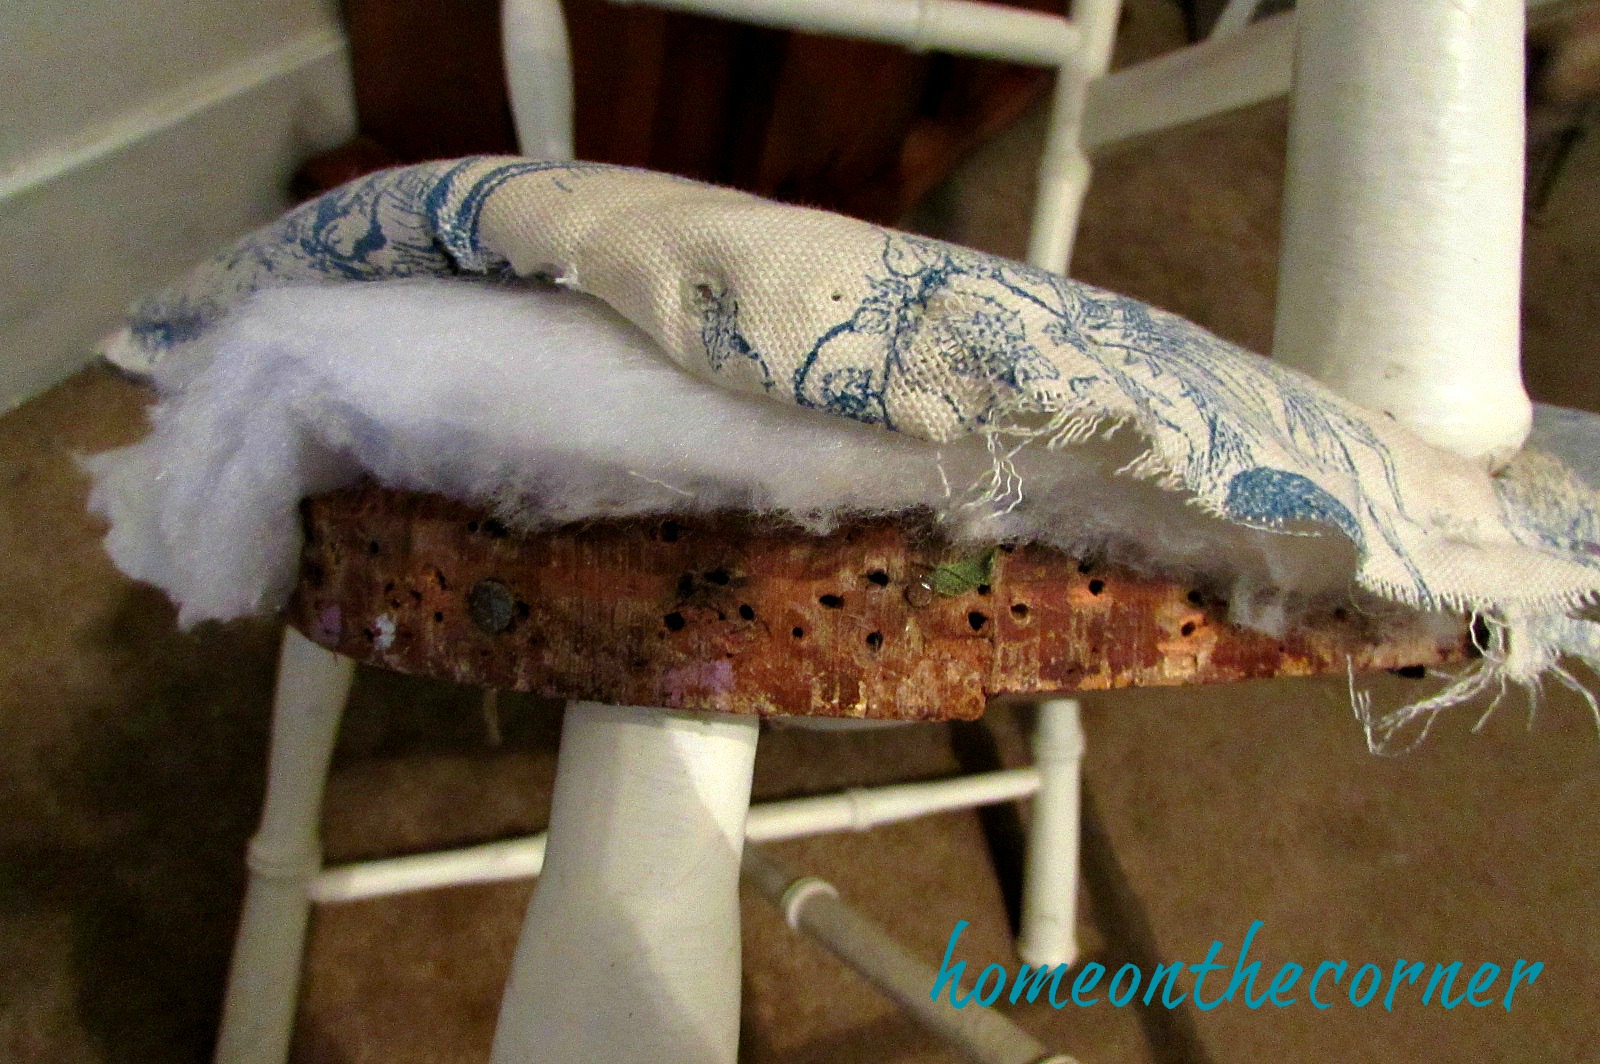
I debated whether or not to leave the burlap on the seats and just put the new fabric over it, but I was afraid the stains on the burlap would go through, so I started to take out all the staples on the bottom of the chair. I used a flat head screwdriver and a needle-nosed pliers to take them all out. It definitely took awhile! Thankfully the foam underneath the burlap was still in good shape.

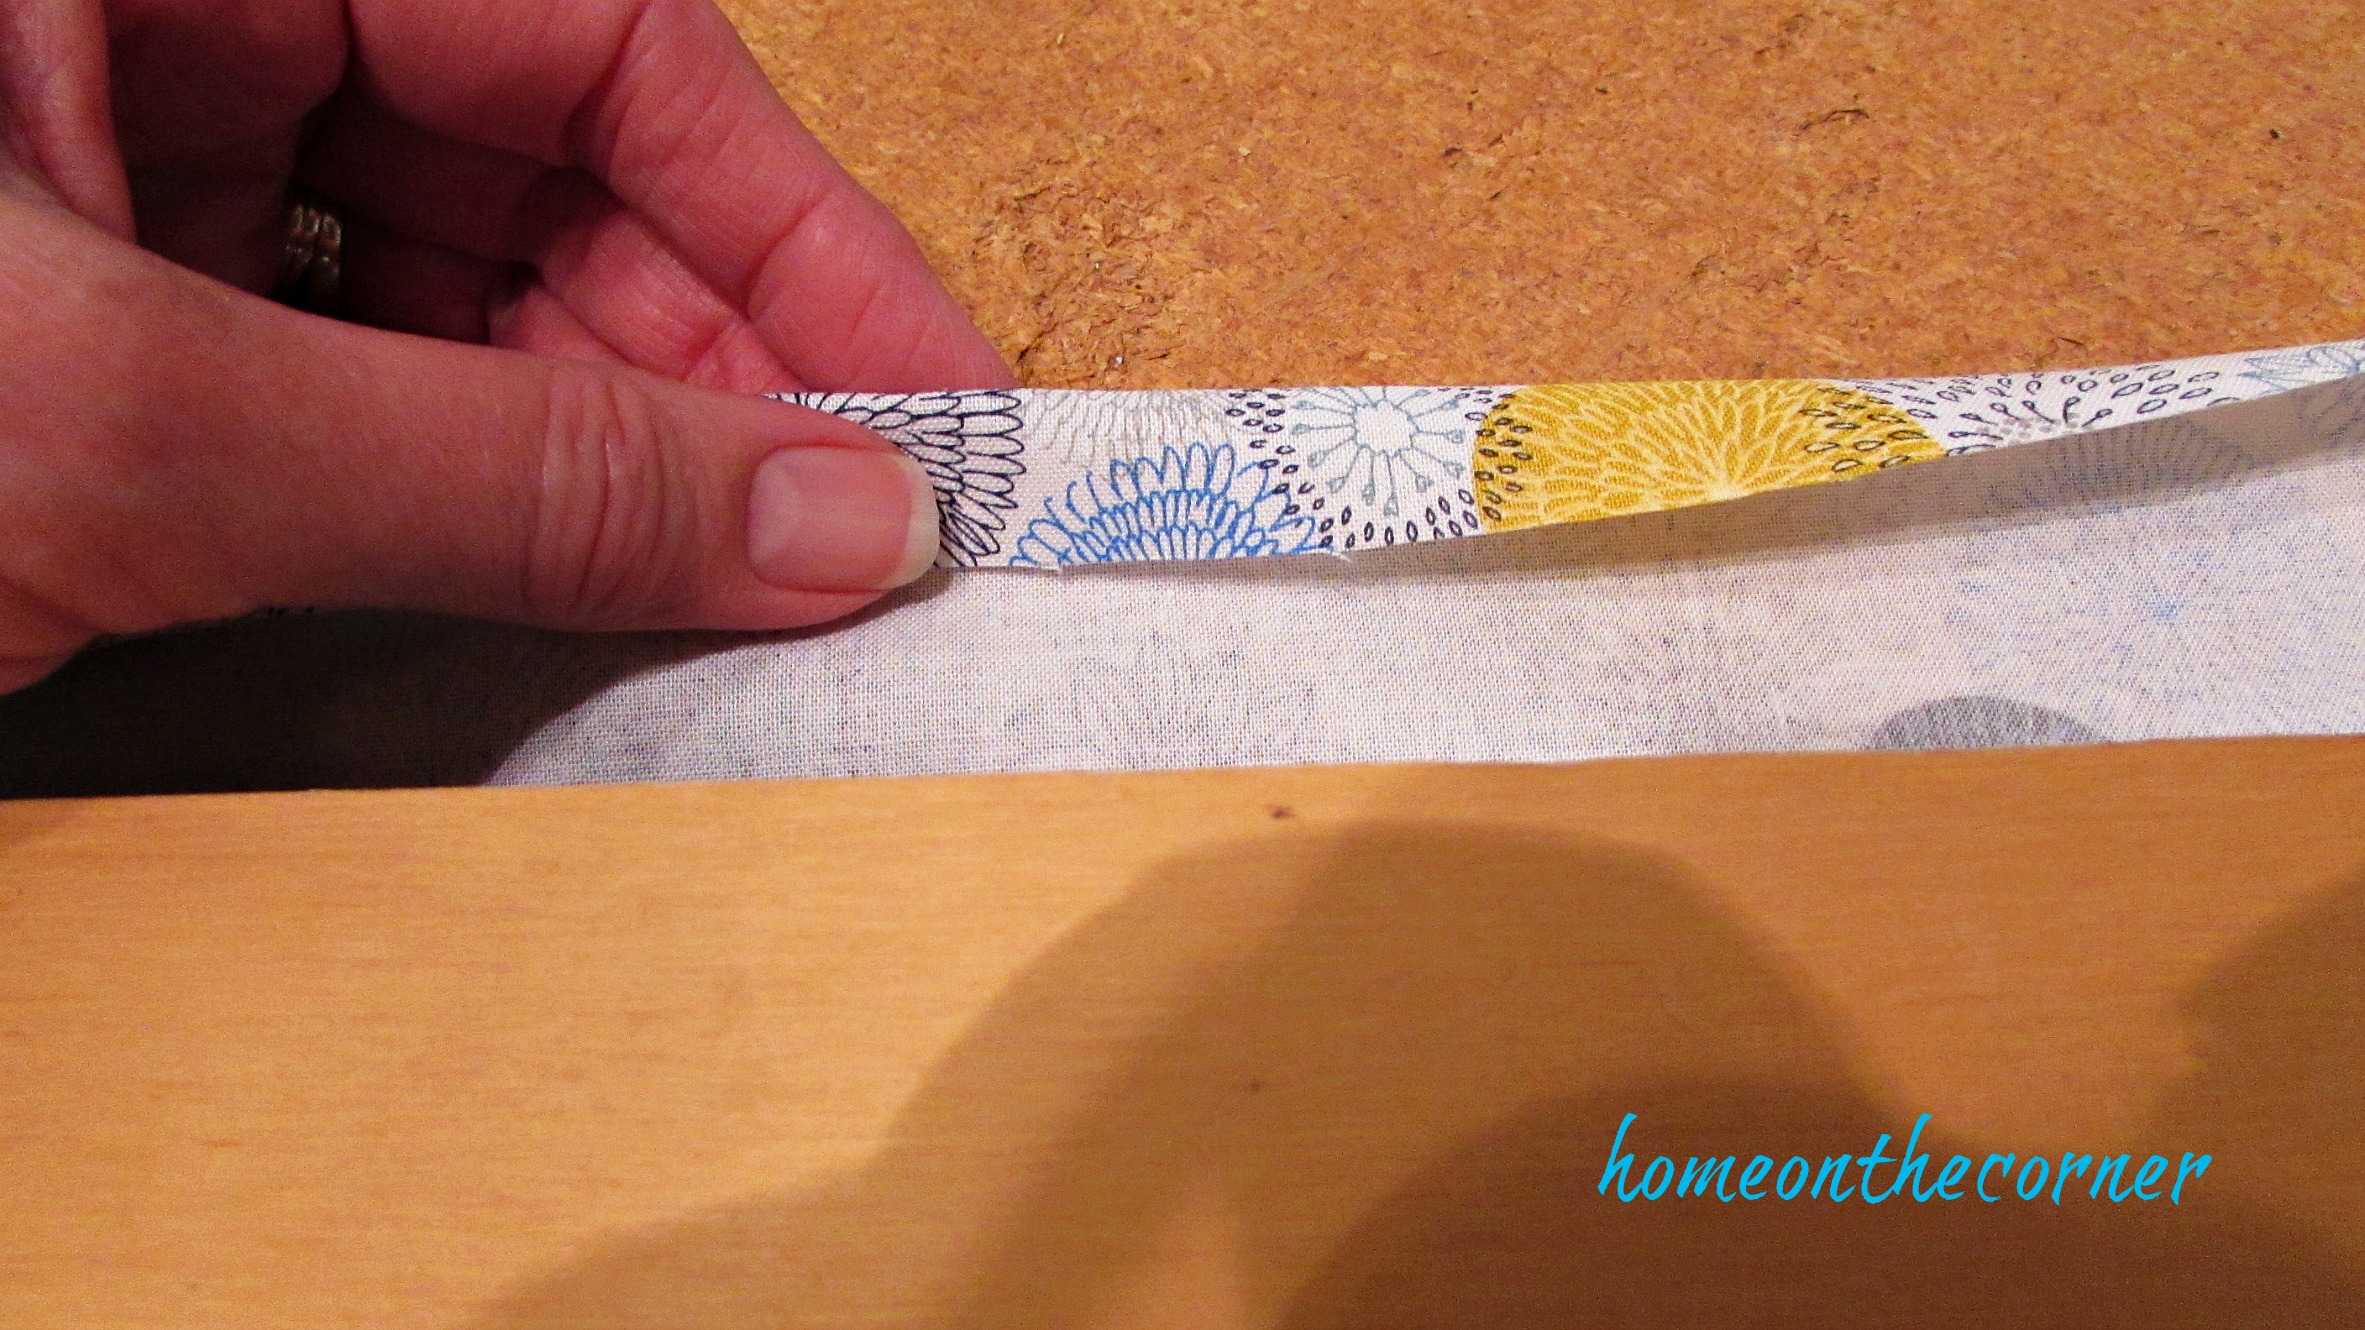
Once the burlap was off, I used it as sort of a pattern for my new fabric.

I used 1/4 inch staples to attach the new fabric to the chairs. I pulled the fabric taut and then stapled all the way around.

As you can see in the photo below, the wood under the seat didn’t get painted. That’s because the burlap covered it before. I was going to cover the chairs the same way as before, but then decided to not cover that part of the wood. I like the chairs much better this way, but I did have to go back and paint those front pieces.

I set up this little table last fall on my back porch. It was such a lovely, sunny day. You can see the chairs with the table set for two!

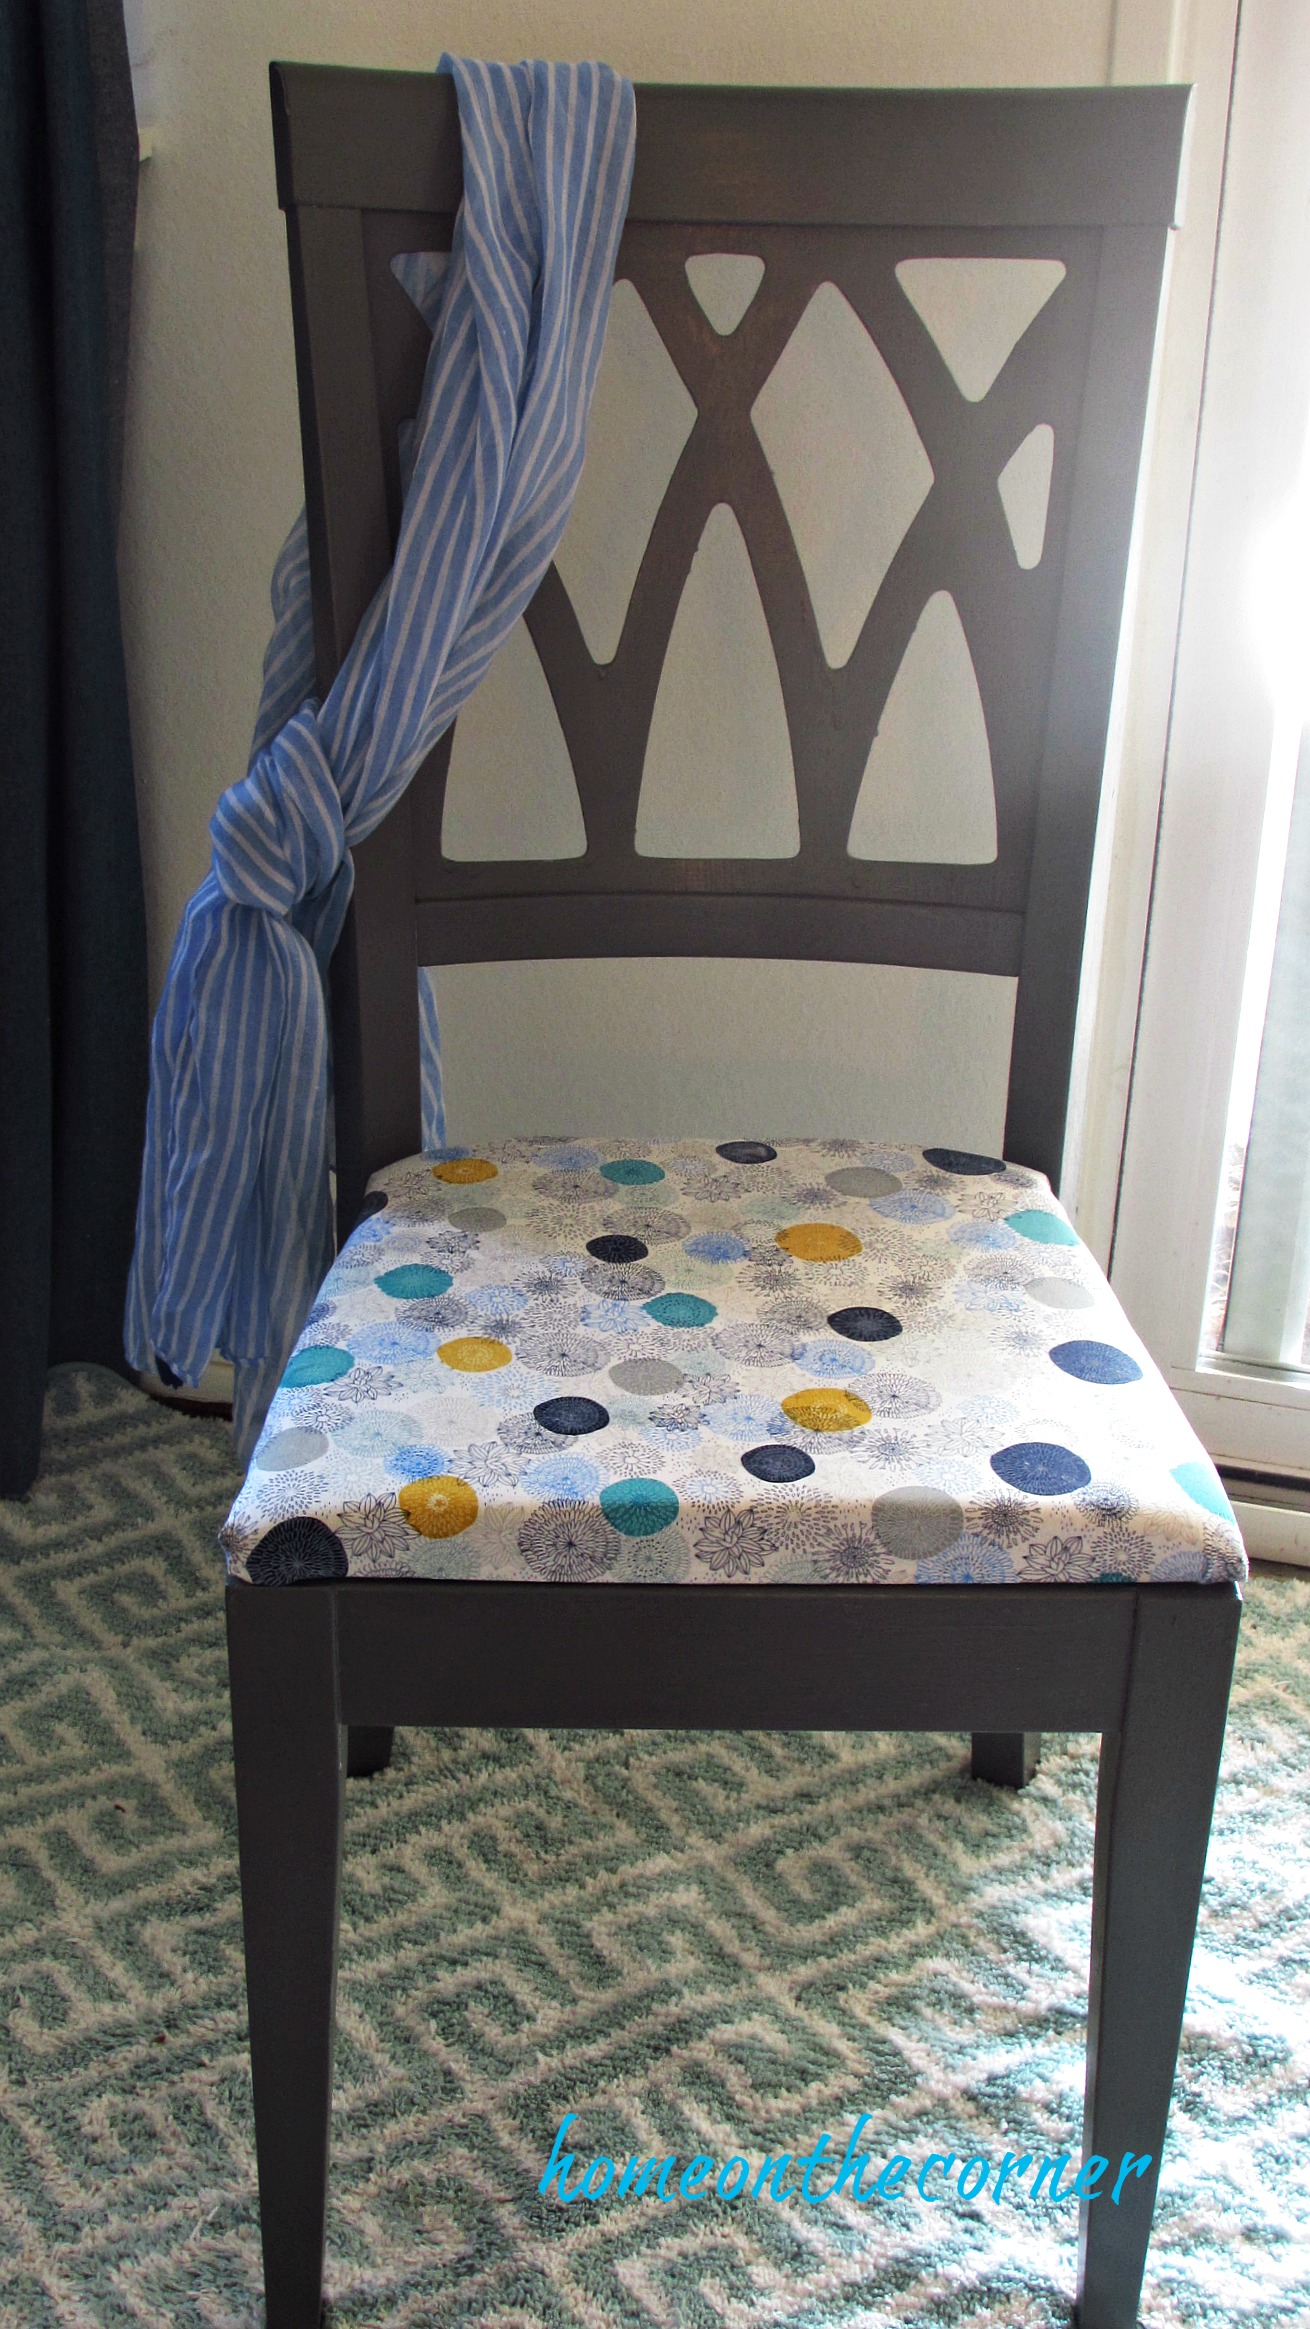
The sun was a little bright over here. The fabric is much more vibrant.

I set up this little sitting spot on the other side of the yard. Can’t wait for all the grass to start coming in as spring gets closer!

I hope you all have a great week and stay safe!

What’s been happening here!

Good morning! I’m so glad you stopped by today! I don’t have a new completed project today, but I wanted to catch you up on a few things that have been going on around here. I have some projects done, but got started on them before taking picture. Oops! I have some projects in the middle of completion, but I have one I can share next week! Yippee!

Here’s the project I will share next week:


I recovered two of my outdoor chairs with…shower curtains! I will detail the process next week. Don’t they look so pretty!

Project number 2: See the wall at the bottom right of the first picture? It was a half wall with posts on the top. Very 1960’s. My husband tore all that out and oh my goodness! What a difference! It really opened up the room! I love it! He also took the drywall off the header above the opening and we are going to try to make it look like a beam. I’m so excited!


Steve also made this plant holder. Lauren featured this on her Garden Round Up Friday post and we both decided we wanted one, so Steve got busy! I planted a couple of succulents and some basil seeds in the others. I love it by the fountain!

hanging plant holder and fountain

I hope you all have a great week! Thanks for stopping by!


Desk Chair Makeover

Good morning! Are you snowed in where you are? I hope everyone is okay! We are finally having some much needed rain! I think I write about this every year, but it’s just been so long since we really had enough. Hopefully it keeps coming! I was also able to get a few projects done during my Christmas break, so here goes!

I found this chair by some trash cans while we still lived at the old house, so that is over a year ago. It’s just been sitting in my garage waiting for me. 🙂 Haley took her desk chair to school with her and had been using one of my kitchen table chairs, so this was the perfect project for the desk in her room.

The chair was a dark brown so I primered it first. I always start with the chair upside down on a table. That way I am sure to get all the underneath parts and don’t miss anything that I have to try and touch up later. Once the underside is done, I turn it over and paint the top. So I started with the primer. I forgot to get a picture of just the primer so you can see some runs from the grey from when I painted the underneath side.

desk chair makeover primered

I went over the whole chair with grey paint next. This was paint I had from Haley’s bedroom. I don’t know the color because it was an ‘oops’ can at Home Depot. I found the fabric at Hobby Lobby at the after Christmas sale. I loved all the different pops of color in it! I can’t have anything too crazy in Haley’s room, so she actually helped picked it out.

desk chair makeover grey with fabricdesk chair makeover floral fabric

I took my board for the seat of the chair and laid out the fabric under it. Then I cut the fabric to a couple of inches larger than the board. This will give me enough to staple onto the board.

desk chair makeover cut fabric to fit

Making sure the fabric is centered, I fold over the edge of the fabric to give it a little more strength. I start by stapling the fabric in the center of each side of the board, making sure it is a snug fit. Once I have the middle staple in, I do a few more on each side to keep it all even. For the corners, I fold it in to make a neat fold.  I have a couple of other posts about recovering chairs if you want to check them out, here and here.

desk chair makeover fabric recover seat

Once the fabric was stapled to the seat board, I screwed the board back onto the chair. And it was finished! Sometimes I wonder why I put off things for so long, when in reality, it doesn’t take that long to do the whole project. Who knows?!

desk chair makeover grey, turquoise

Now Haley can finally have a chair at her desk and won’t have to keep stealing my kitchen chairs! Lol!

desk chair makeover grey and floral

desk chair makeover closeupdesk chair makeover grey and turquoise

I’m so glad I got this project done. One less thing in my garage. Now on to the next one!


I hope you all have a great week!

sunshine-and-blessings-picmonkey

Here are a few other posts you might enjoy!

master-bedroom-closet-makeover       Top Yarn    

diy-spice-drawer-title

My Vintage Chair Makeover

This is a re-post from last year. Hope you enjoy!

I’m back today with another makeover! I have so many projects and I am trying to get them done before  summer will be over and I will be back in school!! It’s much harder during the school year.

grandpas chair anchor pillow.jpgtitle


This chair belonged to my Grandpa, my dad’s dad. He was born in 1898 . He sailed here from Holland and met his wife on the ship. They were married after they arrived in the United States. We have even found their names on the registry at Ellis Island. So much history! My dad received this chair after my grandpa passed away many years ago and it was in my parents room for a long time. My mom was ready for something different and asked if I wanted it. Of course! It has sat in Lauren’s room for a couple of years and I finally decided it was time to renew it.

IMG_6017

First I had to take off all the old material and batting.  Do you see all the little nailhead tacks? Yep, I had to remove all of those, plus staples.

grandpas chair makeover seat

I used a small screwdriver and pliers to help me pull them all out.

This isn’t very pretty :(. I will have to figure out something to cover it up.

grandpas chair makeover

Here is what was underneath everything. I pulled out all these nails too. The ‘stuffing’ is just a pillow inserted into the middle.

grandpas chair makeover wooden seat and pillow

Here it is, all naked. I tightened up the straps with a few more staples underneath and gave the wood a good cleaning. Then I used some antiquing wax on the brown wood to freshen it up a bit.

grandpas chair taken apart

I used the material from the old cover as a pattern to cut out a new one. I had some painters cloth and decided to use that for my cover. I laid the old one on top of the cloth and cut around it. I had to do some trimming afterwards.

grandpas chair seat cover and pad

It didn’t quite come out straight! After trimming, I sewed the two sides together, leaving the back open to insert new padding.  Notice, I purposely left the hem on the back so I wouldn’t have to sew it! 🙂 #justLOVEsewing!! #NOT!

grandpas chair seat fabric

The padding that was in it was in pretty good shape, so I used it again.

I found this pretty twisted trim at Hobby Lobby and thought it would look relly good with the chair, plus it would cover up all the ugly holes. I used the tacks again, but no as many this time.

grandpas chair trim

I did freshen up the paint a bit too, but just with the same color. It’s done and ready to live out more days in our home.  It’s perfect with the beach theme right now!

grandpa's chair styled

I used neutral colors so it would go easily into any room in our home.

grandpas chair top viewgrandpas chair anchor pillow

Thanks for coming by and hope you have a wonderful week!

Sunshine and Blessings

Click on a picture below to see more makeovers!

sketcher makeover 6

Ugly April Makeover-homeonthecorner.com

vintage beverage cart with tassels

New Apartment, New Stuff

Hello everyone!  Welcome to another blog to show you where I live and what I have done with decorating.

So, I wanted to show off the living room and kitchen in my new apartment.  It is a lot smaller than the apartment before, but it is still very nice and cozy.

Living Room Full View

Okay, let me start off by saying that the chair is probably not staying there.  My roommate Mariah’s brothers brought the couch and chair and we aren’t sure what we are doing with the chair.  But, besides that, this is the living room.  This is the view from the kitchen with the front door in the background.  We have a sliding glass door that is behind the chair that looks out onto our porch.  We have the couch, the loveseat, the possible chair, a bookshelf and a TV stand.

Living Room TV

Here’s the bookshelf and the TV stand.  The TV stand was here when I moved in, but I brought the bookshelf and my roommate Bailey helped to decorate it.

Living Room Bookshelf

The bookshelf is super cute!  I covered the back with wrapping paper to add more design to the shelf.  Some of the stuff is mine, where some was the other stuff was the other girls’.

Kitchen

And here is the kitchen.  It’s so much smaller than the last kitchen, but it’s not bad because there’s less to clean.  It’s just a skinny kitchen.  Nothing too special.  But one of my favorite things about it is the oven.

Oven View

I love the sign and the pot on the oven.  Even though it is a misleading jar, it still looks cool on the oven.  It also complements the small sugar jar on the counter next to the oven.  And the sign…I don’t drink that much alcohol, but it is a cute sign.

So that’s the new living space in the apartment.  It’s super cute and cozy!  Even though it isn’t close to being completed, it is still really nice to have a living space.  Oh, and if you’re wondering if I’m changing the cushions on the loveseat, I have fabric to make a cover for it.

sparkle