Grey, White and Blue Master Bath Refresh

Good morning! Well, I survived my first week back at school. Actually, it went pretty well! I have a rather small class this time and it sure helps with the noise level! Last year, they could hear my class all the way down the hall! Anyways, I think we are off to a good start.

I am back today with my Master Bath Refresh! I didn’t completely tear out the whole room and start over, but instead, tried to make it work with what was already there.

*This posts contains affiliate links for your convenience. I have linked to similar items at the bottom of the page.  Any purchase made will not cost you any extra. Thanks for your support.*

Here are a couple of before pictures. The paint was very white and and there was a lot of paint scraped off on the cabinet. The mirror and cabinet were circa 1970.Master Bath 2

The floor was part carpet (#gross) and part linoleum.

Master Bath

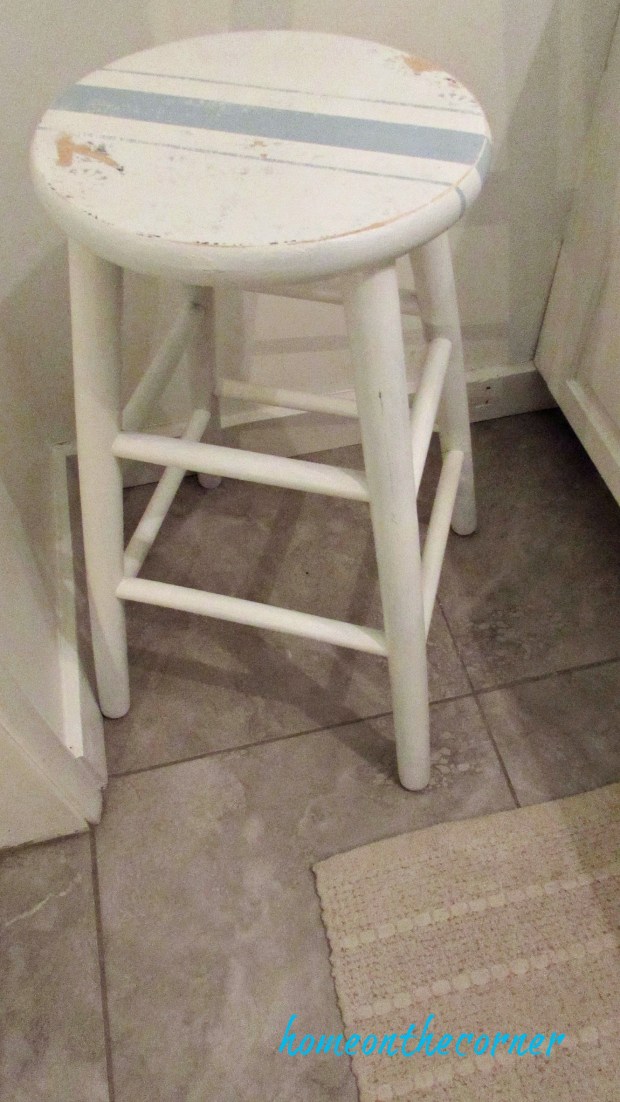
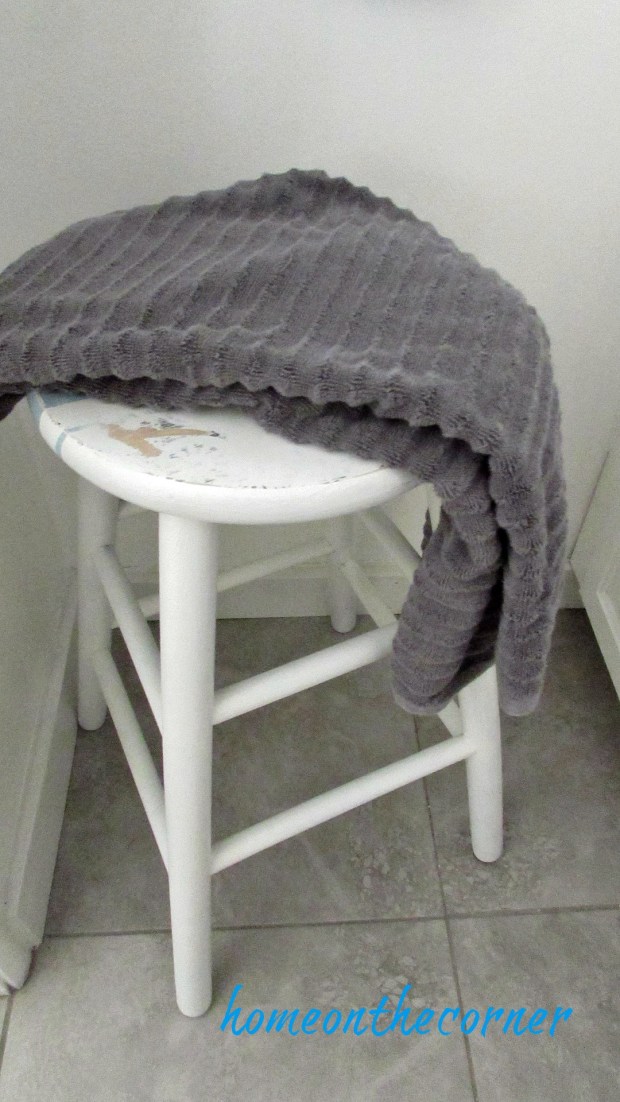
Now: the new and improved! Sorry the pictures aren’t the best. The room has no natural light. The walls and cabinets were painted Benjamin Moore Simply White. I kept the same silver knobs and handles. You can see I added one of my beachy bar stools, which is the perfect spot to set your towel or clothing. The hook above it holds my hanging clothes.

master bathroom blue, white and grey turquoise

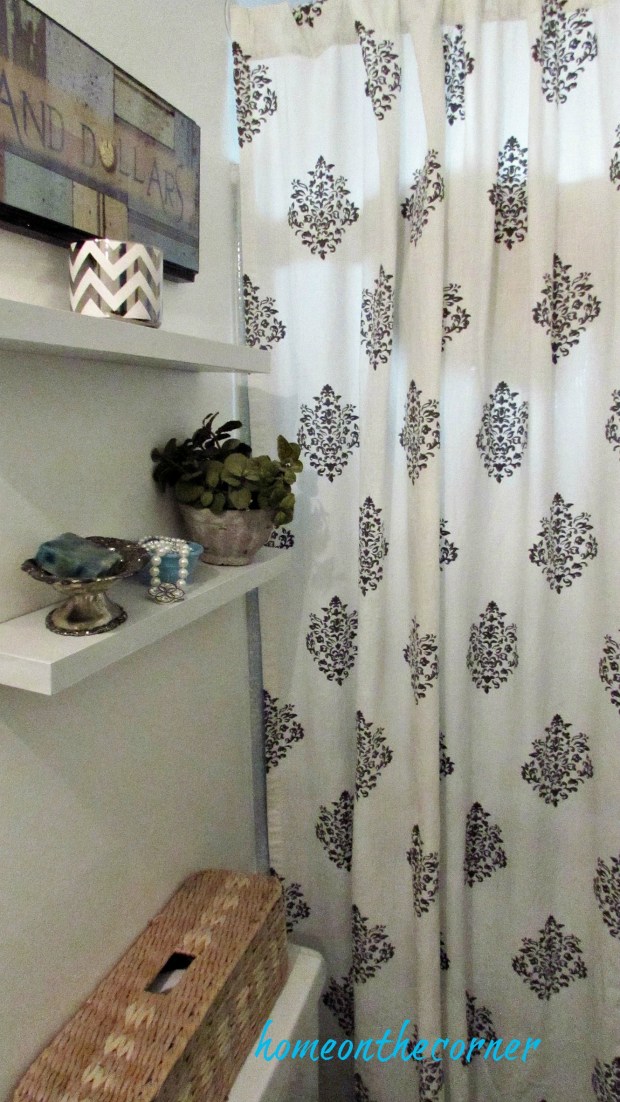
I finally found a shower curtain I thought would work with the blue tile. It’s really long so I had to hang it up high, but I love how it looks!

master bathroom grey, white and turquoise

I was able to replace the dated light fixture and the mirror. I found the light fixture for only $20 on clearance at Lowes and the mirror I found at Hobby Lobby.

master bathroom light fixturemaster bathroom shell mirror

We added the 12 inch grey tile to the floor. What a difference! I love how all the grey, blue and white tie together.

master bathroom tile floor

I used the top section of a bed headboard ( I think!) to make the towel rack. I cleaned it up, painted it and added some black hooks. I hung a weathered seahorse above it.

Master bathroom grey towels

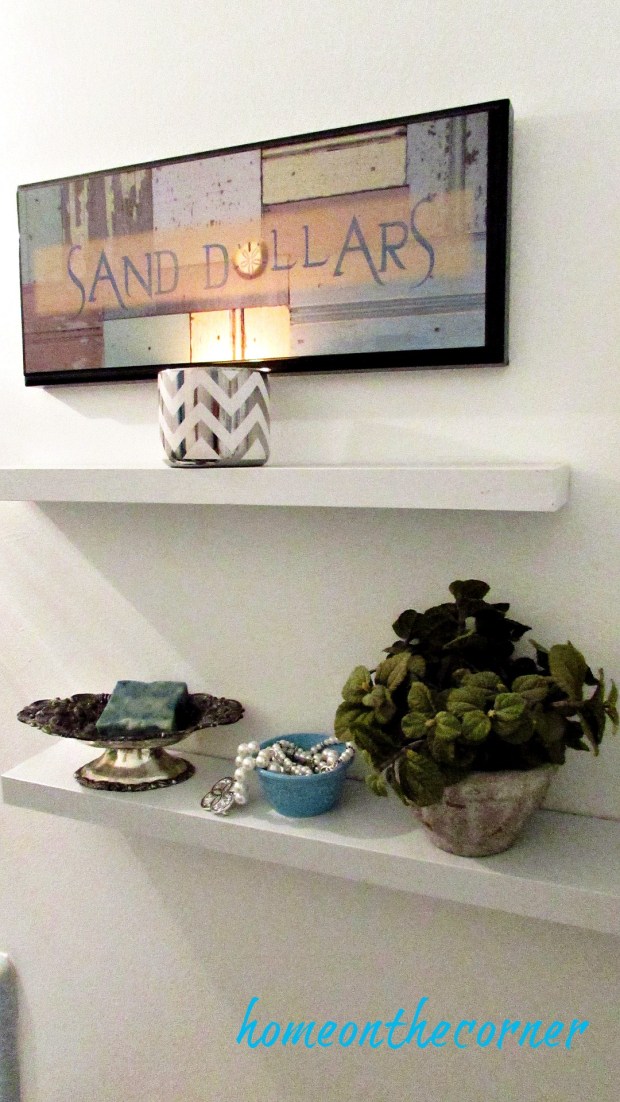
I hung two floating shelves above the toilet and added a few decor pieces-a candle, a plant, a silver dish. I also found a Sand Dollar sign to hang above the shelves.

master bathroom makeover sand dollarsmaster bathroom makeover stool and grey towelmaster bathroom makeover wooden seahorse

I found these great little baskets at Target to help organize all my bathroom essentials.

master bathroom cupboard storage

Some pretty baubles in a turquoise bowl!!

master bathroom makeover pearl necklace

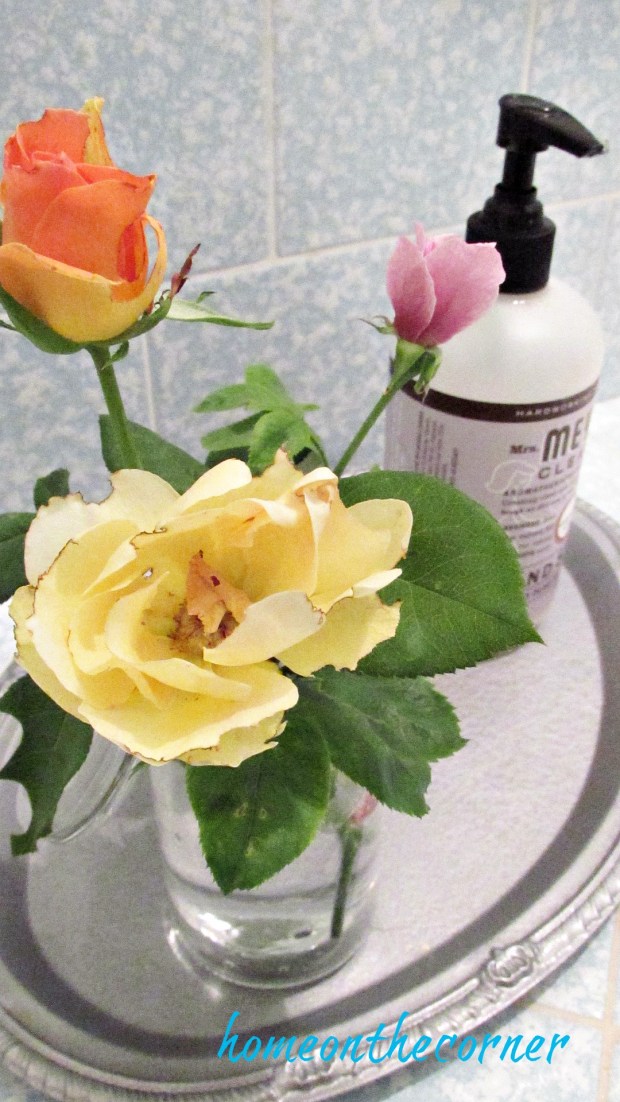
I picked some pretty roses and placed them on a silver tray to add some extra beauty to the room.

master bathroom makeover roses silver traymaster bathroom makeover fresh roses

I hope you enjoyed the little tour! I’m sure glad I finally finished the master bathroom. It’s so much nicer now! See you next week!

sunshine-and-blessings-picmonkey


From Black Lace to Turquoise Beachy

Hello! Sorry about missing last week Monday! Between being gone two weekends in a row, getting stuff done at school, working at the animal shelter, and just life, a post didn’t get written! Just the way it goes sometimes. This week we take Haley to college. Wah! How did it come to this!? I’m going to miss her greatly, but I am also excited to see where this takes her and to see everything I know she is capable of accomplishing!

Remember when Lauren painted these bar stools? After moving this summer, she decided she didn’t need them at her new apartment. So guess where they end up? That’s right…mom’s house! They don’t really fit in my decor with the black and white, so I went with a more beachy look.

I sanded down the top first, not completely down to the wood, but just to get most of the black off. I kept a bit of it because I knew I wanted to sand down whatever I painted and let some of the black show through. The next step was primer. I used my favorite Kilz Primer.

bar stool makeover

I used my Benjamin Moore Simply White over the whole stool. After the paint dried, I used painters tape to make stripes on the seat of the stool. I’m not very good at measuring things out, so I just eyeballed it, trying to keep my lines as straight as possible. I actually did pretty well!beachy barstools with painters tape

I pressed down the edges of the tape really well and then I used the same ‘unknown paint color’ that I used in my bedroom and the front door. You can see it here.

beachy bar stool with blue stripes

After the paint dried a bit, I peeled off the tape. The lines look pretty good!

beachy bar stools farmhouse stripes

I used an orbital sander over the seat and around the edges. I sanded down to the black in some places and to the wood in other places.

Here it is in the bathroom. You can still see some of the black showing through.

bar stool beachy makeover turquoise stripesbar stool beachy makeover white and bluebar stool beachy blue and white stripe

I also used one in my entryway. It’s the perfect place to take off your shoes or leave a bag for a moment.

bar stool beach stripes white and bluebar stool beach stripes blue and white

So what do you think? I love how these turned out! I have two more and I am thinking about painting them the same. I’m so glad I got this project done! On to the next project!

sunshine-and-blessings-picmonkey

*Here are some of the products that are similar to what I used. This is a sponsored post.*


Here are a few other previous posts you might enjoy!

Travel Sign 2

filing cabinet makeover files, chair, pillow  wooden crate starfish, garland, blue

How to Use an Old Atlas for New Decor

Hello everyone!  I hope you have all had a wonderful week so far and are ready for the weekend.  Anyone have any awesome plans?

Well this weeks project was originally seen when I was in Seattle on my trip.  I saw this and knew that I could make it myself.  So with a small bit of help from my mom for the main supply, I am bringing you a wonderful DIY.

Supplies You Will Need

Supplies you Need

An old atlas or maps (mom found hers at a thrift store)

Glue

Paperclips

A pencil

A frame

Chip letters

Step 1

Paperclipping

Decide how big you want your pieces.  There was actually a pre-cut piece in the atlas that I used as my sizer.  I would paperclip my sizer to the atlas and cut around it until I had the two pieces.  I tried to use pages with a lot of blue so I ended up using a log of pages with the ocean or lakes as my pieces.

Step 2

Roll you pieces.  I would put a small line of glue on the edge of the paper before I rolled it around the pencil.  And at the end I would put more glue to secure the edge.  I would then use two paperclips to hold it down to try to dry.  That way the roll didn’t lose its shape and the glue could dry.

Step 3

Template

Measure out your frame.  I bought a 5×7 frame from Dollar Tree and took the glass out of the front of it.  I turned the paper over so it was white and laid the atlas rolls out in a pattern.  I found a few spaces that needed to be filled in with smaller rolls.  After using some Elmer’s glue, I was able to move on to the final step.

Step 4

Attach your chip letters.  Since I used atlases, I decided to make the word travel.  And I felt like it was fitting since I saw this while I was traveling.  So after a lot of gluing and drying, here is the finished product!

Travel Sign 1Travel Sign 2Travel Sign 3Travel Sign 4

I love how it turned out.  And I definitely plan on hanging this on my map gallery wall in my living room when I finally get around to it.  I hope this you enjoyed this DIY and if you have any questions please let me know!

sparkle


Rustic Crate with Starfish

Good morning! Are you ready for another week? Are your kids in school yet or do they still have a couple of weeks off? I don’t start until August 28, so I still have a little bit of time to get some projects done. I have a pretty easy one today.

I have had this wallpaper border for longer than I can remember. I keep coming across it in my stash and think I should do something with it. Well, I finally came up with an easy project. I didn’t use too much of it, but at least it’s a start. A few weeks ago, I bid on a couple of crates from an online auction nearby and ended up winning these 2 crates, plus a few other things. I painted both of them white, giving one to Lauren, which is the one I forgot to take after pictures of. I did better this time. 🙂

*This post contains affiliate links for your convenience. Any purchase made will not cost you any extra. Thanks for your support.*

wooden crate makeover

I left it rough so it would still have a rustic look to it.

wooden crate painted wallpaper roll

I cut a piece of the wallpaper to fit across the center of the bottom of the crate. I cut it a little longer and then I will trim it after it’s applied. Because this is old wallpaper, I had to get it wet first, so I dipped it into a sink full of water.

wooden crate with wallpaper border

I had a spatula handy, so I used it to smooth down the paper and make sure all the bubbles were out and the edges were down. Once the paper had dried, I used a blade to cut off the excess.

wooden crate apply wallpaper

I’m thinking of using this in my bathroom, if I ever get it done, but for now, I placed it on my bar cart with a few other summer items.

wooden crate starfish seashell garland

A lantern and some seashells bring it all together.

wooden crate seashells and lanternwooden crate seashells blue, neutralwooden crate starfish wallpaper border

I made the seashell garland a few years ago.

wooden crate wallpaper border with seashellswooden crate starfish, garland, blue

I hope you are enjoying your last few weeks of summer! See you next week!

sunshine-and-blessings-picmonkey


Here are a few other seashell DIY’s you might enjoy.
boho seashell mobile title
      rattan plate holder number 2seashell specimen art title

The Post That Didn’t Happen

I had it all planned. I prepped, painted, and planned. And then..forgot the after pictures. I painted something for Lauren for her birthday and then totally forgot to take pictures after I was done. So close to amazing!! Which brings me to KariAnne’s book! Like how I did that?! If you haven’t heard about it yet or missed it, KariAnne Wood has written a book, ‘So Close To Amazing.” It is amazing!! I tells about the family’s trip from Dallas to a farmhouse in Kentucky and all the adventures along the journey. You can pre-order the book here.

Since I don’t have a new post, I thought I would re-share this one. Enjoy!

solar lights title


I don’t know about in your part of the world, but here in California, we need to make reservations for camping in the summer, in the month of March. Crazy, huh?! So when I made a couple of reservations, it made me think of these solar lights I made. I’m sure you have seen these all over the internet, by instead of mason jars, I used plastic peanut butter jars. This way I don’t have to worry about glass breaking in the trailer or at a campsite.  I started with a clean jar.

solar light peanut butter jar

I bought a couple of solar lights from the 99¢ Store. I removed the clear plastic cover off the light.

My supplies

I cut a square in the top of the peanut butter lid. I used a razorblade for the first one. It was a little tough, but it was so windy outside, I really didn’t want to go out. The second jar, I used a dremel. Much faster!

homeonthecornersolarlight2

After cutting out the hole, I used E6000 to attach the solar light, making sure the solar part is facing up.  I’m sure other types of glue would work too.  Let it dry for about 24 hours.

homeonthecornersolarlight4 I


I added some twine and string just to make it look pretty. I also spray painted one of the lids so it would match my camping dishes. I put some rocks in the bottom so the lights wouldn’t get blown away or topple over.

homeonthecornersolarlight6

Doesn’t  it look nice! I love how it adds just a little bit of light, especially at night.homeonthecornersolarlight5

(I didn’t actually go camping to take these pictures. They are in my backyard. That explains the cat on the table! She was being nosy!)

homeontheWcornersolarlight8

It’s also nice if you have to go out later. You will have a little light to guide you.

homeonthecornersolarlight9

These would work great for your yard too. Last year, we had our power go out for awhile. I brought a bunch of these in so each room had a little light.  It sure made getting around a little easier and safer. What do you think? Do you make reservations already for camping? If you try these out, let me know how it works for you!

sunshine-and-blessings-picmonkey


Other post you might like!

Ferris Wheel Ca. Adventure