What part of the house is NOT a Mess?

Good morning!  How are things in your neck of the woods?  Our weather is pretty crazy right now with buckets of rain! We need it so badly, especially the snow in the mountains, so it is pretty wonderful!

Our house is still a complete disaster! Before we moved in, Steve had removed all the popcorn ceiling, but we hadn’t had time to do anything else. So now we had the ceiling textured. What a mess! Even though everything was covered with plastic, there is still dust everywhere! We have had everything primered now and the family room and dining room are done.  There is still the living room, kitchen, 3 bedrooms, the hallway, and the entry. Still a ways to go, but at least we are seeing progress. So since the house is still a mess, I had to find a project to be able to show you.

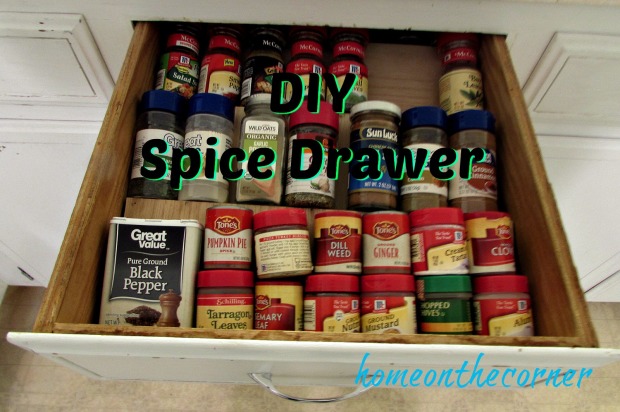
I knew I wanted to do something different with my spices, especially since I have so much more storage in this kitchen. This worked great when I didn’t have much storage space. I was able to see all my spices at once. I ordered these from Amazon. This is what I did before:

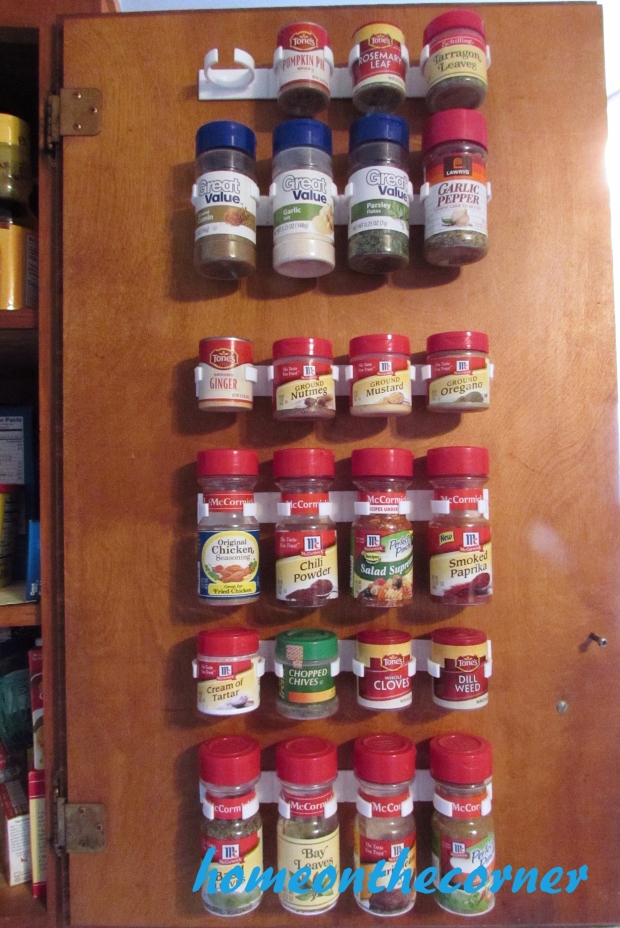
But I had seen this idea, and knew it would be perfect.

diy-spice-drawer-title

Here is the link to the original post I saw: How to Make a Spice Drawer Organizer

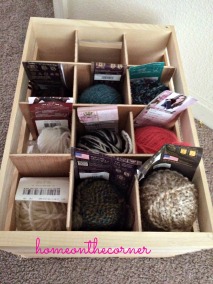
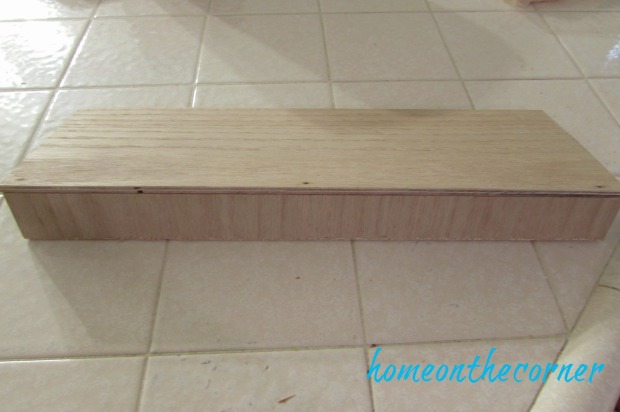
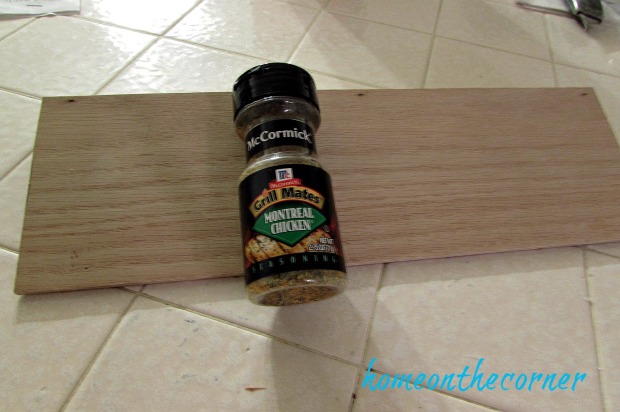
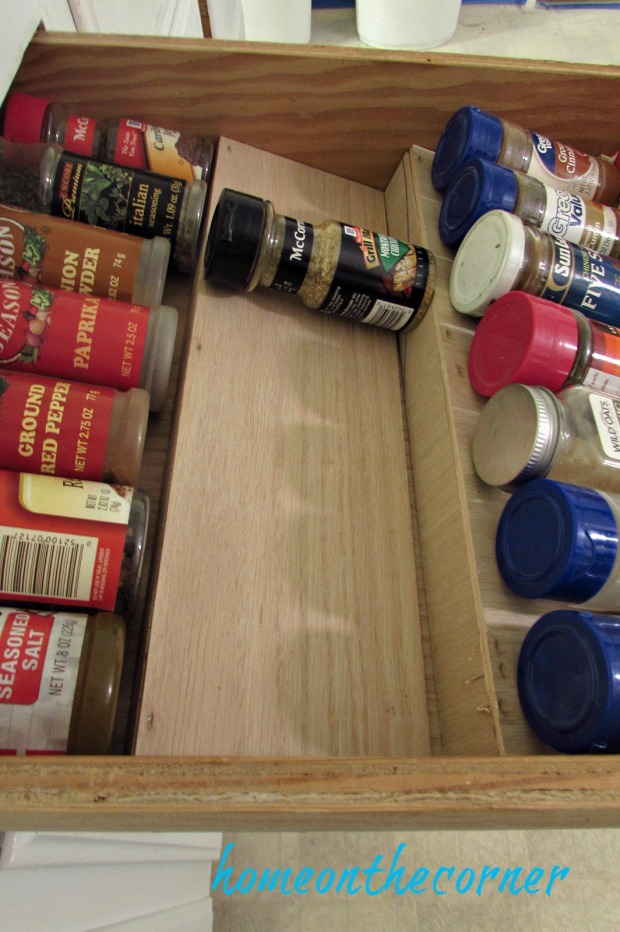
I am not going to add all the measurements, because every drawer is going to be a different size, but you can get the general idea from the pictures.We used 1/4 inch thick wood and cut 4 pieces the width of the drawer. We also made sure they were tall enough for the spice jars.

diy-spice-drawer-organizer

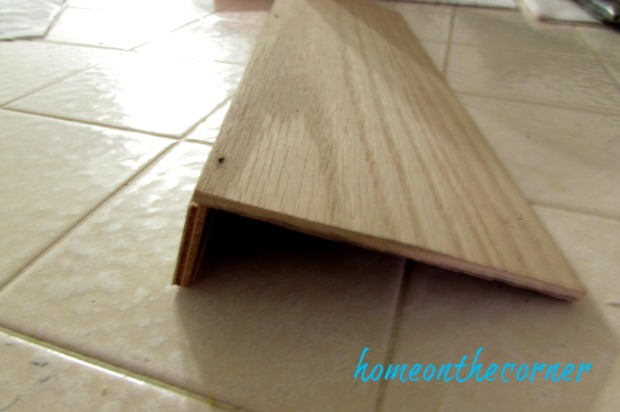
The risers were cut so that the spices could sit on them and the drawer would still open and shut.

diy-spice-drawer-back-view

The bottom of the jar is going to rest on the riser of the shelf in front of it.

diy-spice-drawer-measure-with-spice

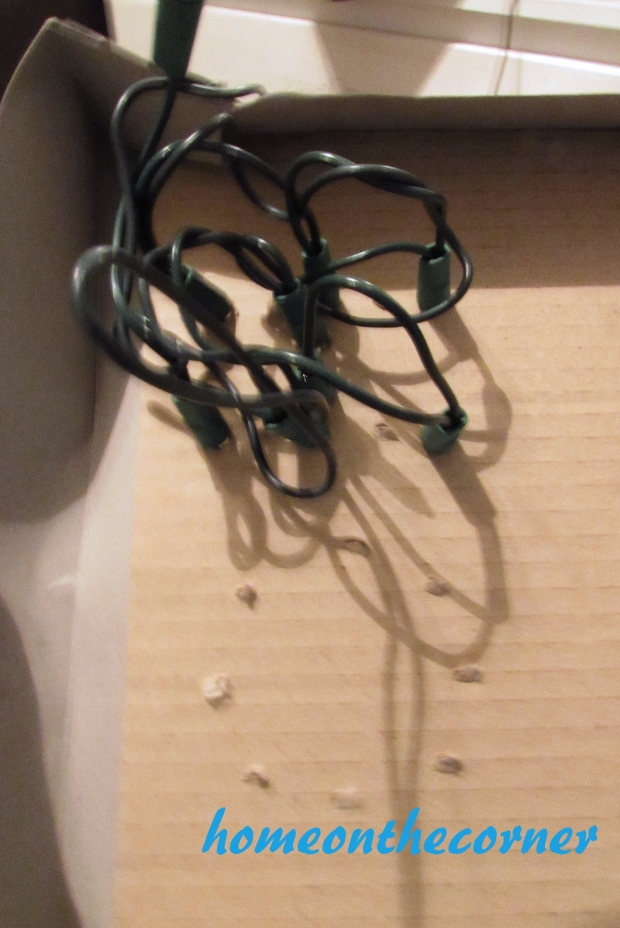
Here is a side view so you can get a better idea of how it works. The jars in the back were a little bigger than the others., so the riser had to be shorter for that one.

diy-spice-drawer-slanted-shelves

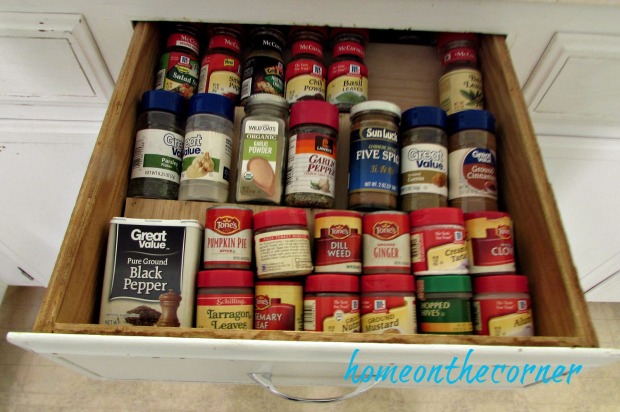
I really love how this turned out! I have it right near the stove so I can reach for whatever spices I need. It also helps to keep track of what I already have or may need the next time I go to the store.

diy-spice-drawer-all-in-a-row

I hope your new year has been off to a good start! Thank you so much for following along on our new house adventure!

sunshine-and-blessings-picmonkey

Here are a few other posts you might enjoy! Just click on the picture to be taken to the page.

Top Yarn   silver gum and heart candy valentine box   valentine mantel pixie stix flower vase 2016

Ho Ho Ho Marquee Box

Well, I am starting some of my Christmas posts! Can you believe it is almost here? I actually worked on some different Christmas projects during the year so they would be ready to post. Good thing I started early!

I received this gift box last year for Christmas and knew I could do some cool project with it. Haley just rolled her eyes at me when I told her that. 🙂

I started with my box, and a string of lights. The lights were a 20 count, but I ended up using 100 count.

Ho Ho Ho lighted box supplies

I punched holes with a pencil from the front to the back. This way I could place them in the right spots and I wouldn’t have the extra cardboard sticking out on the front. I placed the holes in each of the letters of the ho, ho, ho. Then I started pushing the lights into the holes from the back. (sorry for the blur!)

ho ho ho lighted box  light holes

Here it is, from the back, with the 100 lights. There were some lights that didn’t go into holes, but 50 wouldn’t have been enough either.

ho ho ho lighted box 100 lights

And the front. Then it was just a matter of plugging it in and seeing if it would work

ho ho ho lighted box white lights

Yay! It works! And you can even tell what it is supposed to say!

ho ho ho lighted box in the dark

Now I have my own little marquee light!

ho ho ho lighted box lit up

Such a simple idea with a lot of impact! I’m sure you can find boxes similar this at the store too. I will be back next week with another idea!

sunshine-and-blessings-picmonkey


Falling Leaves Door Hanging

falling-leaves-title

Good morning! I have a very simple project for you today!

I already had all the supplies for this project. I found a stick in my backyard, I had twine, but you could use string or yarn, and a package of faux leaves. You could use real ones too, but our leaves aren’t turning yet, so no pretty colors could be found!

fall-leaf-wall-hanging

I started by tying a piece of twine on the stick, long enough so the stick would hang at a good length. Then I added different lengths of twine to hand downward.

fall-leaf-hanging-twine-and-stick

Next step is gluing. I used hot glue, but please be careful of your fingers! I added the leaves in random order, but about the same distance apart. I used mostly yellow and orange, with just a few red ones so they would really stand out.

falling-leaves-project-started

And that’s it!! I spent maybe 15 minutes to complete this project. The gluing took the longest, but it is really so simple!

fall-leaf-wall-hanging-done

After seeing the pictures, I though it would be so pretty to add some pretty bling and then hang it in a window so it would be sparkly. Maybe I will have to add some!

fall-leaves-with-twine-and-stick

I hope you all have a wonderful Monday!

sunshine-and-blessings-picmonkey

More fall ideas!

Basket of Fruit           fall-yellow-gold-placesetting

Fun Braided Leather Headbands

Hello everyone!  We are here with another simple blog, but it is very fun and easy to do!  I hope you are all excited!

I was in Target in the dollar section (a very dangerous section of the store for me and my mother) and found this awesome leather ribbon.  I loved the colors and knew that they would look great as some sort of project.  I didn’t know what, but I would figure something out.

lanyard-leather

And that I did.

I took each piece and measured it out to the size and a half of my head.  I then added a little extra for safety.  I did this with all three pieces for all three of the designs I am about to show you.

The next thing I did was tie a knot in the end with a loop.  This was going to be the end of the headband.

lanyard-knot

The first design I did was a simple chevron design.  I had the brown as the outside strands, white as the second and fifth strand, and blue and the middle two strands.  I crossed the outside strands over to the middle from both sides to make a v shape.  I then continued this pattern until I finished the entire headband.

lanyard-chevron

The second design was a bit more fun, but tricky.  I laid the leather out in the same pattern.  But this time instead of doing a chevron design, I did a bow design.  I tied a bow about the entirety of the leather and put the tails in the middle to use again.  After tying 3 bows of each color, I then braided the rest of the leather in a simple three strand braid.

lanyard-bows

The final design was the most complex, but probably the most fun.  I separated the strands into two sets of three, with one color in each set.  I then started with a braid and went a short distance.  After that, I tied a knot around the entirety of that set, five knots for each color.  Unfortunately, the strand was a lot shorter than I expected it to be.

lanyard-braid-and-knot

So with the other set, I did a simple braid on the entire thing.  When I finished that braid, I tied the two together so they wouldn’t come apart.  Unfortunately, it looks a little silly, but it works if you have a side braid or ponytail.

lanyard-braids

And here are the three finished looks!

lanyard-chevron-finishedlanyard-bows-finishedlanyard-double-finished

And there they are!  I really like how they turned out and they were super simple and easy to make.  And the supplies weren’t super expensive!  If you have any questions about how I made any of these headbands, please let me know!

sparkle

DIY Wooden Ocean Buoys

ocean wooden buoys title

Good morning! Today is my first day back at school with students! Eek! I’m a little nervous because some I have never met before. But I know I have good help in my room and hopefully everything will go smoothly.

I know most people are getting ready for fall, but it is still over 100 degrees here! It’s hard to think about cooler weather projects when it is still so hot! So today is another summer post! It’s pretty simple though.  I actually had everything on hand already. I have been wanting to make these for awhile and I finally got it done.

I had some 4 x 4’s (actually 3.25 x 3.25!) in my wood stash and had my husband cut them in various heights. The tallest one is about 13″ tall and the shortest one is about 8″ tall.  I also had him taper in the tops on each side. They don’t quite come to a point, but are flat on top. I also drilled a hole, large enough to get some rope through. The diameter of the hole would depend on the type of rope you are using. I picked up some more Waverly Chalk Paint at Walmart, this time in ‘Ocean’, ‘Pumpkin’, and ‘Lagoon.’

ocean beach buoys

I first painted each piece with either Waverly ‘Plaster’ or ‘Mineral.’ 2 of each! I didn’t cover the wood too well, because a real buoy would be worn by the sea and sun.

ocean buoys painted grey and white

After the paint dried, I used painter’s tape to mark off where I wanted to put the colored stripes. Make sure to really seal the edges of the tape so the paint doesn’t go under and bleed into other areas. Take off the tape soon after the paint starts to dry. I started with the smallest one and decided to paint just one color around the whole thing. This one will be ‘Lagoon.’

ocean wooden buoy painting stripes

I did a variation of the 3 colors on each buoy. This one will be ‘Pumpkin’ and ‘Lagoon.’

ocean buoy grey painting stripes

After the paint was dry, I sanded the piece all over to give it a rough and worn look. Here is the small one. I love it!!

ocean buoy turquoise and white

I took a length of rope, ran it through the hole and tied it at the top. I should have rolled it in the dirt first, so it wasn’t so new looking! I’m sure it will look more worn before long.

ocean wooden buoys

I am so pleased with how these turned out!!

ocean wooden buoys orange, turquoise, blue

I can’t wait to really display them next summer!!

ocean buoys wooden blue and turquoiseocean wooden striped painted buoys

I hope you all have a great week and I will let you know how my first day of school went!!


ps. Redbubble is having another deal! On Monday only, 8/29, you get 15% off the whole site. Use the code CIRCUS15. 

Sunshine and Blessings