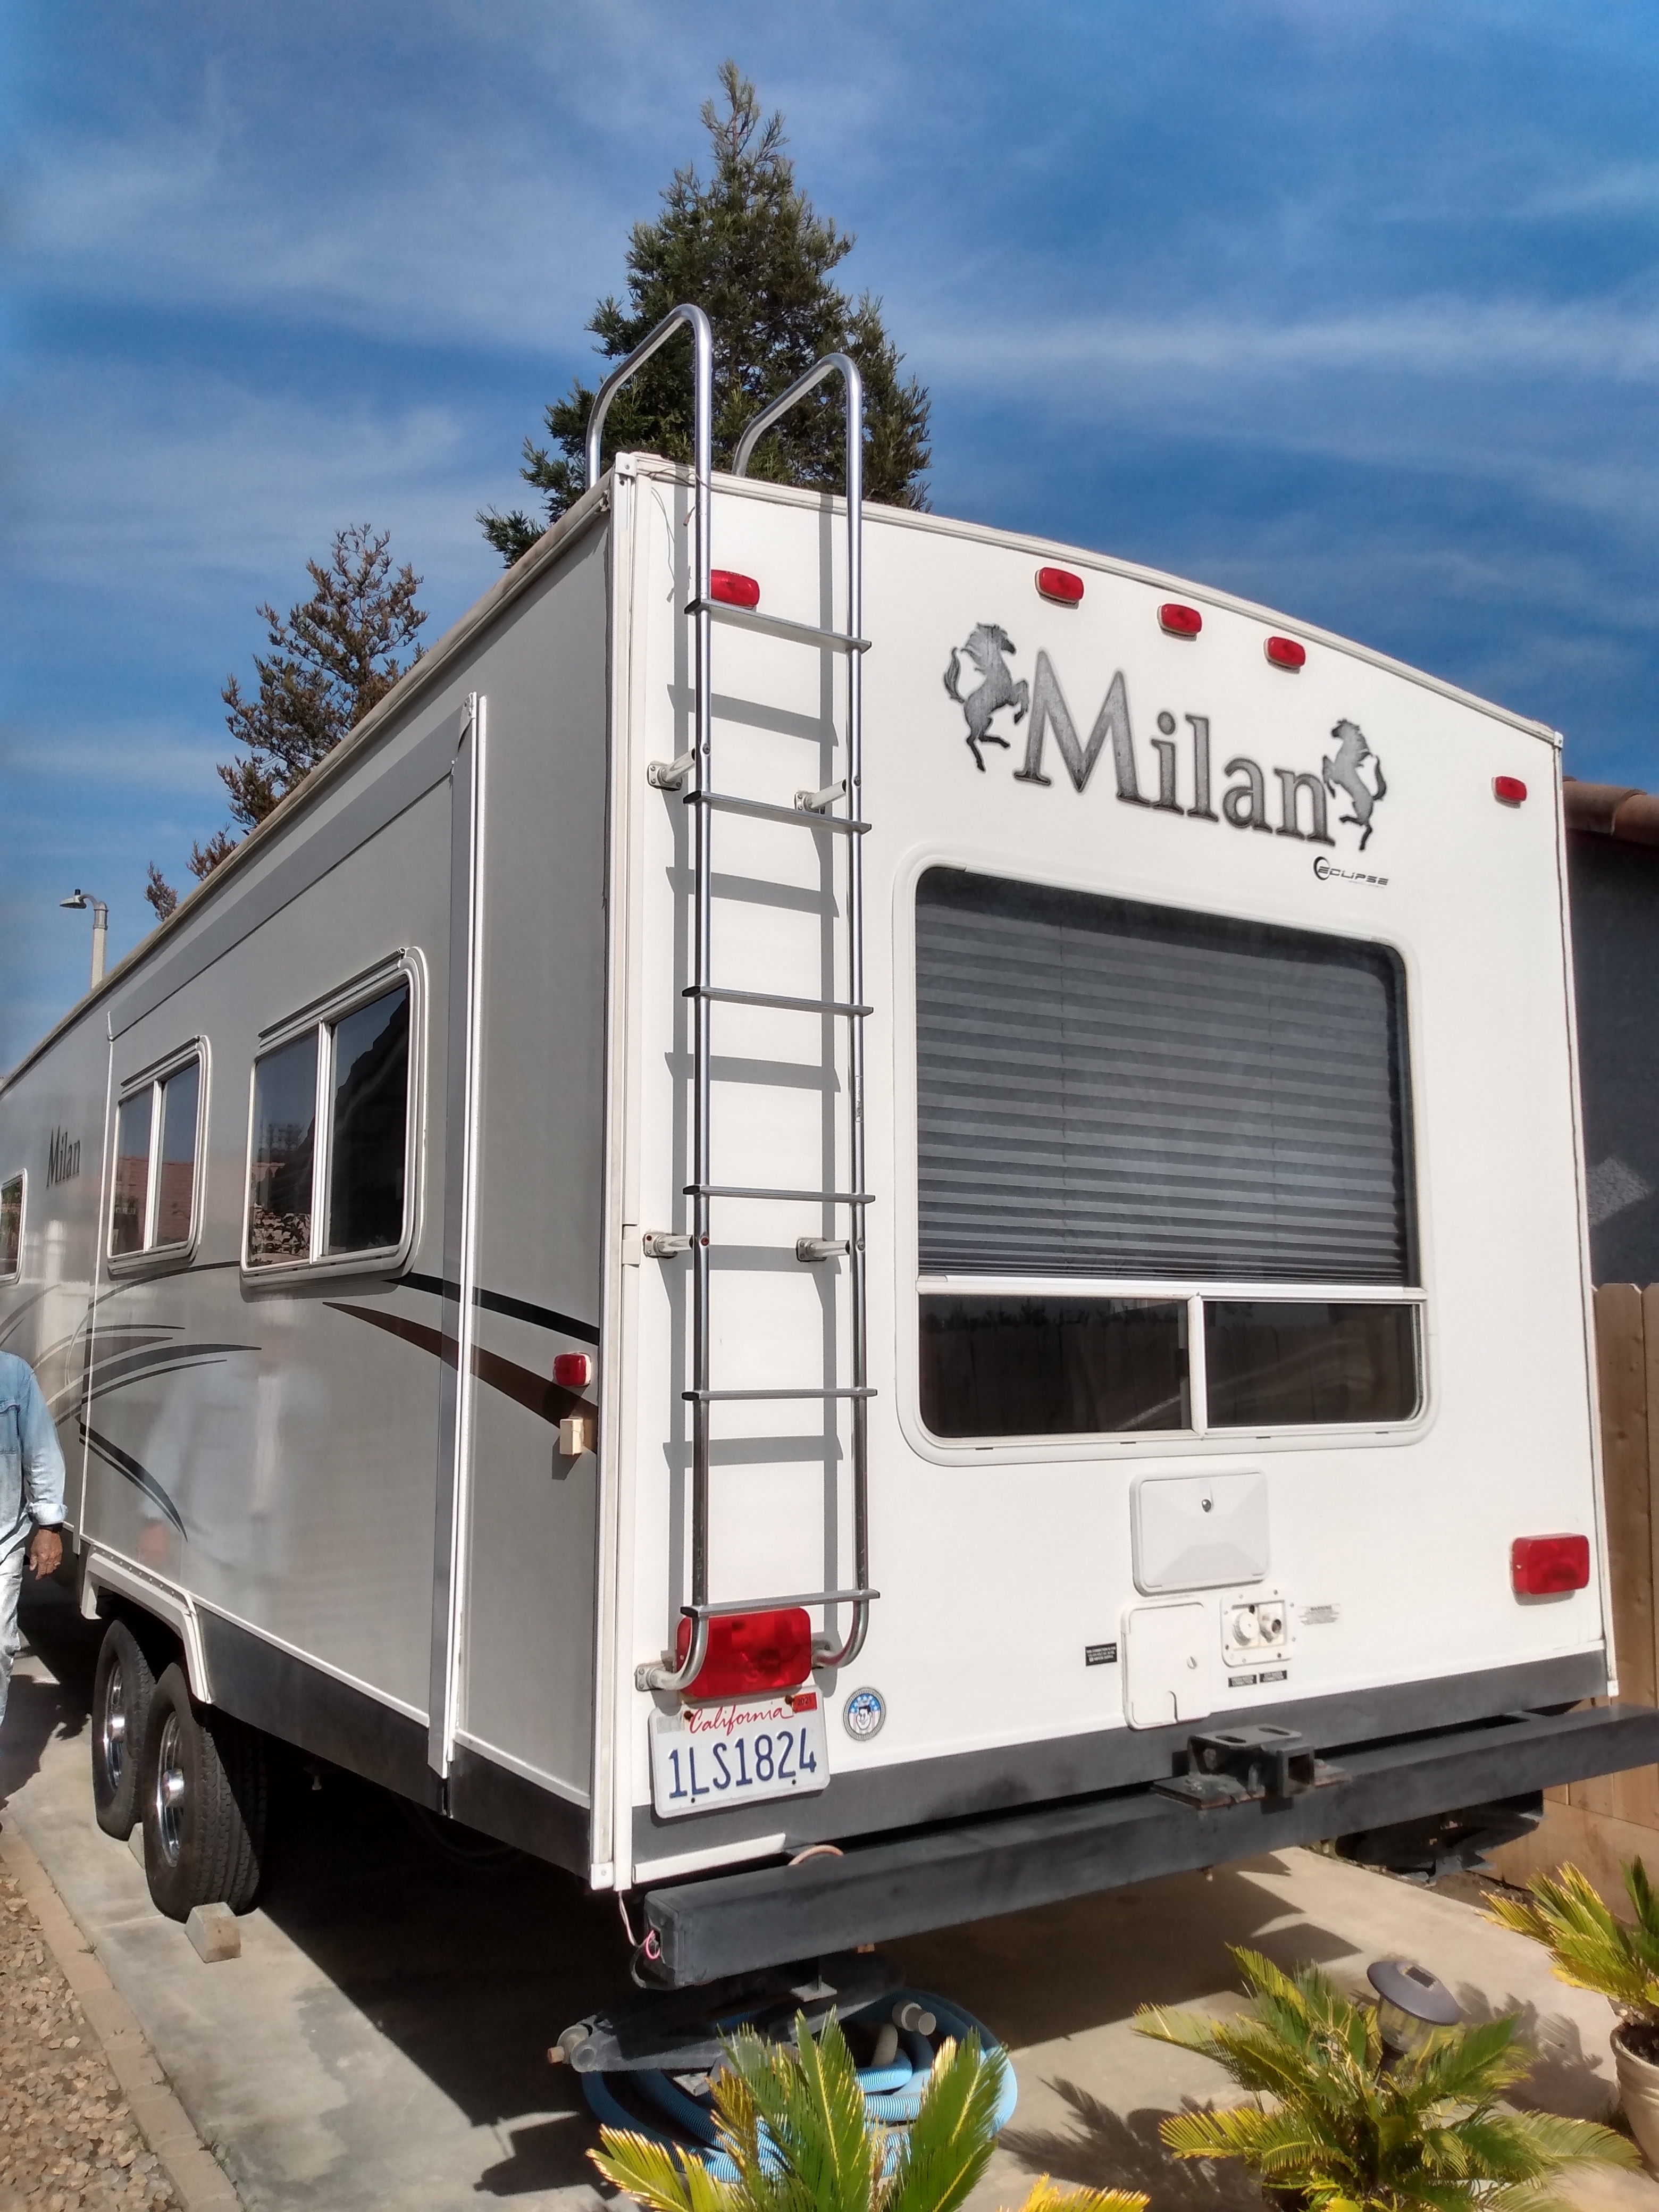
Good morning! How have you all been? I have been good, but so busy with a new project! I’m so excited about this one! My husband and I bought a new travel trailer and are doing renovations on it! I’ve wanted to do this for several years and now I finally get the chance to do it!
I loved our last little trailer, but now that my kids are adults, it was just too small for all of us. You can see a partial makeover I did on that trailer here.
As you can see, this trailer is much bigger! It’s actually bigger than what we were looking for, but the timing and the price were right, so we couldn’t pass it up.
I was specifically looking for the separate bedroom so I wouldn’t have to make up the couch or table every day. I love all the storage too! These pictures were from the sales ad. I love the walk around bed!

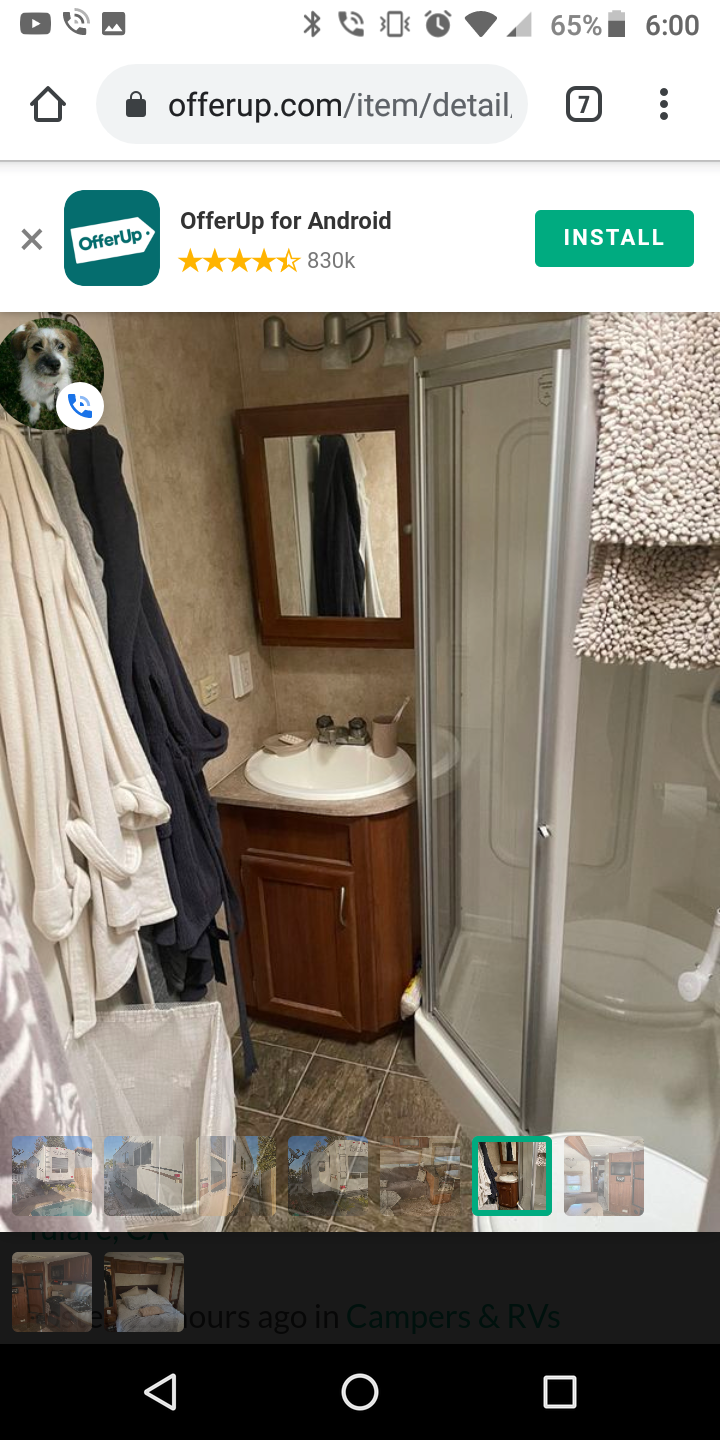
Can you believe the size of the bathroom? Most trailers with this layout have the bathroom split with the hallway down the middle, but this one is all on one side, so it is quite large. There are two doors into the bathroom, one from the bedroom and one from the hallway.
Are you loving all the brown!? The couch and the table are part of the slide-out, which gives so much space! I really like this type of dinette because it goes room for more people to sit around it. You can see the arm of a chair at the bottom corner. There are two swivel chairs that sit in front of the big window in the back of the trailer.

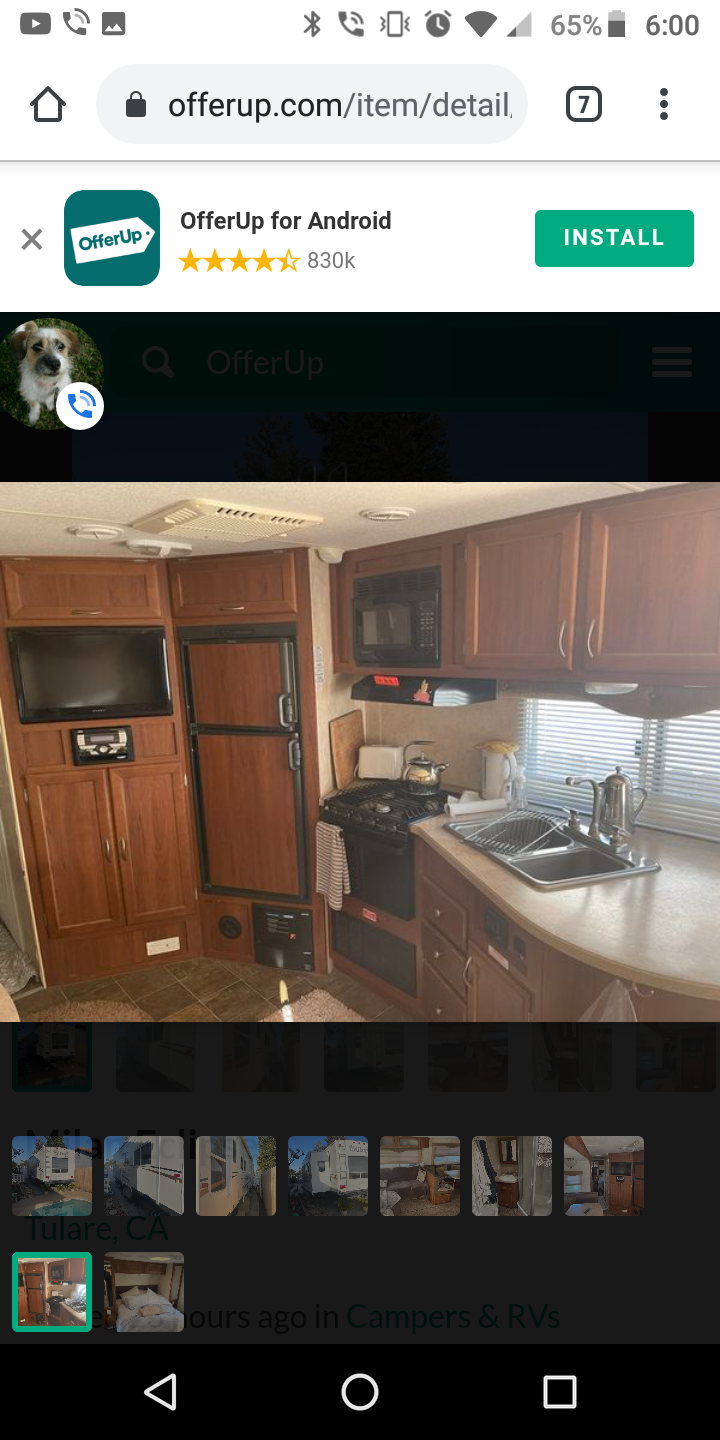
More brown! It is so depressing! But here is the kitchen, with so much storage and even some real counter space! It has a nice size refrigerator too.
While I love the layout of the trailer and the space we will have, I was not loving all the brown. 🙂 So here is where the makeover comes in! The first step is to clean. Ugh! Prepping is the worst, but so important! Don’t skip this step!!
CLEAN
I washed down all the walls and wood with a mixture of TSP and water. Anything you are going to paint, wallpaper or add peel and stick tile to, needs to be cleaned. Our trailer was pretty dirty, so it needed cleaned anyways.
REMOVE EVERYTHING THAT HAS TO GO
After cleaning, we removed all the cupboard doors, drawers and anything else that had to go. We took down the valances over the windows and doors, a shelf, and took off the outlet covers to get ready to paint.
SAND
But before painting, everything needed sanded. Even the walls! The ‘wallpaper’ isn’t really wallpaper and it’s not worth trying to take it off. You don’t need to sand down to bare wood, but rough up the surface so the primer and paint have something to stick to.
TAPE AND PRIMER
Once everything is sanded, you need to tape around anything that isn’t going to get painted. We didn’t paint the ceiling, so we had to tape around the whole top edge. We also taped around window and door frames. Finally, it is time to use primer. I used my favorite, Kilz. On the walls we did one coat of primer, but for the dark wood, it needed two coats. Be sure to let each coat dry in between. All the cupboards and drawers were taken off, cleaned, sanded and then primered in our garage.
I took off all the knobs and drawer pull and handles and spray painted them gold. I even did the screws! Crazy, I know.
PAINT
Now it was finally time to paint! I had found a big 5 gallon bucket of Oops! paint at Home Depot a few years ago and I had plenty left. It is Behr, Swiss Coffee. It was the perfect color for a big freshen up! Again, we painted 2 coats of paint all over and some of the dark brown even got 3 coats. I went around after everything was dry and used a small paint brush to fill an any areas that were missed.
Yes, this is a ton of work, but so worth it!! The trailer looks so much lighter and now I have the fun of decorating! I’m going to give you a sneak peak, but I will post the whole thing in a couple of weeks. We are going camping in it and I can’t wait to try it out!
Here is the bedroom after primering. The cupboard doors were taken off to be painted in the garage. You can see the tape all around the top edge since we weren’t painting the ceiling.

Eeekk! Doesn’t this look so much better!!! I can hardly believe how much brighter it is!

One more peek! The dining area is all painted but no curtains or many accessories yet!

I can’t wait to show you the finished trailer in a few weeks!! It was so much work, but I am so glad we took the time to do it right and now we can just sit back and relax!
Have you ever redone a trailer? I loved looking at all the ideas on Pinterest! See you in a few weeks!