Day of the Dead Hoop Wall Hanging

Good morning! It’s October! Fall is coming quickly! I hope you have been safe and are enjoying some fall weather where you are. I think of all of you every day and pray for you and your families. I love having you come by and visit! Thank you!

I have another Day of the Dead, or Dio de la Muertos craft idea today, but this could be easily adopted to other holidays or colors. Think fall colors with pumpkins or even Christmas with ornaments. So many ideas!

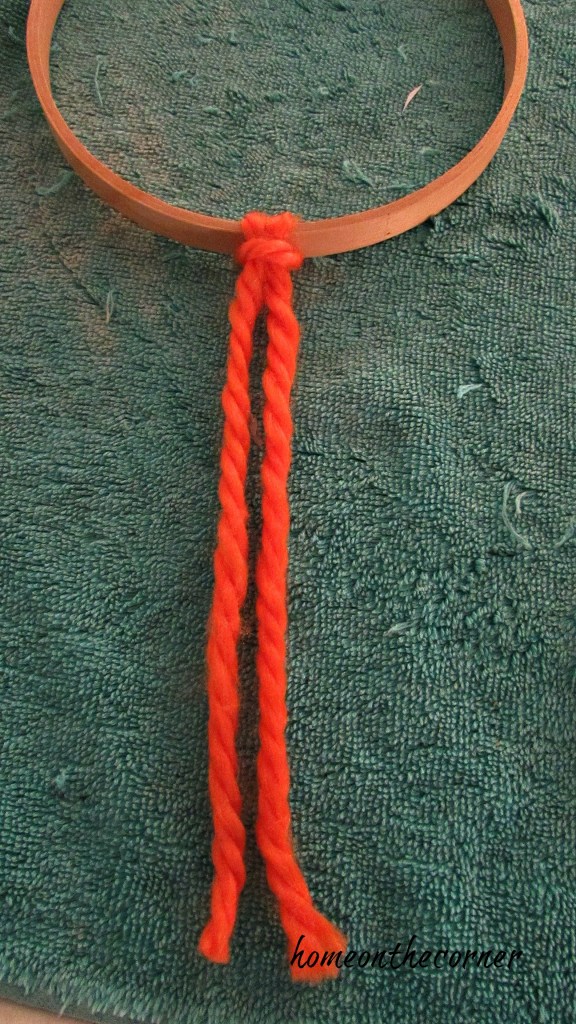
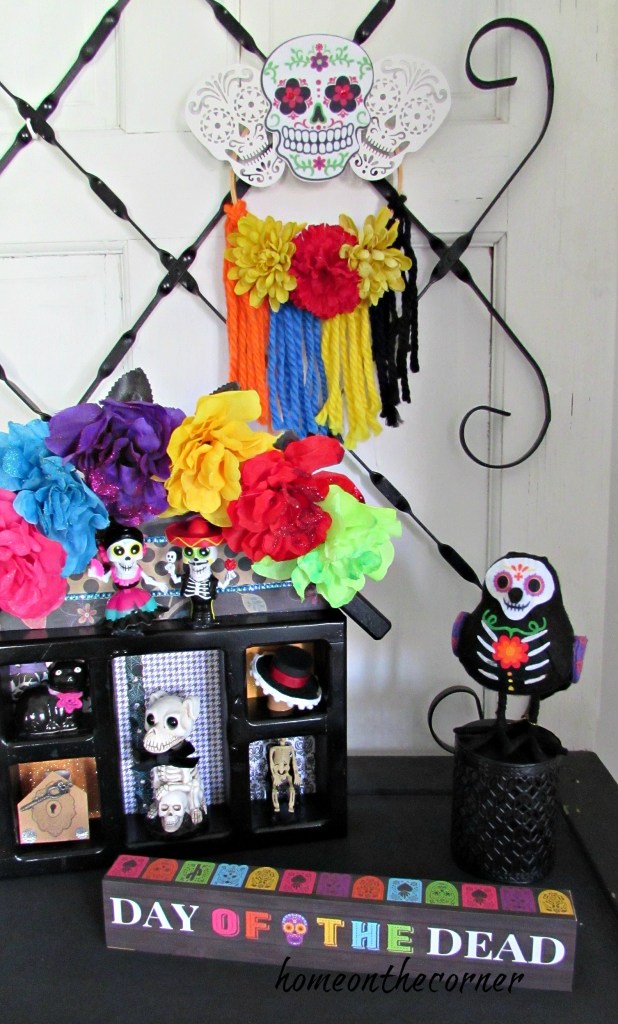
I started with an embroidery hoop, chunky yarn, silk flowers and Day of the Dead sugar skulls.

I cut several pieces of each color of yarn and then started tying them on the bottom of the hoop. I folded the yarn in half and laid it over the hoop.

I took the two loose ends of the yarn, wrapped them around the back of the hoop and then thread it through the loop.

Pull the yarn tight to form the knot. Keep adding yarn for as far as you want it to go.

I added four strings of each color that I was using.

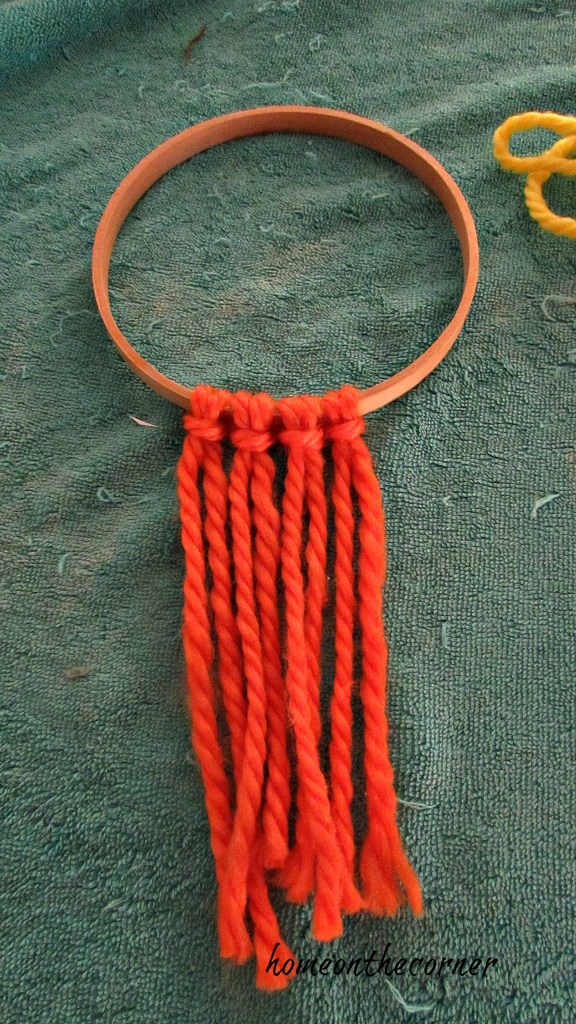
I trimmed the bottom of the yarn to make it a bit more even.

I hot glued three flowers on the hoop over the knots of yarn.

Then I took three skulls and glued them to the top of the hoop. I chose two white ones and one with color.

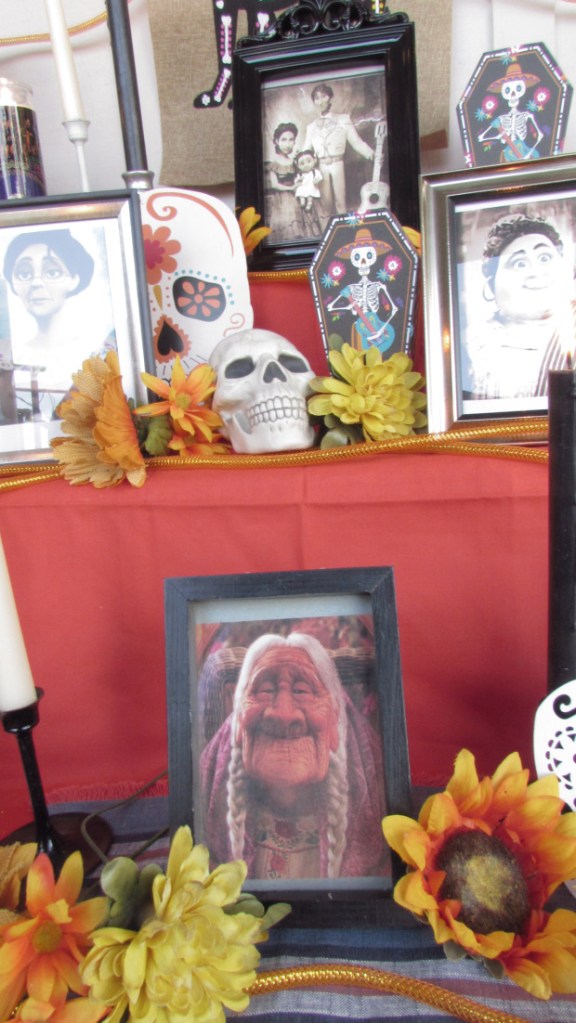
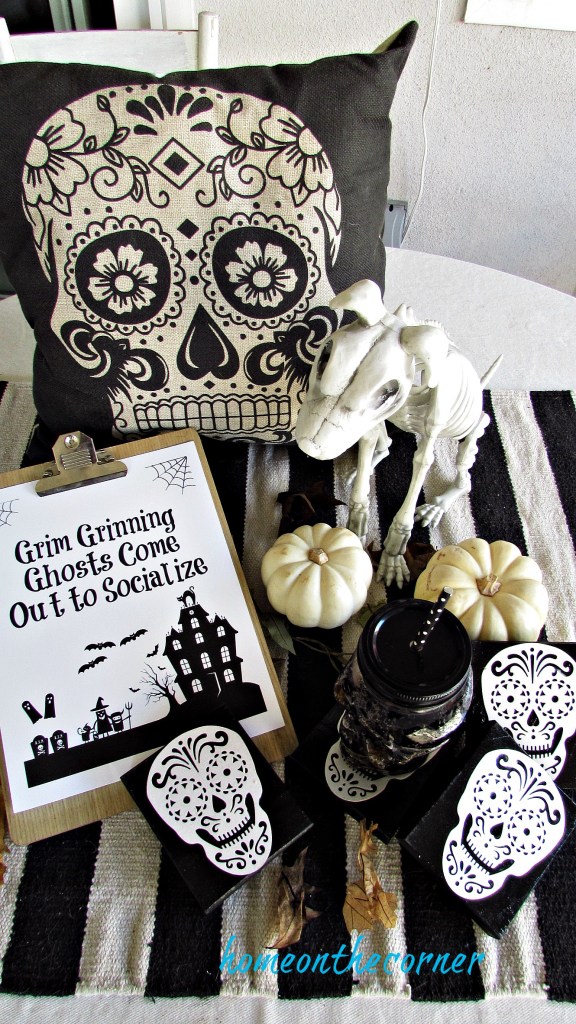
This is such a simple little craft! It’s perfect to add to my other Day of the Dead items- shadowbox, Ofrenda.

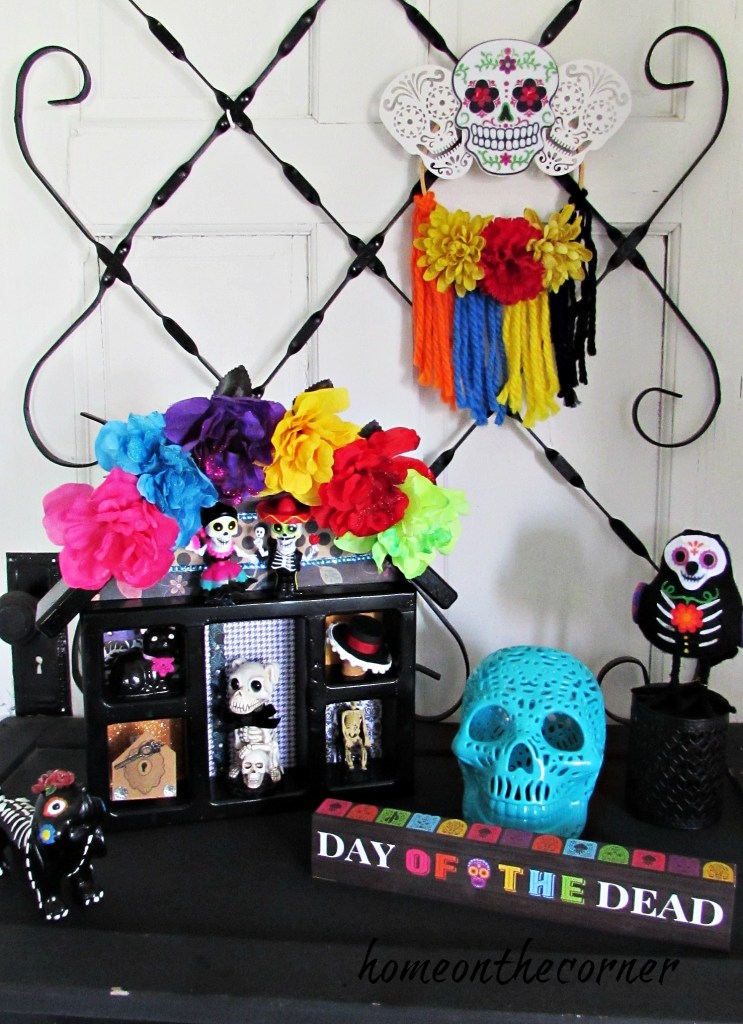
I have this in my entryway right now, but I will move most of it outside to my Ofrenda just before Halloween. Have you ever decorated with Day of the Dead items or put together an Ofrenda? I would love to hear about it!

SEASHELL SPECIMEN WALL HANGING

Good morning! Have you been able to get to the beach this summer? Maybe you collected some seashells. Here is a great way to display them!

Hello! Is spring here yet? I can hardly wait for warmer weather. After being in Hawaii, I am so ready to wear shorts and tank top again. To help get in the mood, I created these Seashell Specimen Pictures. I collect lots of seashells and had divided them up in little baggies and I had found these frames at Goodwill a while back, but with the holiday, I just didn’t get to it. So now that I had a little time, I decided to get this project done!

seashell specimen art title

Here are the frames I found. I was able to find 3 of the same ones.

seashell speciman frame front

The first thing to do was take the backing off.

seashell speciman frame back

I used scissors to cut along the edges to get to the inside.

seashell speciman back of frame

After the back was off, I removed the picture and the glass, so I was left with the frame, mat and cardboard backing.

seashell speciman frame

I didn’t want the cardboard to show, so I used a piece of brown paper looking scrap paper for behind the shells. I laid out the shells the way I thought I would want them to go. Once I had a pleasing layout, I used tacky glue to glue them onto the paper.

seashell specimen frame clam shells

I used some packing tape to secure the back and they were done! I hung them over the bar in the dining room to add some summery fun!

seashell speciman frame set of 3

These clam shells are cool with the ridges in them.

seashell speciman frame ridged clam shells

Sand dollars are my favorite! I am always on the lookout for them when we walk the beach.

seashell speciman frame sand dollars

I love the shape of these!

seashell speciman frame crab

We have the seashells, now we just need the beach!

seashell speciman frame art 3 set

You can see here, I used one of the pictures in my RV makeover! It has really held up well, even with all the bouncing the trailer does as we travel!

rv makeover striped cushion covers and curtains

I hope this inspires you to make your own seashell specimen art.  Hope you have a wonderful week!


sunshine-and-blessings-picmonkey

Picket Snowman Christmas Countdown

I wanted to get in a little Christmas in July before it was too late! Here’s a great project to work on now so you will be all ready for the holidays!

Good morning! It’s almost Thanksgiving!! Can you believe it! Do you start decorating already or do you wait until after Thanksgiving? I have started, mostly because of this blog, but I love it! I especially like the twinkling lights.So festive!

I have a Christmas craft for you today. I should have pictures of the living room and dining room for you next week. There are just a few finishing touches and it’s all ready for the holiday!

*(affiliate links are included at the end of the post for your convenience)*

For this project, I started out with a old painted clay pot. I sanded it down a little and then spray painted it white.

picket snowman countdown clay pot

After the paint had dried, I mixed up the Plaster of Paris. The package I had contained 4 lbs. of plaster. I used all of it. Of course, this is because one package drained out the hole in the bottom, even though I tried plugging it. After putting another piece of cardboard in the bottom and letting that plaster dry, I added the rest. I used a couple of disposable containers to mix the plaster in. I poured in the required amount of water, added the plaster and then mixed until  smooth. Then I poured each one into the pot.

picket snowman countdown plaster of paris

Once the plaster had set for a bit, about 1/2 hour, I put an old picket into the pot. You could use pallet wood or buy a piece from the store too. I then put some scrap pieces of wood around it to keep it upright until it completely hardened, about 24 hours.

picket snowman countdown propping up the picket

Now comes the fun of decorating my snowman. I found an old pair of socks and used a red one to make the hat. I cut off the toe and then slid it over the top of the picket and tied it with a plaid ribbon. I also found a piece of red fleece to tie as a scarf. I hot glued some buttons for the eyes and the mouth.

picket countdown snowman hat

Steve cut a small triangle for scrap wood to use as the nose. I painted it bright orange and then attached it with hot glue.

picket snowman countdown orange nose

I found these numbers awhile ago at a thrift store with no idea what I was going to use them for. This was a perfect craft for them! You could also use scrapbook numbers or house numbers or even print some off the computer to use.

picket countdown snowman numbers

I hammered in small nails, below the scarf, that didn’t have much of a head on them, so I could easily slip each number on each day.

picket snowman countdown nails

I added a little batting to the pot to look like snow and he is done! He adds a little cuteness to the front porch!

picket snowman countdown on the porch

Maybe I will add some stick arms too! With mittens!

picket snowman countdown close-up

This is a great way for your kids to count down the days to Christmas and a reminder for you every time you come to the door!! Of course, we don’t get real snow here, so maybe this makes him more likable. 🙂  See you next week with Christmas decor!

sunshine-and-blessings-picmonkey

*Here are some of the items available at Amazon. If you make a purchase, a little comes back to Home on the Corner. Thank you!*


Decoupaged Disneyland Map Tray

Good morning friends! I hope you are all staying safe. So much has happened in the last few weeks in our country. I am praying that we will find peace and some resolution to everything that is going on.

I mentioned last time that I am missing Disney, so I created another Disney DIY that is so simple. Here is the link to the Disney Lego Table if you missed it. This time I took an acrylic tray that I no longer wanted and decoupaged it with Disneyland maps. I knew I wasn’t going to be visiting Disneyland for quite awhile, but then Casey from Disneyland Daily posted that she had extra maps if anyone wanted any. She was kind enough to send me two so I could make my project!

I first cut apart the maps. I kept one whole map and then cut out the different lands and of course one with Mickey.

I laid out my pieces on the tray and figured out that they wouldn’t completely cover the tray. I found some of my Disney scrap paper and found some yellow with stars to go around the edges of the tray. I also added white polka-dot paper in the middle, just in case there were some open areas between the pieces when I put them on.

Once I had the lay-out figured out, I used Mod Podge to attach it. I brushed the Mod Podge on the tray where I would place the papers and once the papers were on, I spread another layer of Mod Podge on top.

After I attached the large map, I laid out the smaller pieces and attached each one individually so I could make sure the lay-out worked. I spread another layer of Mod Podge over the whole thing to protect it from any future spills.

Now I’m ready to serve summer refreshments! I added the Disney pitcher and cups I received several years ago as a gift.

Of course, I had to place it on the Disney table! It makes the perfect setting!

I can’t wait until we are able to go back and enjoy the Disney magic, but at least I can keep some of the magic when I use the tray! Thank you all for stopping by today!

More posts you might enjoy!

Disney’s Mickey Lego Table Makeover

Hey everyone! It’s been awhile since I have been here! I have missed you all and your sweet comments! I have several projects I have completed, but just haven’t sat down to post them. It’s hot this weekend though, so I thought this was a perfect time!
I bought this child’s Lego table a while ago at a garage sale and had it in my classroom, The paint was getting pretty worn, so I finally brought it home and gave it a makeover. I guess I have been missing Disney, because I have done a couple of Disney projects including this one!
I started out by sanding the chairs a bit. The paint was glossy, so I knew it would need some sanding. I used 120 grit paper and sanded by hand so I could get into all the crevices.
Once the chair was sanded, I painted 2 coats of Kilz Primer. I probably should have done 3 coats! The blue just wanted to keep seeping through. After the primer was dry, I painted 2-3 more coats of semi-gloss white paint.
Once the paint had dried, I wanted to add a Mickey Mouse head shape onto the chair seat. I printed out a Mickey head silhouette onto cardstock paper, cut out the shape and then used it as a stencil. I used a small brush to paint blue inside the stencil. I painted a couple of coats of blue.
Next, I did the same on the table, but this time I DID paint 3 coats of primer. It made covering the red much easier.
I wanted to protect the pieces better so the paint wouldn’t wear off so easily, so I brushed on 2 coats of Minwax Polyurethane on all the pieces.
I didn’t take pictures, but I also painted a small Mickey head on each side of the table using the same technique as above.
I really like the color scheme for this table and chairs! The kids at school loved playing with Lego’s and it was one of the activities I enjoyed doing with them.
Of course, the Disney and Mickey theme is perfect for our family and the turquoise and white colors are perfect for my home!
I even managed to make a pretty good ‘D’ out of the Lego’s I had!
I hope you enjoyed this makeover! I would love to hear your comments! I would also love it if you would pin the image below!

Here are some other Disney posts you might enjoy!

Tomorrowland Graduation Party
Minnie Mouse Ornament
Disney Tips and Tricks