Parisian Halloween Witch Hat

Hello! I remembered I had this Halloween Witch Hat post from last year, and it turned out so cute, I thought I would share it again! Enjoy!!

It’s time again for the witches, ghosts and goblins to come out! I don’t decorate much for Halloween anymore, now that the girls are older, but we did when they were little. Planning the costume was always a big deal. Then there were the pumpkins to carve or decorate. I have a couple boxes full of foam pumpkins that have been made into elephants, dragons, Garfield, and our dogs! I even have a light up hedgehog! I will have to show you that one sometime. It’s pretty cool! Even though I don’t do much Halloween decorating, when I saw this cute witch hat over at Madeinaday.com, I knew I wanted to try one too.

I didn’t make mine quite as large as Kim did. I wanted to make one for Lauren, because she collects these little decorative hats to display in her bedroom and I thought this would make a nice addition. Here is the list of the supplies:

Supplies:

  • Floracraft® Make It: Fun® Foam, (2) 3inch discs, (2) 6 inch disc and (2) 17 inch cones
  • 1 sheet of black poster board
  • 2 7/16×36 inch dowels, cut down to around 19 inches each
  • Black & white contrasting fabric, 1/2 yard of each
  • Black fuzzy fabric, 1/2 yard
  • Coordinating ribbon for base
  • 2 flowers
  • Roll of black tulle
  • Hot glue & gun, low temp
  • Black acrylic paint and brush
  • Black aluminum  floral wire 4.6m
  • Scissors

The cones I bought were only 6″ tall, so then I needed less fabric too. I only bought 1/4 of a yard. I used felt in place of the fuzzy fabric too. In other words, there are lots of ways to make this!

I started out by painting the foam disks with the black paint. This gave them time to dry while I worked on the other parts. I also painted the dowel black.

Witch Hat Painted Disks

I traced around a bowl to make my circle (I forgot to buy black poster board, so I just used cardboard, but I did have to cover both sides so the cardboard wouldn’t show). Then I cut the piece of sparkly felt a little bit larger so it could wrap around the edges and be glued down.

Witch Hat Sparkle Felt

Witch Hat Adding Felt Brim

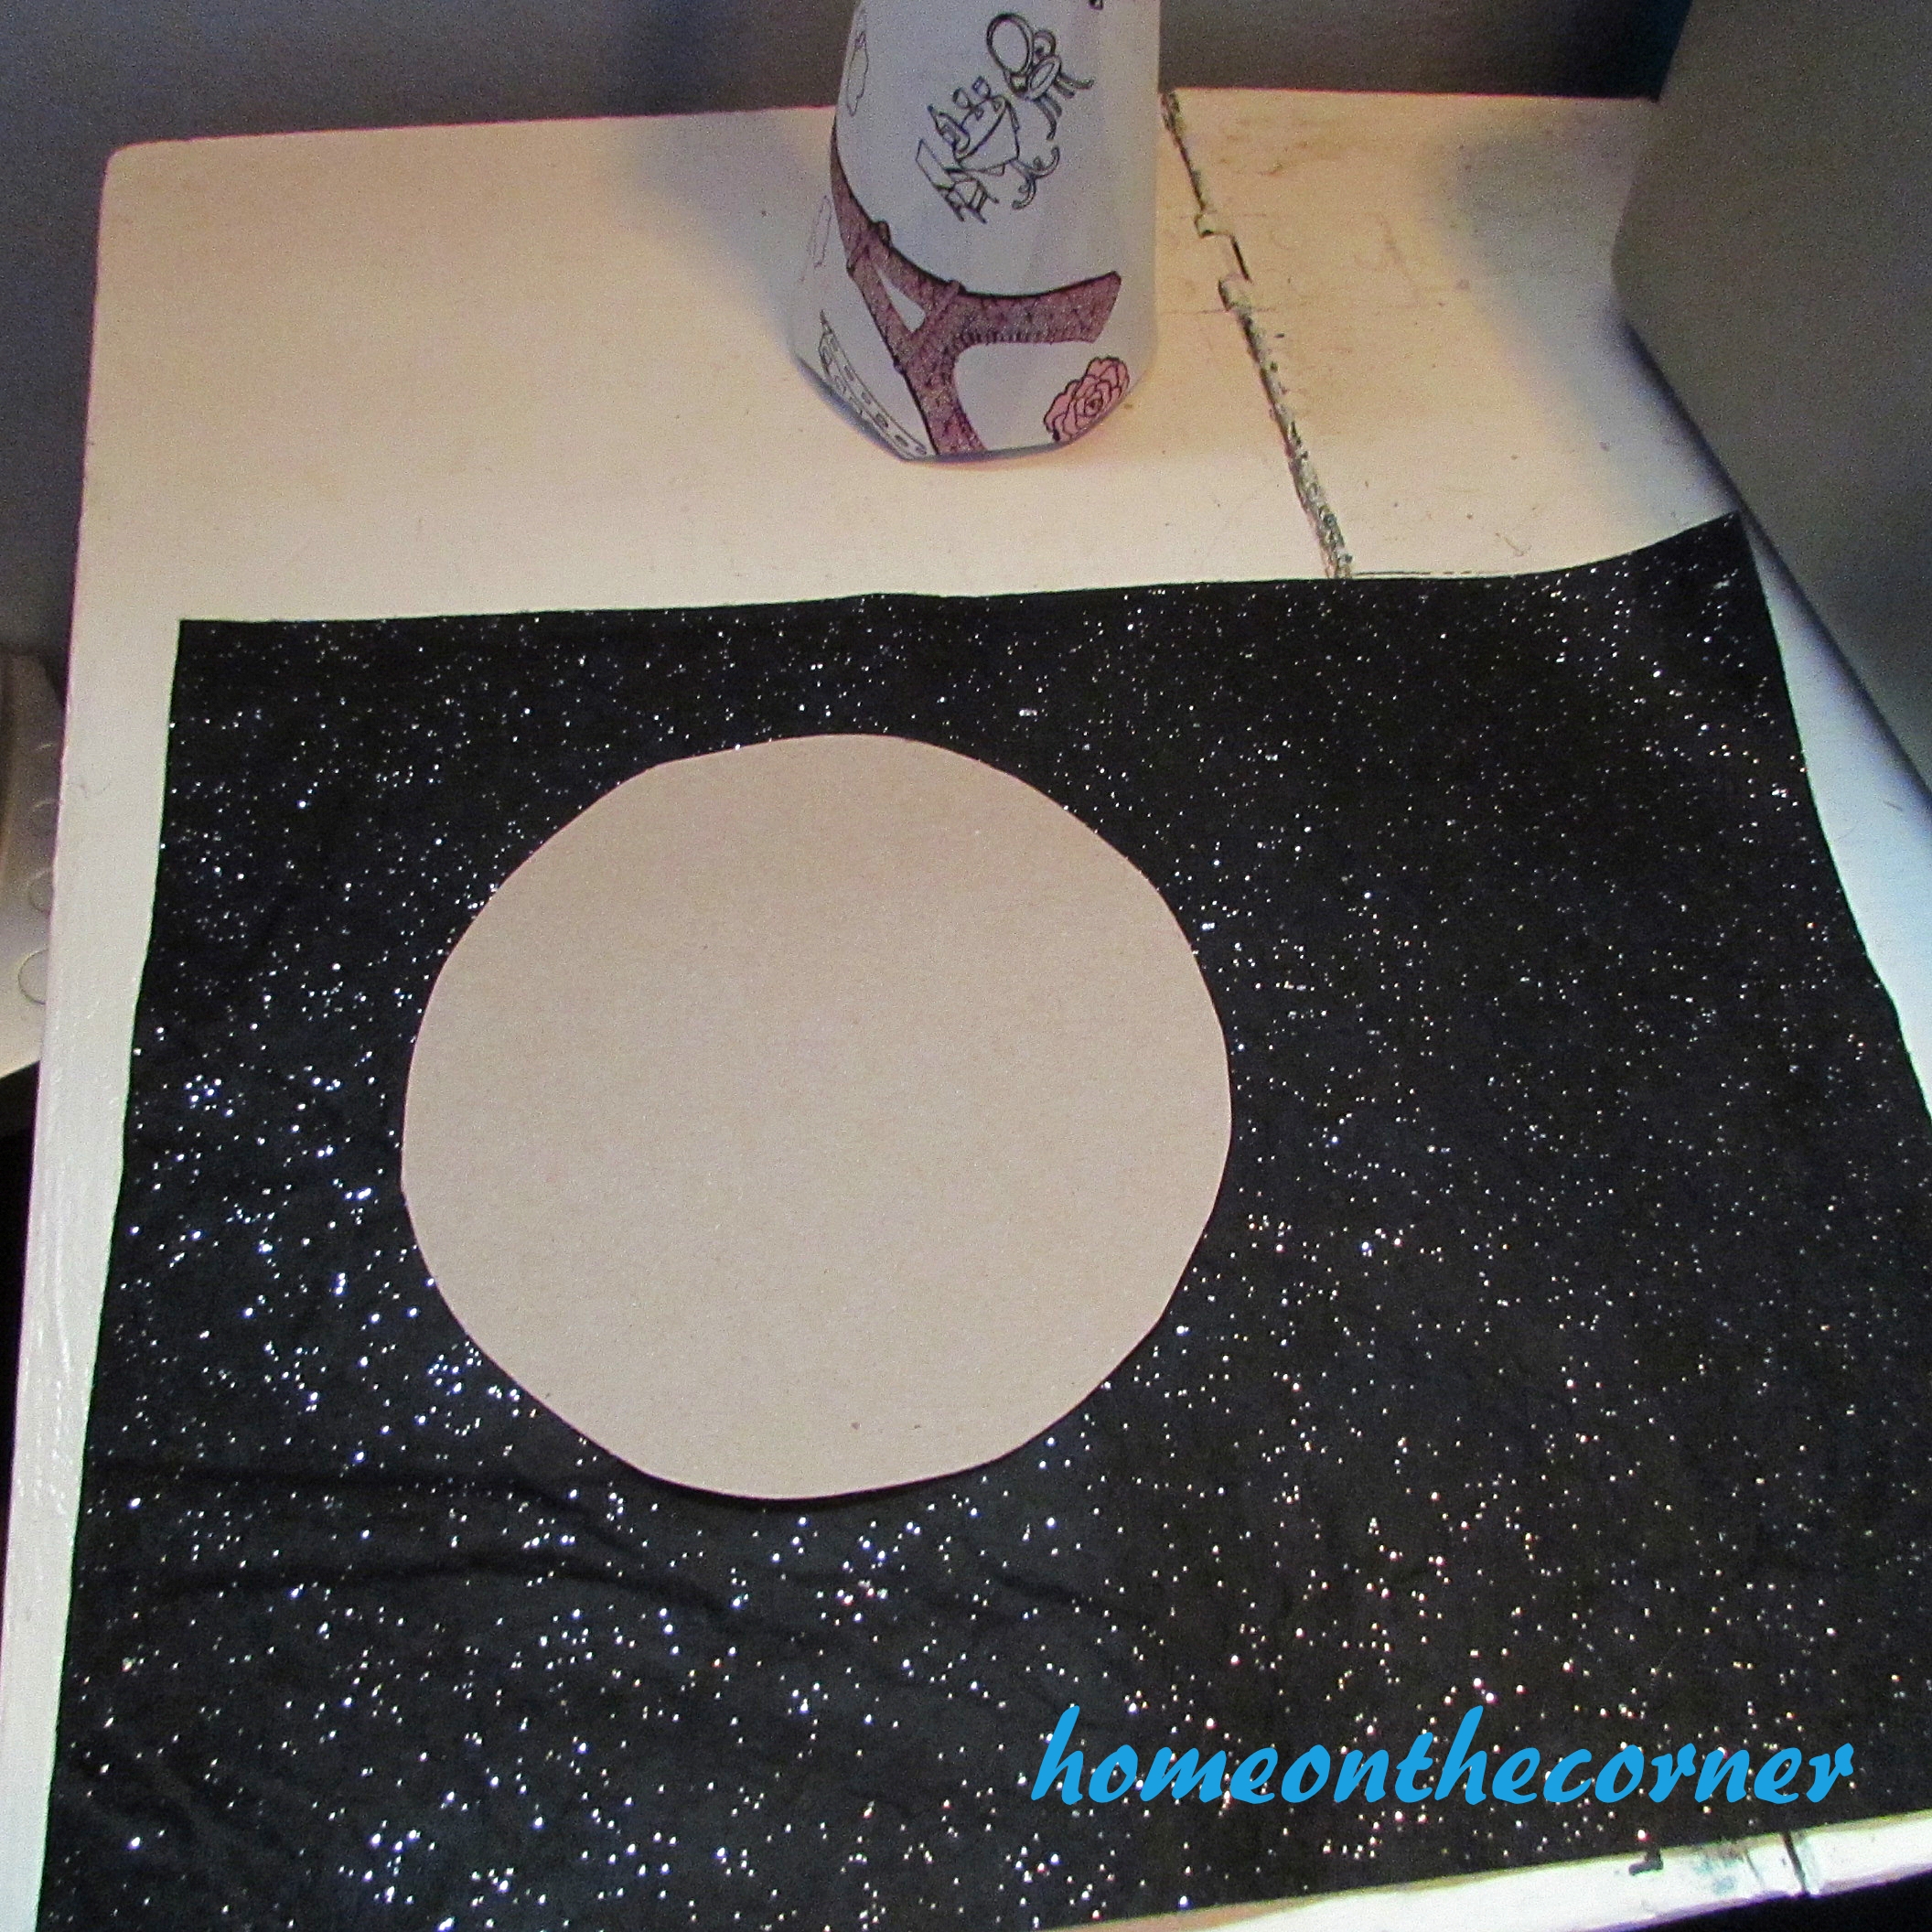
I added another piece on this back side to cover the cardboard.

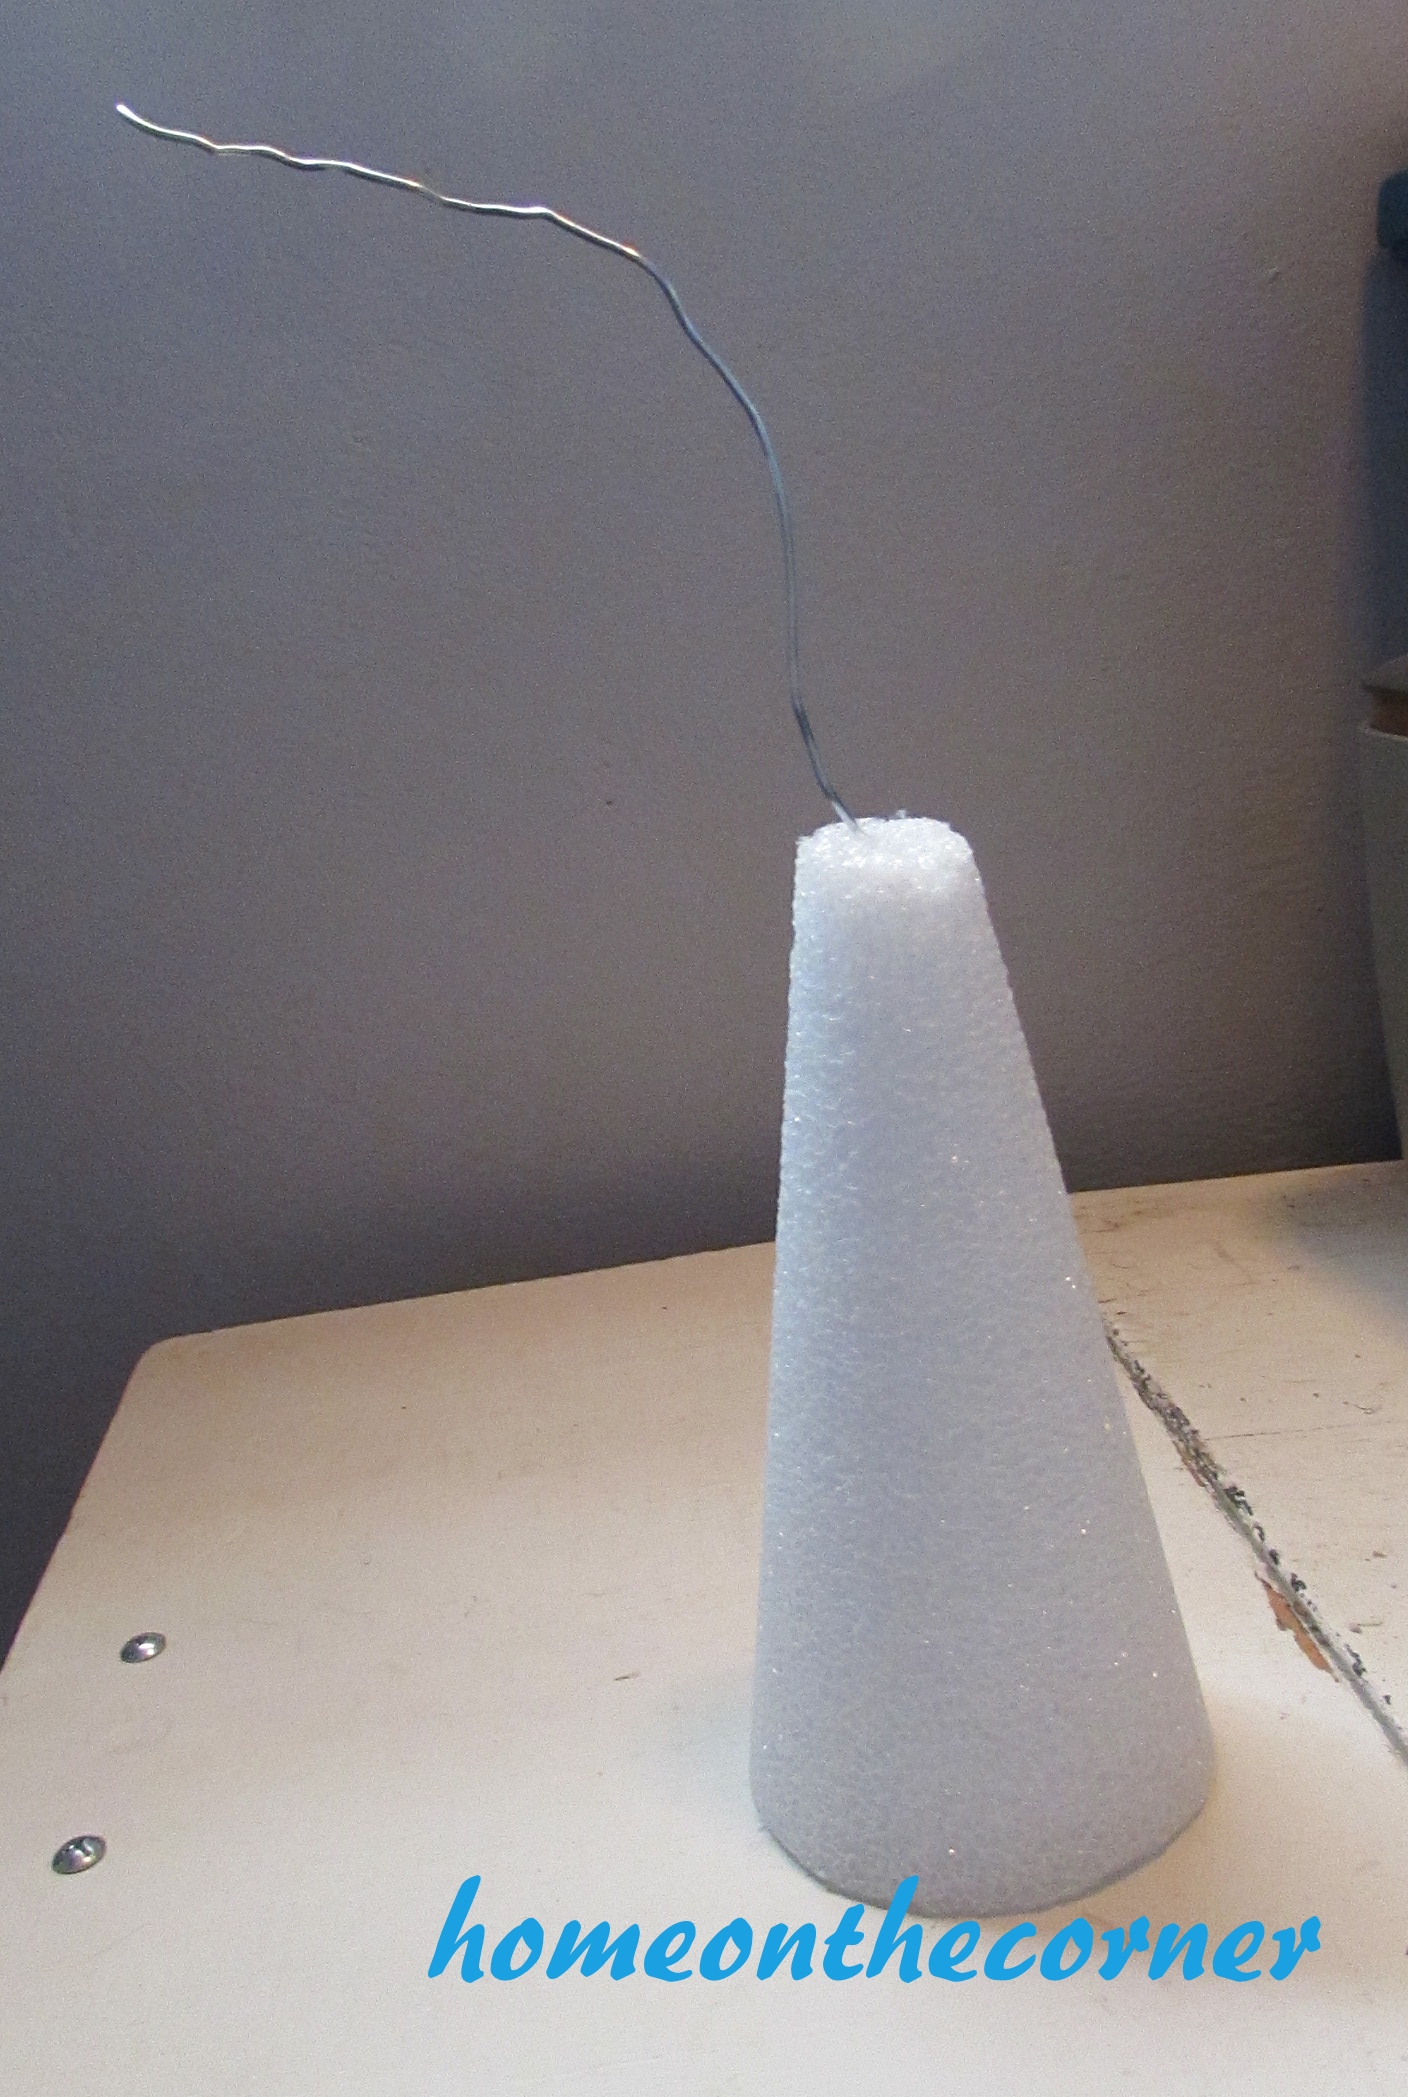
I cut about 2 inches of the styrofoam off the end of the cone. This gives the wire more room to bend once you add the fabric. Poke the piece of wire down into the cone until it feel secure.

Witch Hat Cone and Wire

Here is the fabric I bought. You could never guess who this was for, right?!

Witch Hat Fabric

I wrapped some around the cone just to see how much I would need, and then cut a piece off the end of the fabric. After I figured out just how I wanted the design to go, I glued it around the cone. See how the tip bends over? Make sure you have enough wire so you can make the tip of the hat floppy!

Witch Hat Fabric Covered Cone

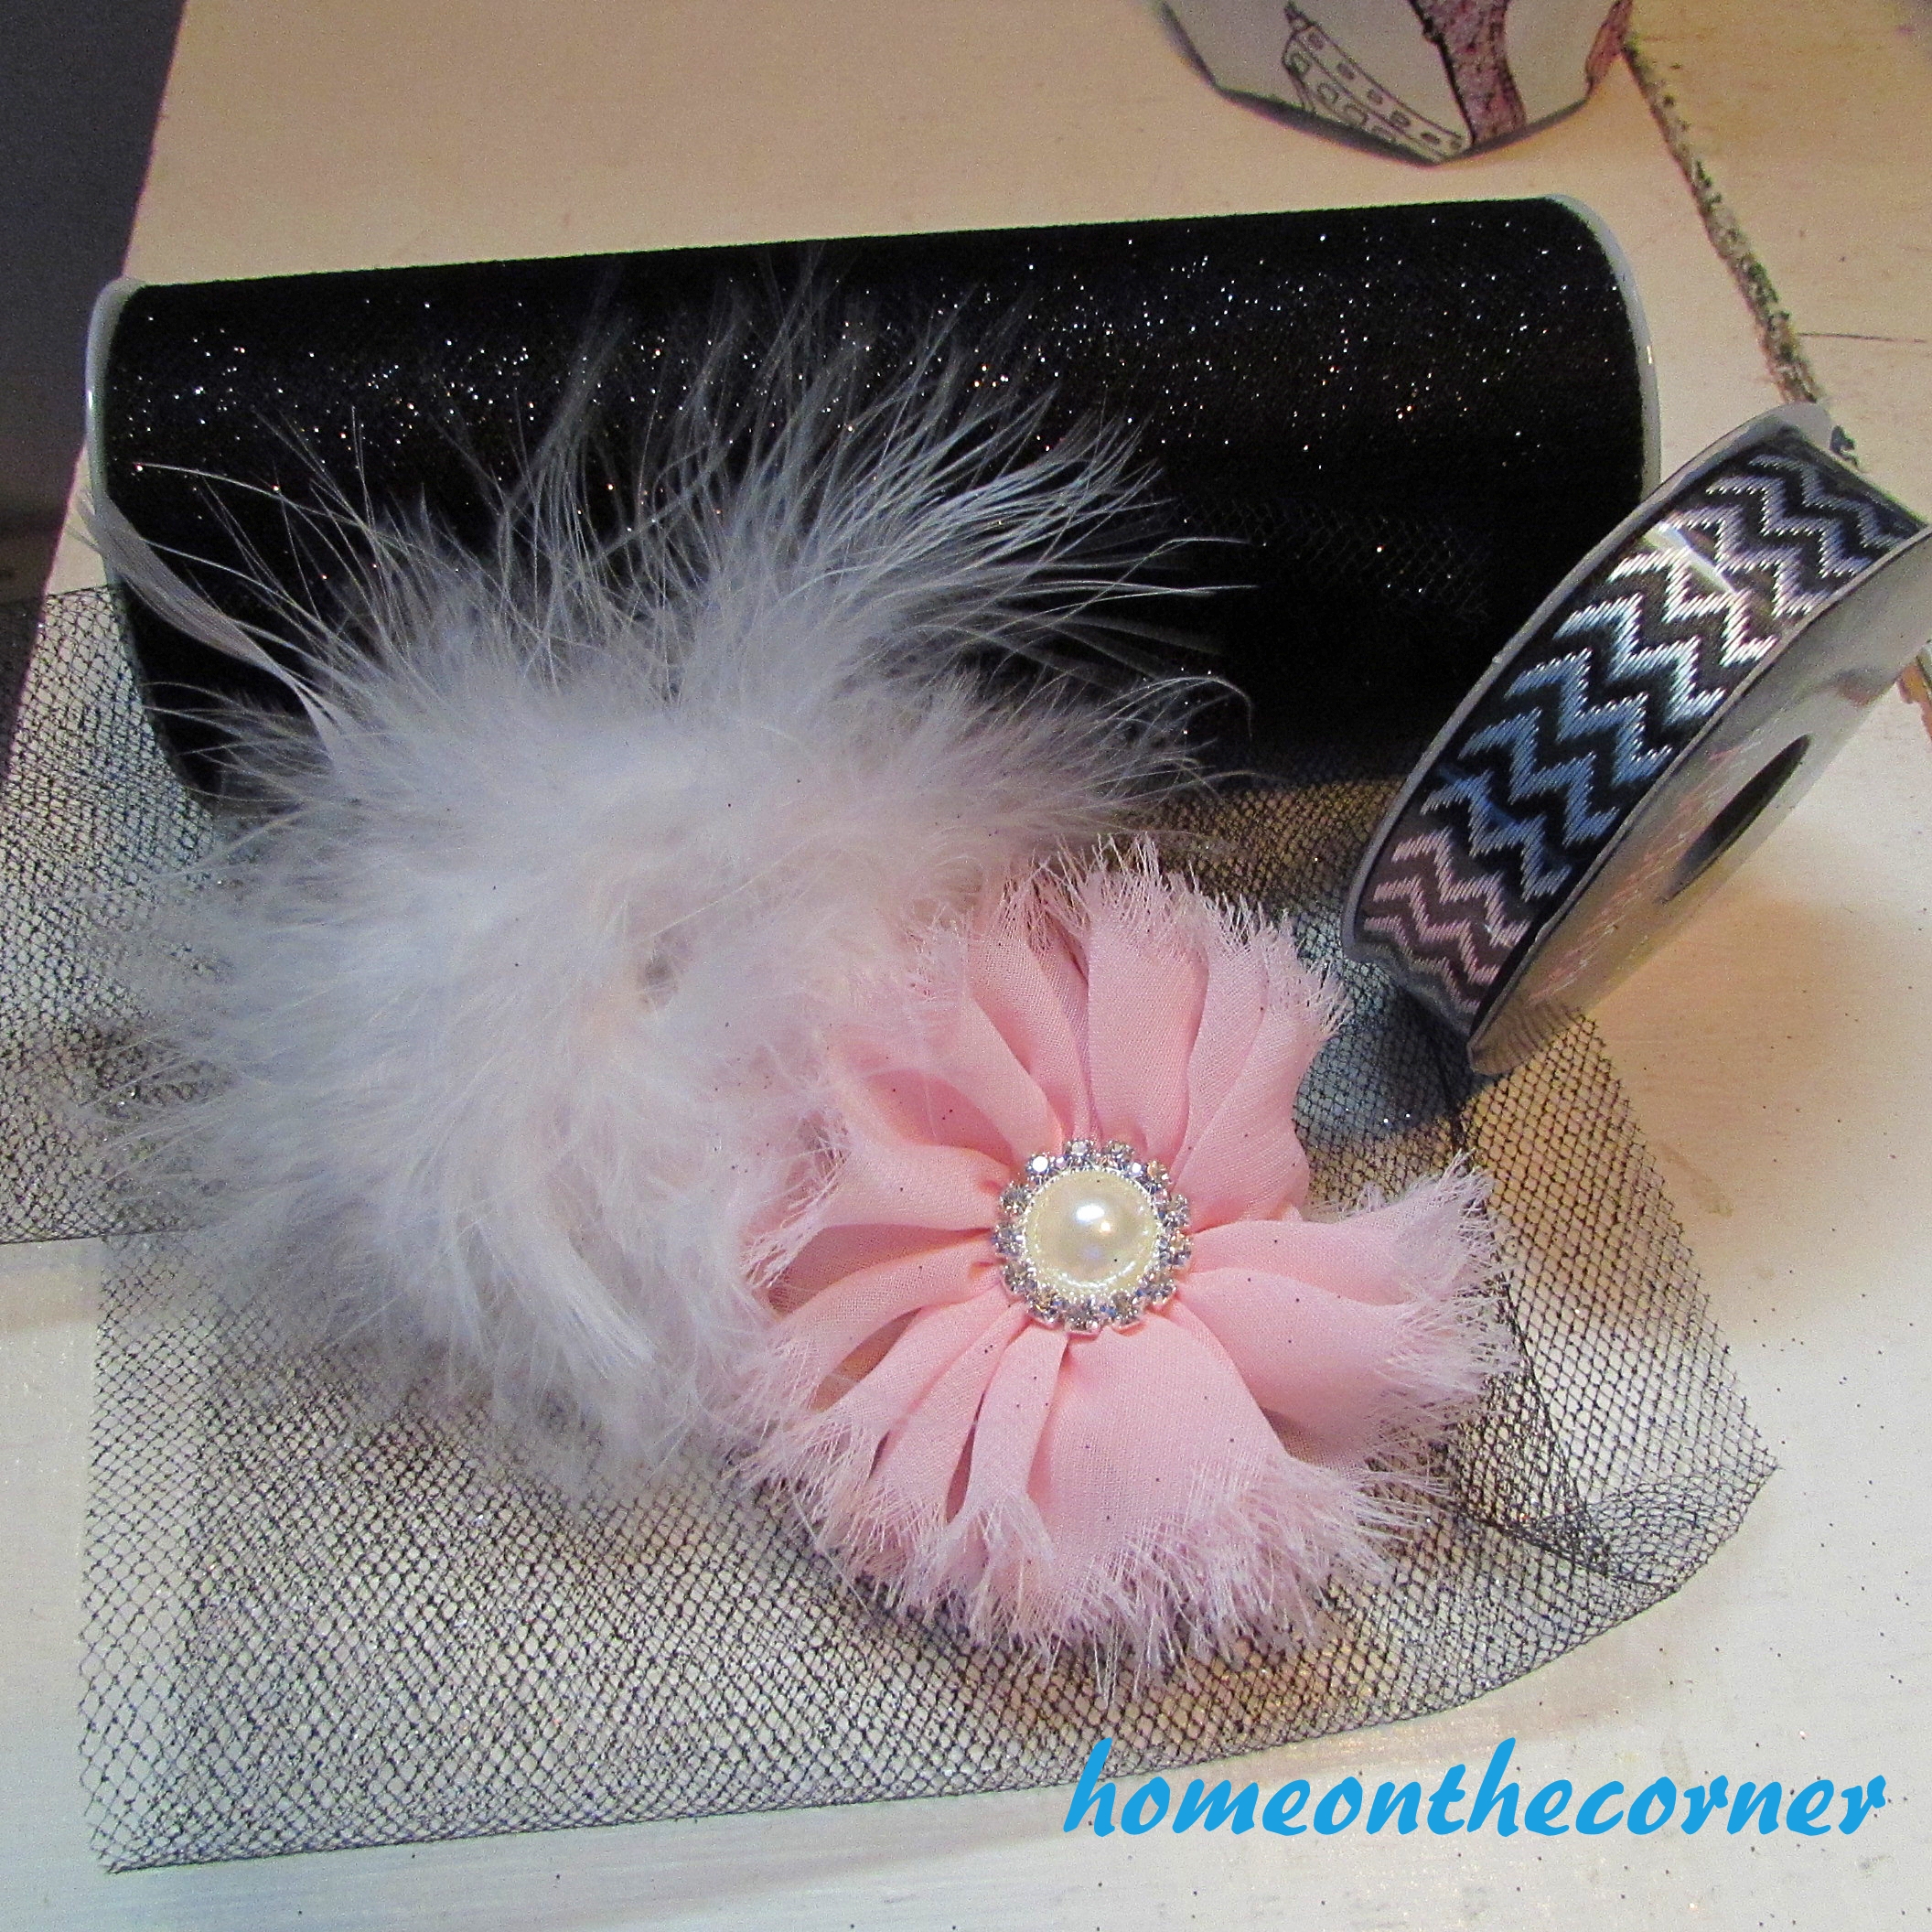
After the fabric was glued to the cone, I glued the sparkly felt brim to the bottom of the come. Now for the decorating and embellishing! Here are a few of the things I found: glittery tulle, a feathery ponytail holder and a pink flower clip and some black and silver ribbon.

Witch Hat Accessories

I don’t have pictures of adding this to the hat, because I couldn’t glue and take pictures at the same time! I first added the tulle in ruffles around the middle, then added the feathers with the flower on top of the feathers. I added the ribbon around the edge of each of the black disks. Once everything was ready, I Poked the dowel through the disks first then the brim of the hat. I had to use a sharp tool to get through the felt. Then I pushed the cone onto the dowel. Once it was far enough on, I put glue on the brim and pushed it up against the cone and let dry.

Here it is!

Witches Hat Display

Witch Hat Close up

Paris Witch Hat Display

I think this came out adorable! I want to try one in more neutral colors too. I would love to see yours if you make one too!

sunshine-and-blessings-picmonkey

2015 Home Tour Fall Glittery Pumpkin      Christmas Fireplace 2015 Deer

I Moved to a New Apartment

Well everyone.  It has been a wonderful two years at my last apartment, but on Monday I moved to a new place.

It was a hard decision, but when I thought I would be moving in with some friends and that fell through, I had to find something else that worked.  So I looked at apartments to live by myself, but I didn’t think that I could afford it on how much I make a month.

So I turned to Craigslist where I found an ad for someone looking for another roommate.  I would have my own room, but share a bathroom with one other roommate.  And after meeting the girls and signing the lease, I moved all of my stuff in on Monday.

And here is what my new room looks like!

Bed and Gallery Wall

Okay, so that’s what my bed and wall looks like.  I put my bed in the corner of the room because I wanted the most room to add my other furniture.  My room is a lot smaller than my last room, so I had to really work to get everything to fit.  One of those things, is all of the artwork that I have.  So, mom told me that I needed to create a gallery wall.

Now, it’s not completely done, but here is what I have so far.

Bed and Gallery Wall 2

Yeah, so I still have a few things left to hang on my wall, like a chalkboard and two mirrors that fit in nicely with my other art.  I might also buy a S to go with the L on the wall.  Who knows?

On the other side of the room is where the rest of my furniture is.  I have this dresser that is filled to the brim with stuff.

Full Dresser

Doesn’t it look familiar?  If not, I’ll leave a link at the end of the post for the original blog post about this dresser.  But, I was finally able to use it and it fits all of the clothes.  Hooray!

I also have my bookshelf that was brought over from the other apartment.  And it is already filled with decor and books.

Bookshelf Decor

And yes, that is an unopened box of Cards Against Humanity on the bottom shelf.  I just need to find some people who would want to play it with me… But yeah, I have I ever mentioned that I like Paris and the Eiffel Tower and pink?  I think you can definitely tell just by looking at my room.

Finally for furniture, I have this TV stand that I had painted blue a few weeks ago when I still thought that I was moving in with my friends, not people on Craigslist.  Well, mom surprised me by painting it black, adding pink and white knobs on the front, and decorative paper on the bottom of the drawer and inside the doors.  Imagine my surprise when I saw that pull up to the new apartment instead of the blue one.

Extra Storage

I also hung my bow board up behind my bedroom door because I am sharing a bathroom and there isn’t space in the bathroom to hang it.  So, it is by my door so that way I can just grab a bow before I head out to work!

Bow Board

And finally the closet… Is it any bigger than the closet at my last apartment?  The answer is yes.  Not much, but yes it is bigger.  I don’t have a walk in closet anymore, but I have a lot more hanging room and storage for my tee shirts and work clothes.  So, I guess that I have a bigger closet?

Closet Space

So, yeah.  That’s my new space.  I really like it.  It makes me really think before I buy something big because I have to think about where I am going to put it.  Since I don’t have as large of a space like my last apartment, I have to be really careful.  But, I like it a lot and I am very grateful for not having to climb so many stairs.

Check out some of my other blogs!

Parisian Room Decor                  dresser 1                  TV Stand Final 1

Lauren’s Apartment                            A New Dresser                           Teen to Adult TV Stand

sparkle