Hundreds of Christmas Ornament Ideas!

Welcome to the 2019 Ornament Exchange Link Party! It’s my fourth year of the blogger ornament exchange and you’ll find hundreds of DIY ornament tutorials and inspiration. This link party runs from November 14th through December 14th, so make sure to come back to add as many of your own handmade ornament tutorials before it closes!


This year, we have 38 talented bloggers hosting the handmade ornament exchange link party! The rules of the challenge were simple: create a handmade ornament for $15 or under, create a tutorial (all tutorials are linked below), and ship the ornament off to a new home!

2019 Ornament Exchange Long

ORNAMENT EXCHANGE LINK PARTY HOSTS

My Pinterventures •  Create and Babble • 2 Bees in a Pod
 Across the Boulevard •  Elle Marie Home  • Faeries and Fauna
Home on the Corner • This Autoimmune Life • Our Unschooling Journey
Domestic Deadline •  Inside the Fox Den • Intelligent Domestications
Cookies, Coffee and Crafts  • Munofore •  Rosewood and Grace
Raggedy Bits • Christmas Tree Lane •  Making Manzanita
Mom Home Guide • From Evija with Love •  Red Cottage Chronicles
Coastal Bohemian • Our Crafty Mom •  Girl, Just DIY! •  Pixel Maven’s Retreat
Prim and Propah •  Purple Hues and Me • Farm Girl Reformed • Eye Love Knots
Keys to InspirationCharleston CraftedSparkle Living
Interior Frugalista  • Love My Little Cottage •  My Family Thyme
Crafting a Family  •  All Things New Again  •  Just a Little Creativity

Ornament Exchange Collage 3 Blank (1)

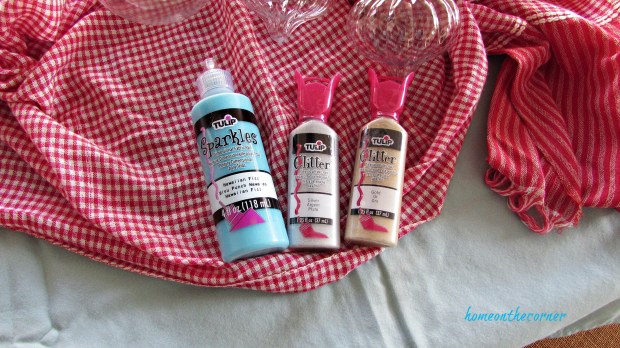
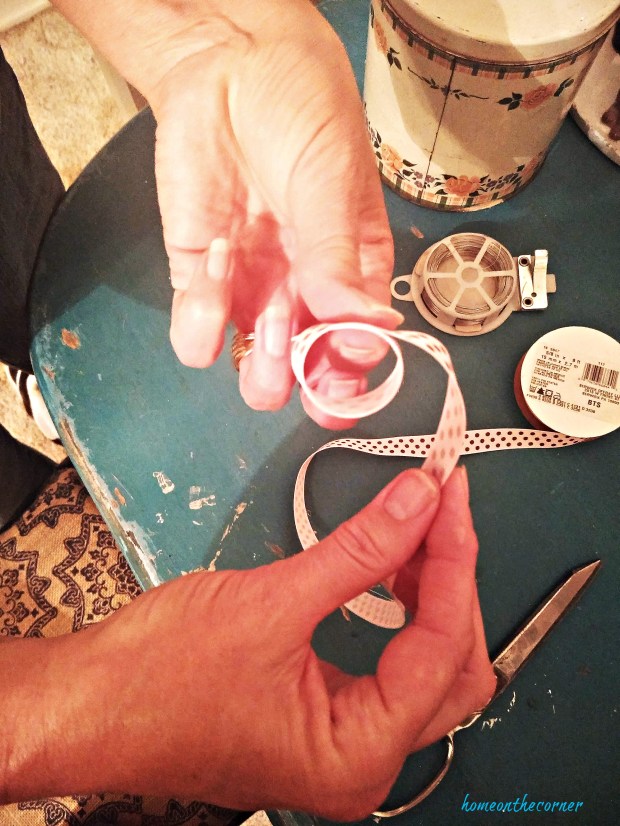
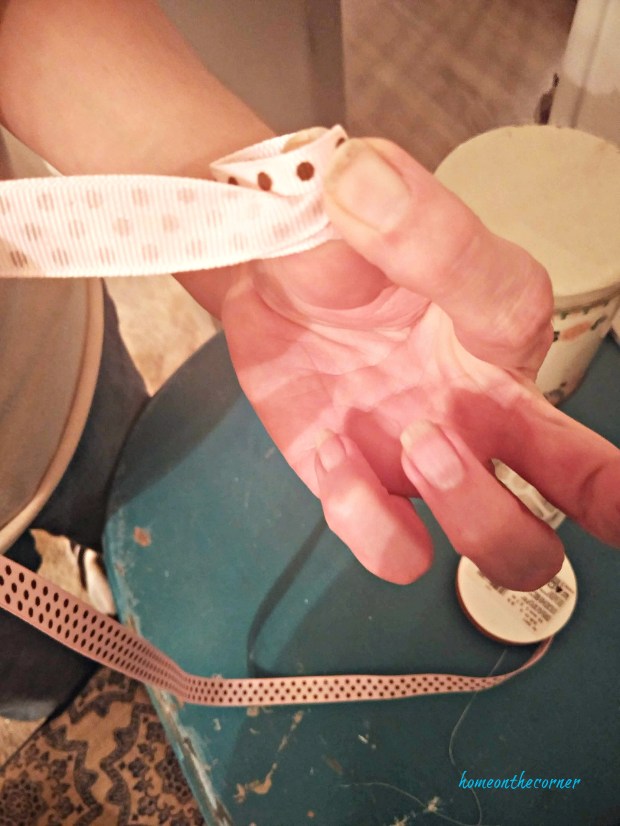
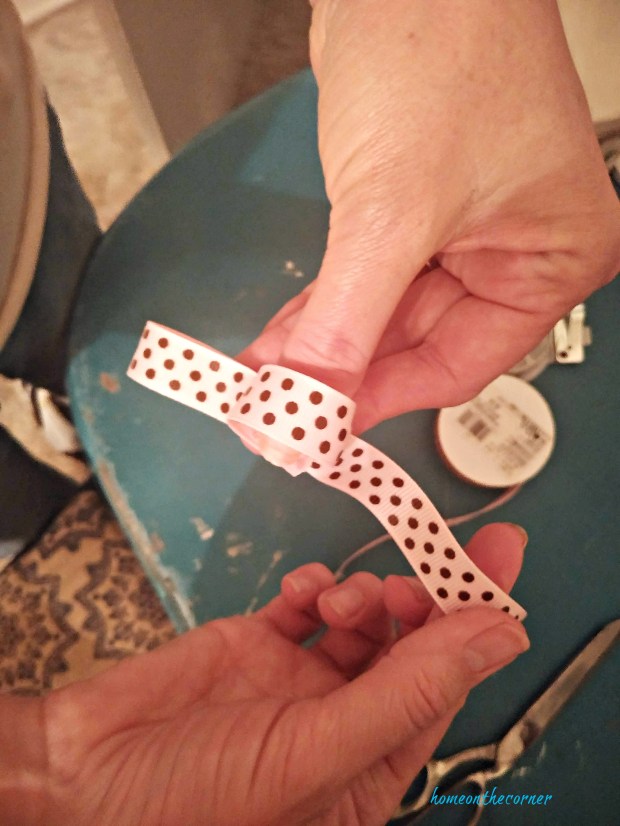
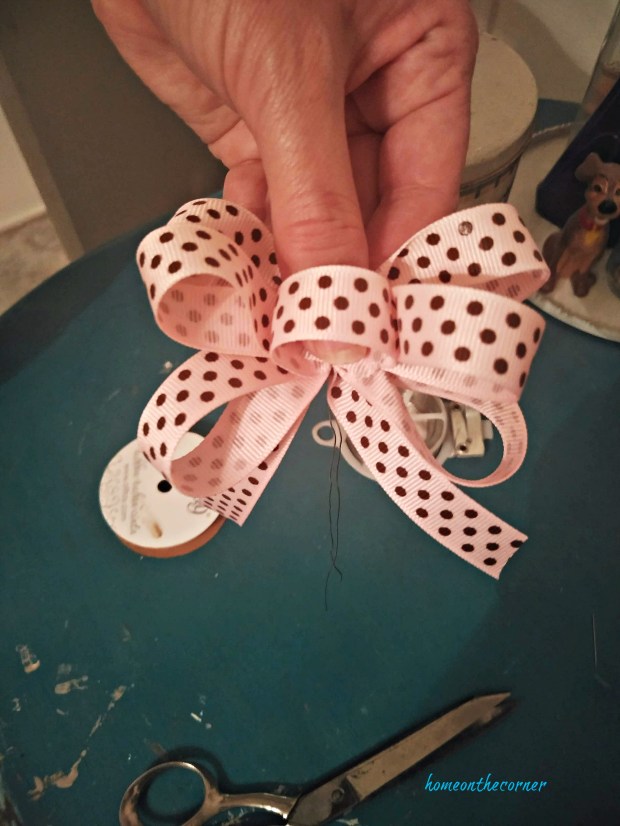
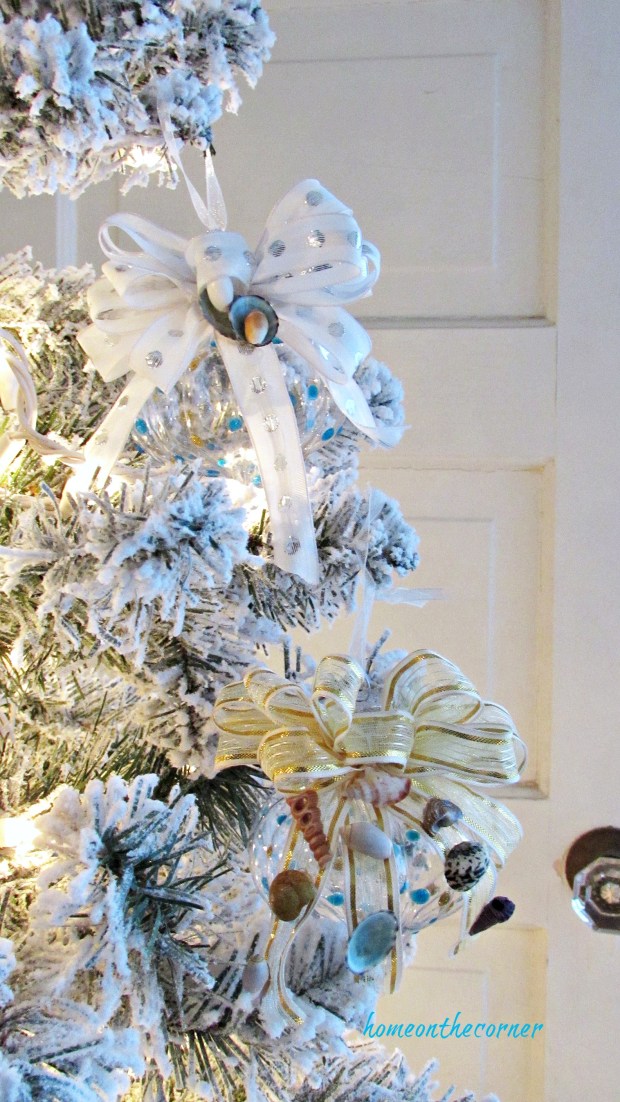
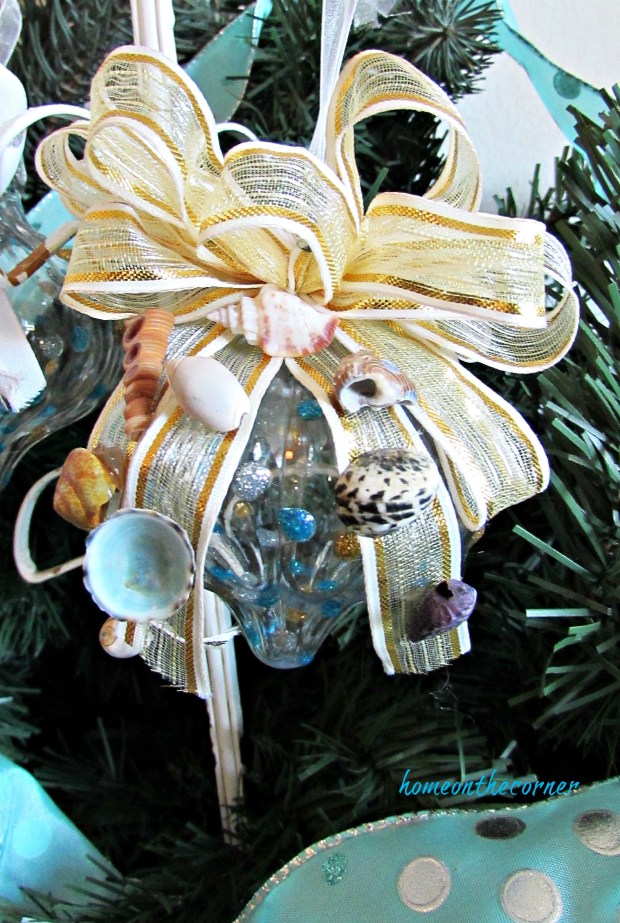
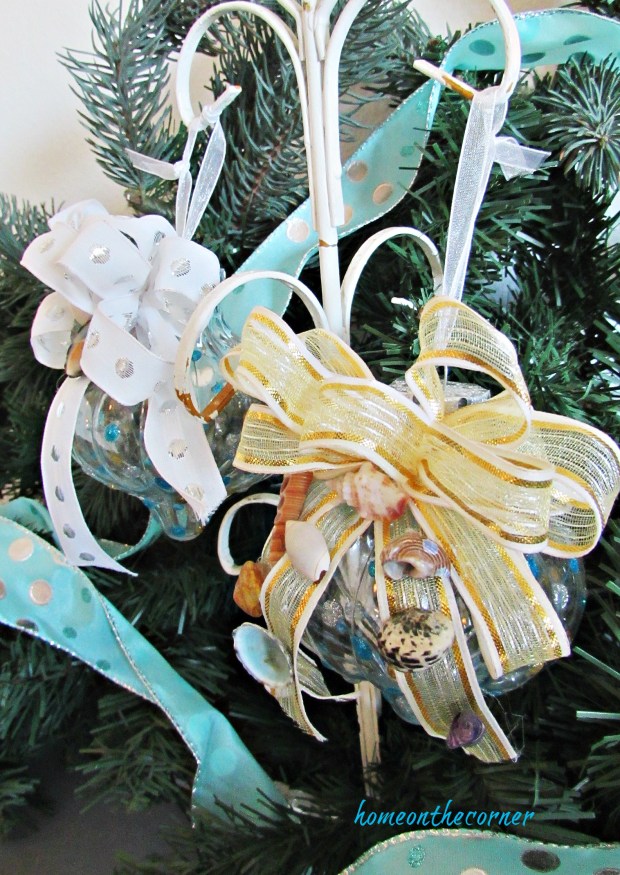
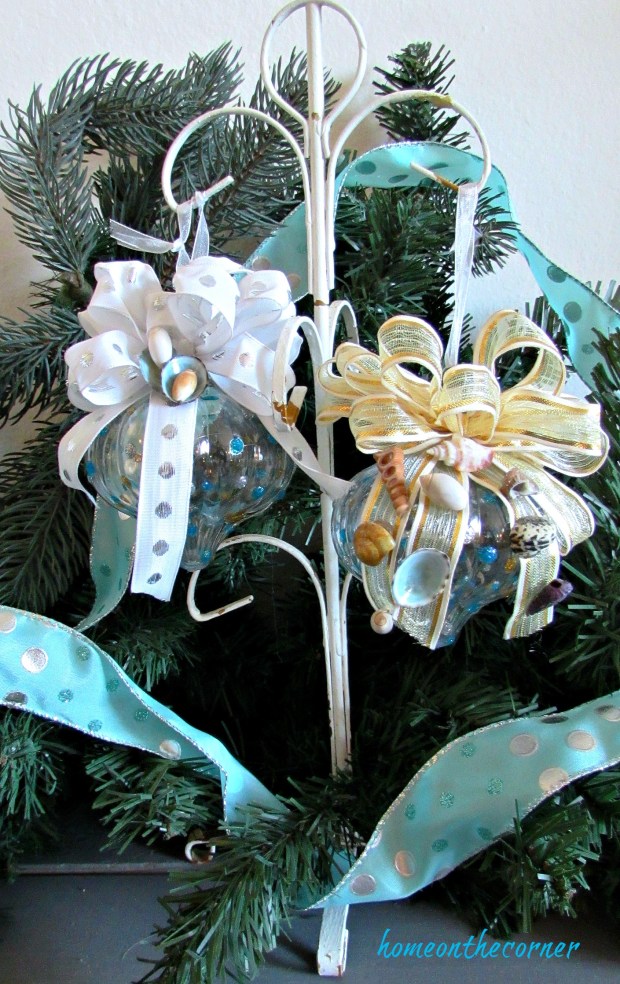
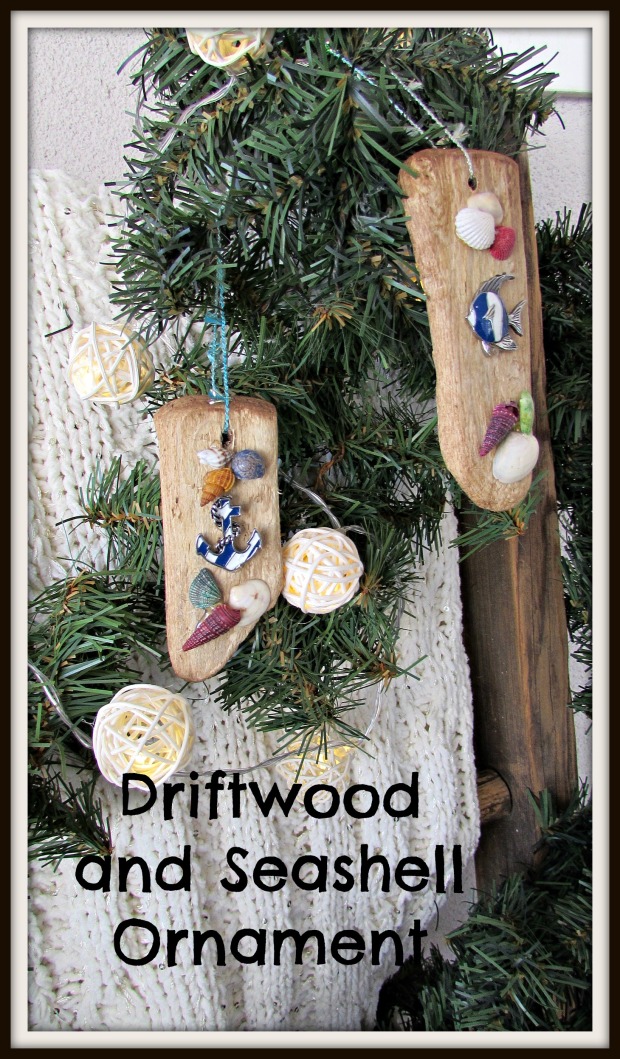
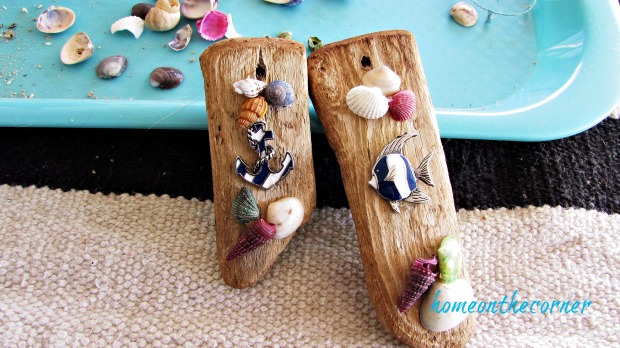
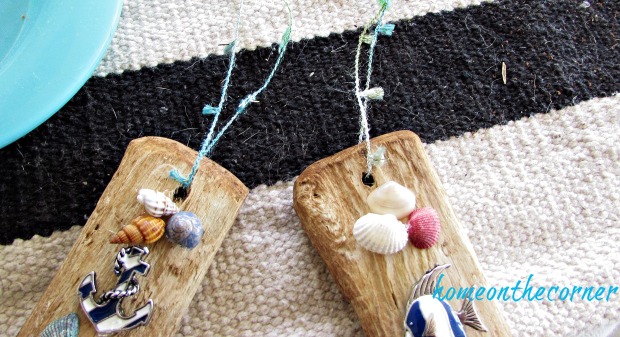
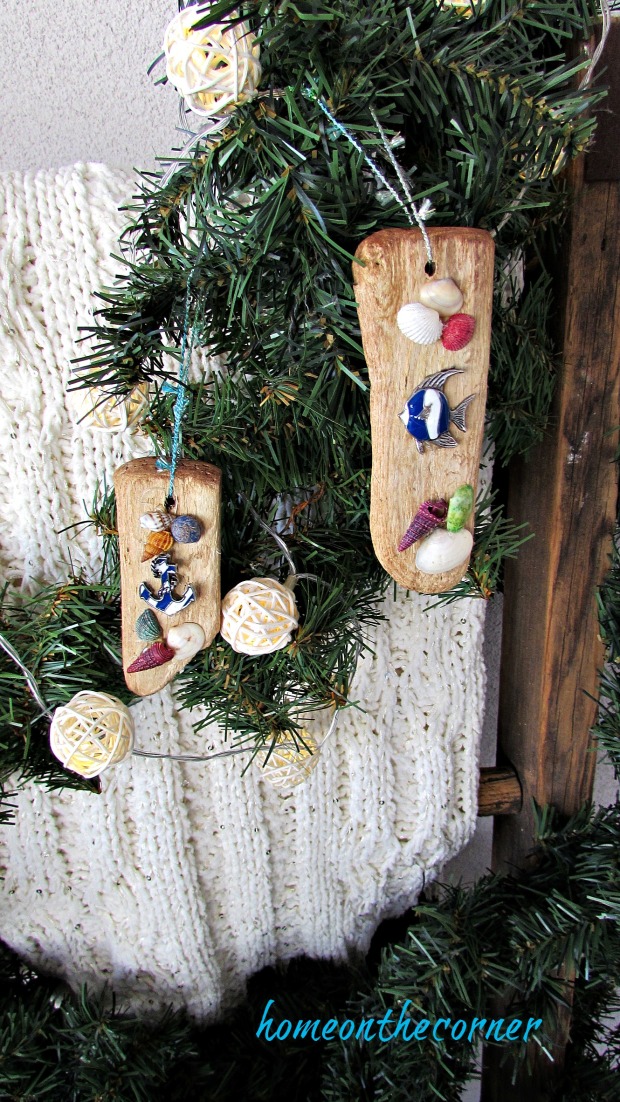
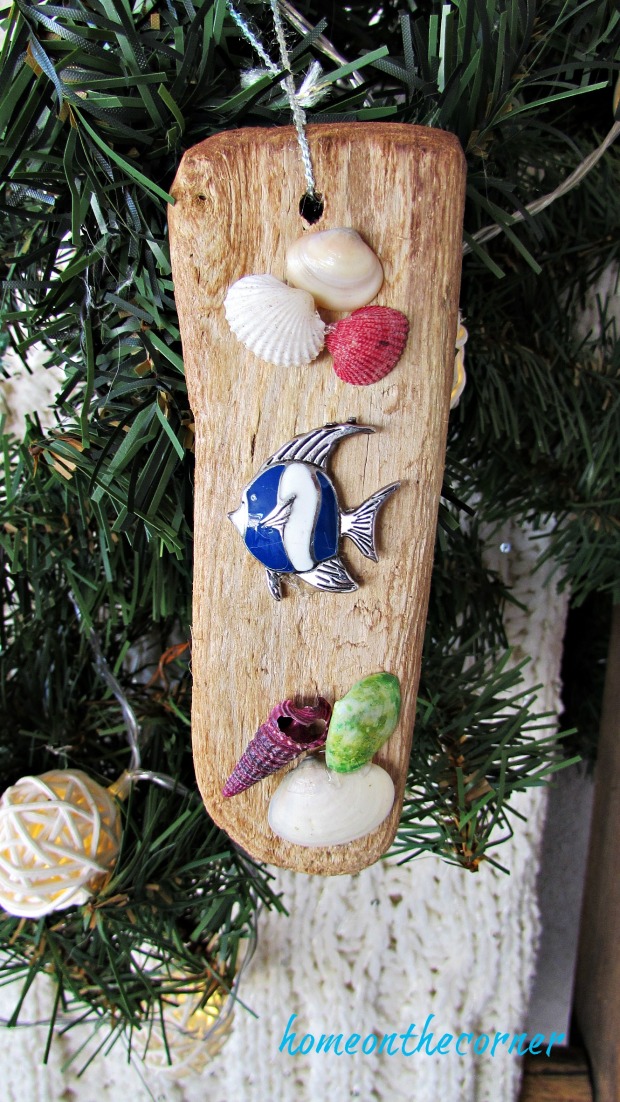
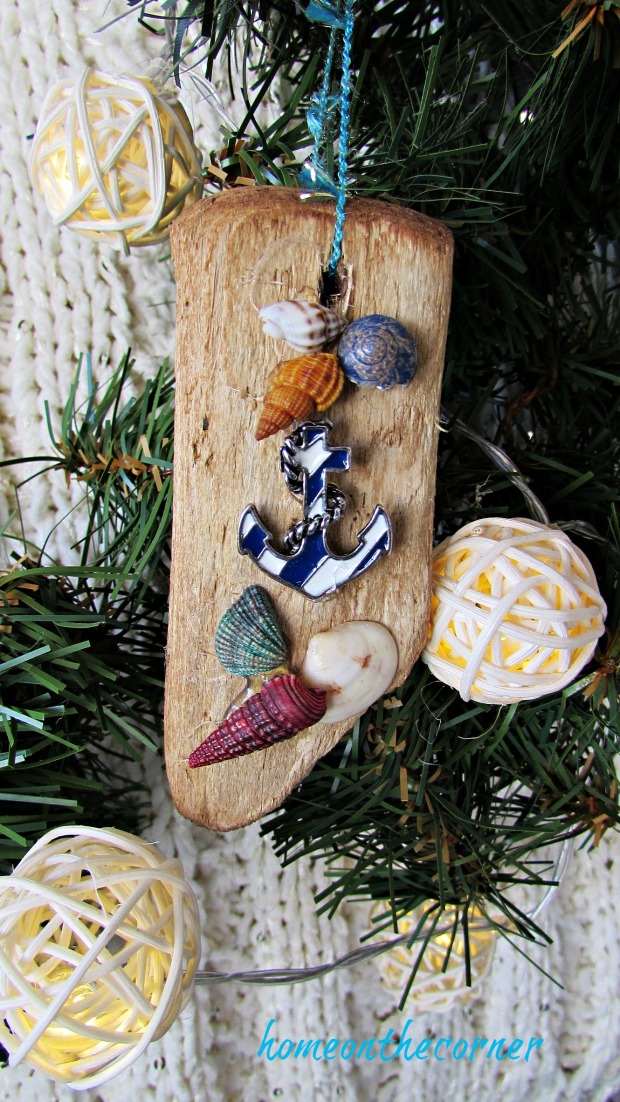
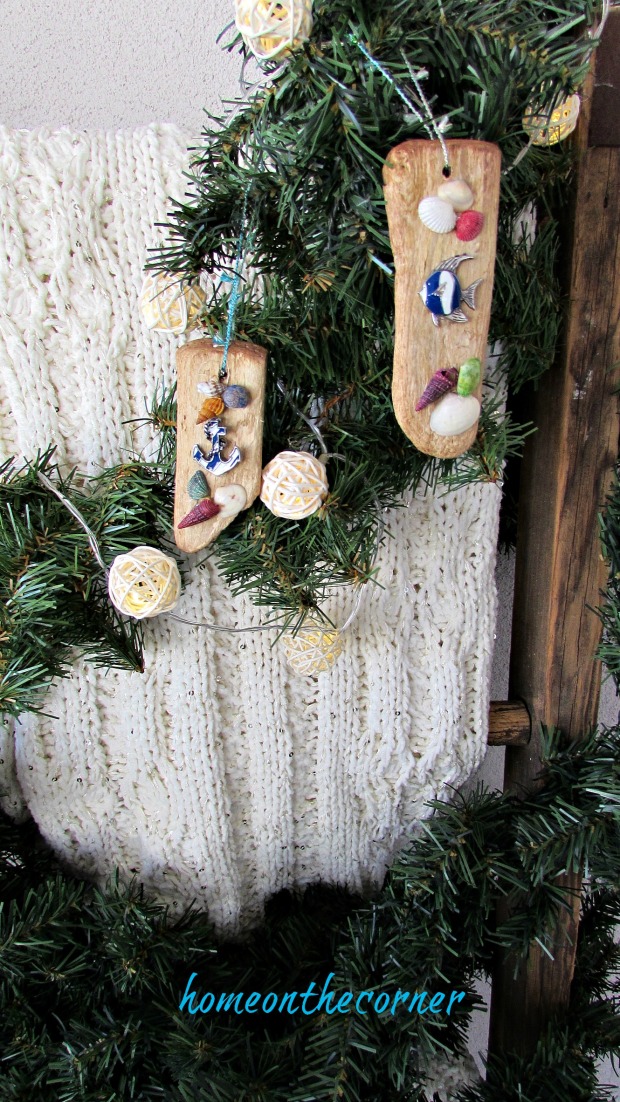
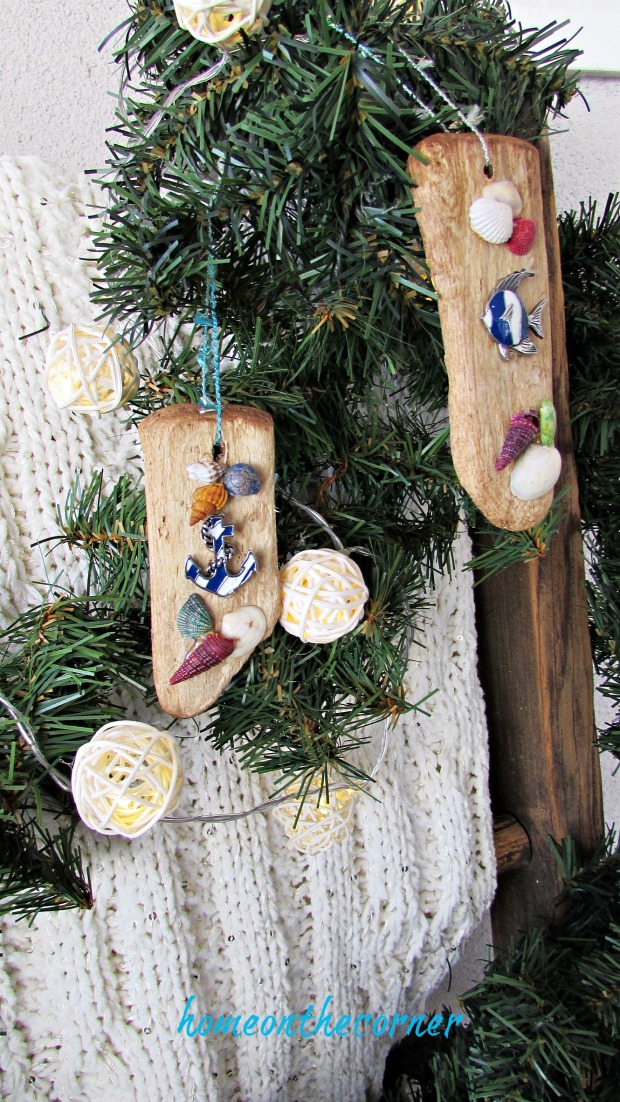
You can see the ornament I created for my new friend Morgan, here.

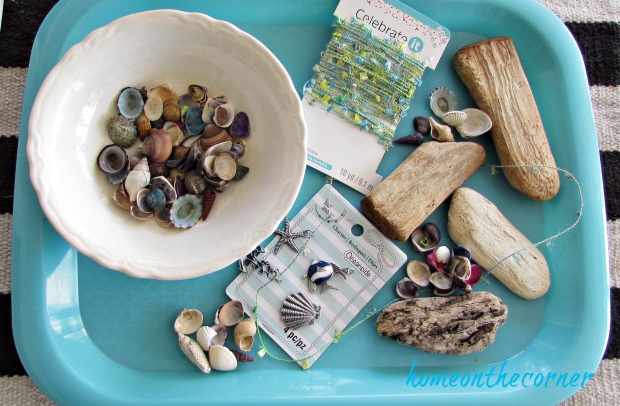
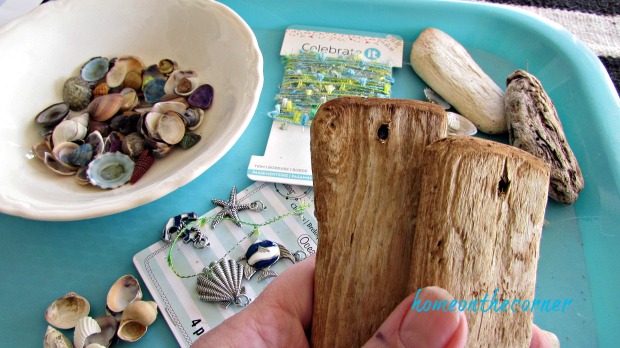
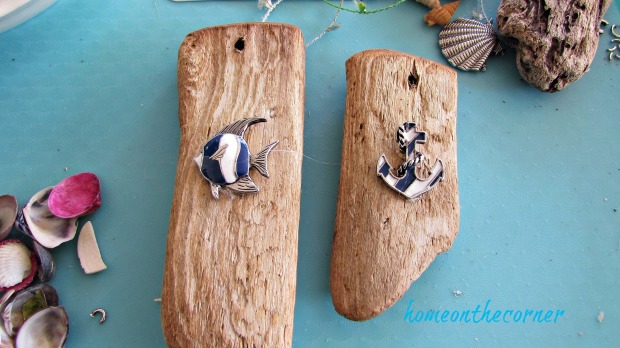
DIY Turquoise, Silver and Gold Coastal Ornament

turquoise ornament white and silver bow

I can’t wait to see what you have all created! Link up you ornaments below!

2019 Ornament Exchange Link Party

Share your handmade ornament tutorial on the link party below ⇓⇓ Add as many ornament tutorials as you like until December 14th. 

You are invited to the Inlinkz link party!

Click here to enter

sunshine-and-blessings-picmonkey


Nautical Inspired Seashell Ornament

Good morning! Welcome to the 2019 Ornament Exchange! I’m so excited to be participating again this year! It’s such a great way to find other bloggers and some new friends. Thank you Erlene for putting this all together! Look at all these great ideas! You can click here to go back to the blog hop and link up your own ornaments!

Ornament Exchange Collage 3 Blank (1)

This year I was partnered with Morgan from Charleston Crafted.  She has some of the cutest ideas and the cutest little boy! I love her style and enjoy following all the diy’s her and her husband work on. Please go over and take a look at her blog!

Morgan enjoys the coastal style just like I do, so making her an ornament for her Christmas tree was easy! I started our with these clear ornaments. I found the smaller ones at the Dollar tree and loved the swirly design.

christmas ornament exchange clear ornament

I bought some glittery paint to add to the ornaments. I knew these would be the perfect colors for Morgan.

christmas ornament exchange glitter paint

I practiced making dots first on a piece of paper. I didn’t want to mess up the ornaments!

christmas ornament exchange paint dots

I used a cup to balance the ornament on and once one side was dry, I turned the ornament to paint the other side.

christmas ornament exchange glitter paint dots

While the paint was drying, I made bows for the top of each ornament. I learned to make bows years ago when I took some florist classes. They aren’t too difficult, but do take a little bit of practice. If you want really nice looking bow, use wired ribbon. It makes any bow look perfect! Here are the steps for making your own bow:

!. Start with a small loop of ribbon. This will be the center of your bow.

how to tie a bow step 1

2. Twist the long piece of the ribbon on the back of the loop.

how to tie a bow step 2

3. Taking the long piece, twist the ribbon into another longer loop on one side. When you bring it back to the middle, twist it again and make a loop on the other side.

how to tie a bow step 3

4. Keep making loops on each side of the center loop and keep twisting the ribbon on the back.

how to tie a bow step 4

5. Once you have as many loops as you want on each side, make one more loop around the bottom. You can also leave extra so you will have 3 tails on the bottom.

how to tie a bow step 6

6. Cut a small piece of wire (easier done before you start :)), slide half the wire through the middle loop.

how to tie a bow step 7

7. This part takes a little practice. The wire should go between your two first fingers and them squeeze the two ends of the wire together under the loop.

how to tie a bow step 8

8. Once the wire is together, twist it tightly around to secure the bow.

how to tie a bow step 9

Fluff up each loop and cut the long tail loop and you have a bow! Did you know if you cut ribbon on a diagonal, it won’t fray?

how to tie a bow step 10

Here is a video too that might make it a little easier to understand.

I used silver and gold ribbon, tied them into bows and glued them to the top of each ornament. I also glued some seashells onto the ribbon, just to make it look more coastal.

christmas ornament exchange gold and seashellschristmas ornament exchange turquoise, gold, silver

They look so pretty when they sparkle with the lights from the tree.

christmas ornament exchange silver and white ribbonchristmas ornament exchange coastal turquoisechristmas ornament exchange coastal seashellschristmas ornament exchange 2 ornaments

Since the ornaments were a little hard to see on a white tree, I took a few pictures with green pine too.

turquoise clear ornamentturquoise ornament gold bow and seashellsturquoise ornament gold, silver seashellsturquoise ornament polka dotsturquoise ornament white and silver bowturquoise ornament with bow

I loved making these and I think they turned out so good. Thank you Morgan for your ornament too! I will be sharing it soon! Be sure to go back and link up your ornaments too. I would love to see them! I hope you all have a wonderful holiday season!

sunshine-and-blessings-picmonkey

Make Your Own Coasters Plus a Printable!

Skull coasters title

Good morning! Are you ready for a new week? it’s hard to believe that October is almost over! Crazy! Are you starting to think of Christmas yet? I have been. In fact, this project is a gift for Christmas, that is, if my daughter doesn’t see this blog post first! 🙂

I have lots of scrap pieces of wood around and this was the perfect project to use a little bit of it. I had my husband cut 4 pieces of wood into squares and then sand the edges to smooth them.

Skull coaster blocks of wood

I painted 2 coats of black acrylic paint on all sides. I had these skulls in my stash, so they were perfect for Haley’s love of skulls. I used Mod Podge to attach them to the wood.

skull coasters with mod podge

I brushed Mod Podge all over the top of the wood block.

skull coaster mod podge

I centered the skull on top and then brushed more Mod Podge over the whole thing.

skull coaster paper skullskull coaster black wooden block

Once everything was dry, I sprayed each block with clear gloss. I gave each one 2 coats, since these will be used as coasters and have wet glasses on them.

skull coaster white and silver clear coat

I also attached rubber feet on the bottom so they won’t scratch any surfaces.

skull coaster rubber feet

They are ready for a cup of something cool or hot!

skull coasters with printableskull coasters mug, skeleton, pillow black and white

Isn’t this printable great? Lauren made this just for all of you! I want to sing the song every time I look at it. You can get this printable by clicking here. Just scroll to the bottom of the page once you get there. There is another one to choose from too.

skull coasters gim grinning ghosts printable

As you can see, we have quite a few skulls to go along with the coasters.

skull coaster tablescapeskull coaster black silver white

I tied them up with orange bakers twine so they are all ready to give as a gift. I’m excited to give these to Haley!

skull coasters tied with orange twine

Hope you all have a great week!

sunshine-and-blessings-picmonkey

Here are some other posts you might like:

travel map pumpkin book pumpkins leaves   fall 2018 back patio coffee table pumpkins

amazon affiliate


Vintage Pink Ornament Christmas Tree

Good morning! I hope you all had a wonderful Thanksgiving We had a nice, quiet day and now I have been busy Christmas decorating! Its always fun to unpack the boxes and relive the special memories some of the pieces have.

I have been collecting some vintage ornaments for several years now. My dad gave me a box of vintage Shiny Brights that had been his moms and I have loved them ever since. I have even picked up some pink ones for Lauren. Not all are vintage, but when mixed together, they look pretty nice.

Pink and Silver Ornament Tree Title

I had seen this idea a while back and finally got around to making it. I picked out some pink and silver ornaments in various sizes. I took some wire and shaped it into a triangle. My wire was pretty thick and sort of hard to work with, but it was all I had on hand. Just be sure whatever you get is strong enough to hold the ornaments, but easy enough to bend.

pink christmas ornament wire tree and vintage ornaments

I snipped a bunch of little pieces of thinner wire to attach each ornament to the tree shaped wire.

pink christmas ornament treepink ornament tree wire for hooks

I curled each piece by wrapping it around a pencil. These will be my ornament hooks.

pink ornament christmas tree wire hook

Most of my ornaments didn’t have a hanger on the top so I took a small piece of narrow black ribbon and hot glued it inside the opening.

pink christmas ornament ribbon hangers

Once my ornaments wee ready, I measured the sides of my triangle and marked the sides where I wanted to add wire across.

pink christmas ornament tree wire triangle

I cut another piece of wire to place across my triangle. I cut each one a little longer than the width of the tree. This will give a place for my ornaments to hang. I attached each side with thinner wire and a little bit of hot glue. I also curled the ends of each one.

pink christmas ornament tree curled wire ends

I started placing my ornaments on my wire tree, moving them around until I got the placement I wanted.

pink christmas ornament tree with black frame

This will be perfect for Lauren’s pink Christmas!

pink christmas ornament pink silver blackpink christmas tree ornament tree topperpink christmas black frame wall decor

I also made this cute little topper with some scrapbook paper and a metal key.

pink christmas tree ornament tree topper with keypink christmas silver black and pink hanging treepink christmas ornament tree hanging

I can’t wait to see this hanging in Lauren’s home! Do you have any other ideas for vintage ornaments? I would love to hear about it!

sunshine-and-blessings-picmonkey

Here are some other posts you may like:

ornament exchange driftwood beach shells anchor            getting ready for guests pillows          full wreath

amazon affiliate


Seashell and Driftwood Ornament

Good morning! I have an exciting post today! I am taking part in MyPinterventures Ornament Exchange! (Thanks Erlene!) I believe this is the 4th year I have participated in the exchange and it’s fun to see what all the other bloggers come up with for their ornaments and see what your partner made for you!

driftwood and seashell ornament title

I was partnered with Michelle from Coastal Bohemian. Of course, coastal always works for me! I picked up the driftwood from the beach this past summer and I bought the small seashells ($2.99) and charms ($1.99) from Michaels. I already had the pretty string from another project. Other than those pieces, I just needed my drill and my hot glue gun.

Ornament exchange Supplies

I started out by drilling a hole in the top of each piece of driftwood, so there would be a place for the string. This was pretty easy since the wood is so soft.

ornament exchange driftwood ornament

I picked which charms I wanted to use and snipped off the ring at the top with wire cutters. I used hot glue to attach it to the driftwood.

ornament exchange coastal fish anchor

I played around with different placement of the seashells, trying out different colors and sizes. Once I was happy with it, I hot glued them into place.

ornament exchange seashells driftwood seashore beach

The last step was to tie a piece of string through the hole so it could hang from the tree.

ornament exchange seashells, ribbon hanger

They turned out so pretty! I’m going to make a couple of extra for my own tree too.

ornament exchange driftwood ornament seashells

I hope Michelle enjoys hanging these on her tree as much as I enjoyed making them.

ornament exchange angel fish

ornament exchange driftwood anchor

The pretty colors and seashells immediately take me back to the beach.

ornament exchange fish, anchor blue, turquoiseornament exchange driftwood beach shells anchor

Thank you so much for stopping by today! I hope you take time to go visit the other bloggers and see their ornaments too! If you would like to add your ornament how-to to the link party, go here.

sunshine-and-blessings-picmonkey