Welcome Fall!

Good morning! It’s September! Fall time, right?! Well, not really. But in the blogging world, we have to get our ideas out to inspire everyone. I didn’t want to pull out all the red, golds and oranges, so when I visited Michaels, I noticed all the pretty soft neutrals, like sage green, cream and blush. I decided I would focus mostly on those colors with a few spots of orange thrown in.

Come on in!

Since I tried to keep a more neutral color scheme, I added lots of texture. I added a woven basket, a burlap pumpkin, book page paper leaves, and a brass candlestick.

early fall entryway neutralsearly fall entryway neutral colors textureearly fall entryway leaves and pumpkins

I did pick up this Thankful and Grateful framed print from Hobby Lobby. I figured it was perfect for fall!

early fall entry grateful and thankfulearly fall entryway grateful and thankful print

Let’s head into the living room! I’m still loving having my faux fireplace in here and I love decorating it too!

early fall living room mantle cotton chalkboardearly fall living room mantle fireplaceearly fall living room mantle with cotton

I used lots of neutrals on the mantle, using books, chalkboard, cotton and even a spool of ribbon for texture.

early fall living room neutral bird and booksearly fall living room chalkboard a fallen leafearly fall living room pumpkin pillow

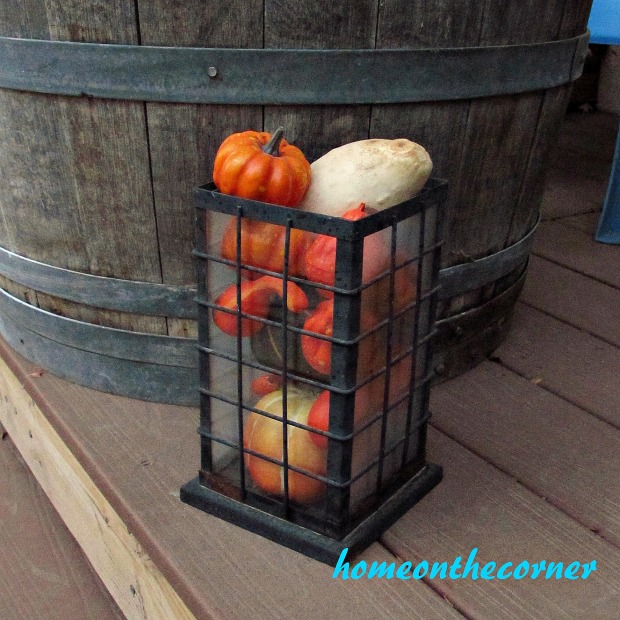
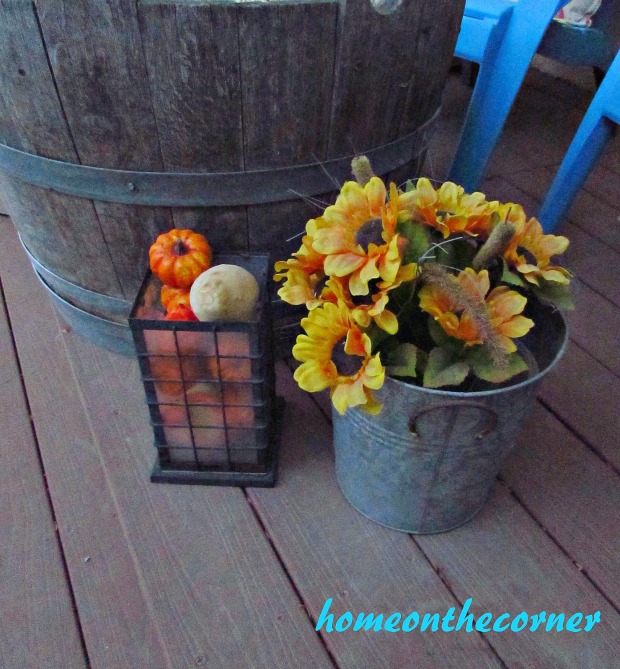
Here’s a peek into the dining area! On my coffee table I created a simple vignette. I did add one turquoise pumpkin here along with some gourds. I just received this little ‘Grateful’ wooden block from a friend and knew it would be perfect.

early fall living room coffee table vignetteearly fall living room lantern and pumpkin vinetteearly fall living room grateful vignette

I finished painting this little side table this summer and it was nice to be able to finally add it to my room and place some special pieces on top. I tied a few stems of flowers together, added a burlap pumpkin and a lantern.

early fall living room side table flowers pumpkinearly fall living room side table

I hope you enjoyed this little tour. I will be back next week with my early fall dining room. Thanks for stopping by today!

sunshine-and-blessings-picmonkey

amazon affiliate


Driftwood Starfish

Good morning! Well, this will probably be my last summer post this year. Crazy, right? It’s hard to think about fall when it’s still over 100 degrees outside!

I found this cute idea over at The Wicker House.  Thanks Emily! Great craft!

I thought I would give it a try with some of the driftwood I picked up when we went to the beach. I found some slim pieces that weren’t too long and some small chunks of wood to add to the back. I already had the twine.

driftwood starfish supplies

I started with the long pieces that I wanted to go together and a piece that would work for the middle.

driftwood starfish 5 pieces

I used hot glue to attach all the pieces together.

driftwood starfish hot glue and twine

I then glued the end of the twine to the back of the piece of wood to secure it and then started wrapping it around all the long pieces.

driftwood starfish with twine

I continued wrapping until everything seemed secure and then added a little more hot glue on the back to finish it off.

driftwood starfish wrapping with twine

Such a simple project, but looks so cute!

driftwood starfish with sailboat

These starfish give the perfect finishing touch to any coastal vignette.

driftwood starfish 5 pieces and twine

I wrapped this one with string instead of twine and it looks great too.

driftwood starfish single 5 pieces with stringdriftwood starfish small starfishdriftwood starfish with bucket

I love the little extra touch these starfish bring to my home.

driftwood starfish with twine boats

Are you ready for fall or are you still hanging on to summer?

sunshine-and-blessings-picmonkey

Summer To Fall Back Porch

Good morning! I posted this a couple of years ago, but we are at that time of year again! This was at our old house, but there are still some great ideas here. Enjoy!

Summer to fall Back Porch Title

Well, I guess it is time to face the fact that Fall is just around the corner :(. I really do love summer! But I like to decorate for Fall too! I decided to do a little decorating on my back porch, not too much fall, but just enough for a transition.

I used more yellows, golds, and oranges to go along with my turquoise and blues.

Transitional Back Patio Full view 2015


These chairs came from a friend of mine and I just spray painted them blue. I used a variety of pillows in the yellow and orange colors.

Transitional Back Patio View 2015


Over near the door I placed two tall windows and a piece of picket fence behind a basket with chrysanthemums and sunflowers.

Transitional Back Porch Flowers 2015


I also pinned sunflowers onto a string of twine across the window frame that hangs behind the chairs.

Transitional Back Patio Sunflower 2015


We received this half-barrel from a friend a few years ago. I kept thinking i would plant something in it, but with the drought this year, I finally decided to do something different. I had the round piece of wood sitting out in our shop, so I painted it black. My husband added some little boards inside the barrel so the round piece would have something to sit on and would stay balanced if we placed stuff on top. I added a handle on each side. I found an old hula-hoop and cut it open and then cut it to fit around the circle. Then I added rope all the way around until it fit nice and snug inside the barrel rim. I love the rustic look of it!

Transitional Back Patio Succulents 2015


I found the little succulents at the .99 Cent Store. Lauren thought her Starbucks cup added so much more to the ambiance! 🙂

Transitional Back Porch Decor 2015


I added just a few pumpkins to bring in a touch of fall.

Transitional Back Porch 2015Transitional Back Patio Pumpkins 2015


I hope you enjoyed the little tour! I am slowly getting the rest of the house ready for Fall too. How about you? Are you ready for Fall?


sunshine-and-blessings-picmonkey

Fun Ideas To Do With Seashells

Good morning! Do you collect seashells like I do? Last week I showed you my new storage box I made for my collection.

seashell box makeover turquoise letters

I also made a seashell mobile to hang in my yard.

boho seashell mobile hanging outside

I’ve used them quite a bit in my decorating too!

family room bookshelves sea urchins

I even made a seashell garland!

dining room refresh seashell garland

So what else can you make? I found some more ideas around the internet.

Shells can help keep your houseplants happy. By placing seashells on top of the soil, they helps to keep the moisture in the flower pot.

Of course, you can also decorate your flower pot.

Deep shells are perfect for planting succulents in. These are the cutest!

DIY Sea Urchin Succulent Planters- A lovely natural way to display your succulents is in sea urchin shells! Here is how to turn a bunch of empty shells into lovely DIY sea urchin succulent planters! This is such an easy craft, and the end result works great with beach themed decor! | indoor gardening, ways to decorate with succulents, #DIY #craft #succulent #beach

How about using a large open shell to hold your little items next to your bed? I love the gold on these!

This is so simple, I don’t know why I haven’t thought of it! A nightlight!

I made a garland, but not a wind-chime. this is so pretty!

DIY Seashell & Bead Wind Chime - artsychicksrule.com #coastaldecor #beadwindchime #seashellprojects #diywindchime #seashellwindchime

Are you going to try any of these projects! The night-light is my first one! Have a great week!

sunshine-and-blessings-picmonkey

“We are participants in the Amazon Services LLC Associates Program, an affiliate advertising program designed to provide a means for us to earn fees by linking to Amazon.com and affiliated sites.”

Here are some items you might like!


Creating Storage for My Seashells

Good morning! It’s the last day of July! Can you believe it? Do have children getting rady to go back to school? Or maybe you are! I still have  a few weeks left before I go back. So today I am heading to the zoo with Lauren and my two little nieces. It’s supposed to be over 100 degrees today (actually this will be 26 days in a row!), but we are going anyways! The zoo does have a water play area, so we will be spending time in there getting wet!

Seashell box makeover title

Last week, I pulled down a box from my closet, not even sure what was inside. It ended up being fabric. I wondered where those fabric pieces had gone to! For some reason, this time when I looked at the box, I came up with the perfect use for it! My seashells!

Seashell box makeoverseashell box makeover dividers

Here’s how I had them separated. Real classy, right? Yep, good ol’ ziplock bags!

seashell box makeover sorted seashells

I knew I needed more than just 4 compartments, so I dug through my scrapbooking paper and made some more dividers.

seashell box makeover scrapbook paper dividers

I measured each section and then cut pieces of paper a little larger than would fit across each one. I then folded the edges to create a place to glue. I cut 4 pieces and then varied where I glued them in, so that some of the spaces were bigger for my larger shells.

seashell box makeover scrapbook paper folded edgeseashell box makeover printed paper dividers

The dividers in the box weren’t exactly straight, so some of my pieces are a little bowed, but that won’t matter once the shells are in it.

seasehll box makeover with dividers

The lid had one corner missing. I don’t even remember that happening, but I had to find away to fix it, at least a little bit.


IMG_8865

I guess I forgot to take a picture, but I cut 2 little strips of cardboard and glued them on the side and around the corner. Then I glued a burlap ribbon over the while edge of the lid, so it was all covered up. You will see it in the finished pictures.

This is my ancient Cricut machine. I’m sure it’s an antique now.:) But it still mostly works! It took me forever to decide what I wanted to put on to of the box. I knew I wanted it to say ‘seashells’, but I couldn’t decide how I wanted to do it. Stickers, chipboard, paint? I looked through my stash, but finally decided I could get the style I wanted with my Cricut.

seashell box makeover cricut

I love this paper! Once I had my letters cut out, I drew a chalk line on the box so I could keep my letters in a straight line and then glued the letters on. Once I had the letters afixed, I just wiped off the chalk.

seashell box makeover cricut letters chalkseashell box makeover chalk line

Here is the side of the box. I added the ribbon to cover up the fixed edge and then added the sailor knot to cover the spot where the ribbon comes together. I added the label too, just in case I forget what’s in the box again. 🙂

seashell box makeover label and rope

Now my shells are all organized and neat! I love that I can easily find exactly the kind of shell I want!

seashell box makeover divided shellsseashell box makeover paper letters and starfishseashell box makeover lid and box

Now I have room for both small shells and large ones.

seashell box makeover shell lid and strfishseashell box makeover turquoise letters

I’m really pleased with how this turned out! Now I probably need something for all the driftwood I have! Hope you all have a great week!

sunshine-and-blessings-picmonkey

Here are some other ideas for your seashell collection!

seashell speciman frame sand dollars      family room shelves, coastal, books, seashells     boho seashell mobile hanging outside