Upcycled Old Metal T.V. Trays

Hello again! Did you all have a wonderful weekend? I pretty much just stayed home (saves money that way!) and worked on bringing some spring inside! We already have blossoms on trees and flowers blooming here. It’s probably too early, but it’s so beautiful, it’s hard to complain! I did get to work on a couple of projects too.

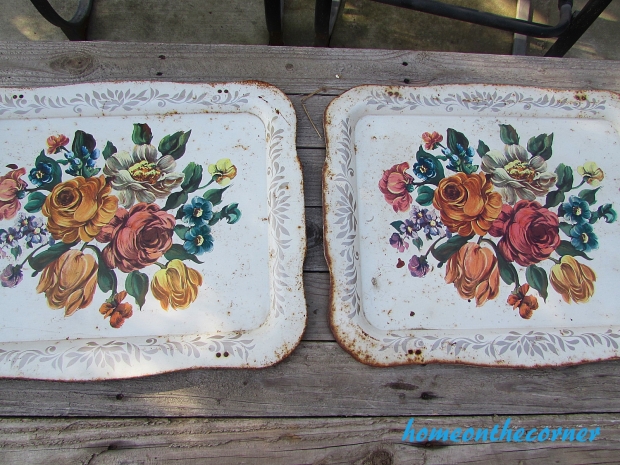
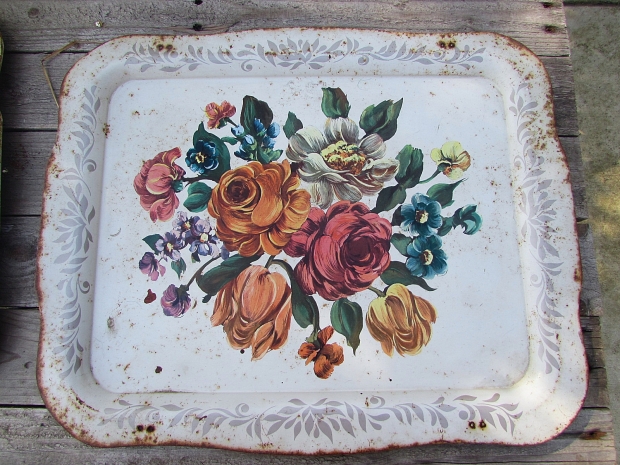
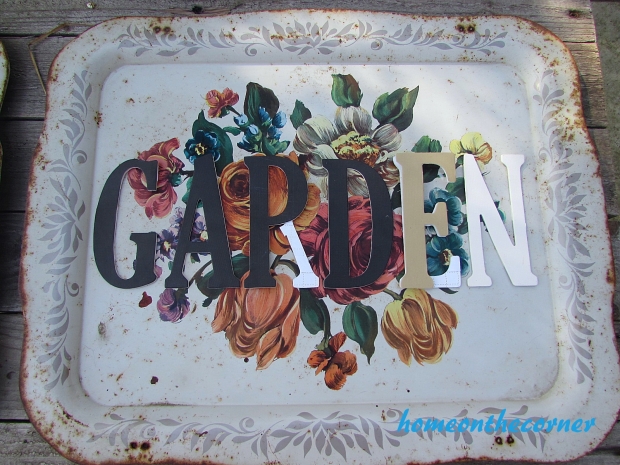
I have had these trays for years and could never really decide what to do with them. I have always used them for decorating outside because I felt like the floral design just lent itself to be outdoors. But they never had a specific purpose. I don’t know why this took so long to figure out, but an idea finally came to mind-at least for one of them.

floral metal trays makeoverfloral metal trays makeover single tray

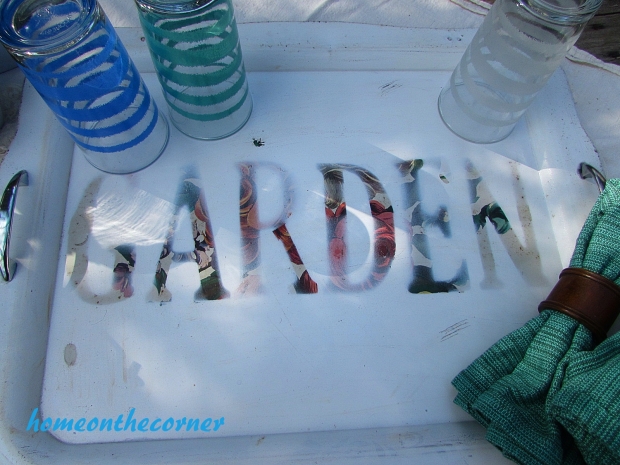
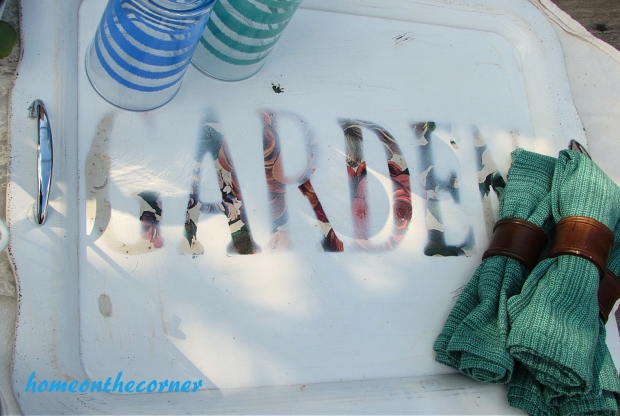
I dug through some letters I have had for awhile and found enough to sort of make the word ‘garden.’ I had to add the leg for the ‘R’ and an extra line for the ‘E’, but I managed to make it work. I planned on doing the word ‘summer’ on the other one, but I didn’t have enough letters.

floral metal trays garden letters

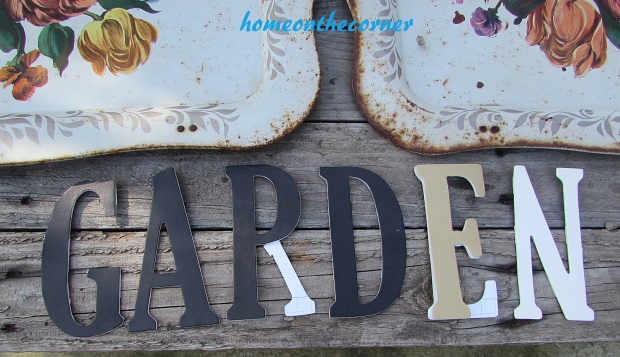
Now that I have my letters, I put a little glue on the back of each one and placed them on the tray. Probably a spray adhesive would have worked better, but I didn’t have any, so I went with what I could.

floral metal trays garden layout

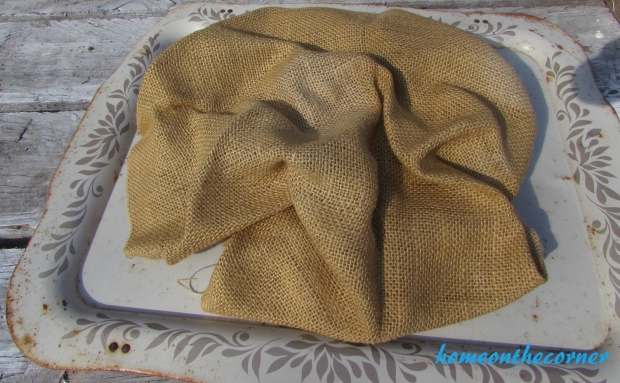
For the other tray, I tried covering the design with burlap and spraying around it.

floral metal trays burlap

With the letters attached on the first tray and lined up, I started spraying lightly over the top with white spray paint. I always use the Rustoleum 2X paint. Love this stuff!

floral metal trays garden painted

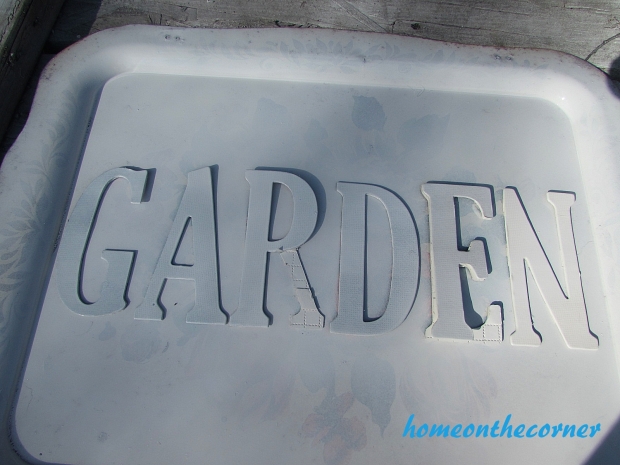
Once I knew the letters would stick, I sprayed more layers of paint. It’s best to spray several light layers and let the paint dry in between. Once the paint was dry, I removed the letters.

floral metal trays floral garden

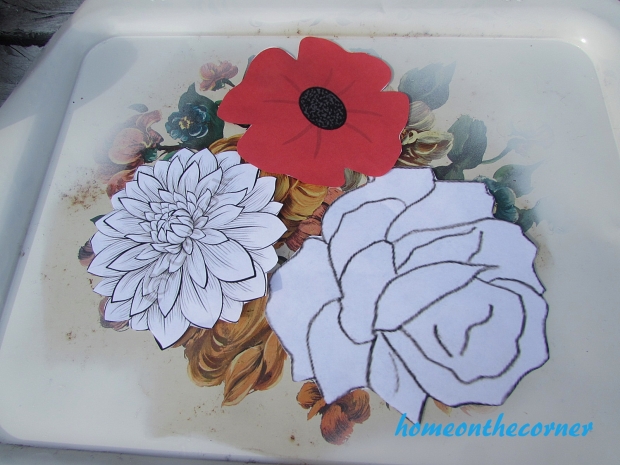
I didn’t like how the second tray turned out, so I tried something different. I printed out 3 large flowers, laid them on top and sprayed around them. I didn’t like this either, so I am going to have to come up with a whole new plan. I will probably spray the whole thing white and then stencil something on top.

floral metal trays flower cutouts

On the first tray, I sanded a little around the edges and over the top. I still wanted it to look like it belonged outside. After the sanding, I sprayed a clear sealer over the top to add some protection for the outdoors. I also added drawer pulls to the edges so it could be used as a tray for serving. At least one out of two turned out good!

floral metal tray styled

I love how a little bit of the floral peeks through.

floral metal tray garden closeup

I wish it was warm enough to actually use this right now!

floral metal tray garden letters

floral metal tray with glassware

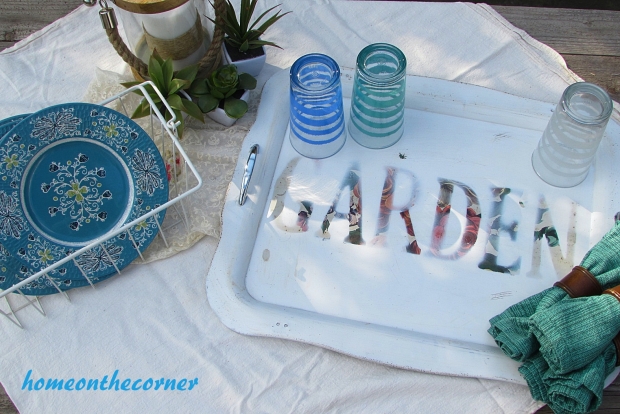
Hopefully it won’t be too long before we can enjoy a nice glass of tea out in the garden. Are you ready for spring? Have you started any spring projects yet? I would love to hear about it!

Sunshine and Blessings

A Project That Has Taken Almost A Year

So, a small disclaimer that this project is yet to be completed.  But, I will show you what I have completed so far, and tell you what I plan on doing with it.  Hopefully I can get this project done in the near future.

This project started from an idea that I found while exploring the wonders of the internet.  I had Googled a term that I search very often when I am bored: ‘recycled outfits’.
I like to see what other people have created and try to see if there is a possibility of me trying to create my own.

And while on one of my Google searches, I found my newest project.  People have created dresses with cupcake liners.  And they look amazing!

So, I took up the challenge to create my own version.

I had some white fabric that I had left over from other projects that I used as a simple long skirt.  I plan on attaching a top for a dress, but this is just a small portion of what the skirt looks like so far.

full skirt

The cupcake liners have all been cut in half to help make the skirt have a scale like look.  And each and every cupcake liner has been hot glued to the fabric to give it this look.  They still have some maneuverability, but for the most part, the skirt is pretty stiff.

scales

I am really excited to see how the whole dress turns out.

Now, this isn’t the first dress that I have recycled.  My senior year in high school I made a jean dress for a 4-H recycled project.  I used 26 pairs of jeans that I purchased from thrift stores and made this beautiful dress.  I love the ombre look of the skirt, which is good since the dress weighs 10 pounds!

jean dress edit

So these are some of my recycled outfits.  I love to see what I can come up with and see how the dress turns out.  I can’t wait to see how the final product turns out and I can’t wait to show you as well!

sparkle

TASSEL KEYCHAIN AND NECKLACES


tassel necklace title

Have you made tassels before? I remember making these as a kid, and they are still cool now! I wrapped embroidery thread around a piece of cardboard that was the length I wanted. Keeping the string together, but pulling it off the cardboard, I opened up the o-ring and wrapped it through the thread at the top. I closed the o-ring and then I tied another piece of thread around the top, just under the o-ring. Trim the bottom of the thread until it is even. I will get up pictures as soon as I can.  Now you get to add the fun stuff!

Here are some of the pieces I gathered from around the house plus I bought a few from Hobby Lobby. I have kept a pitcher, since the girls were small, with all little trinkets that were broken or came off of other jewelry or toys.

tassel key chain pieces and parts

I took an o-ring and stretched it a little with the pliers so I could add some items to it. The first one I did for Lauren. I added a pink heart, a white piece from an earring, a key and her initial.

tassel key chain jump ring

I love the kind of old-fashioned look of the ‘L.’ This one I added to a chain for a necklace.

tassel necklace pink heart 'L'

tassel necklace pink heart 'L' initial

The next one is also a necklace. I found this piece with the words ‘Be Strong and Courageous’ and knew I wanted to add it. I added another piece from an earring and some chain and beads from a broken necklace. (sorry for the blurry picture!)

tassel necklace be strong and courageous

Lastly I did a key-chain. I especially love the colors of this one. The thread has some shine to it and is so pretty. I had a little sparkly Scottie Dog from an old necklace and a charm with clocks on it. I added some turquoise pony beads too.

tassel keychain turquoise numbers

There are so many different ways to make these! I especially like that you can personalize them. Thanks for coming by today!

Sunshine and Blessings


Ombre Painted Canvas with Starfish

Corner News

Happy Saturday!! We had an interesting week at school. Lice! Every year this comes up. Hopefully we kept it at just 2 kids and that will be the end of it. Next week will be Valentine’s parties and fun. The preschool buys heart shaped pizzas and the kids think it’s cool.  We usually just order heart shaped pizzas at home too. I just buy a couple of little things for the girls and my husband and call it good.

I have a simple little craft for you this week. I found a pack of small canvases at Goodwill awhile back and finally decided to use one. I also picked up a couple of starfish at a yard sale and combined them with the canvas.

I guess I didn’t take any before pictures, but here are the paint colors I used. I had a white and a light blue. I also mixed some blue and white together to make a lighter blue that I could blend together on the canvas.

ombre painted canvas


So I started with the white at the top of my canvas. Then I added the mixed blue and then the light blue. After each color was applied, I went over each color again and blended it more with the next one, creating an ombre’ effect. Here is the white and mixed blue.


ombre painted canvas 3 colors

Once the paint was dry, I added the starfish. I used tacky glue to attach them to the canvas. Here you can see the darker blue too.

ombre painted  canvas with starfish


ombre painted canvas with 2 starfish

Just the perfect little touch to remind me that summer IS coming again! Hope you all have a wonderful weekend!

Sunshine and Blessings


ONE WAY TO ORGANIZE YOUR SPICES

Okay, I know it’s the first day of February and we are not in January anymore, but I am still doing some organizing around the house.

organize spices title pictures

My spices have been driving me crazy! I had them all on a lazy susan, but I still could only find the spices that were on the outside. Then I tried lining them up, but since I couldn’t see them all, it ended up being a jumbled mess.

spice organizer cabinet of spices

I had seen different ideas all over the internet, but they didn’t work out with my kitchen. I only have about 5 feet of counter on one side and 4 feet on the other, plus a microwave and a dish drainer take up some of that space. I only have 5 drawers in my kitchen, so I couldn’t use up one of them for the spices. I finally found these on Amazon. I am not affiliated with Amazon, but I love these. Here is the link if you want to order some. I ordered 2 sets to make sure I would have enough for all the jars.

Spice organizer

Each rack holds 4 jars. There is sticky tape on the back plus a tiny screw to hold it on the door. I started out by figuring out where to line them up so the jars wouldn’t hit the shelf inside the cupboard when the door closed. I placed small jars in one row and then larger ones in the other row. This way there could be 2 rows and they would fit between the shelves.

spice organizer measuring

Once I figured out how far apart they needed to be I stuck them on using the tape.  I did end up putting the tiny screws on the end, especially for the racks holding the larger bottles.

spice organizer full of jars

My summer goal is to paint these cupboards, so I will have to take these down and hopefully they will stick again. The directions say to use heat to loosen the glue. I will probably try a blow dryer and see if that works.

organize spices on the door side view

So far, I love these! It’s so much easier to find the spice I need plus it cleared up space in my cupboard. A win/win! Have you been doing your January/February organizing and clean-up? I love to hear what you have been doing!

Sunshine and Blessings