It’s Been Pretty Quiet Around Here…

It’s Monday again. Back to school and schedules again. Really not wanting to go back, but there are just 6 weeks left and I know we will busy with different activities and time will go by quickly.

We haven’t been around much this past week either. Without a schedule and with spring break, everything got thrown off. We did get to take my little nieces to the zoo and it was so much fun to see it through little one’s eyes again. We enjoyed a beautiful day there and saw a baby rhino and a baby lion. Even a rhino is cute when it’s a baby! My mom and I held our annual yard sale and did pretty well. I’m just glad to get rid of all that stuff and make a little bit of money too! This next weekend, I am going with Haley to visit another college. We will see how it goes! Here are a few pictures from the zoo:

zoo 2017 giraffezoo 2017 flamingozoo 2017 Lioness and cubzoo 2017 rhino mommy and baby

I don’t have any new projects for you, but here are a couple of past ones you might enjoy! Just click on the title to be taken to the page.

Celebration! Our Peacock Graduation Party!

graduation party 2015 (7)

Recovering My Outdoor Swing (I Cheated a Little!)

swinging chair 23

Springtime Concrete Painted Planter

concrete planter stencil succulents

Hope you all had a great week and enjoy reading these posts!

sunshine-and-blessings-picmonkey

A Spring Tablescape Contest

It’s Spring Break this week! Yay! I was actually out of work 2 days last week too, because I didn’t feel well, but went back on Friday for our Jesus Lives party. The kids really enjoy that. We do some crafts, listen to the Bible story, dye eggs, decorate cookies and go on an egg hunt. It’s a fun filled morning, and now I am ready for the break.

*This post contains affiliate links for your convenience. Any purchase made will not cost you any extra, but a little comes back to us. Thank you!*

This weekend I was putting some tablescapes together for a blog post, when Haley decided we should do a competition. We used to put together a place-setting complete with menu for 4-H competitions. She stated we should do it for the blog. We won’t tell you whose is whose and you can vote in the comments. The winner gets bragging rights, and if Haley wins, we will never hear the end of it! We collected all these things from around the house and had a great time teasing each other about who would win. So here we go!

  1. Retro Turquoise Chic

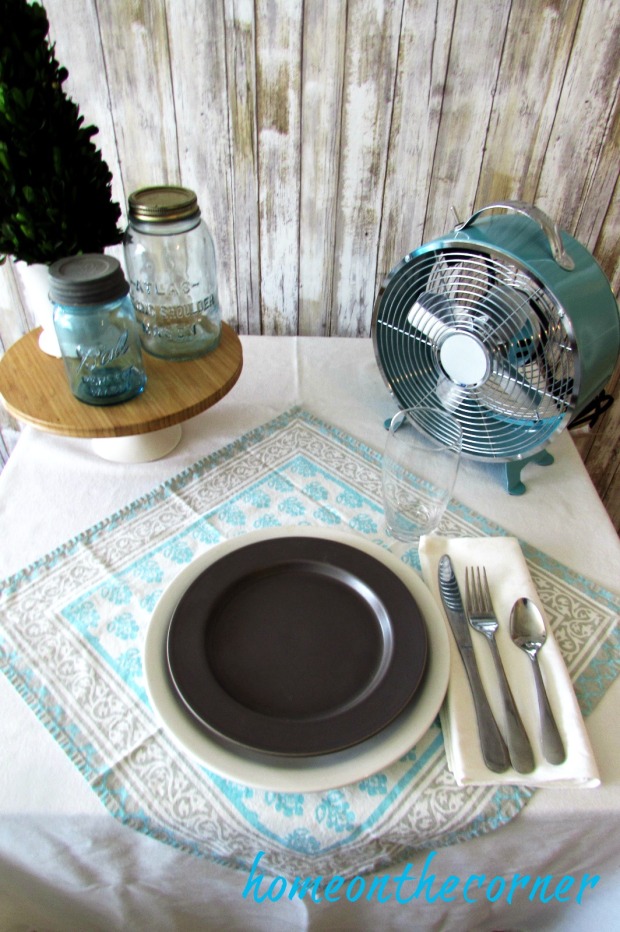
This tablescape starts out with a white tablecloth and is layered with a turquoise, grey and white patterned napkin. A white plate is layered with a grey plate and a white napkin and silverware are laid by the side. The wood and white cake stand is topped with turquoise mason jars and a topiary to bring in some texture and coziness. A retro turquoise fan will keep you cool on those hot summer nights. Perfect simplicity for a summer dinner under the stars.

tablescapes 2017 turquoise and grey

2. Summer Chic

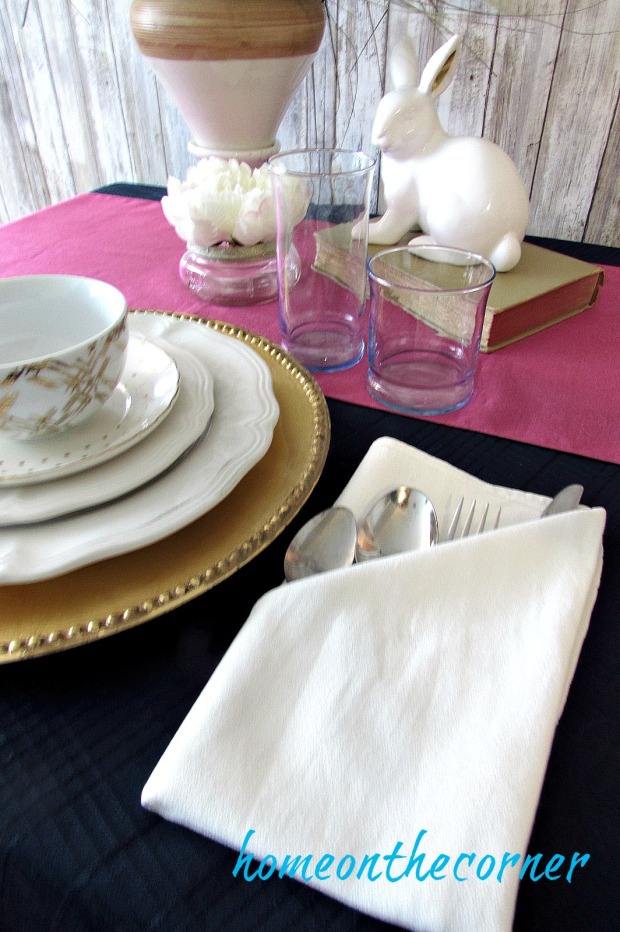
This is the perfect tablescape to add a little glam to your table! A navy blue tablecloth is layered with a bright pink runner. A stack of plates combines white and gold, both solid pieces and ones with designs. Silverware is packaged into a crisp white napkin. Simple details, such as a white bunny with gold ears, white and pink peony and a green fern add to the chic. Add a few candles for the perfect dinner with someone special.

tablescapes 2017 gold, spring, bunny

3. Seaside Charm

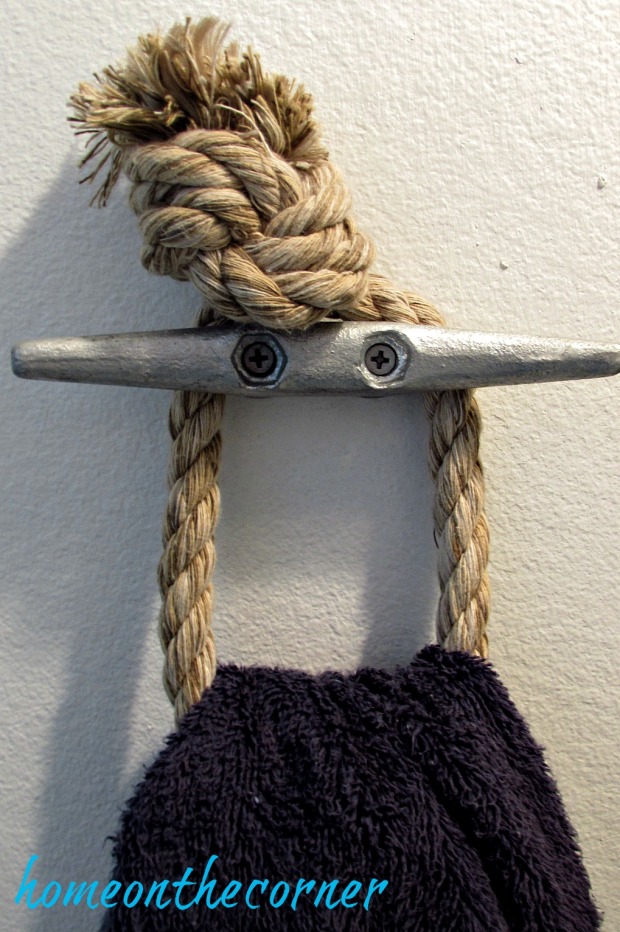
This tablescape features a white tablecloth with a burlap runner. A white and turquoise chippy metal charger is layered with a grey rattan plate holder and a turquoise plate with white trim. A grey swirled napkin is topped with a starfish.  Flatware tied with rope adds to the coastal look. A twine wrapped candle inside a rope and glass candleholder adds some ambiance and charm. Glass floats and a little burlap treat bag bring in some character and texture. Great for imagining yourself at the sea.

tablescape 2017 nautical turquoise, blue and grey

So, which one did you like the best? Let us know in the comments and I will let you know next week who the winner is! This was a lot of fun for us and we hope you enjoyed it too! Have a great week and a blessed Easter!

sunshine-and-blessings-picmonkey

For your convenience, here are some links to similar items on Amazon. There is no extra cost to you, but a little bit comes back to us. Thank you!

Mint Chocolate Donuts??????

Hey everyone!  I hope you are reading this in the morning before you eat breakfast because I can almost guarantee that you will want to leave to get breakfast after reading this.  Or you will be extremely hungry, your choice.

As some of you may have heard thanks to social media, Krispy Kreme donuts and Ghirardelli chocolate have teamed up to make the epitome of all donuts!  So when I heard this, I knew that my roommate Amber and I had to go and taste test them.

So, we jumped in the car and drove 15 minutes to the closest Krispy Kreme to get ourselves some donuts.  At 7 pm….

Roommate Edit

So we arrive at Krispy Kreme and we start drooling.  There were so many choices to make and we knew of 2 different donuts that we were testing.  So we picked a third and went on our merry way.

So here are the different kinds of donuts we picked and how we ranked them from worst to best.

Our Donut Edit

1. The Mint Chocolate Donut

Mint Chocolate Donut

This donut is like a Thin Mint cookie to the extreme.  There is so much flavor in a single donut, it a bit overwhelming.  The donut has a dark chocolate top with chocolate chips and mint frosting.  But, it has a mint kreme filling that is too much.  If there wasn’t so much Kreme in the middle it would be a lot better.  Rating: 3/10

2. Strawberry Icing with Sprinkles

Strawberry Sprinkle Donut

These are not part of the Ghirardelli line (is that what you would call it?), but we wanted a “normal” donut.  Honestly, I think they look a bit fake in this picture lol.  But they were really good and we enjoyed them.  Rating: 6/10

3. The Salted Caramel Donut

Salted Caramel Donut

If you love chocolate and caramel, then you will be in heaven with this donut.  It is so sweet and so delicious and it’s amazing!  There is dark chocolate frosting with caramel drizzle and salt.  And, there’s caramel in the middle!  It’s absolutely perfect for a sweet donut!  Rating: 10/10

So there you go!  The two chocolate donuts will only be around for a limited time so go to your nearest Krispy Kreme and buy yourself some donuts!  You can thank me later!

sparkle

Hallway Bathroom Makeover-Rustic Nautical

Can you believe it? I can finally show you one of the rooms in my house? It’s taken me long enough! This isn’t a complete renovation, just a makeover.  The biggest item changed out was the floor. So here we go!

hallway bathroom makeover wood pallet mirror title

We have to start with the before. Isn’t it pretty? There was brown carpeting in front of the sink and linoleum in front of the shower and toilet. The medicine cabinet and mirror were a nice 1970’s touch. The light fixture wasn’t too bad, in a retro kind of way, but we wanted something more updated. The baseboards were some kind of rubber stuff I didn’t even know existed. The toilet and the faucet were recent updates, so we left them. We also changed out the knobs on the vanity so they fit in better with the new updates.


The first thing to go was the carpet and the old linoleum. We had it torn out before we even moved in! We lived with the cement floor for a couple of months and finally got the tile put in. We thought we had enough of the leftover flooring, but we didn’t. Which is okay, because I really like this grey 18″ tile we found at Home Depot.


hallway bathroom makeover full view

Lauren and I painted the room before we moved in also. We used Benjamin Moore Simply White, which is what we used in the whole house. As you can see, we also took out the mirror and medicine cabinet that was from the 1970’s. We added in the pallet mirror that Steve made last summer. We also used pallet wood for the baseboards. Steve cut them all to fit and then I stained them and nailed them in. I love how they tie in with the mirror and give the room a rustic look.

hallway bathroom makeover farmhouse beach

I loved this idea when Haley showed it to me! We found the dock cleats at Walmart in the sporting goods section, tied some rope on and it makes a great towel holder.

hallway bathroom makeover boat cleat

We also found this amazing hanging light to replace the old one. It’s actually very similar, just a little more updated.

hallway bathroom makeover globe light rustic mirror

Haley made this whale string art, which is the perfect addition to the room.

hallway bathroom makeover whale string art blue and turquoise

I added another rope towel bar on the other side of the room with a fun turquoise and white striped towel.

hallway bathroom makeover rope towel bar nautical

I also created this California chalkboard subway art that perfectly compliments the room.

hallway bathroom makeover subway sign turquoise striped towel

The small hand towel is perfect for a teenagers bathroom! I really like how this room turned out! It’s so much more my style and feels clean and fresh. Now on to the next room!

sunshine-and-blessings-picmonkey

Cute and Simple Easter Egg Decorations

Hello everyone!  I hope you had a wonderful week!  I am reposting this because I found that you can still purchase these items or similar items.  Enjoy!

So, this project started when I was walking through the 99 cent store.  And to be honest, I love shopping at the 99 cent store.  I can go and buy dog treats, Arnold Palmers, lunchables, spatulas, mixing bowls, and stuff for your car all in one spot.  It’s like a lesser version of Walmart!

While shopping through the 99 cent store, I came across some Styrofoam eggs that could be used for decorating for Easter.  And then I saw some smaller eggs on Kabob sticks.  And I thought, what if I put the smaller eggs in the larger egg to make an arrangement?

And then I bought the supplies!

supplies

I bought two of the bigger eggs, one package of bigger eggs on sticks, and two packages of the smaller eggs.

eggs

I split all the eggs into two separate piles.  There were four big eggs in each arrangement and ten smaller eggs in each arrangements.  I knew that the biggest problem was going to be the long Kabob sticks.  So as I went along, I broke off the sticks to make them shorter and easier to stick into the large Styrofoam eggs.

And here are the end results.

Finished Eggs 5Finished eggs 1Finished Eggs 2Finished Eggs 3Finished Eggs 4

So…I’m not completely happy with how they turned out.  I like all the colors worked together, but it didn’t go exactly as planned for how the eggs looked once they were in the giant eggs.  I had a completely different idea of what they would look like when they were done, and this isn’t what I had in mind.

But other than that, it was a very simple project to do for Easter.  I only spent $5 creating this, but you could spend a little more if you wanted to add more egg Kabobs (or whatever they are actually called), go for it.  This is what I made with what I had, but I might go back and buy more egg Kabobs to fill in the arrangement.

sparkle