Toolbox Restyle-Blue Coastal Style

Hello! How was your weekend? We spent Friday night watching our local Triple A baseball team play, Saturday was a catch-up on blogging day and Sunday, I volunteered at the shelter after church. I would say it was successful!

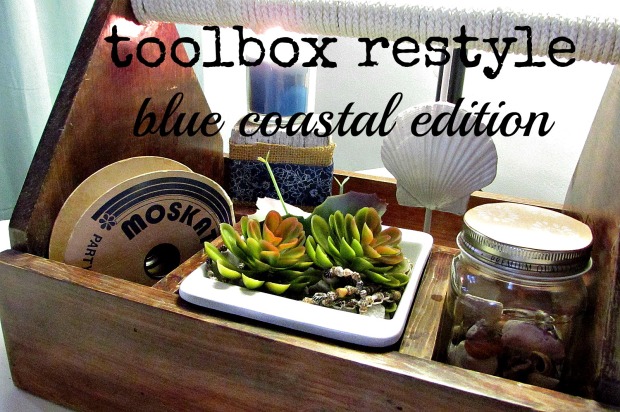
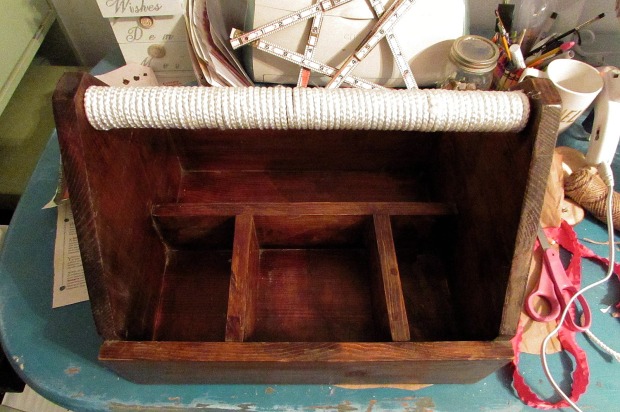
I also worked on this Toolbox Restyle. As you know, I love the coastal and beachy style. And Lauren is kind of moving that way too when she moves into another place. She made this toolbox years ago as part of a 4-H Woodworking project. I have mostly used it outdoors with candles and such, but decided to fix it up for her to use in her new place. In the meantime, I get to enjoy it in my living room!

Toolbox makeover restyle title

I cleaned the box up and gave it a good polish and then wound some rope around the handle. I secured the ends with a little hot glue.

Tool Box MakeoverTool Box Makeover with roper

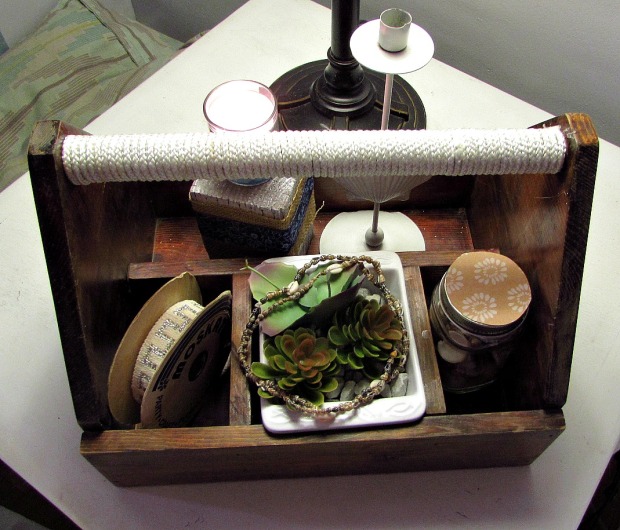
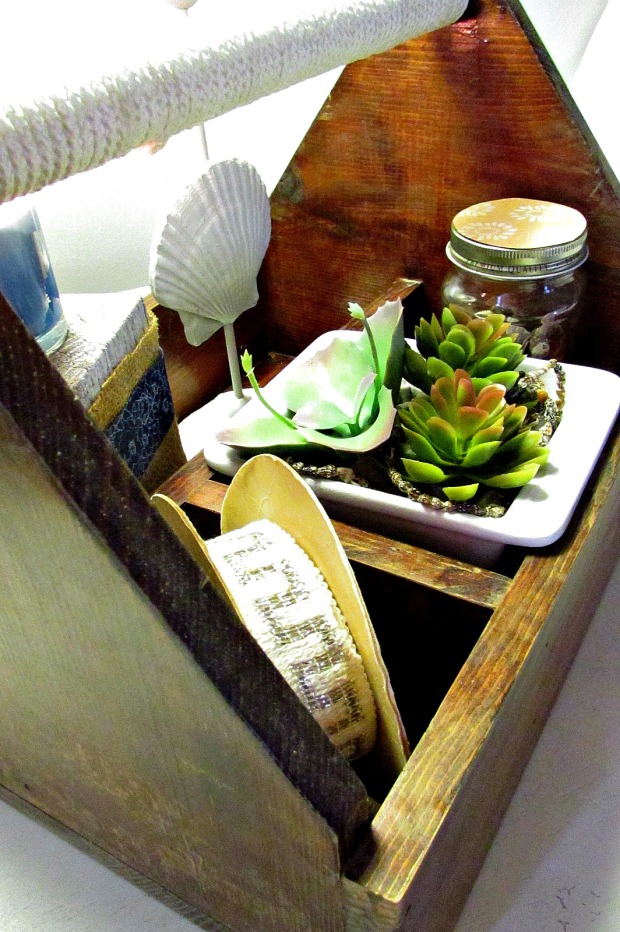
Next, I searched around the house for a few things to fill it with. I tried to add a little bit of navy blue, since that seems to be what Lauren is moving towards.

Tool Box makeover styled

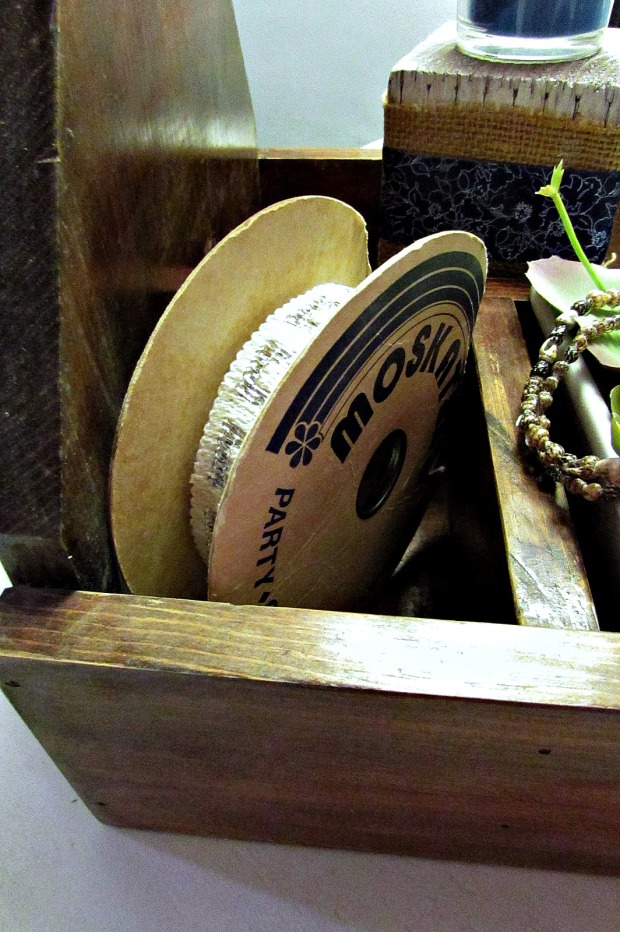
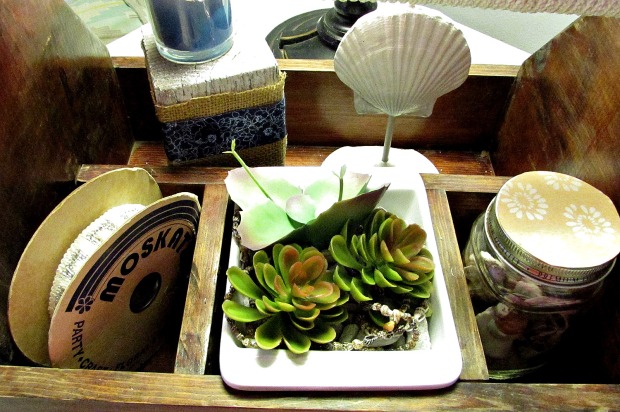
I found this old paper spool of ribbon in Lauren’s stash. It had pink lace on it. I removed the lace and wrapped white and silver ribbon on it instead. I love the old spool!

Toolbox makeover ribbon spool

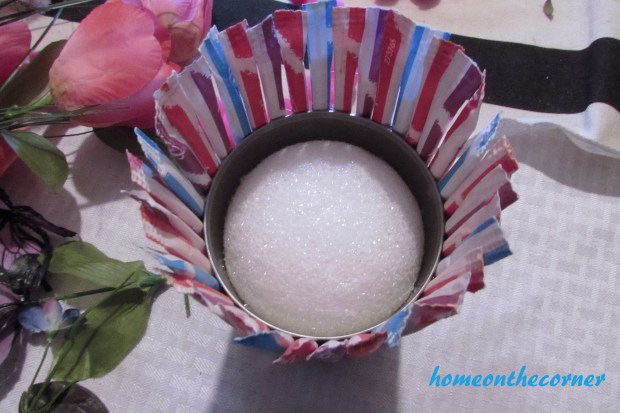
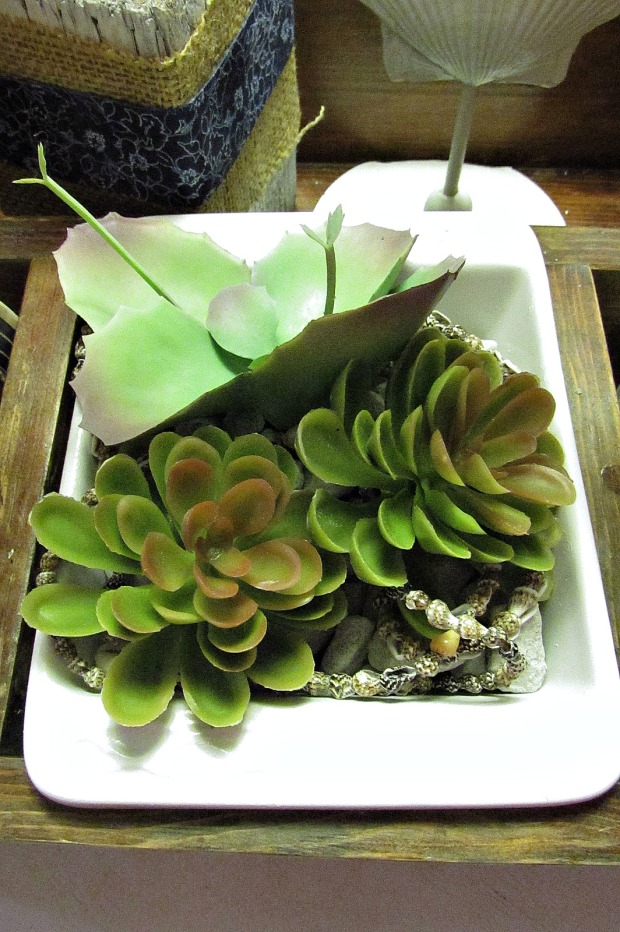
This bowl had been green. I liked the design and the shape, but not the color, so I spray-painted it white. I added some white rocks to the bottom, ‘planted’ the (faux) succulents and added a little garland of seashells. The bowl was the perfect fit for the middle section.

toolbox makeover succulents

I didn’t get a picture of the mason jar, but it hold some seashells and rocks Lauren had been saving. I covered the top of the lid with some scrapbooking paper.

This candle holder was purchased by my mom from Goodwill. It came in a set of three and I liked the height in the back of the box. Lauren and I talked about possibly cutting the little part off the top so she could use a pillar candle instead.

toolbox makeover candlestick

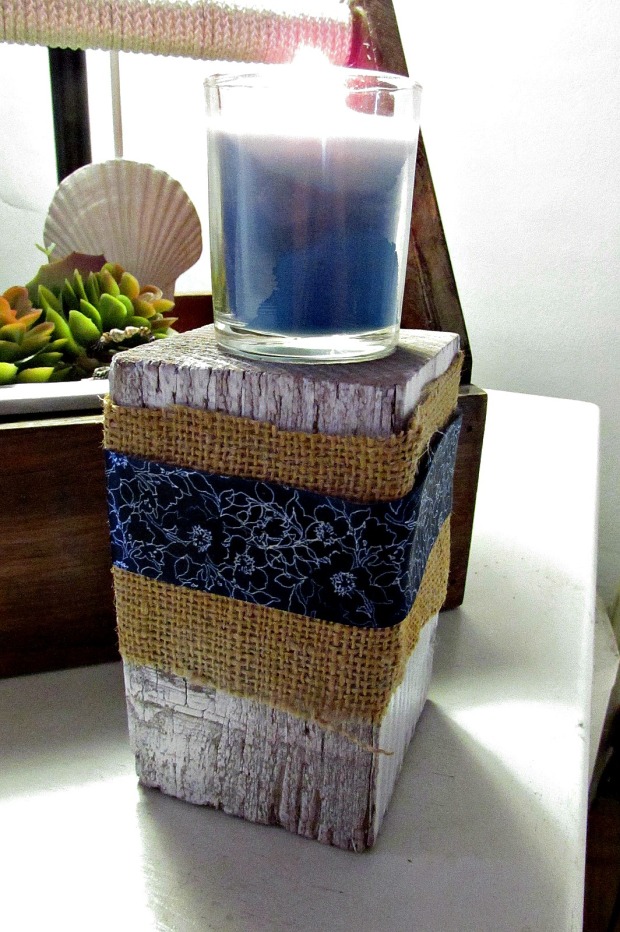
I found this block of wood in our wood stash and added some burlap and navy blue ribbon. A blue candle is perfect for the top and the block fit perfectly in the toolbox.

toolbox makeover wood block

There are so many different uses for this box. This would be great to change out for the different seasons too!

toolbox makeover spool, plants candlestoolbox makeover closeup

I’m glad I was able to do something with a piece of art Lauren made so many years ago. It will make a great conversation piece in her new place!

Want to see more coastal decor? Click on the pictures below!

dining room refresh driftwood bowl seashell garland      boho seashell mobile clam, snail   seashell speciman frame crab   Board with

Sunshine and Blessings


A New Day, A New Idea

So, I wanted to try something new for the blog.  It was easy for me to do and is something that I wouldn’t mind doing more often.  Please let me know what you think so that I know if you want to see more blogs like this or not.

This week, I am video blogging, also known as vlogging.  I decided to give an apartment tour, but as a video instead of a regular blog with just pictures.  Let me know what you think so I can continue doing these if there are enough people who like it!

Also, subscribe to our YouTube channel to get some behind the scenes content!  Click here to go to our page.

sparkle

Corner News-March 19, 2016

corner news cover photo

Happy Saturday!  We are starting our spring break here and I have the next week off! Yeah!! I am hoping to get a few projects done to share with you all! We’ll see how it goes!

Do you remember Zoella? Her nickname is Munch, because she is such a Munchkin! She was adopted by Lauren, but she had to stay at our house for awhile. Wweelll, we became attached, and Rozy became her best friend, so now she is mine. I love this little girl!!  Zoella’s baby picture is here and Rozy is here.

IMG_20160312_153956723 (1)

I added this box shelf to my craft room wall. Steve had put this together a long time ago and I had it outside. But now I repainted the outside white and gold on the inside. I added some fun little accessories.

corner news craft room

I found the adorable puppy picture on clearance at Hobby Lobby. There was no way I would pass this one up!! I added glitter to a wooden ‘S’ for another project and then changed my mind, so now it resides here. I just picked up the little bicycle plate from Goodwill, but it originally came from Target and the jar is part of my button collection.

corner news craft display

I love all these things! Bicycles and buttons…

corner news buttons and bicycle

Puppies and letters!

corner news dog and balloon

I hope you all have a wonderful weekend and spring break! I can’t wait to update you on my projects. I hope I can accomplish something!!

Sunshine and Blessings

Springy Tablescape

Hello and welcome to winteng…sprinter…wintering?  Whatever.  The time of the year where it is too warm for winter or too cold for spring.  Where the mornings are perfect for sweaters, jeans, and flip flops; but the afternoons are greats for shorts, tank tops, and flip flops.

Oh the struggle is real!

But, nonetheless, it is getting closer to the springy weather and closer to pretty colors from all the flowers.  So, why not get started early with a pretty table setting?

full table

I really like how all of the colors came together on the table setting.  I like the pink tablecloth and how the patterned plates add to the brightness and happiness of the tablescape as a whole.

These are the two different place settings.  One is a floral plate on top of a plaid plate with a striped napkin while the other is a plaid plate on top of floral.  They look great together and the colors compliment each other very nicely.

Hobby Lobby Sign

I added this adorable sign that I purchased for Hobby Lobby.  I completely agree with this saying because who doesn’t like pink?

Flowers and Necklace

I added some pretty pink and white flowers in the centerpiece.  They sit in a mason jar that mom decorated for me for my birthday two years ago.  I also added a tree nut necklace with pink flowers that I bought in Hawaii.  I thought that it added a lot to the centerpiece.

Cupcakes

And finally, who could forget the cupcakes.  I added some delicious cupcakes that have matching blue frosting to keep with the colors of the tablescape.  They are a sweet blueberry.  Yum!

So this completes my tablescape.  I love how it turned out and can’t wait to see what my roommates think of my creation!

sparkle

Valentine Pixy Stix Flower Vase & Blog Hop


Valentine's-Day-Blog-Hop-Budget-Crafts

Hello everyone! Thank you for joining me for the Valentine’s Day Blog Hop! I’ve joined with 13 other talented bloggers to share Valentine’s Day crafts on a budget. Each blogger was given a budget of no more than $10 and challenged to create a Valentine’s Day craft using items from the dollar store or dollar section of their local stores. If you have budget Valentine’s Day crafts to share, please add it to the link-up at the bottom of this post so it can be seen on all of our blogs.

For my Valentine Budget Craft, I made a Pixy Stix Flower Vase. So simple too!

valentine mantel pixie stix flower vase 2016

I bought what I needed from the Dollar Tree and used some things I already had. Here is what you will need:

  • Pixy Stix or any other long candy- I bought 2 bags so I would be sure to have enough of red, purple and blue. $2.00
  • A tin can-I used some beans for dinner and cleaned the can and removed the label.
  • Styrofoam ball or square- I had some of these from Christmas, but I know I have seen square pieces at the Dollar Tree. $1.00
  • Silk Flowers-(2) Pink Tulips, (2) pinkish fuzzy ball things, (1) pink berry-$5.00
  • Ribbon-I had mine, but they had some cute designs at the store. $1.00

pixie stix flower holder tin can

I first sorted through my Pixy Stix and pulled out the colors I wanted to use. I put them into the pattern I wanted and then started hot gluing them onto the can.

pixie stix gluing the stix

pixie stix flower holder covered

Once my candy went all the way around, I pushed the styrofoam ball into the can.

pixie stix flower holder styrofoam ball

I used wire cutters to cut each stem of flowers off the big part on the end.

pixie stix flower fase silk flowers

I arranged them in the can by pushing them into the styrofoam ball. I placed a taller tulip in the middle and then placed shorter ones all around it. Next I filled in with the fuzzy balls and lastly, added the berries. I used the green spiky leaves that came with the flowers to fill in any empty spaces. After the arranging was done, I added a pink bow around the middle of the can.

valentine mantel pixie stix flower vase 2016

There you have it! A cute, simple and budget friendly vase! You could even fill it with those fresh flowers you are sure to receive!

valentine mantel flower vase 2016

If you are looking for more budget friendly Valentine’s Day crafts, visit these blogs for their creative Valentine’s Day crafts ~

Copy of Valentine's Day Blog Hop Update (3)

  1. My Pinterventures
  2. DIY Adulation
  3. Houseful of Handmade
  4. C’mon Get Crafty
  5. Olives-n-Okra
  6. Inside The Fox Den
  7. Made In A Day
  8. The Robin’s Nest Designs
  9. Arrows & Awe
  10. Happily Ever After, Etc.
  11. Our House Now A Home
  12. Home On The Corner
  13. Decor by the Seashore
  14. Intelligent Domestications

Share your $10 or less Valentine’s Day crafts on the link-up below and be seen on all 15 blogs! Have fun!

Sunshine and Blessings