A Project That Has Taken Almost A Year

So, a small disclaimer that this project is yet to be completed.  But, I will show you what I have completed so far, and tell you what I plan on doing with it.  Hopefully I can get this project done in the near future.

This project started from an idea that I found while exploring the wonders of the internet.  I had Googled a term that I search very often when I am bored: ‘recycled outfits’.
I like to see what other people have created and try to see if there is a possibility of me trying to create my own.

And while on one of my Google searches, I found my newest project.  People have created dresses with cupcake liners.  And they look amazing!

So, I took up the challenge to create my own version.

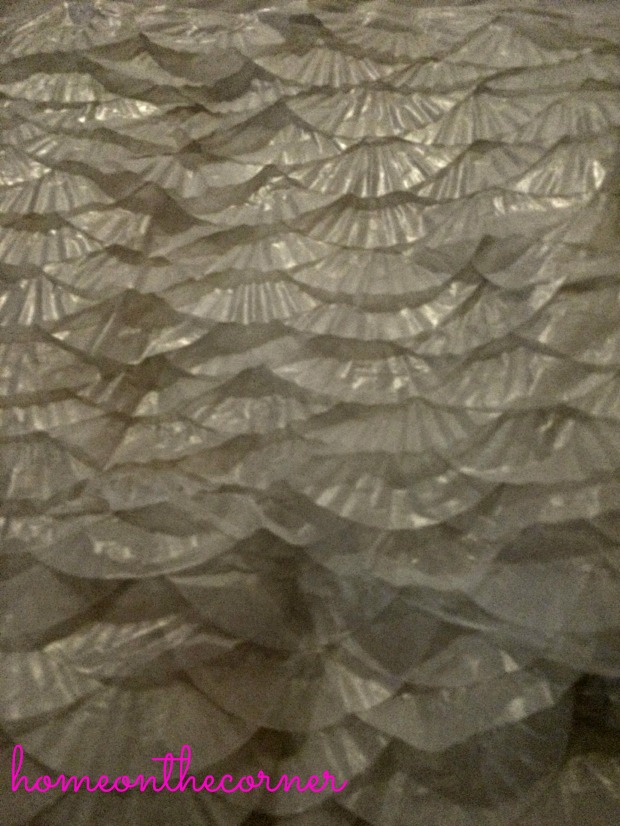
I had some white fabric that I had left over from other projects that I used as a simple long skirt.  I plan on attaching a top for a dress, but this is just a small portion of what the skirt looks like so far.

full skirt

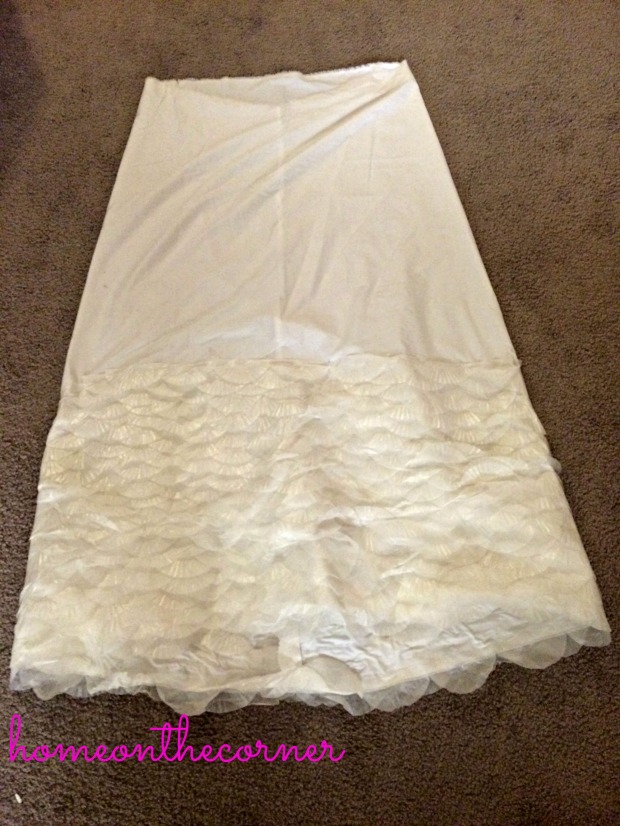
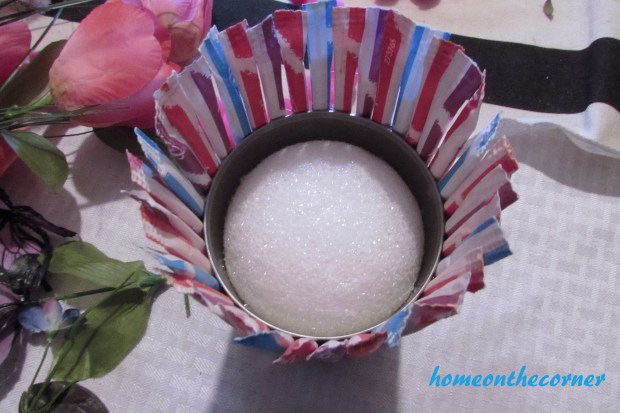
The cupcake liners have all been cut in half to help make the skirt have a scale like look.  And each and every cupcake liner has been hot glued to the fabric to give it this look.  They still have some maneuverability, but for the most part, the skirt is pretty stiff.

scales

I am really excited to see how the whole dress turns out.

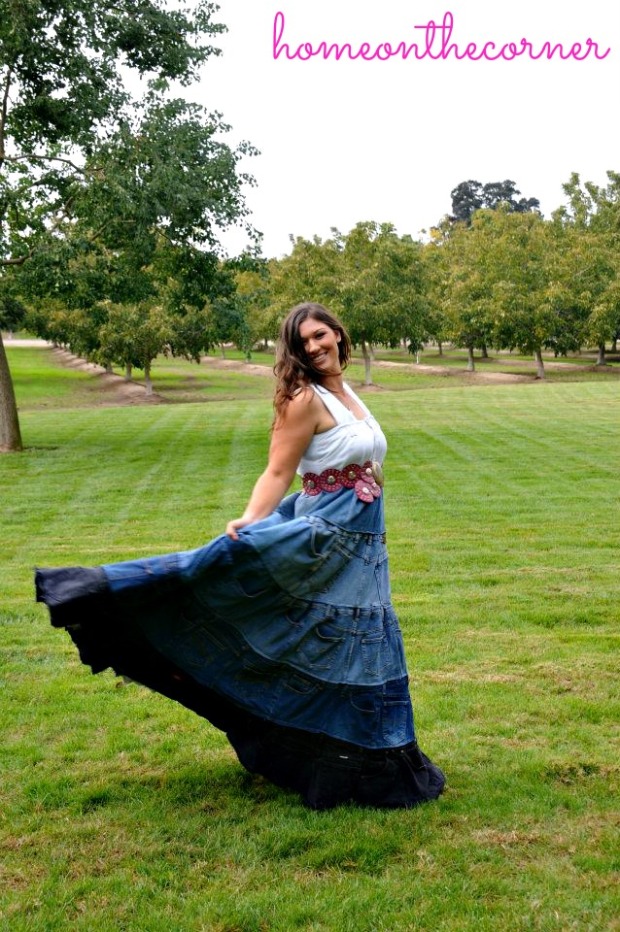
Now, this isn’t the first dress that I have recycled.  My senior year in high school I made a jean dress for a 4-H recycled project.  I used 26 pairs of jeans that I purchased from thrift stores and made this beautiful dress.  I love the ombre look of the skirt, which is good since the dress weighs 10 pounds!

jean dress edit

So these are some of my recycled outfits.  I love to see what I can come up with and see how the dress turns out.  I can’t wait to see how the final product turns out and I can’t wait to show you as well!

sparkle

TASSEL KEYCHAIN AND NECKLACES


tassel necklace title

Have you made tassels before? I remember making these as a kid, and they are still cool now! I wrapped embroidery thread around a piece of cardboard that was the length I wanted. Keeping the string together, but pulling it off the cardboard, I opened up the o-ring and wrapped it through the thread at the top. I closed the o-ring and then I tied another piece of thread around the top, just under the o-ring. Trim the bottom of the thread until it is even. I will get up pictures as soon as I can.  Now you get to add the fun stuff!

Here are some of the pieces I gathered from around the house plus I bought a few from Hobby Lobby. I have kept a pitcher, since the girls were small, with all little trinkets that were broken or came off of other jewelry or toys.

tassel key chain pieces and parts

I took an o-ring and stretched it a little with the pliers so I could add some items to it. The first one I did for Lauren. I added a pink heart, a white piece from an earring, a key and her initial.

tassel key chain jump ring

I love the kind of old-fashioned look of the ‘L.’ This one I added to a chain for a necklace.

tassel necklace pink heart 'L'

tassel necklace pink heart 'L' initial

The next one is also a necklace. I found this piece with the words ‘Be Strong and Courageous’ and knew I wanted to add it. I added another piece from an earring and some chain and beads from a broken necklace. (sorry for the blurry picture!)

tassel necklace be strong and courageous

Lastly I did a key-chain. I especially love the colors of this one. The thread has some shine to it and is so pretty. I had a little sparkly Scottie Dog from an old necklace and a charm with clocks on it. I added some turquoise pony beads too.

tassel keychain turquoise numbers

There are so many different ways to make these! I especially like that you can personalize them. Thanks for coming by today!

Sunshine and Blessings


Ombre Painted Canvas with Starfish

Corner News

Happy Saturday!! We had an interesting week at school. Lice! Every year this comes up. Hopefully we kept it at just 2 kids and that will be the end of it. Next week will be Valentine’s parties and fun. The preschool buys heart shaped pizzas and the kids think it’s cool.  We usually just order heart shaped pizzas at home too. I just buy a couple of little things for the girls and my husband and call it good.

I have a simple little craft for you this week. I found a pack of small canvases at Goodwill awhile back and finally decided to use one. I also picked up a couple of starfish at a yard sale and combined them with the canvas.

I guess I didn’t take any before pictures, but here are the paint colors I used. I had a white and a light blue. I also mixed some blue and white together to make a lighter blue that I could blend together on the canvas.

ombre painted canvas


So I started with the white at the top of my canvas. Then I added the mixed blue and then the light blue. After each color was applied, I went over each color again and blended it more with the next one, creating an ombre’ effect. Here is the white and mixed blue.


ombre painted canvas 3 colors

Once the paint was dry, I added the starfish. I used tacky glue to attach them to the canvas. Here you can see the darker blue too.

ombre painted  canvas with starfish


ombre painted canvas with 2 starfish

Just the perfect little touch to remind me that summer IS coming again! Hope you all have a wonderful weekend!

Sunshine and Blessings


New Life for Old Chairs

Good morning everyone! Welcome to another post about furniture that we have no idea what to do with. We always seem to acquire this furniture and have no idea how to use it or how to change it.

So, here we go!

Mom found someone who was selling chairs online for $10 a chair. They are from a hotel, so pretty normal looking chairs, and in great condition.

Well, when mom got there, someone had brought the seller more furniture, so now the chairs were $5 a piece. What a deal!

So here’s what the look like.

img_0469

They aren’t the most beautiful chairs, but they are functional and somewhat comfortable.  They work well for kitchen chairs and a computer chair, and for a great price.

So now comes the hard part…what do we do to fix them up?  If you have any suggestions for what to do with our chairs, please leave us a comment!

sparkle

Valentine Pixy Stix Flower Vase & Blog Hop


Valentine's-Day-Blog-Hop-Budget-Crafts

Hello everyone! Thank you for joining me for the Valentine’s Day Blog Hop! I’ve joined with 13 other talented bloggers to share Valentine’s Day crafts on a budget. Each blogger was given a budget of no more than $10 and challenged to create a Valentine’s Day craft using items from the dollar store or dollar section of their local stores. If you have budget Valentine’s Day crafts to share, please add it to the link-up at the bottom of this post so it can be seen on all of our blogs.

For my Valentine Budget Craft, I made a Pixy Stix Flower Vase. So simple too!

valentine mantel pixie stix flower vase 2016

I bought what I needed from the Dollar Tree and used some things I already had. Here is what you will need:

  • Pixy Stix or any other long candy- I bought 2 bags so I would be sure to have enough of red, purple and blue. $2.00
  • A tin can-I used some beans for dinner and cleaned the can and removed the label.
  • Styrofoam ball or square- I had some of these from Christmas, but I know I have seen square pieces at the Dollar Tree. $1.00
  • Silk Flowers-(2) Pink Tulips, (2) pinkish fuzzy ball things, (1) pink berry-$5.00
  • Ribbon-I had mine, but they had some cute designs at the store. $1.00

pixie stix flower holder tin can

I first sorted through my Pixy Stix and pulled out the colors I wanted to use. I put them into the pattern I wanted and then started hot gluing them onto the can.

pixie stix gluing the stix

pixie stix flower holder covered

Once my candy went all the way around, I pushed the styrofoam ball into the can.

pixie stix flower holder styrofoam ball

I used wire cutters to cut each stem of flowers off the big part on the end.

pixie stix flower fase silk flowers

I arranged them in the can by pushing them into the styrofoam ball. I placed a taller tulip in the middle and then placed shorter ones all around it. Next I filled in with the fuzzy balls and lastly, added the berries. I used the green spiky leaves that came with the flowers to fill in any empty spaces. After the arranging was done, I added a pink bow around the middle of the can.

valentine mantel pixie stix flower vase 2016

There you have it! A cute, simple and budget friendly vase! You could even fill it with those fresh flowers you are sure to receive!

valentine mantel flower vase 2016

If you are looking for more budget friendly Valentine’s Day crafts, visit these blogs for their creative Valentine’s Day crafts ~

Copy of Valentine's Day Blog Hop Update (3)

  1. My Pinterventures
  2. DIY Adulation
  3. Houseful of Handmade
  4. C’mon Get Crafty
  5. Olives-n-Okra
  6. Inside The Fox Den
  7. Made In A Day
  8. The Robin’s Nest Designs
  9. Arrows & Awe
  10. Happily Ever After, Etc.
  11. Our House Now A Home
  12. Home On The Corner
  13. Decor by the Seashore
  14. Intelligent Domestications

Share your $10 or less Valentine’s Day crafts on the link-up below and be seen on all 15 blogs! Have fun!

Sunshine and Blessings