Candlestick Plus Newspaper Equals Awesome!

Hello everyone!  I am reposting this awesome project from June of 2015.  I love how it turned out and love having these as decoration in my apartment.  So, here is my tutorial on how to decorate a wooden candlestick with decoupage and newspaper.

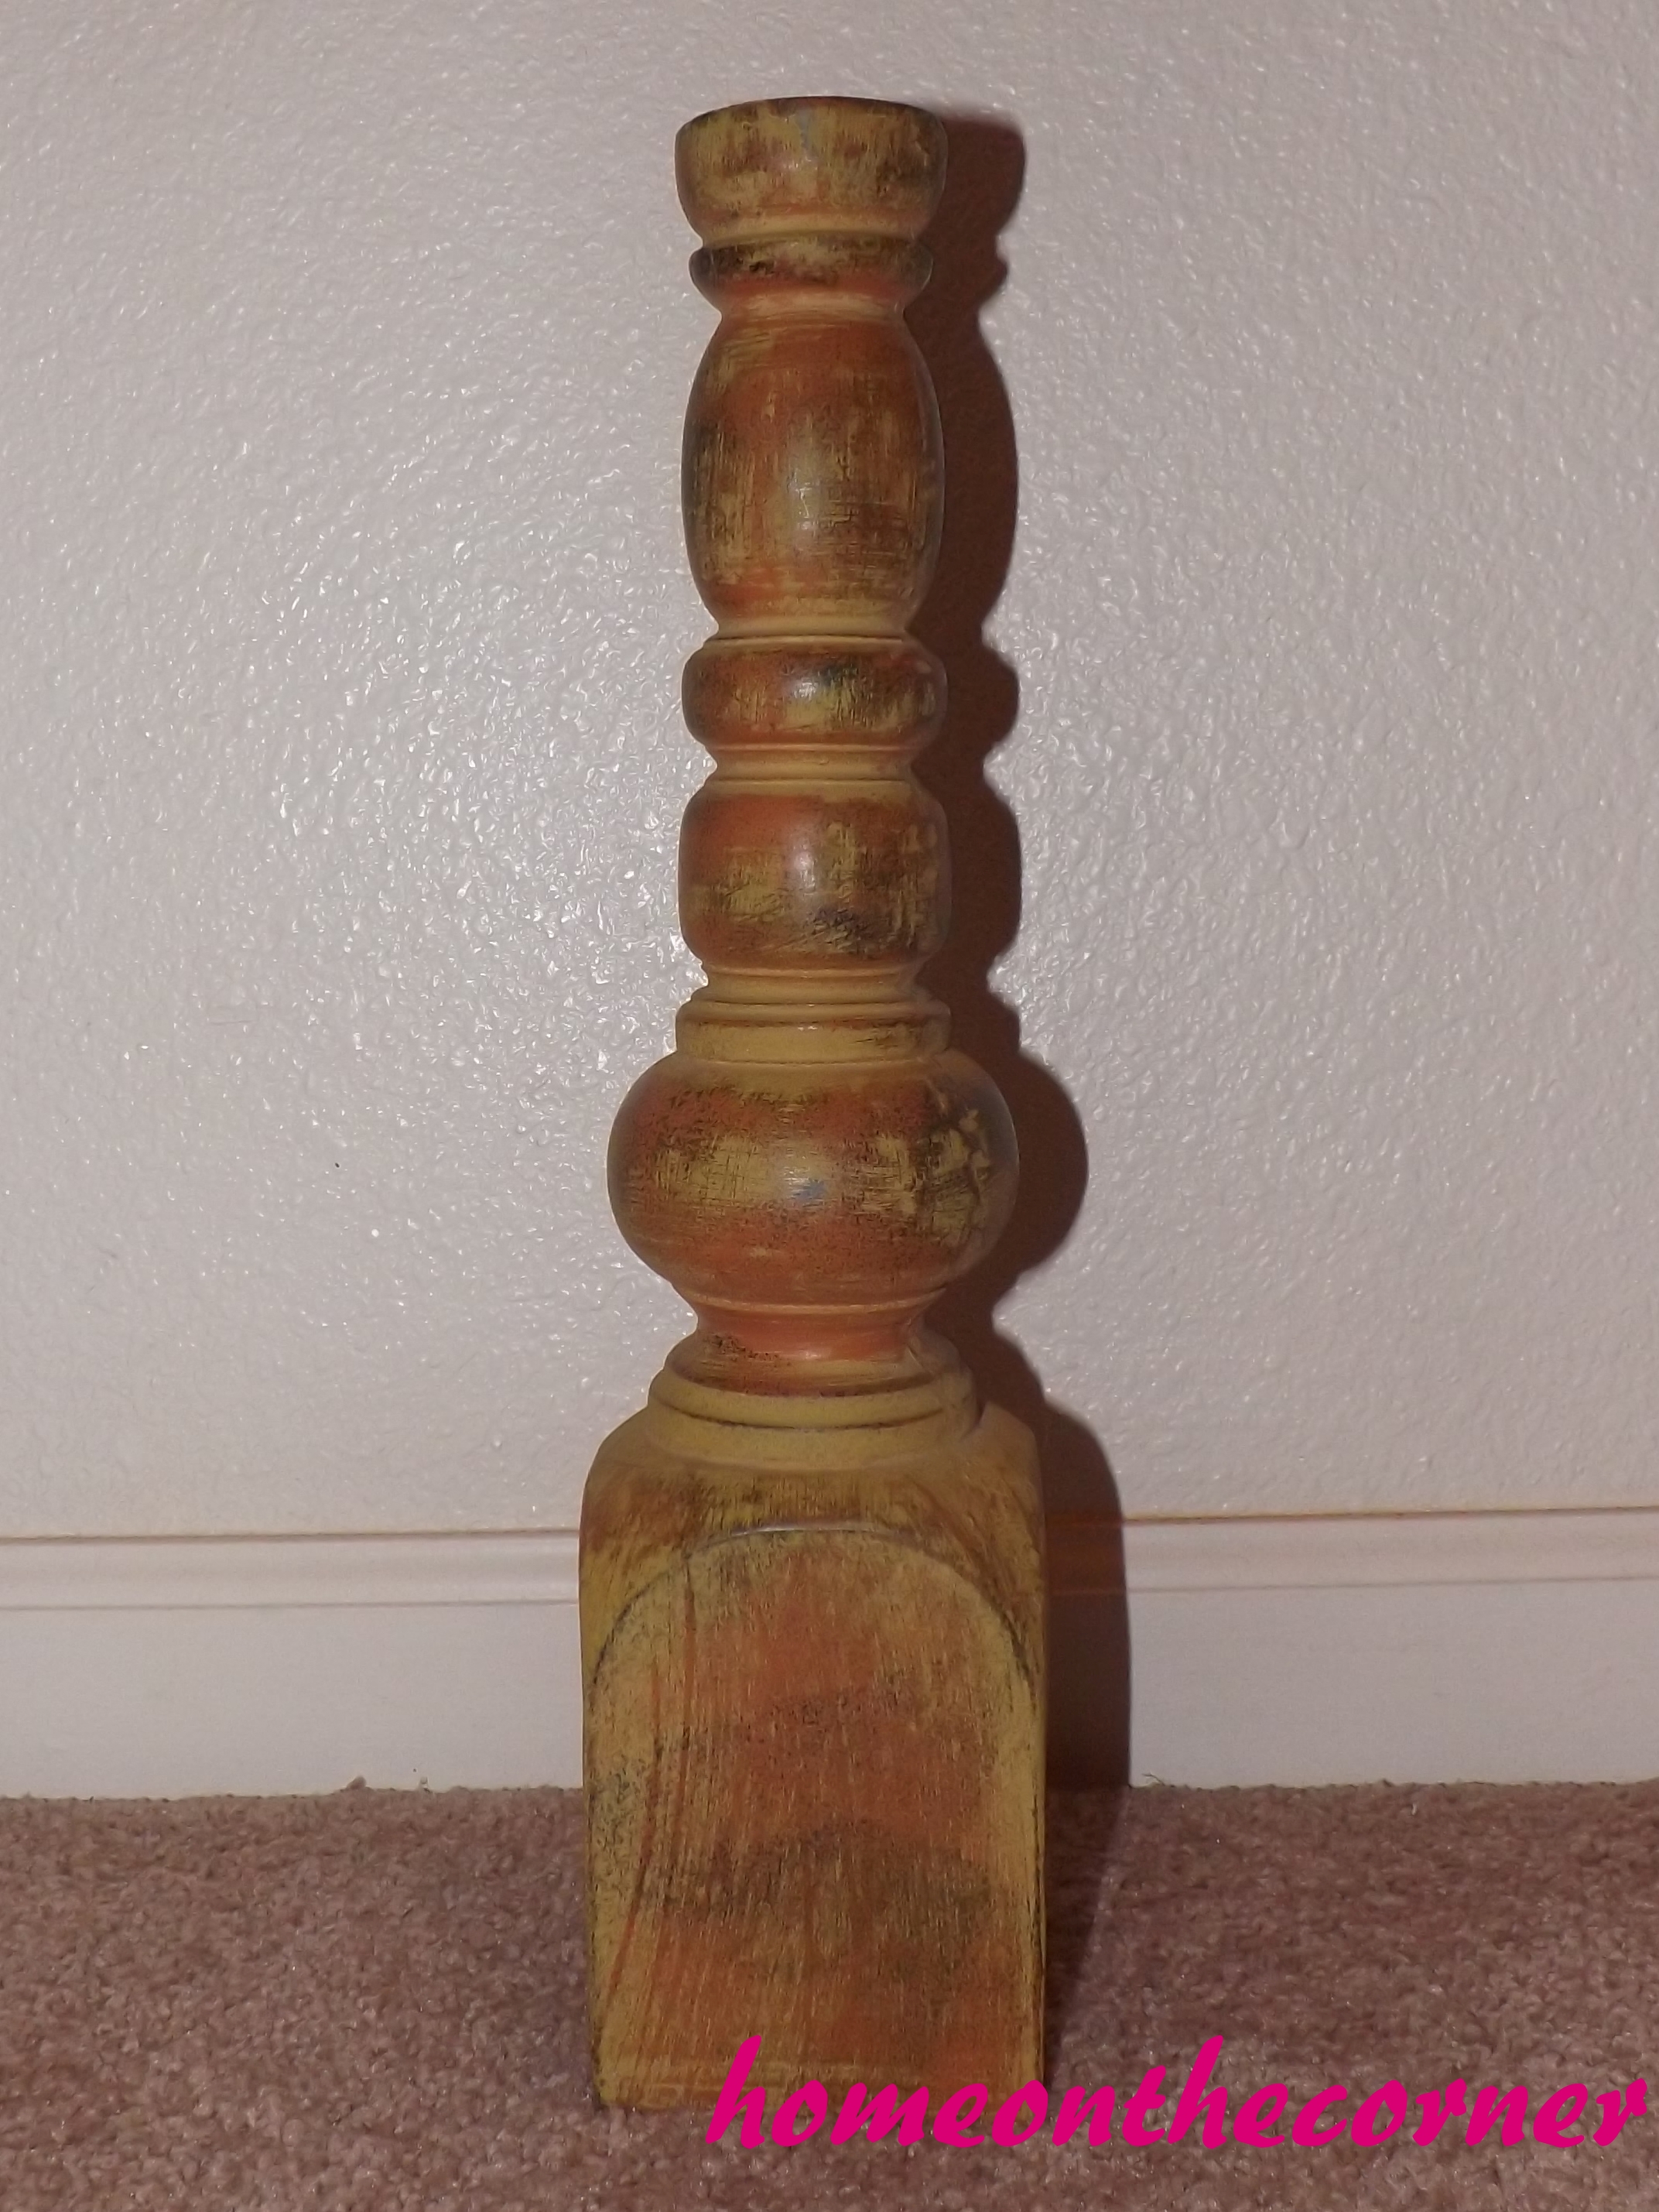
Mom was cleaning her room and found this candlestick.  Now, I have the same candlestick in my bedroom.  I covered it in newspaper by means of decoupage and love how it looks.  So, I decided to do the same thing for this candlestick.  And here is what I used.

candlestick

I had a newspaper that my roommates and I got for free, mod poge from Michaels, sponge brushes, a small bowl to put the mod poge in, paper towels, and tv shows to watch as I was decoupaging.

supplies

I tore the newspaper into small pieces to make it easier to decoupage onto the candlestick.  I then got the sponge brush damp with the mod poge and lightly coated it over the piece of newspaper.  Because newspaper is thin, it doesn’t require that much mod poge to make it stick to the candlestick.  I used only pieces with words on them because I was afraid of the color from pictures bleeding through.

candlestick 1

Almost Done!

So after two nights of mod poging, approximately 4 hours of work, the candlestick was complete!

candlestick 3

candlestick 4

candlestick 5

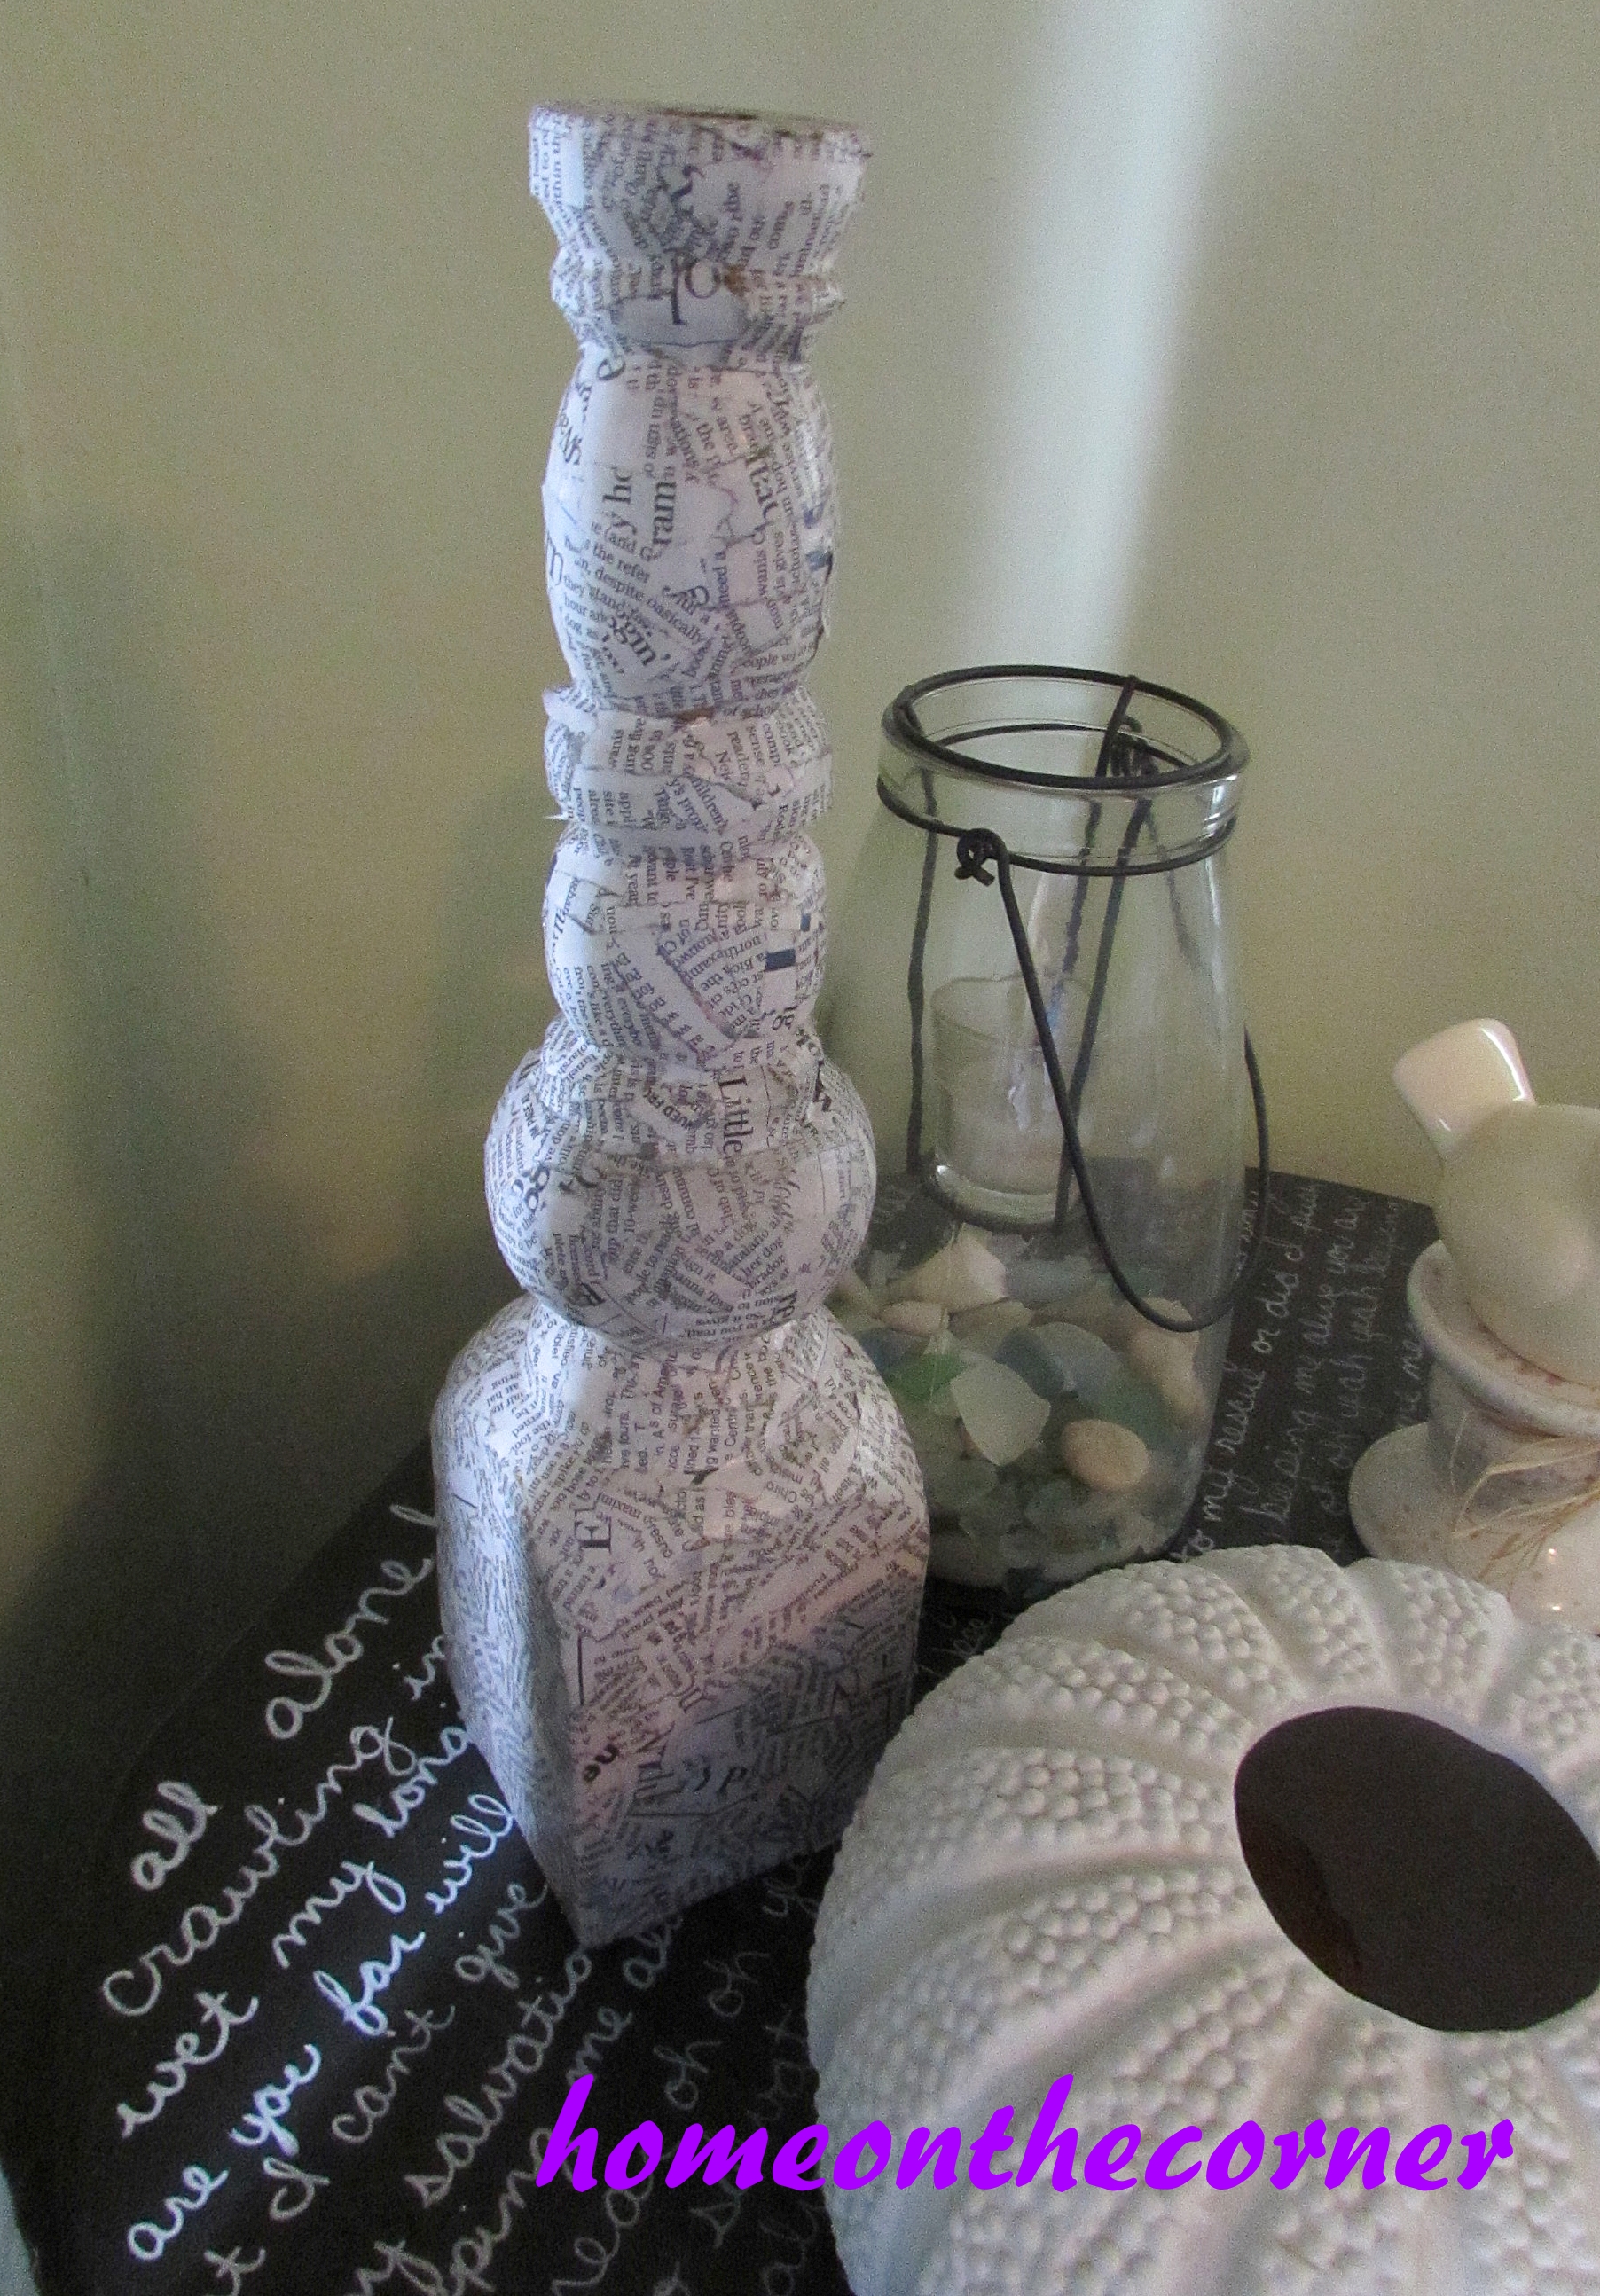
Currently it is sitting on my Salvation Table, which you can seehere, along with some of mom’s decorations.  I might be taking this to my apartment to decorate in the living room area.  I like the look of the newspaper, something that could be modern or vintage looking.  This project was fun and something that I know I will be doing more of this summer!

sparkle

How To Make a Super Simple Superhero Cape


I have a super easy project for you today! As most of you know, I really don’t like to sew. I made this project without having to sew, but you could if you wanted to make it fancier! I used knit fabric so I wouldn’t have to worry about sewing seams or having the fabric fray. My kind of project! Here are a few of the fabrics I picked.

Superhero cape fabric 2


The size of the cape is going to depend on the size of your child. I made these for my preschoolers and for my 2 great-nieces. I started with a 25″ by 30″, but that looked too big for the kids. I cut them down to a 21″ long by 15″ neck for my 3 year old niece and 15″ long by 12″ neck for the 1 1/2 year old. The ones for 4-5 year old preschoolers were a little longer.

After cutting the rectangle, I cut in from the sides, about half way up, to the neckline. I cut in just enough so it would be a 15″ or 12″ neckline. You could also make a wide seam at the top and run a ribbon through it, but I didn’t want to have to tie it on the kids each time someone else wanted to use the cape. So I used velcro instead.

superhero cape tapered edge 2


I attached a piece of velcro to the top, one on each side of the fabric so it would lay flat.

superhero cape velcro closure 2


I also added emblems to the back. Every superhero needs an emblem! This one is the letters for the preschool where I work.

superhero cape emblem 2


Here it is all done. You can see how it goes narrower at the top to fit around the neck.

superhero cape silver stripe with emblem 2


I added a star to this one.

superhero cape pink with star 2


Here are the ones I made for my great nieces-Super ‘E’ and Super ‘L.’ L had just woken up from a nap, so she didn’t really feel like being a superhero, but E ran ‘really fast’ and ‘flew’ all over the house. It’s so fun to see kids use their imagination when playing! Who need tv when you have a 3 year old playing superhero! By the way, she was just pretending to sleep. No rest for this one!!

This is a great ‘super’ easy project to make for your kids this summer. Hopefully it will provide hours of enjoyment for both of you!

Sunshine and Blessings


Steps to Painting Farmhouse Chairs with a Brush

Happy summer! I have so many projects to do!  Eeekkk! One at a time, right?

So I started with my kitchen chairs. I have the chairs that actually belong to my grandma’s table, but they were getting so much use, I didn’t want them to get too worn out. So when the girls were young, we bought 6 oak ones at a liquidation store. Nothing fancy, just something to have around the table. But by now, they were pretty worn too. Paint time!

Kitchen chair makeover

I know there are lots of different ways to paint and products to use, but I thought I would share what works for me. This time I used just a good old brush and can of paint. I am going to try chalk paint next time and I would like to try a sprayer too, just sayin’!

I cleaned up the chairs, removing dust and any leftover food. I find it easiest to turn the chairs upside down so I can make sure all the underneath is primered and painted well. I didn’t sand this time, and the primer seemed to hold pretty well.

kitchen chair makeover paint underside

There are hundreds of different primers out there, but Kilz is the one I like the best. It goes on thick and covers really well. I have never had any problems with it not adhering or peeling off.

kitchen chair makeover Kilz pimer

After the underside of the chairs was dry, I turned them over and primered the top. Be sure to let all the coats dry before starting a new one. I painted just one coat of primer on all the chairs.

kitchen chair makeover primered

As you can see, I had a very curious kitty come by to see what I was doing! I debated about leaving the pawprints because they looked so cute, but I did end up painting over them. The kitty does still have paint on her ear though!

kitchen chair makeover kitty pawprints

Once all the primer was dry, it was time for the paint! I followed the some pattern as with the primer. Turn the chairs over and start underneath. When it’s dry, paint the top. I used Orchard Supply brand paint, Benjamin Moore’s Cloud White. I did paint a second coat of the paint, but I purposely did not do complete coverage.

kitchen chair makeover painted cloud white

I wanted the chairs to have more of a farmhouse look to them. A little worn. Plus I don’t have to worry if the dogs or cats do a little scratching on them.

kitchen chair makeover farmhouse

Again, wait for everything to dry and then add a protective finish over the whole chair. I used Minwax Water Based Polycrylic Finish. It goes on very smoothly and dries quickly. It’s not tacky to the touch and it cleans up great.

kitchen chair makeover minwax polycrylic finish

They are all ready to sit at the table again! I love the white! What a difference! I have 2 more to paint and then the farmhouse table. I am going to do the table with chalk paint. I will let you know how that goes!

collage

So fresh and clean! I think Ezzy likes them too!

kitchen chair makeover white farmhouse

I will see you next time with the table! Have a great week!

Sunshine and Blessings

From Yellow to Blue with a Bit of Paint

I AM SOOOOOOOOOOOO SORRY!  I CANNOT BELIEVE THAT I DIDN’T GET THIS POST UP YESTERDAY!  PLEASE ACCEPT MY APOLOGY AND KEEP READING THE BLOG!  PLEASE!

All kidding aside, I do apologize for missing the post yesterday.  Time got away from me, and I am just getting to post it today.

So, we have this table that you might have seen before in some of our blogs.  It was a cute little folding table that mom had painted yellow because it was originally green.  But, I was tired of it being yellow and I wanted a table for when I move out of my current apartment and into a new place.

Table Before

So, the first thing I did was paint the legs white.  I knew that this would help to make the top of the table a statement but still keep it neutral.  I used an old sheet that I wrapped around the bottom of the table to protect it while I painted the top.

Table Cloth

I used three different shades of blue from Rustoleum for the table top.  I wanted to do an ombre effect so I used Aqua, Spa Blue, and Lagoon.

Paint

It was a bit difficult to paint the top since there were different slats that I wanted different colors.  So I started with painting the Aqua and Lagoon on the edges and painted both of those.  Then, I covered both of those parts and painted the Spa Blue section since it was in the middle of the table.

And here is the final product!

Table After 1Table After 2Table After 3

I love the ombre look on the tabletop!  It is great for the outdoors and is perfect for a front or back porch.  It would look good with things displayed on it or by itself.

I hope that you enjoyed the blog this week.  Thanks for stopping by!

sparkle


Another Closet, Another Organization

Everyone has a closet that is stuffed full of stuff where you can’t see what’s in there.  You know, things like wrapping paper, clothes, suitcases, sheets, and other stuff.

No…just me.  Okay.

Anyway.  So in my apartment, I have a closet in my bedroom and a hall closet to put all of my stuff in.  Now, this may seem like I have a lot of room to put stuff in and store everything.  Unfortunately, I have so much stuff that this doesn’t really work out.  Because this, is what my hall closet looks like.

Closet BeforeCloset Before 2

There is so much stuff in this closet that I never want to open it because it isn’t clean.  I don’t actually know what’s all in the closet, but it is a mess.  I had everything from kitchen stuff I wasn’t using to a tool box to jeans because they didn’t fit in my closet or my dresser.

Step 1: Clear out everything in the closet.  I literally pulled out everything that was in the closet and set it on the floor and the stairs so that I could see what I all had.

Closet Stuff 1Closet Stuff 2

Closet Empty

Look!  It’s Empty!

Step 2: Find little things that can be stored in other things.  So, I had extra sheets for my bed that I kept in the closet.  I had my printer box that was still in the closet, so I was able to fit all of the sheets in the printer box to make more room for other items.  I also put all of my gift and Christmas stuff (so gift bag, wrapping paper, a small Christmas tree, a tree topper, you get the point) into my big suitcase.  It worked out perfectly!

Step 3:  Fit everything on shelves about the same size.  I put a few of the bigger items on the shelves that they were originally on.  I kept the top shelf pretty much the same, printer box, movies, and a bag of craft stuff.  I also kept the suitcases on the bottom shelf because they didn’t fit on other shelves.  I did move some things, like me jeans, to the floor where there was more room.

Step 4: Put everything back in the closet.  Now, it’s time to fit everything else on the shelves.  Surprise!  You may now be able to fit more stuff in the closet!

Step 5: Step back and admire how nice and neat your closet looks!

Closet AfterCloset After 2

I am so happy that I took this apart and back together.  It looks much cleaner and organized.  I was actually able to place more things in the closet to make my bedroom a little cleaner.  Now, if it can actually stay that way, that would be fantastic!

sparkle