Guest Room Complete & Canvas Giveaway

Good morning! Hope you all had a good weekend! We had lots and lots of rain, which we do need so badly. Thankfully, it stops for awhile in between storms so the water has time to drain. And guess what!? It’s our 2 Year Blogiversary!!! I can hardly believe it! Thank you to all our wonderful followers and supporters! Obviously we couldn’t keep going if it wasn’t for all of you! You are so appreciated and we really have enjoyed getting to know you and reading all your sweet comments.

Since I couldn’t get out much, I was able to get a little more done in my house. I mostly worked on the guest room/craft room/Lauren’s room. It’s basically the same as it was at the other house, but this room is much larger. So nice! I actually have room to stretch out a bit!

*The contents of this blog are sponsored by CanvasFactory.com.*

Before we moved to our new house, I was contacted by CanvasFactory.com. They offered to send me a 16 X 20 canvas of my choice. I could either upload my own picture to be placed on a canvas or use one of their 20 million wall art prints. There are so many sizes and styles to choose from! There are canvas, acrylic glass, aluminum or collages. You can order a single print, like I did, a split canvas, or a do a whole canvas display. Plus, CanvasFactory is giving away a 16 X 20 canvas of your choice! Just enter the Rafflecopter at the end of the post. Good luck!

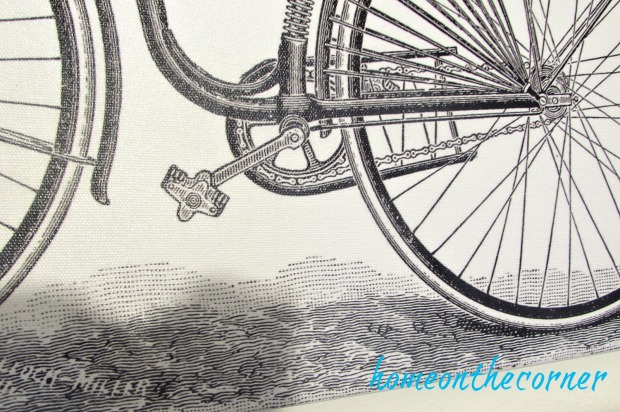
It took me awhile to go through the different prints they offered, but I finally decided on an old-fashioned bicycle. Even then, I had to choose between what color bicycle and what style. I finally chose black and white.

canvas-factory-old-fashioned-bicycle

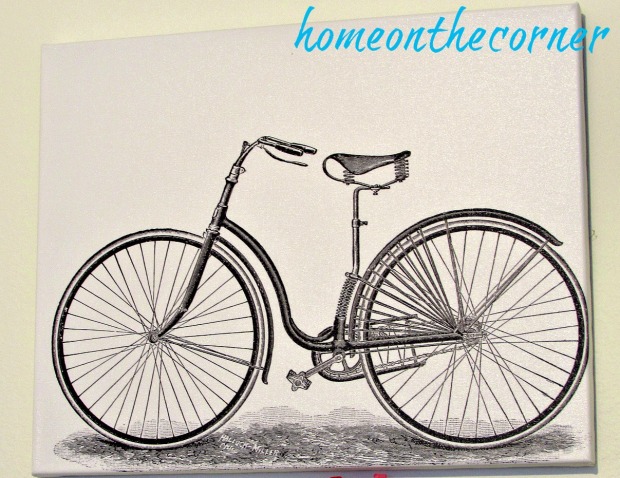
The quality of this canvas is so great! The background is very white, so the black bicycle really stands out. There is even a bit of a sparkle to it!

canvas-factory-bicycle-canvas-plates-decor

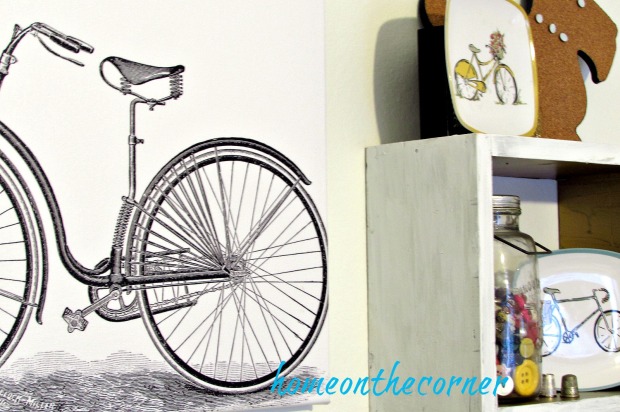
Here you can see some of the great detail.

canvas-factory-detail-close-up-bicycle

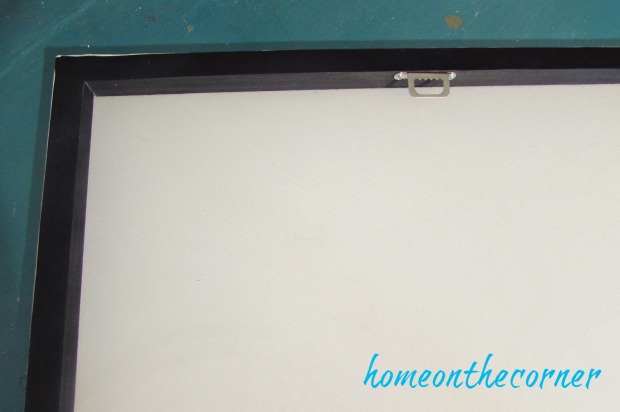
Even the back is finished nicely. There is black velvet all around the back edge to protect your walls and a sturdy hanger too.

canvas-factory-black-velvet-backing

I would love to have a few more of these around! They really look nice and add a great element to your room.  Continue reading to find out how you can win a canvas of your own from Canvas Factory!

canvas-factory-craft-room-bicycle-bulletin-board

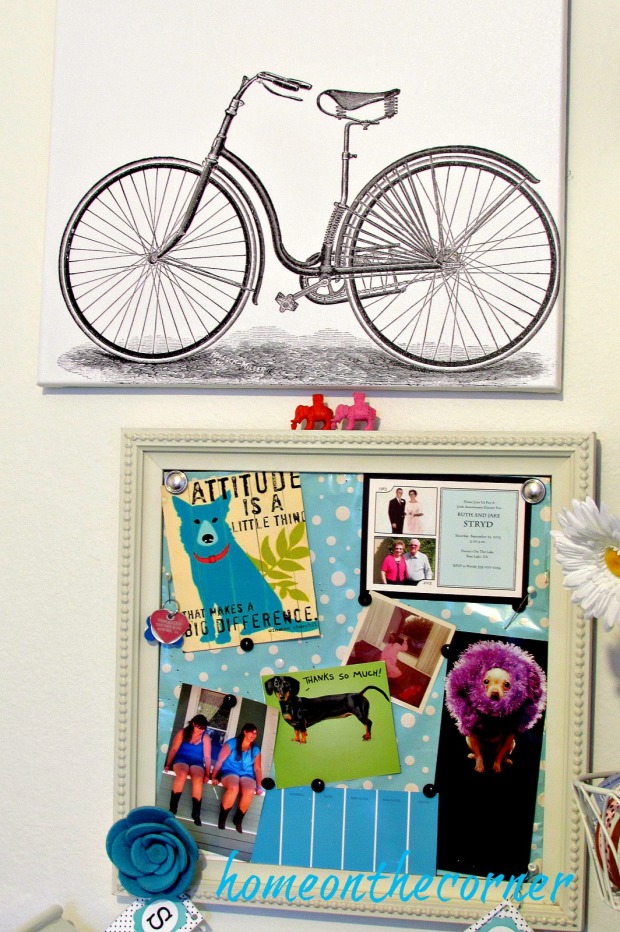
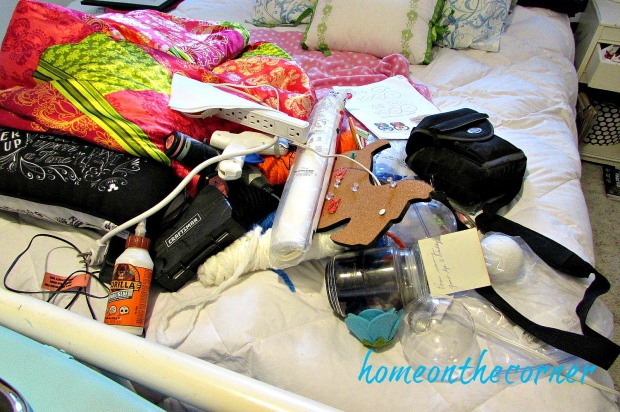
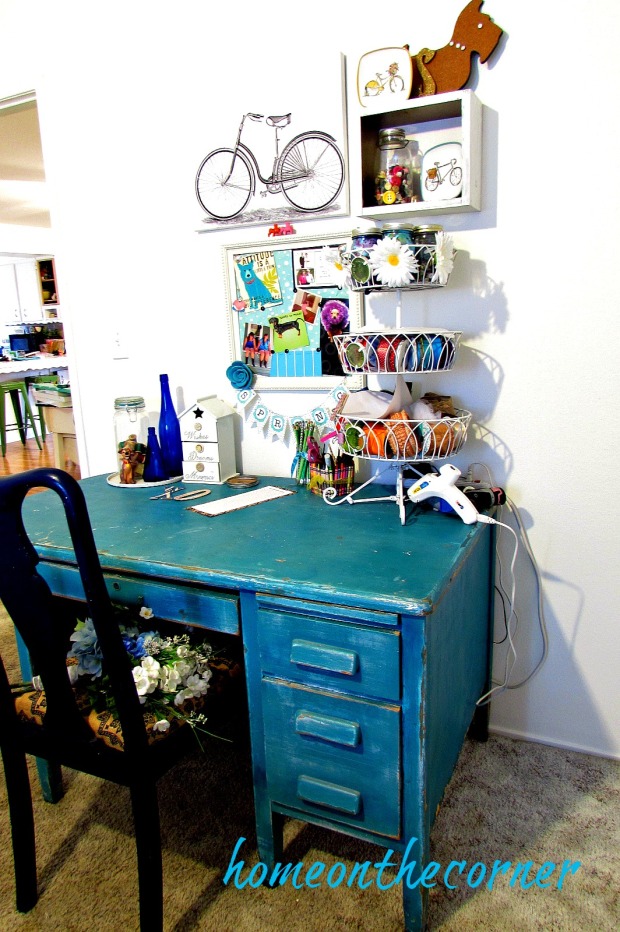
Okay, on to the guest room! Obviously, I hung this CanvasFactory.com print in the guest room, so now I will show you the rest of it. It started out as quite a mess! I really hadn’t done anything to it since we had the painting (Benjamin Moore, Simply White)done. So I unloaded everything from the desk and put it onto the bed.

canvas-factory-guest-room-makeover

Then I started with my ribbon basket. I took everything out and gave it a good dusting. I did get rid of a few rolls and then secured all my other rolls with straight pins so I wouldn’t have pieces of ribbon hanging all over.
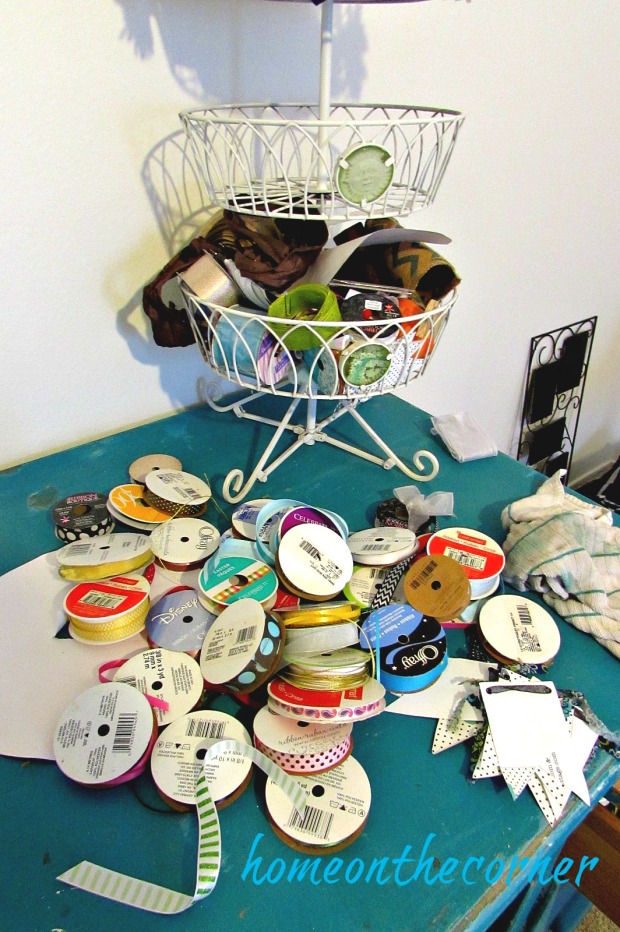
canvas-factory-ribbon-mess-before

Much better!

canvas-factory-craft-room-ribbon-organization

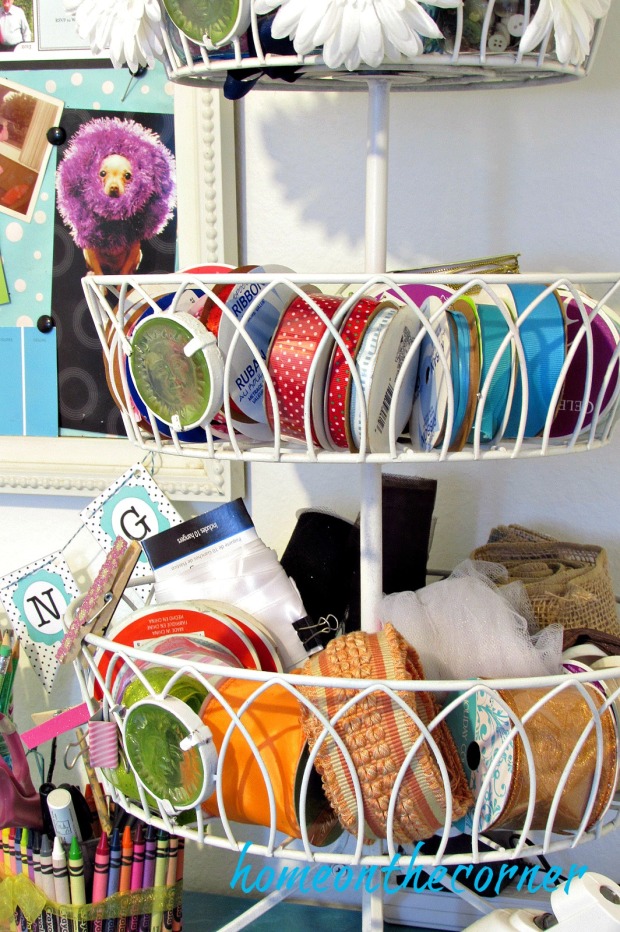
What a difference a good cleaning can make!

canvas-factory-guest-roomcraft-room-makeover

canvas-factory-craft-room-desk-thread-bottles

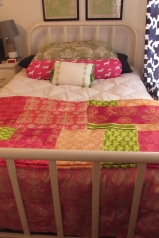
I used the same bedding and curtains I had before.

canvas-factory-guest-bedroom-makeover-pink-blue-green

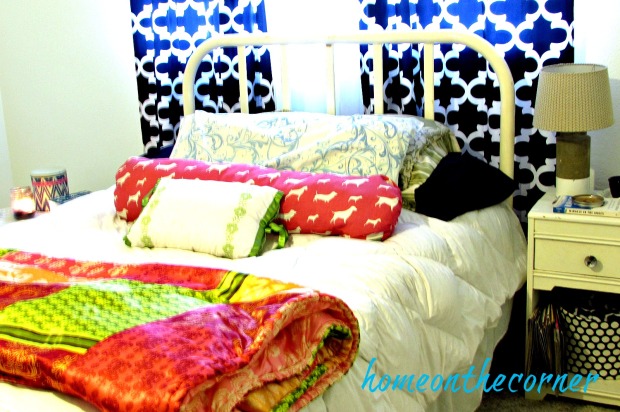
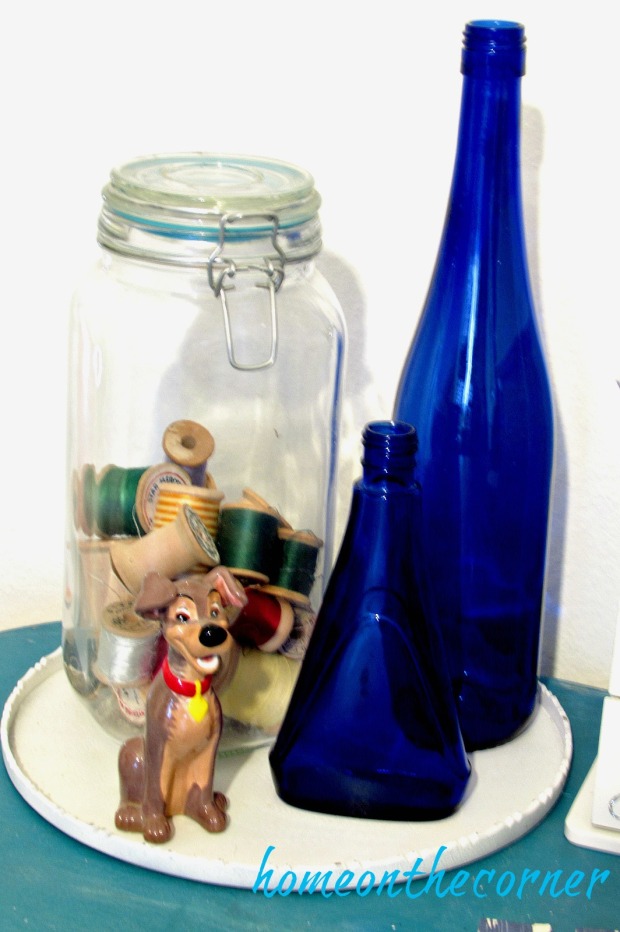
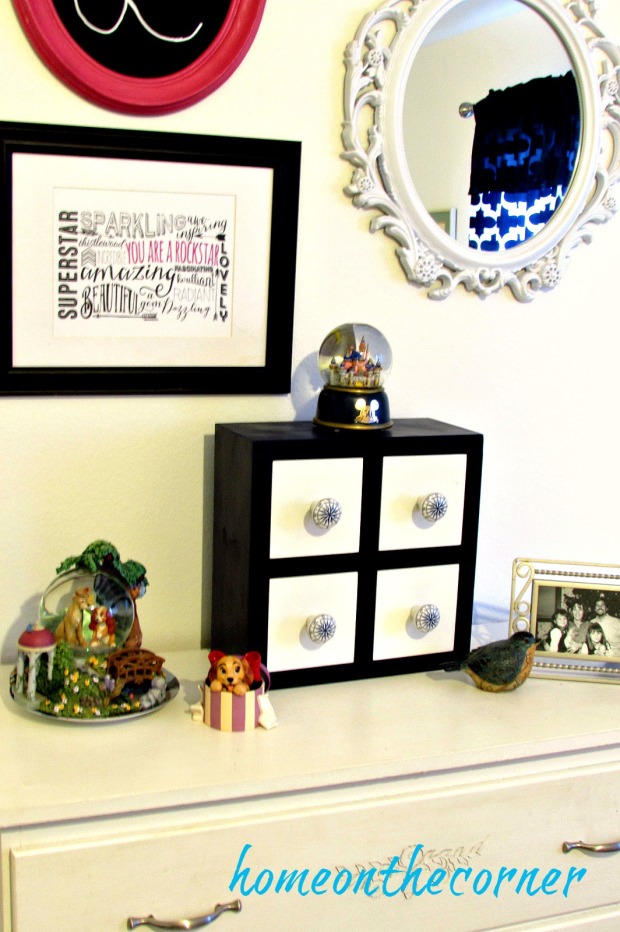
I did change up the dresser a bit though. I used a lot of the same things, just rearranged them a bit.

canvas-factory-guest-bedroom-white-dresser-mirror

I really like how fresh and clean the room is now. It feels ready to take on a new craft project! Slowly, but surely, the house is coming together. We have several big projects to tackle, and several little ones, but it’s nice to see some progress.

I have added some links to some items similar to what I have in my guest room if you are interested. I earn a little bit from each sale, but there is no extra charge for you. Thanks for taking a look!

Azar 300703 3 Tiered Round Wire Dump Bins, White

Catalina Printed Cork Board

Ball Mason Jar-32 oz. Aqua Blue Glass Ball Collection Elite Color Series Wide Mouth

Howard Elliott 2146W Dorsiere Oval Mirror, Glossy White

Best Home Fashion Room Darkening Morrocan Print Curtains – Antique Bronze Grommet Top – Navy- 52″W X 63″L – (1 Panel)

Finally, the fun stuff!  Canvas Factory was kind enough to give us a second coupon code to give out to one lucky person!  This will get you a free 16 X 20 canvas.  There are thousands to choose from and as you can tell from our experience, they are awesome!  Click on the link below to enter!  Good luck!

a Rafflecopter giveaway

sunshine-and-blessings-picmonkey

Here are some other posts you might want to look at!

Laurens Room 4     IMG_2322    IMG_2379

Super Cute No Carve Pumpkins

Hello everyone and welcome to another fabulous blog post.  I loved working on this post and I hope that you enjoy it as much as I do!

So I was toodaling around the intranet (also known as the internet for those who don’t understand young adult lingo lol) and came across this wonderful blog post on Simple as That.  Okay, so my mom found it for me, but it is still adorable!  Rebecca made these cute no carve pumpkins, so I wanted to make my own!  Check out her blog post by clicking on the picture below!

woodlandpumpkins3web

So here on Home on the Corner, I decided to try to make the fox and the owl.  Neither my mom or I are real big into raccoons, but he is still cute none the less.

Here are the supplies I used for these pumpkins.

pumpkin-supplies

2 Fake Pumpkins-I bought both of mine from Michaels.  Also, the turquoise one came that way.

1 Hot Glue Gun

1 Sharpie

1 Pair of Scissors

Lots of Felt!

Also, I have a pencil in the picture, but didn’t end up using it.

So I started with the owl.  I started with measuring my pink felt to see how big of a wing I wanted.  I folded the felt in half and drew what I wanted my wing to look like and cut it out.

Next I took the beige color and drew what I wanted for a belly.  I drew a half circle since the bottom of that piece wouldn’t be seen.

tummy-shape

I then went for the nose.  I just cut a small triangle out of orange felt to make a nice small beak.

beak-shape

The final part was the eyes.  Unfortunately, I was so excited to get them done that I didn’t take a picture…sorry.  But, I took white felt and used the bottom of a candle to make big bug eyes.  I then used my sharpie to draw little pupils in the eyes.

Then I moved onto the fox.  I used the white felt to draw the face.  I wanted her to have a bit of a mask, so I made a slit down the middle to symbolize the snout.  From there, I went to draw on two little eyes and a nose.

I then took the beige fabric to make another tummy.  I did the same half circle shape for her little tummy.

Finally, I took some orange felt and leftover white to make the ears.  I wanted them to be a bit big, so I over drew them and trimmed them where I needed.

fox-ear-design

The final step for both of these pumpkins was to hot glue everything on!  This was by far the most exciting  because I wanted to see the finished product!

And here you go!  The final look of my owl and my fox!

finished-fox-and-owl

I think that they are absolutely adorable!  I love how they turned out and can’t wait to find where I want to use them as decoration.  I know I didn’t put a tail on the fox, but I ran out of orange and white felt and didn’t have any orange paper to make a tail.  I’m sorry…I failed at making a fox!

But in all seriousness.  They are super cute and super easy to make.  I love how they turned out and I hope you found this tutorial easy to follow!

sparkle

DIY Wooden Ocean Buoys

ocean wooden buoys title

Good morning! Today is my first day back at school with students! Eek! I’m a little nervous because some I have never met before. But I know I have good help in my room and hopefully everything will go smoothly.

I know most people are getting ready for fall, but it is still over 100 degrees here! It’s hard to think about cooler weather projects when it is still so hot! So today is another summer post! It’s pretty simple though.  I actually had everything on hand already. I have been wanting to make these for awhile and I finally got it done.

I had some 4 x 4’s (actually 3.25 x 3.25!) in my wood stash and had my husband cut them in various heights. The tallest one is about 13″ tall and the shortest one is about 8″ tall.  I also had him taper in the tops on each side. They don’t quite come to a point, but are flat on top. I also drilled a hole, large enough to get some rope through. The diameter of the hole would depend on the type of rope you are using. I picked up some more Waverly Chalk Paint at Walmart, this time in ‘Ocean’, ‘Pumpkin’, and ‘Lagoon.’

ocean beach buoys

I first painted each piece with either Waverly ‘Plaster’ or ‘Mineral.’ 2 of each! I didn’t cover the wood too well, because a real buoy would be worn by the sea and sun.

ocean buoys painted grey and white

After the paint dried, I used painter’s tape to mark off where I wanted to put the colored stripes. Make sure to really seal the edges of the tape so the paint doesn’t go under and bleed into other areas. Take off the tape soon after the paint starts to dry. I started with the smallest one and decided to paint just one color around the whole thing. This one will be ‘Lagoon.’

ocean wooden buoy painting stripes

I did a variation of the 3 colors on each buoy. This one will be ‘Pumpkin’ and ‘Lagoon.’

ocean buoy grey painting stripes

After the paint was dry, I sanded the piece all over to give it a rough and worn look. Here is the small one. I love it!!

ocean buoy turquoise and white

I took a length of rope, ran it through the hole and tied it at the top. I should have rolled it in the dirt first, so it wasn’t so new looking! I’m sure it will look more worn before long.

ocean wooden buoys

I am so pleased with how these turned out!!

ocean wooden buoys orange, turquoise, blue

I can’t wait to really display them next summer!!

ocean buoys wooden blue and turquoiseocean wooden striped painted buoys

I hope you all have a great week and I will let you know how my first day of school went!!


ps. Redbubble is having another deal! On Monday only, 8/29, you get 15% off the whole site. Use the code CIRCUS15. 

Sunshine and Blessings

Just a Blog Post


Hey everyone! I really don’t have much of a blog post today, but I thought I would share a little bit from the bridal shower, a little bit more from Hawaii, and a deal from Redbubble.

Last week Lauren told you about Redbubble, an online shop where you can find all sorts of items from your favorite tv shows or gamers. Great gift ideas too! Just click on the Redbubble logo below to be taken to the site.

RedBubble Logo

The bridal shower for Lauren’s friend was so nice. We managed to fit everyone in my little house and had a good time together. We played a few games, ate delicious food (prepared by someone else!) and just enjoyed time spent together. I’m so glad we could do this for the bride and her family.

I haven’t shared pictures from Hawaii for awhile now, and since summer is almost over, I thought I would get a few more pictures on here and make everyone wish they were at the beach! We spent a couple of hours out on a catamaran and got very wet and windblown, but also were able to see a couple of whales spouting! It was so nice to be out on the ocean and have time to relax.

See the spouts?!

hawaii catamaran 15

I hope you all have a wonderful week!

Sunshine and Blessings

Rattan Plate Holders plus a Nautical Tablescape

Do you ever have an item you know you want to do something with, but it takes forever to figure out what? That’s me. All the time. I have had these paper plate holders for years. I saw, in a magazine, how they painted them pretty colors. Ok, I can do that. But should I make them all the same, or different colors, and what colors? Oh decisions, decisions!

I finally decided on grey, because…I had the paint already. 🙂 Then Haley came up with the pattern idea.

The first step was to paint them all grey and let them dry. I always use the Rustoleum Ultra Cover. Love this stuff!

Rattan Plate Holdersrattan plate holders spray painted grey

Then I wanted to put a  white stripe across the middle with a number in it. I measured out how large the stripe would have to be so the number would fit and then used the piece of cardboard to tape off the rest of the plate.

rattan plate holder stencil and stripe

I taped scrap paper onto the plate with painters tape. This way I won’t get white paint on the grey.

rattan plate holder tape off stripe

They came out pretty well!

rattan plate holder white stripe

Now came the number. I took an old magazine cover and cut out a square that matched the size of the stencil.

rattan plate holder stencil #4

It’s kind of hard to tell, but here is the square. I taped the stencil to the paper and then pressed it flat against the plate holder. I used turquoise for the numbers.

rattan plate holder magazine and stencil number

Once they were all dry, I was ready to set the table for a night of Al Fresco dining!

rattan plate holders under the lights

When I told Haley I was doing a nautical theme, she asked if it was different then beach theme. I had to think a bit, but yes, in my mind it is a bit different.

rattan chargers on a Nautical table

Nautical is more boats, ropes, and glass floats. Beach would be more sand and shells. At least that is how my mind categorizes it!! 🙂

rattan plate holders farm table

I did add a few shells and my favorite whale to the table along with glass floats and some rope.

rattan plate holders nautical table

I love how the striped runners look under the plates. I got them from Target last fall.

rattan plate holder seashells, jars, roperattan plate holder number 4

It was starting to get a bit dark on these last pictures, so they are a little grainy.

rattan plate holders tablerattan plate holder number 2rattan plate holder whale

I love how this turned out and really glad I finally did something with these plate holders. Now if I can only come up with ideas for the dozens of other items I have!!

Sunshine and Blessings

Here’s a few other tablescapes you might be interested in!

Fall Tablescape Cover Photo

turquoise and white spring tablescape title