Old Cigar Box to Earring Storage

Good morning! I hope you are all doing well. It is 100+ and hot here right now! Woowee! August tends to  be the hottest time of year and this year did not disappoint! I haven’t been able to get much done outside, but I have done a few inside projects.

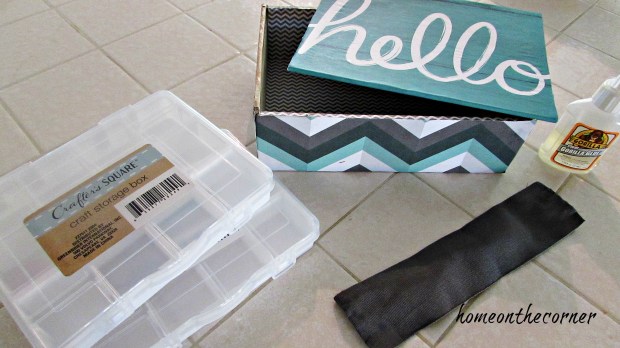
I have to tell you, this is not one of my favorite projects. I mean it looks okay, and I took pictures of cutting and gluing the paper, but now I can’t find them. Bum,bum,bum.  The box was an old cardboard cigar box I have had for years, and I finally decided to do something with it. I went through my scrapbook paper and found some pieces that went together. I cut pieces that fit each side and glued them on. It’s pretty easy and I’m sure most of you have done something like this before. The biggest problem, came with using the ribbon as a hinge. Actually with the Gorilla Glue.

cigar box makeovercigar box ribbon cut in half

The glue totally leaked through!! That might be okay on the inside of the box, but not on the outside. I ended up having to peel off the ribbon on the outside and and finding paper to use instead.
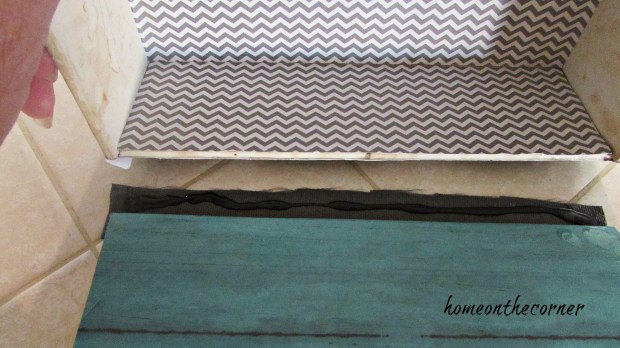
cigar box ribbon and glue

What a mess…

cigar box grey ribbon

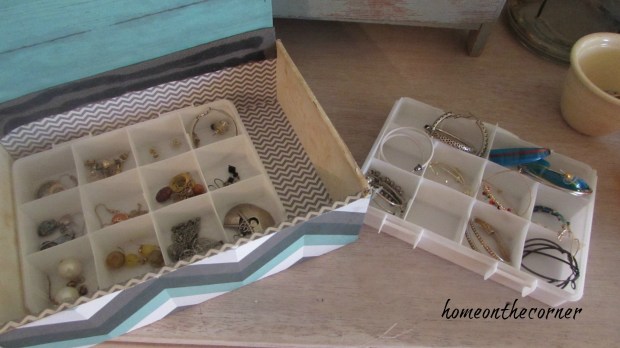
This whole project started because I needed some kind of storage for my hoop earrings. I have been buying more hoops lately, but didn’t have a good place to keep them where they would be separated and easy to find.

cigar box earrings

I found these little craft storage boxes at the Dollar Tree. They fit in the box, plus they were low enough that I could stack them on top of each other. I removed the lid and cut out a couple of the walls for the bigger earrings.

cigar box storage boxes

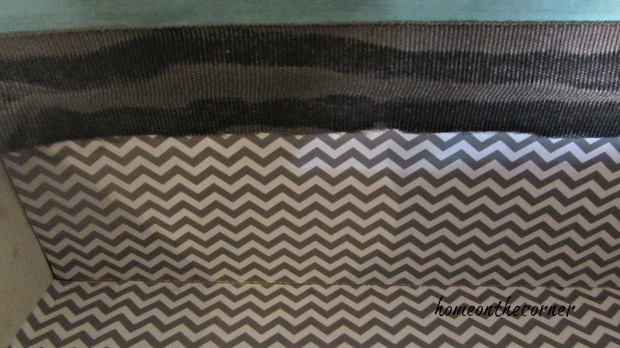
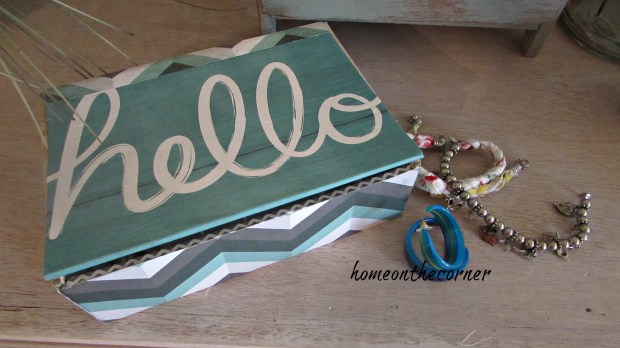
Here is a picture of the paper I used instead of the ribbon.

cigar box lid hello

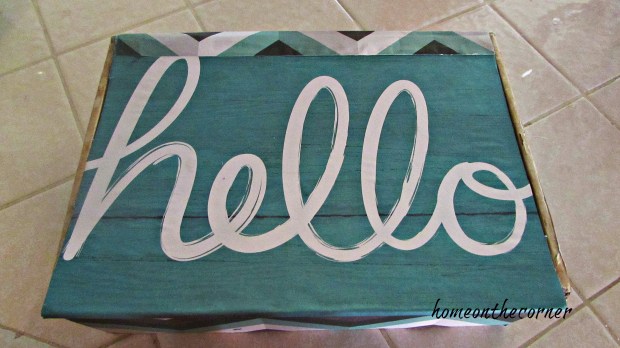
And the finished project!

cigar box hello paper

So much better! I have a couple of really large hoops, so I can place those in the little side area next to the organizers.

cigar box organized earringscigar box turquoise earring boxcigar box earring organizer

Yay! Now my dresser looks so much better! Plus I can find the hoops I am looking for and they won’t be all tangled up with the others.

cigar box turquoise and grey

Well, I’m not sure I should say I hope you enjoyed this, :), but I’m glad you stopped by!

sunshine-and-blessings-picmonkey

Here are a few other posts you may like!

wooden box sparkle decoupage gold and white vintage-jewelry-box-rings upcycle clementine box doll beds

What I Have Been Up To-Recycled Box to Planter

Good morning! I can hardly believe summer is coming to an end, on the calendar anyways! We will be very hot for awhile yet. But that’s ok by me!

Here is one project I was able to complete this summer. My husband brought this big box home from work. It took me a bit to figure out how to recycle it into something useful, but I finally did. I knew it would be a great planter for the back yard.

The first thing I did was to remove any nails and stickers. I then patched the holes where the nails had been.

IMG_0653

IMG_0654

IMG_0655

I painted all the edges of the box, the ends, and the top of the inside with white paint. I knew I was going to cover up the middle sections on the sides with wood, so I didn’t worry about the middle.

IMG_0668

Once the paint was dry, I drilled two holes in both ends of the box.

IMG_0662

I ran rope through the holes and tied knots on the inside.

IMG_0666

I found a bunch of pieces of scrap wood and cut them all the same length. I painted them with all the different colors I already had in my garage. 🙂 Then I sanded them a bit to give them a worn look.

IMG_0656

I laid the pieces out to make sure they would be randomly placed and then nailed them on both sides of the box.

IMG_0670IMG_0669IMG_0671IMG_0673IMG_0675

I didn’t want all the dirt and water to rot the wood, so I cut a piece of plastic to line the box with. It took two of us, but we stapled the plastic to the inside of the box. I don’t have a picture, but I filled the bottom of the box with plastic bottles and then filled the rest with potting soil.

IMG_0676

Next I filled it with some plants and a few other decorations.

IMG_0732

Pieces of driftwood, seashells and rocks fill in some of the empty spaces until the plants start to grow.

IMG_0728

I found this Mickey and other pieces at Dollar General and knew he would be perfect here!

IMG_0726

I added a few fairy lights too which look so pretty in the evening.

IMG_0724IMG_0725

I like adding a few special touches to my patio and enjoy spending time out here! Have you made anything for your patio or porch this summer? I would love to hear about it!

sunshine-and-blessings-picmonkey

Here are some posts you may have missed!

seashell specimen art title      spray paint starfish plate    Paper Strip Apple.jpg


SEASHELL SPECIMEN WALL HANGING

Good morning! Have you been able to get to the beach this summer? Maybe you collected some seashells. Here is a great way to display them!

Hello! Is spring here yet? I can hardly wait for warmer weather. After being in Hawaii, I am so ready to wear shorts and tank top again. To help get in the mood, I created these Seashell Specimen Pictures. I collect lots of seashells and had divided them up in little baggies and I had found these frames at Goodwill a while back, but with the holiday, I just didn’t get to it. So now that I had a little time, I decided to get this project done!

seashell specimen art title

Here are the frames I found. I was able to find 3 of the same ones.

seashell speciman frame front

The first thing to do was take the backing off.

seashell speciman frame back

I used scissors to cut along the edges to get to the inside.

seashell speciman back of frame

After the back was off, I removed the picture and the glass, so I was left with the frame, mat and cardboard backing.

seashell speciman frame

I didn’t want the cardboard to show, so I used a piece of brown paper looking scrap paper for behind the shells. I laid out the shells the way I thought I would want them to go. Once I had a pleasing layout, I used tacky glue to glue them onto the paper.

seashell specimen frame clam shells

I used some packing tape to secure the back and they were done! I hung them over the bar in the dining room to add some summery fun!

seashell speciman frame set of 3

These clam shells are cool with the ridges in them.

seashell speciman frame ridged clam shells

Sand dollars are my favorite! I am always on the lookout for them when we walk the beach.

seashell speciman frame sand dollars

I love the shape of these!

seashell speciman frame crab

We have the seashells, now we just need the beach!

seashell speciman frame art 3 set

You can see here, I used one of the pictures in my RV makeover! It has really held up well, even with all the bouncing the trailer does as we travel!

rv makeover striped cushion covers and curtains

I hope this inspires you to make your own seashell specimen art.  Hope you have a wonderful week!


sunshine-and-blessings-picmonkey

Picket Snowman Christmas Countdown

I wanted to get in a little Christmas in July before it was too late! Here’s a great project to work on now so you will be all ready for the holidays!

Good morning! It’s almost Thanksgiving!! Can you believe it! Do you start decorating already or do you wait until after Thanksgiving? I have started, mostly because of this blog, but I love it! I especially like the twinkling lights.So festive!

I have a Christmas craft for you today. I should have pictures of the living room and dining room for you next week. There are just a few finishing touches and it’s all ready for the holiday!

*(affiliate links are included at the end of the post for your convenience)*

For this project, I started out with a old painted clay pot. I sanded it down a little and then spray painted it white.

picket snowman countdown clay pot

After the paint had dried, I mixed up the Plaster of Paris. The package I had contained 4 lbs. of plaster. I used all of it. Of course, this is because one package drained out the hole in the bottom, even though I tried plugging it. After putting another piece of cardboard in the bottom and letting that plaster dry, I added the rest. I used a couple of disposable containers to mix the plaster in. I poured in the required amount of water, added the plaster and then mixed until  smooth. Then I poured each one into the pot.

picket snowman countdown plaster of paris

Once the plaster had set for a bit, about 1/2 hour, I put an old picket into the pot. You could use pallet wood or buy a piece from the store too. I then put some scrap pieces of wood around it to keep it upright until it completely hardened, about 24 hours.

picket snowman countdown propping up the picket

Now comes the fun of decorating my snowman. I found an old pair of socks and used a red one to make the hat. I cut off the toe and then slid it over the top of the picket and tied it with a plaid ribbon. I also found a piece of red fleece to tie as a scarf. I hot glued some buttons for the eyes and the mouth.

picket countdown snowman hat

Steve cut a small triangle for scrap wood to use as the nose. I painted it bright orange and then attached it with hot glue.

picket snowman countdown orange nose

I found these numbers awhile ago at a thrift store with no idea what I was going to use them for. This was a perfect craft for them! You could also use scrapbook numbers or house numbers or even print some off the computer to use.

picket countdown snowman numbers

I hammered in small nails, below the scarf, that didn’t have much of a head on them, so I could easily slip each number on each day.

picket snowman countdown nails

I added a little batting to the pot to look like snow and he is done! He adds a little cuteness to the front porch!

picket snowman countdown on the porch

Maybe I will add some stick arms too! With mittens!

picket snowman countdown close-up

This is a great way for your kids to count down the days to Christmas and a reminder for you every time you come to the door!! Of course, we don’t get real snow here, so maybe this makes him more likable. 🙂  See you next week with Christmas decor!

sunshine-and-blessings-picmonkey

*Here are some of the items available at Amazon. If you make a purchase, a little comes back to Home on the Corner. Thank you!*


Backyard Camping Crafts and Activities

Good morning everyone! I know I haven’t been posting as often, but I have been busy with stuff around the house. Most things have been simple projects, nothing really to blog about, but I think I will take some pictures, just to show you what I have been up to!
Today I have a special guest post for you all to enjoy! Back in February, we shared Gabrielle’s valentine printables. We have some new summer printables for you today. My family went camping a couple of weekends ago, and while I don’t have any little children, we still had fun with these!
Here’s Gabrielle:
Summer is finally here and backyard camping is super popular. You don’t have to leave the safety of your own yard to enjoy some camping-themed fun in the sun. Of course, no “camping trip” would be complete without plenty of activities. Below, check out some printable crafts and activities to get you started. You’ll be creating summer memories before you know it!
Creative Nature Collage Critters
Use natural materials found in your backyard to make creative critters. Collect flowers, twigs, leaves, and more to design unique-looking animals. All you need is some glue and imagination! You can download these printable animal faces here.
backyard-camping-printables-nature-collages-mockup.jpg
Campfire Story Activity
Have some laughs together by taking turns storytelling based on random story elements. All you need is a single die, the story creation sheet, and your creative mind. Each person rolls the die 5 times, circling whichever story elements correspond with the number rolled under each category. Download this printable story activity here.
backyard-camping-printable-storytime-activity
Sensory Scavenger Hunt
Discover the hidden wonders of your own backyard using your senses. Download this printable sensory scavenger hunt here.
backyard-camping-printable-scavenger-hunt-mockup
Constellation Connect-the-Dots
Connect the dots of some favorite constellations to prepare for stargazing. You can color in the constellations, making them as bright and elaborate as you would like. When the stars become visible at night, you can find the constellations together with your knowledge gained by drawing them. Download this connect-the-dots activity here.
backyard-camping-printable-star-constellations-mockup

Thank you so much Gabrielle! These are so cute and fun!


Okay, now I will show you our versions! My girls and I each created a collage critter. We gathered our supplies from around our campsite and then started gluing our pieces on. I love how different each one was!
 Next, we did the story time activity. Um, I found out we are NOT very good story tellers! Haha! We had a story about a Ship Captain and a Vampire struggling to rule the kingdom in the middle of the dessert, a Witch and a Detective battling to save the world, and lastly, a Werewolf and a Detective in an adventure to solve a mystery on the ocean!
camping story
Lastly, we did the scavenger hunt. We divided into two teams and set a timer for 5 minutes. We tried to find each thing on the list and take a picture of it. We got one point for each item, but if we had the same answer, neither one got a point. It was interesting to see what we each came up with for our answers!
IMG_0723
Can you guess which category each of these pictures went with? Scan over each picture to see the answer!
 This was so much fun to do together as a family! Thank you again Gabrielle for sharing these activities with all of us!
sunshine-and-blessings-picmonkey
Here are a few other posts you might be interested in!

ocean wooden buoys orange, turquoise, blue    Wander Supplies  rV cushion title