A New Dresser…Finally!

So…do you remember a few weeks ago that I posted about a dresser that I was going to be posting soon?  Yeah…life got in the way and it didn’t exactly happen soon.

But I finally got it finished!

If you haven’t read the before post, please click here.

Before and After

before and after

I love the new look on this dresser.  Before it was a weird eggshell whitish yellow, a drawer was broken, and there was peeling paint all over.  Now, it looks like it could fit anywhere in someone’s house.

But it wasn’t all easy.

The first problem I ran into was the broken drawer.  With the help of my dad, we were able to get that fixed.  He also helped me fix the bottoms of the drawers so they wouldn’t fall apart.

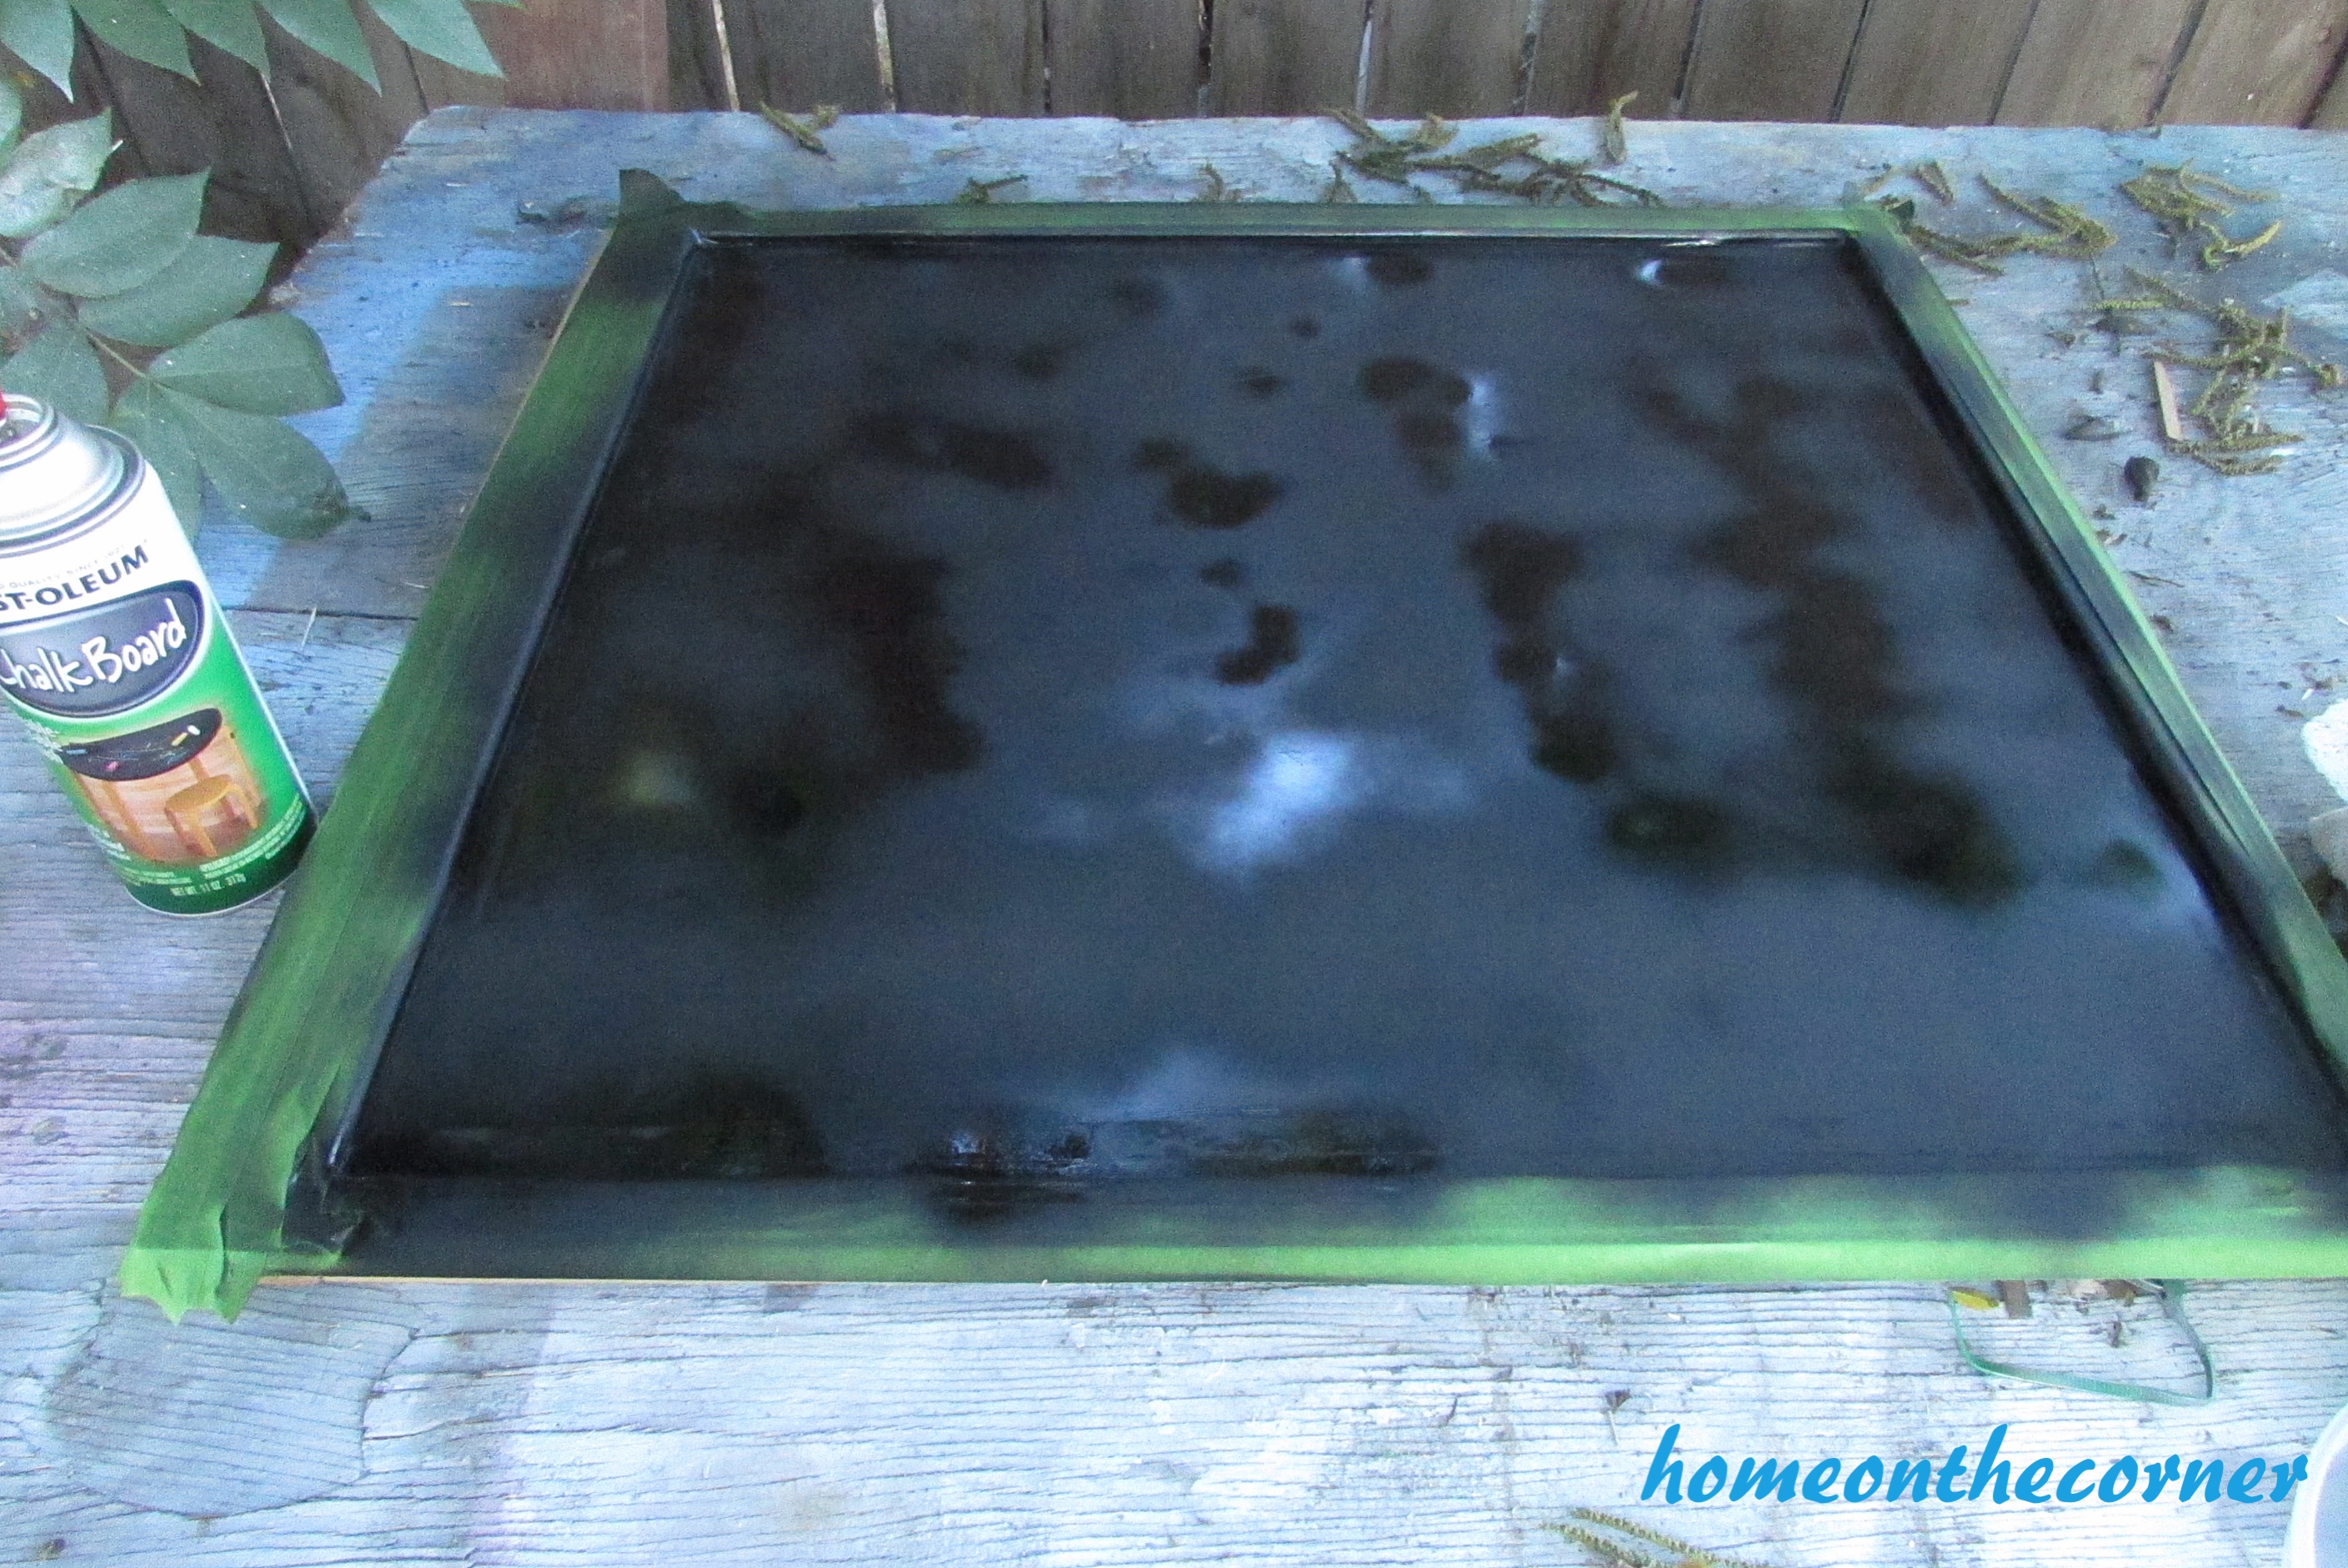
When I was painting the dresser, I also ran into the problem that the paint didn’t cover the peeling paint on the top of the dresser.  When I was using the spray paint, it was two different tones because the wood would just soak up the paint.  So, I had to use a can of black paint instead of spray paint.  Thankfully, that worked and made the top of the dresser look nice.

My final problem came when I tried to put the new knobs on.  The space between the screws was wider than the original knobs, so I had to remeasure to make new holes.  After filling in the original holes and drilling in new holes, I was finally able to put the new knobs on.  Yeah!

The Drawers

The Drawers

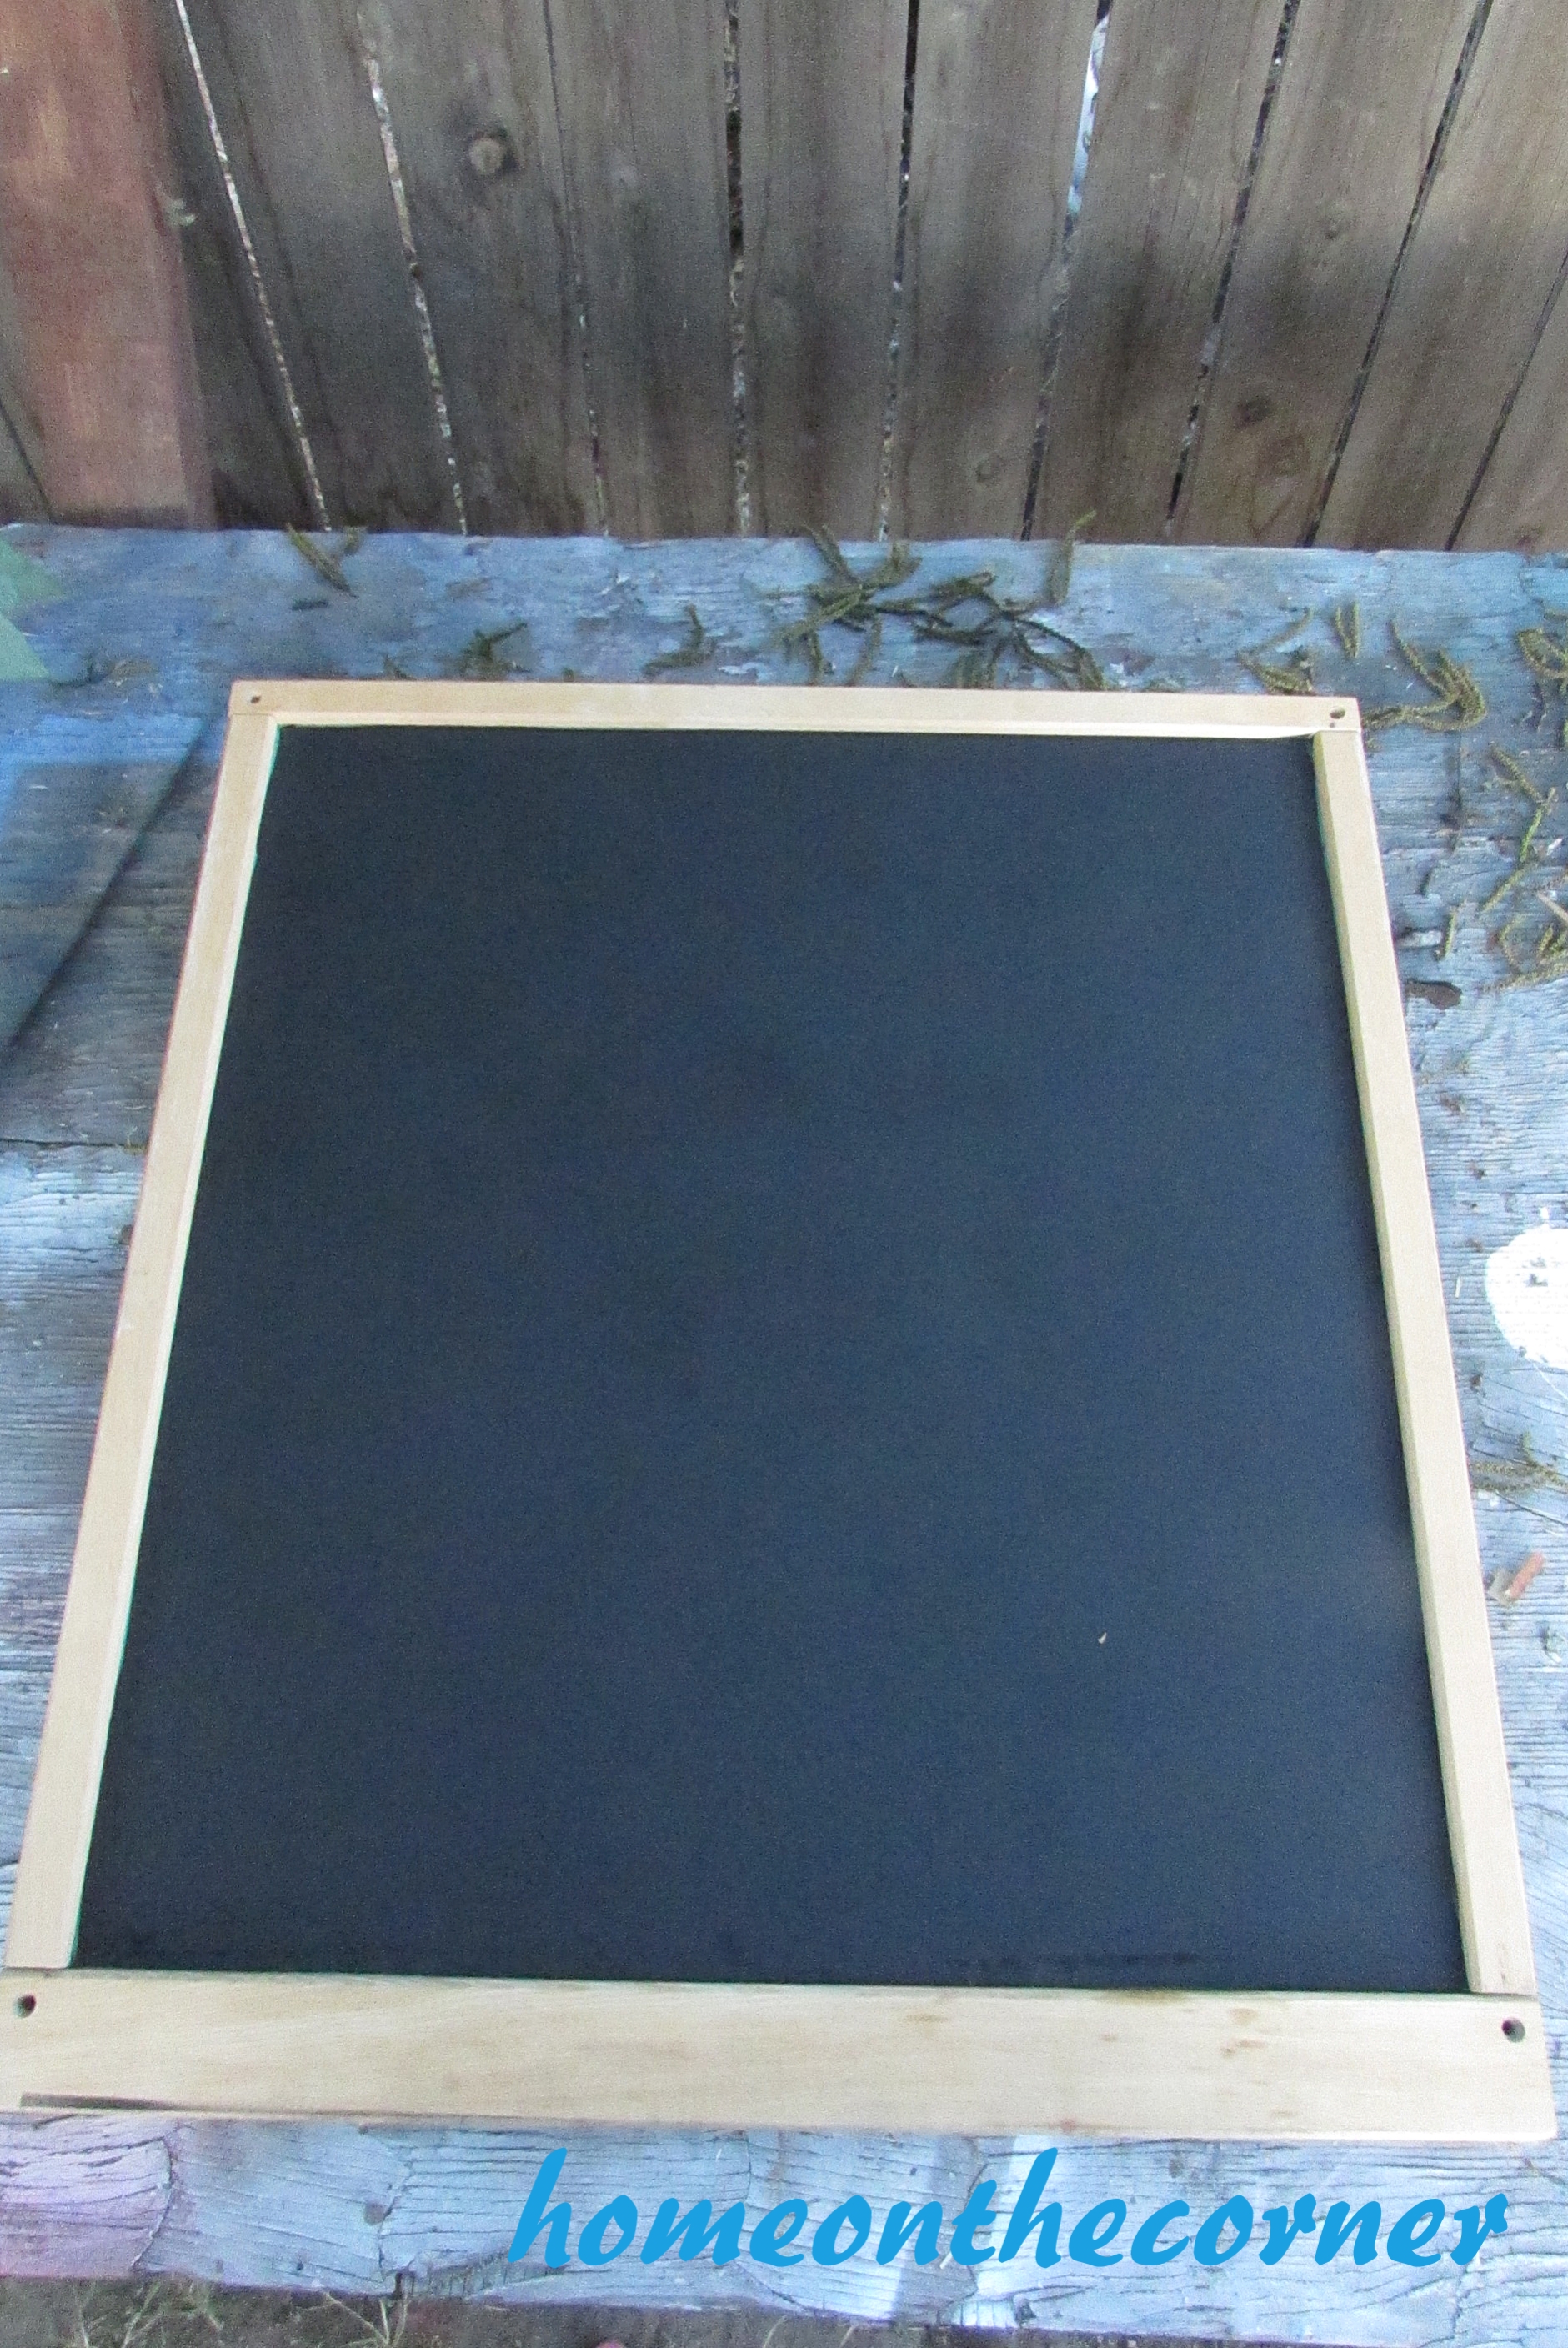
The featured part of this dresser is the drawers.  They are all chalkboard, so you can write what you have in each drawer (examples: socks, pants, checkbook, undisclosed amounts of money…too much?), or write numbers like I did.  Numbers are really in right now, so that is why I picked them.

dresser 1

Another feature this that every pull for the drawers is different.  I bought all five of them at Junk Days and they all worked perfectly.  It’s a great way to make the drawers unique.

IMG_3595

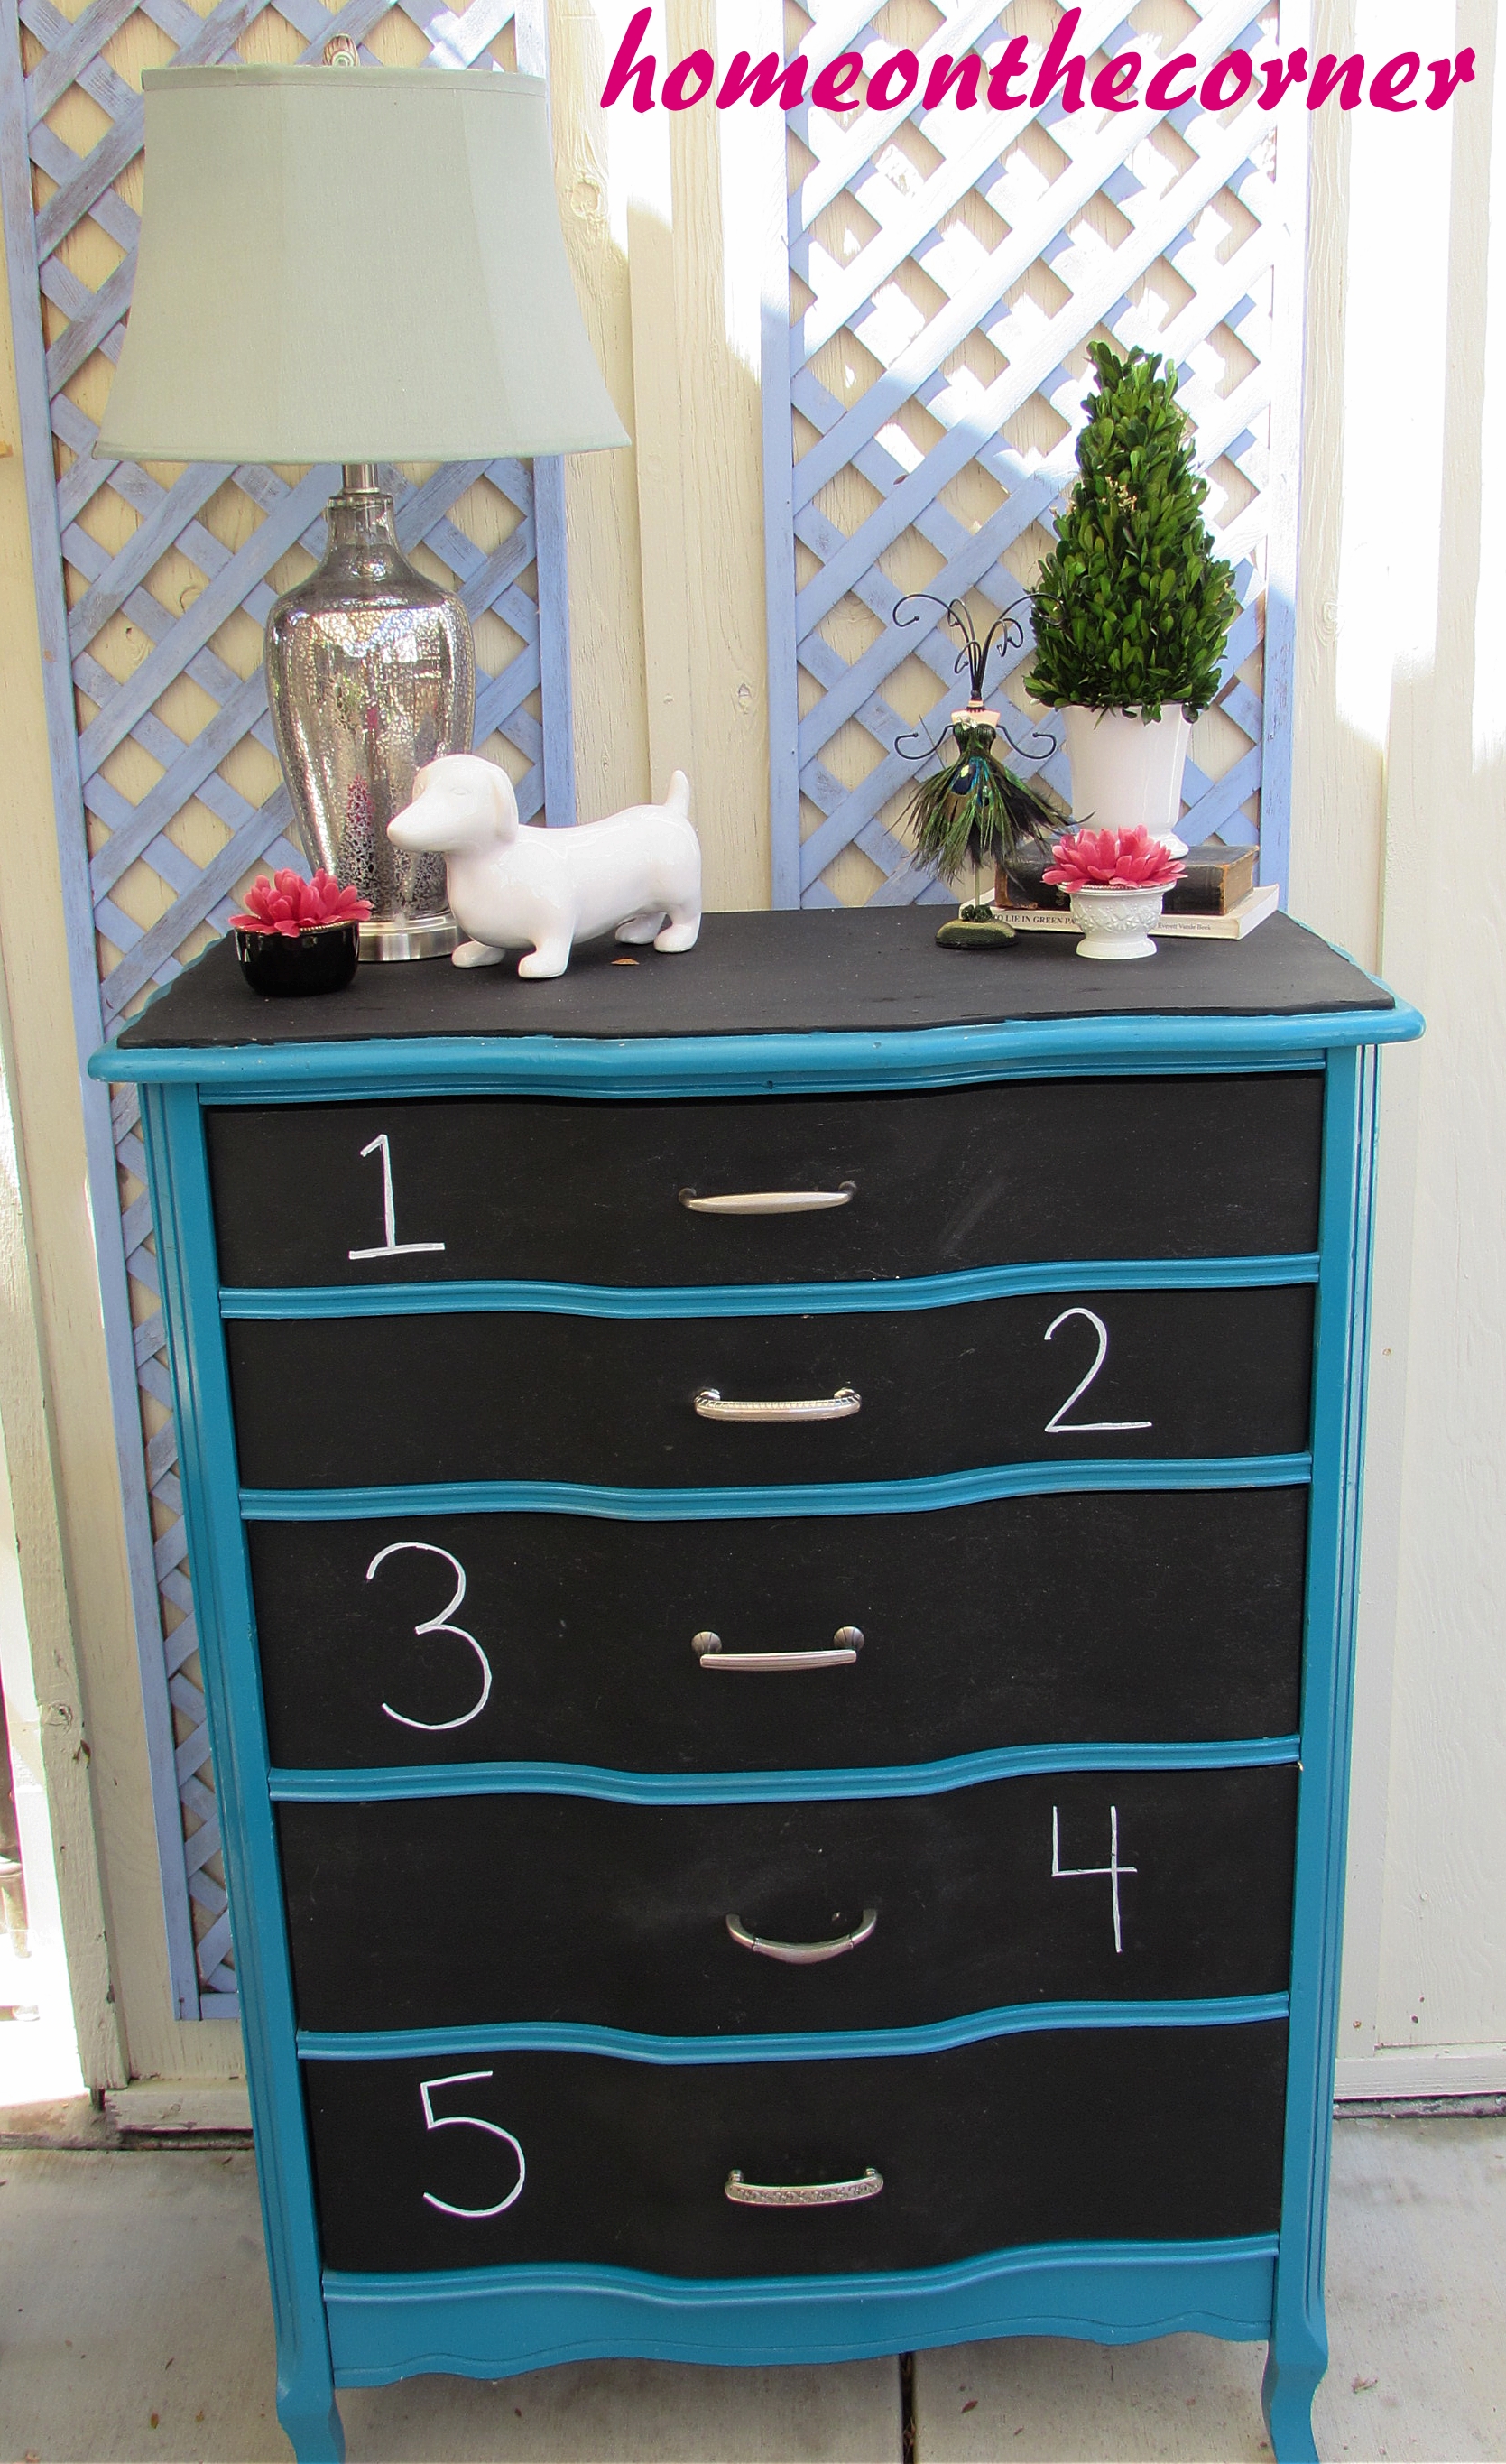
I love how this dresser turned out.  It has a very modern feel and is something that I can see myself putting in my house when I have my own one day.  Now, if only I can figure out what to do with it in the meantime.:)

sparkle

How to Turn Baking Pans into Chalkboards

Sorry that this post is late.  I have been busy with finals, work, and getting ready for Haley’s graduation on Saturday.  But I digress.

I have seen these chalkboards online and made one for myself, so I have decided to post how to turn a simple baking pan into a chalkboard.

First thing you need is these baking pans.  I bought these three at a thrift store for 10 cents each.  What a deal, right?

I have 3 pans here, but I only ended up using 2

I have 3 pans here, but I only ended up using 2

Next I painted the pan.  I wasn’t too particular if the paint for the outside of the pan got on the inside because it would be painted over anyways.  I chose pink and turquoise as my outside colors.  Shocking isn’t it.

Pink and Turquoise

Pink and Turquoise

Next, I taped off the edges of the pan to protect the color and not get chalkboard paint on the outside.  This was a little tricky because I wanted to cover the entire edge of the pan.  So I had to use quite a few pieces of tape to cover the edges.

Tape for Days

Tape for Days

Now, it’s time for the chalkboard paint!  I sprayed the inside of the pan completely to get a nice coat of chalkboard on the pan.

And Voila!  They are done.

Voila!

Voila!

I decided to make a checklist on the turquoise pan of things that need to still be finished before the graduation and graduation party.  Fortunately, I was able to mark one thing off already.  And the last two things won’t be able to be checked off until after the ceremony on Saturday.

GRADUATE!

GRADUATE!

For the second pan, I decided to put my salutation.  Because I love the saying and love pink, it worked perfectly.

Pretty in Pink

Pretty in Pink

These chalkboard pans are really easy to make and really easy to use.  I use chalk markers to write on them, and the chalk marker comes off with a wet washcloth so you can change what it says.  Check out my apartment bedroom blog here to see the chalkboard pan I have in my bedroom.

sparkle

How To Make Chalkboard Subway Art-California Style

Hi everyone! First of all I want to apologize for only getting out one post this past week. Life has been so crazy for both Lauren and I! I have been working more hours, plus had activities each night and Haley graduates in a week!!! Lauren has also had more work hours and had finals and many papers to write. Not sure how much better this week will be with graduation preparations, but I am here today! I will share all the good grad tips when I come back!

I did manage to get a project done this past week. I wanted to change out an old decorative window I had hanging in my bathroom. The preschool I work at was getting rid of an old puppet theater type thing. I didn’t want it for my classroom, but it had chalkboard on all 3 sides. Hello!? Yes, I want it!

My husband took it apart before I took a picture, but here are the 3 sides.

chalkboard subway sign1

I took the smallest piece and taped all the ages. Then I took Rust-oleum Black Chalkboard Paint and sprayed the middle.

Taped off

Taped off

From green to black!

From green to black!

chalkboard subway sign4

After the chalkboard paint was dry, I removed the tape. Then I used some Minwax Wood Finish, Golden Oak, that I had on hand. I dipped a rag into the can and then wiped it on the wood frame. I let it dry and then added another coat.

chalkboard subway sign5

This shows the difference in the wood color.

This shows the difference in the wood color.

After everything was dry, I primed the chalkboard. This just means rubbing chalk all over the whole board and then wiping it off. Now your board is ready to use!

Primed

Primed

I printed out the names of different California beaches, in different fonts on the computer. My plan was to rub chalk on the back of the paper, then trace it on to the board. It worked a little, but the chalk wasn’t dark enough for me to see. So I ended up just using the prints as my samples and I freehanded as best I could.

California Beaches

California Beaches

This is where it’s now hanging! I like how it looks here, but it’s also nice that I can either change where I put it or I can change what’s on it.

New artwork for my bathroom!

New artwork for my bathroom!

chalkboard subway sign11

chalkboard subway sign12

chalkboard subway sign13

chalkboard subway sign14

chalkboard subway sign16

I have an idea for one of the other pieces. I think I am going to use it in my classroom to write all the funny things the kids say, but I don’t know about the other piece. I would love to hear some ideas! I hope you all have a great week!

Sunshine and Blessings