My Vintage Chair Makeover

This is a re-post from last year. Hope you enjoy!

I’m back today with another makeover! I have so many projects and I am trying to get them done before  summer will be over and I will be back in school!! It’s much harder during the school year.

grandpas chair anchor pillow.jpgtitle


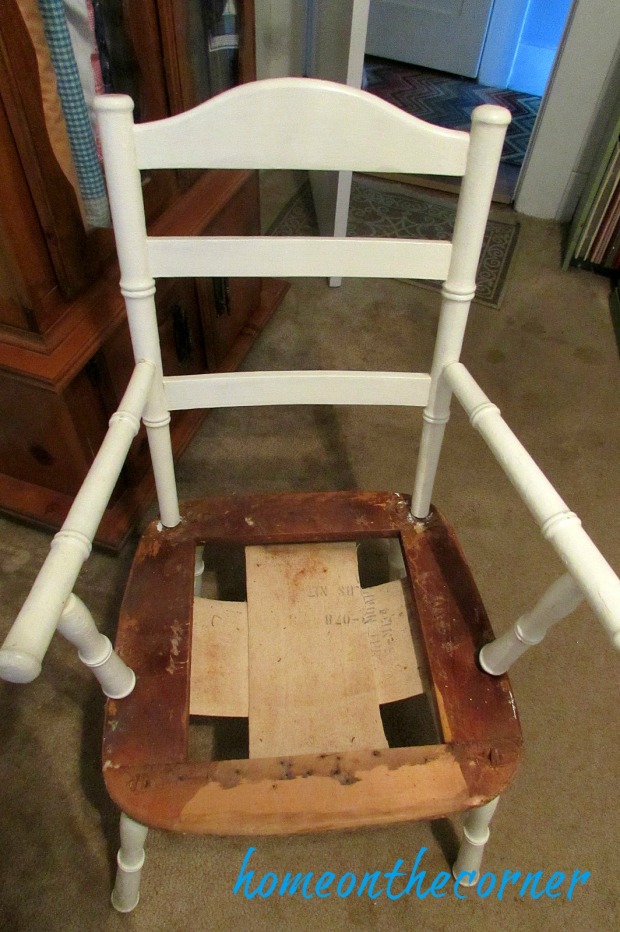
This chair belonged to my Grandpa, my dad’s dad. He was born in 1898 . He sailed here from Holland and met his wife on the ship. They were married after they arrived in the United States. We have even found their names on the registry at Ellis Island. So much history! My dad received this chair after my grandpa passed away many years ago and it was in my parents room for a long time. My mom was ready for something different and asked if I wanted it. Of course! It has sat in Lauren’s room for a couple of years and I finally decided it was time to renew it.

IMG_6017

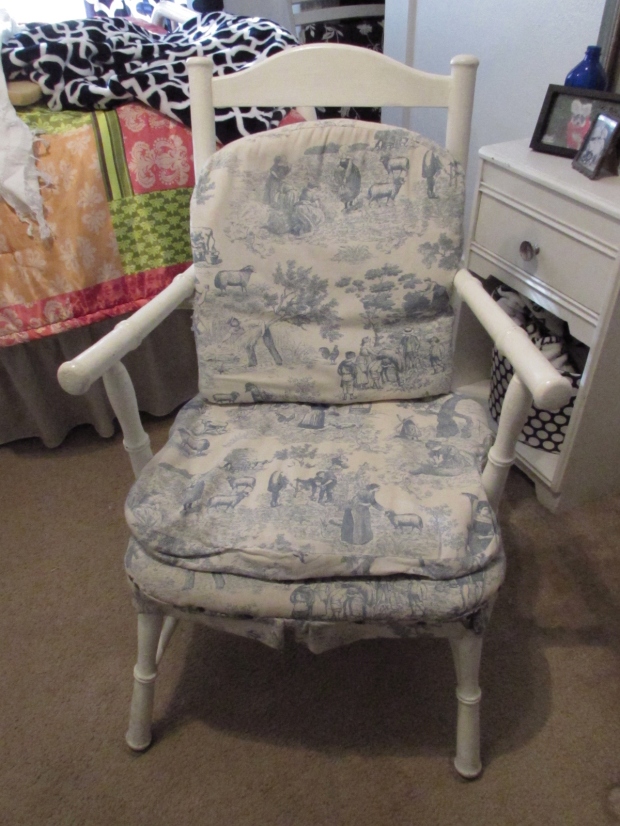
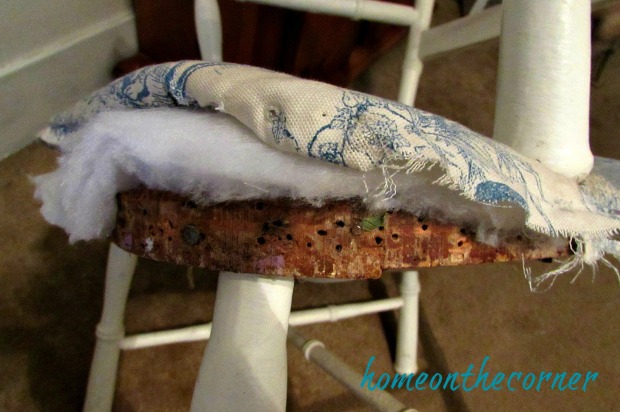
First I had to take off all the old material and batting.  Do you see all the little nailhead tacks? Yep, I had to remove all of those, plus staples.

grandpas chair makeover seat

I used a small screwdriver and pliers to help me pull them all out.

This isn’t very pretty :(. I will have to figure out something to cover it up.

grandpas chair makeover

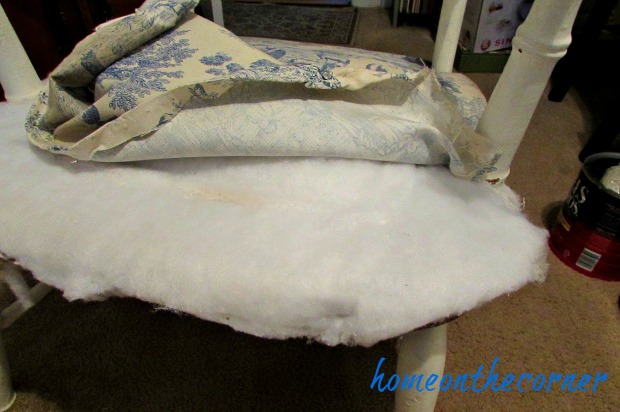
Here is what was underneath everything. I pulled out all these nails too. The ‘stuffing’ is just a pillow inserted into the middle.

grandpas chair makeover wooden seat and pillow

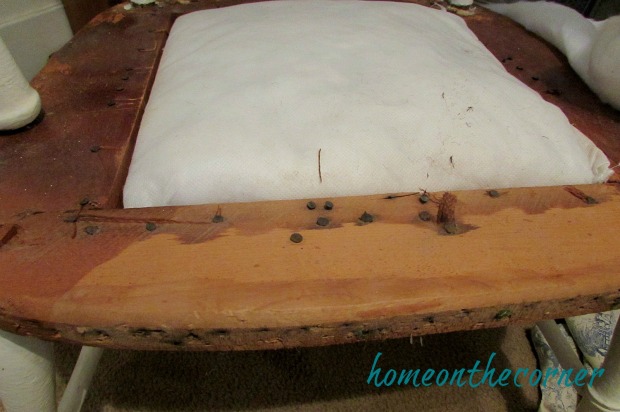
Here it is, all naked. I tightened up the straps with a few more staples underneath and gave the wood a good cleaning. Then I used some antiquing wax on the brown wood to freshen it up a bit.

grandpas chair taken apart

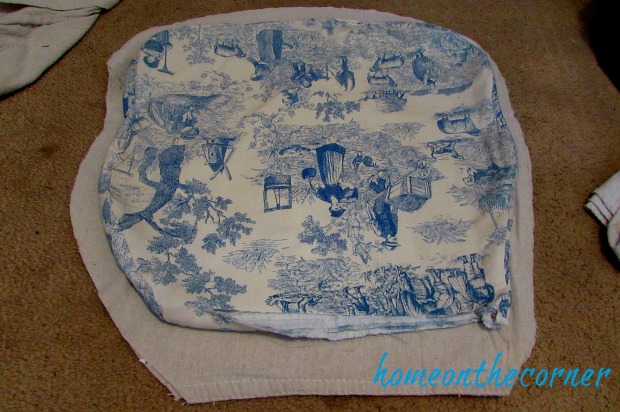
I used the material from the old cover as a pattern to cut out a new one. I had some painters cloth and decided to use that for my cover. I laid the old one on top of the cloth and cut around it. I had to do some trimming afterwards.

grandpas chair seat cover and pad

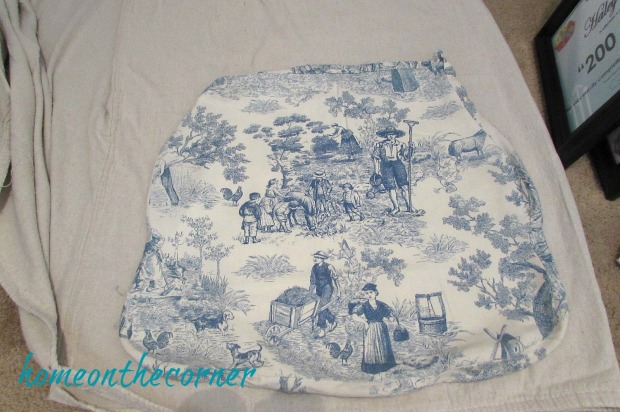
It didn’t quite come out straight! After trimming, I sewed the two sides together, leaving the back open to insert new padding.  Notice, I purposely left the hem on the back so I wouldn’t have to sew it! 🙂 #justLOVEsewing!! #NOT!

grandpas chair seat fabric

The padding that was in it was in pretty good shape, so I used it again.

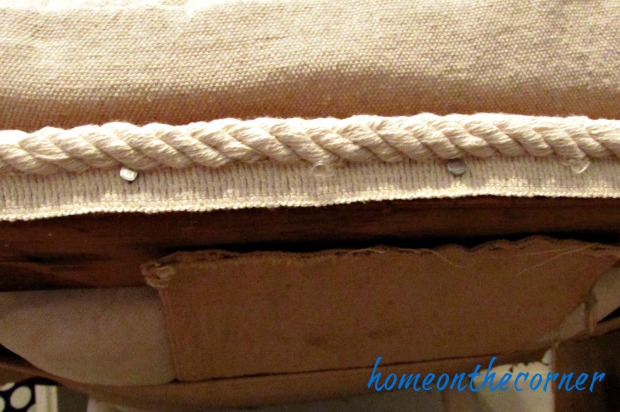
I found this pretty twisted trim at Hobby Lobby and thought it would look relly good with the chair, plus it would cover up all the ugly holes. I used the tacks again, but no as many this time.

grandpas chair trim

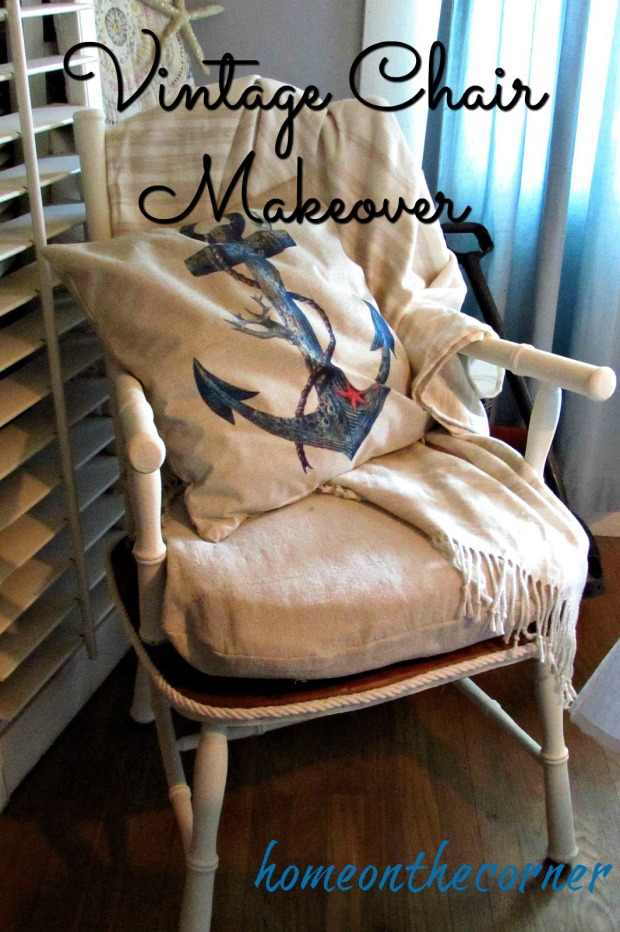
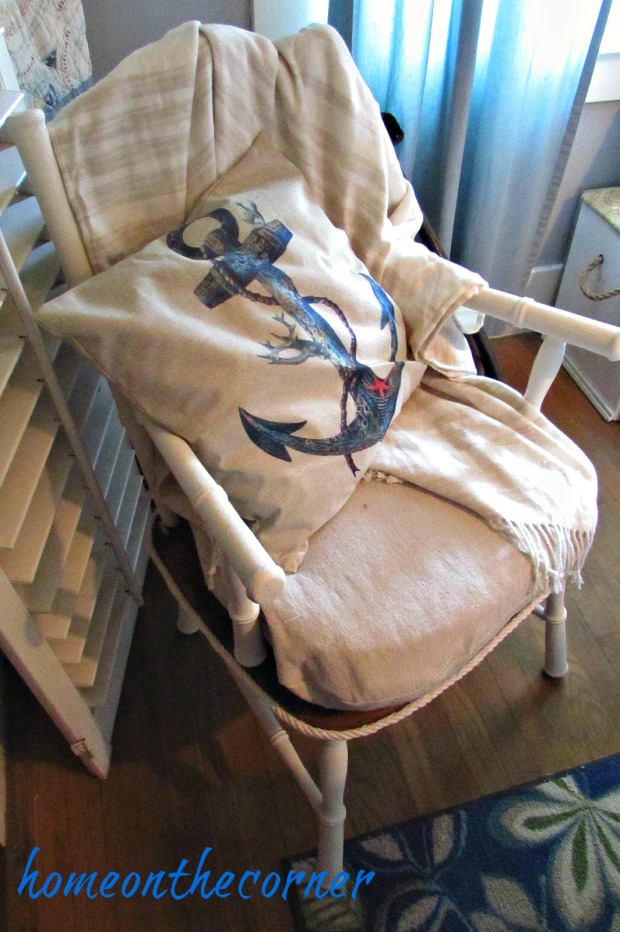
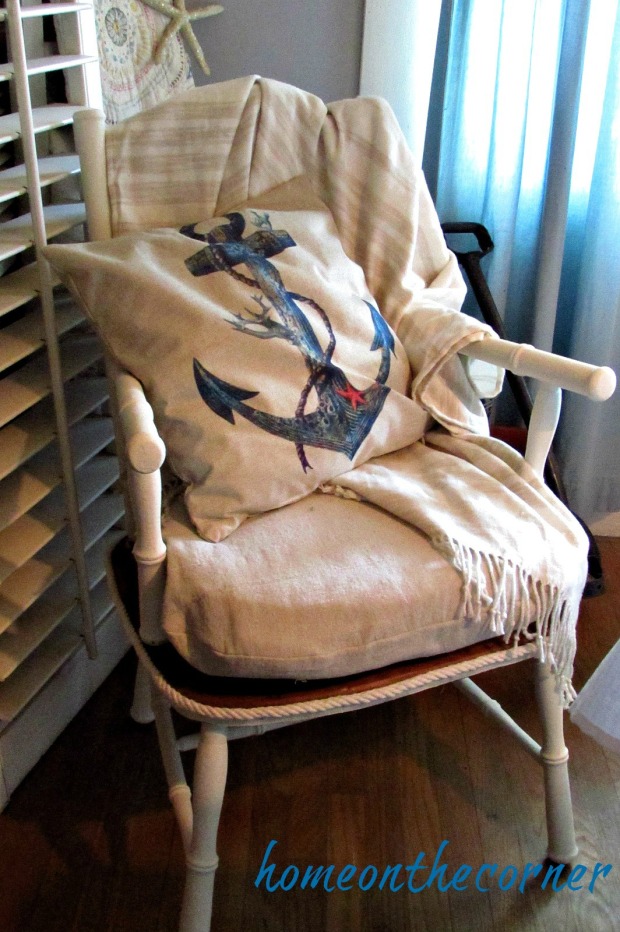
I did freshen up the paint a bit too, but just with the same color. It’s done and ready to live out more days in our home.  It’s perfect with the beach theme right now!

grandpa's chair styled

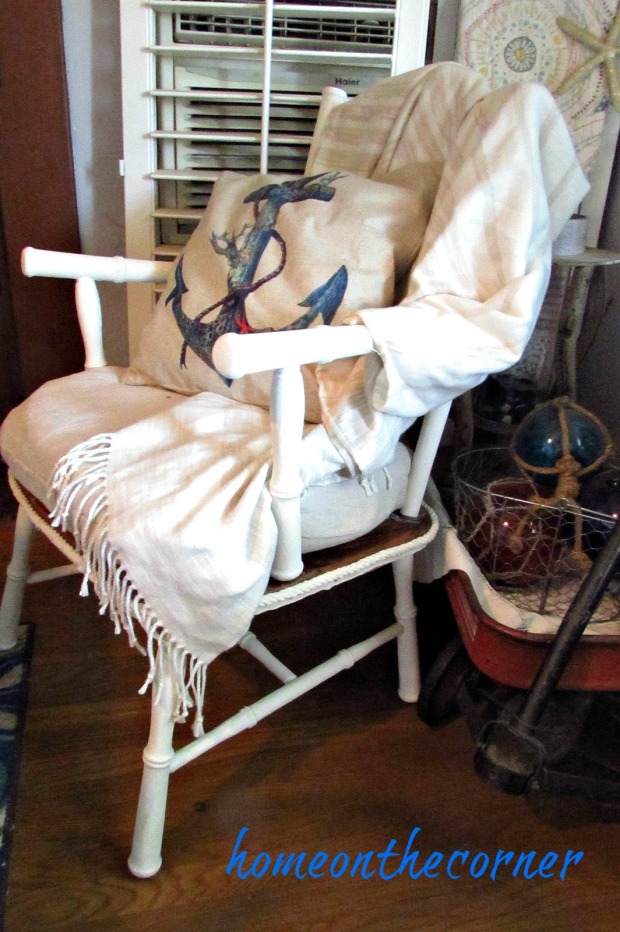
I used neutral colors so it would go easily into any room in our home.

grandpas chair top viewgrandpas chair anchor pillow

Thanks for coming by and hope you have a wonderful week!

Sunshine and Blessings

Click on a picture below to see more makeovers!

sketcher makeover 6

Ugly April Makeover-homeonthecorner.com

vintage beverage cart with tassels

Hallway Bathroom Makeover-Rustic Nautical

Can you believe it? I can finally show you one of the rooms in my house? It’s taken me long enough! This isn’t a complete renovation, just a makeover.  The biggest item changed out was the floor. So here we go!

hallway bathroom makeover wood pallet mirror title

We have to start with the before. Isn’t it pretty? There was brown carpeting in front of the sink and linoleum in front of the shower and toilet. The medicine cabinet and mirror were a nice 1970’s touch. The light fixture wasn’t too bad, in a retro kind of way, but we wanted something more updated. The baseboards were some kind of rubber stuff I didn’t even know existed. The toilet and the faucet were recent updates, so we left them. We also changed out the knobs on the vanity so they fit in better with the new updates.


The first thing to go was the carpet and the old linoleum. We had it torn out before we even moved in! We lived with the cement floor for a couple of months and finally got the tile put in. We thought we had enough of the leftover flooring, but we didn’t. Which is okay, because I really like this grey 18″ tile we found at Home Depot.


hallway bathroom makeover full view

Lauren and I painted the room before we moved in also. We used Benjamin Moore Simply White, which is what we used in the whole house. As you can see, we also took out the mirror and medicine cabinet that was from the 1970’s. We added in the pallet mirror that Steve made last summer. We also used pallet wood for the baseboards. Steve cut them all to fit and then I stained them and nailed them in. I love how they tie in with the mirror and give the room a rustic look.

hallway bathroom makeover farmhouse beach

I loved this idea when Haley showed it to me! We found the dock cleats at Walmart in the sporting goods section, tied some rope on and it makes a great towel holder.

hallway bathroom makeover boat cleat

We also found this amazing hanging light to replace the old one. It’s actually very similar, just a little more updated.

hallway bathroom makeover globe light rustic mirror

Haley made this whale string art, which is the perfect addition to the room.

hallway bathroom makeover whale string art blue and turquoise

I added another rope towel bar on the other side of the room with a fun turquoise and white striped towel.

hallway bathroom makeover rope towel bar nautical

I also created this California chalkboard subway art that perfectly compliments the room.

hallway bathroom makeover subway sign turquoise striped towel

The small hand towel is perfect for a teenagers bathroom! I really like how this room turned out! It’s so much more my style and feels clean and fresh. Now on to the next room!

sunshine-and-blessings-picmonkey

Papering the Wall with Barnwood Wallpaper

Good Monday morning! I hope everyone is safe after some of the storms going on lately! We have had beautiful weather and now it is raining again. Not that I am complaining-we need it and this will probably be the last big storm. We won’t get much of a spring and will go right into summer. Are you ready?

Have any of you tried out the new removable wallpaper? I found this at Walmart and thought I would give it a try. This is not like the old glue wallpaper, thank goodness! I have scraped enough of that stuff off to last a lifetime! This is more like contact paper. It has a back that peels off and you stick it to your wall or whatever else you want to use it for. If it goes on crooked, just peel and re-stick!

barn wood wallpaper room mate

Here is the one I got and another similar one with turquoise in it. Love!!


I wanted to paper one of the walls in the front living room. The barn door/window is on that wall, so I really can’t put anything else there. This really added a lot of character. I have even had a couple of people think we actually put wood up! It looks so great!

It took 2 of us to put it up, well 3, if you count Rozy. Haley would start of the top and I would hold the rest of it to make sure it lined up and slowly peel off the paper backing. We used rulers to make sure all the bubbles were out and the paper was smooth.

barn wood wallpaper application

The top and bottom were trimmed with a razor blade. That really was it! It went up really easy and it has stayed up! I really love how it looks!

barn wood wallpaper rulerbarn wood wallpaper trim razorblade

This is where the barn door/window slides over it. I love that you can see it through the window. It really reminds me of an old farmhouse or beach-house.

barnwood removable wallpaper with barn door

Looking towards the front door that I painted turquoise, my favorite go-to color. See the little white thing on the carper? That’s Munchy’s ice-cube she didn’t finish. 🙂

barnwood removable wallpaperbarn wood wallpaperbarn wood wallpaper hydrangeas in basketbarn wood wallpaper full wall

I’m so excited how this room is turning out! It feels so light and fresh!

barn wood wallpaper hydrangeas and wicker table

I hope you all have a wonderful week!

sunshine-and-blessings-picmonkey


Little Vintage Jewelry Box

Good morning! Are you enjoying a 3 day weekend or are you working today? We have President’s Day today to celebrate President Washington and Lincoln’s birthday. I even talk about it with my preschoolers. They actually have a pretty good memory for it all. It’s always great to see what they actually retain.

I received this jewelry box from my mom. It had been hers. I have had it for quite a while and finally decided what I was going to do with it. It always takes me the longest time to decide. There are just too many choices! But as I was going through my jewelry, I realized I had quite a few costume jewelry rings. I had them all in a small bowl, but it was hard to see what I had, so I decided to make this box a ring holder.

I started by cutting dowels the length of the top and bottom shelf. The fabric I used is white flannel, but I think a vintage material would look really nice. I just didn’t have any on hand when I started this project.

vintage-jewelry-box-makeover

I cut strips of flannel long and wide enough to roll the dowel up in.

vintage-jewelry-box-dowel

I folded in the ends and then rolled the dowel up in the flannel.

vintage-jewelry-box-dowel-with-flannel

I didn’t glue mine, but you certainly could. Mine ended up having a tight enough fit that I didn’t need any glue to keep them in place.

vintage-jewelry-box-rolled-up-dowel

Once your pieces are rolled up, place them in your box.

vintage-jewelry-box-flannel-rolls

I used the edge of a scissor to tuck the edges in.

vintage-jewelry-box-flannel-rolls-for-rings

For the bottom, I wanted a small shelf to lay some of my brooches on. I found that a butter box was the perfect fit! I ran some glue on it and covered it with the same white flannel.

vintage-jewelry-box-butter-box

I place the butter box in the back and then added 3 more rolls in the front.

vintage-jewelry-box-flannel-lined

Now it was time to add the bling!

vintage-jewelry-box-ring-and-pins

I love being able to see all my rings at the same time and not have to dig through a bowl to find the one I want.

vintage-jewelry-box-rings

I don’t wear brooches very often, but these are some of my favorites.

vintage-jewelry-box-pinsvintage-jewelry-box-organizationvintage-jewelry-box-makeover-2

I’m glad I got this project done. One more thing accomplished and a little more organized! We are still plugging along on the house updates. We have flooring in the main bathroom now and I painted the inside of the front door this weekend. I will be sharing soon!

sunshine-and-blessings-picmonkey

Here are some links to similar products. If you purchase one of these, a little bit comes back to homeonthecorner with no extra expense to you. Thank you so much!


Finds and Fashions-January 17, 2017

Hello again! It’s time for another Finds and Fashions…except I don’t have any (sigh). I really haven’t been out shopping or buying much lately, unless you count paint and primer, but that’s not too exciting.

finds-and-fashions-paint-and-primer


I did take the doors off the coat closet that is right in front of the front door. It’s so close, you practically run into it. I want to remove the insides and the wall in the front, just to give a little more room. There is another coat closet in the hallway, so we really don’t need this one. (really bad picture…sorry!)

entry-closet-door-removed

After I took the doors off, I realized I could put them together and form a kind of screen in front of the water heater. The water heater sits right inside the door into the laundry room and you can see it from the family room. This at least disguises it a bit. I want to do something pretty with it in the future.

finds-and-fashions-door-screen

We also brought this big window from the old house and are in the process of installing it between the dining room and kitchen. Can you guess what it is going to be when it is finished?  You also get a sneak peek into the dining room! This is the only room that is even a little bit decorated.

large-window-peek-into-dining-room

That’s going to be it for today! I hope you have a wonderful day and hopefully I can show you a little more progress on Monday!

sunshine-and-blessings-picmonkey