Recap of 2015-Our First Year of Blogging

I can hardly believe it’s been almost a year since Lauren and I started this blog! There have been many days of frustration when we can’t figure out how something works, but there have also been many exciting days along the way. Thank you so much to all our followers! It’s always great to hear from so many of you and make new friends along the way! We look forward to some new and exciting stuff in 2016!

Today is Recap Day! Let’s see what were the 10 top posts of 2015!

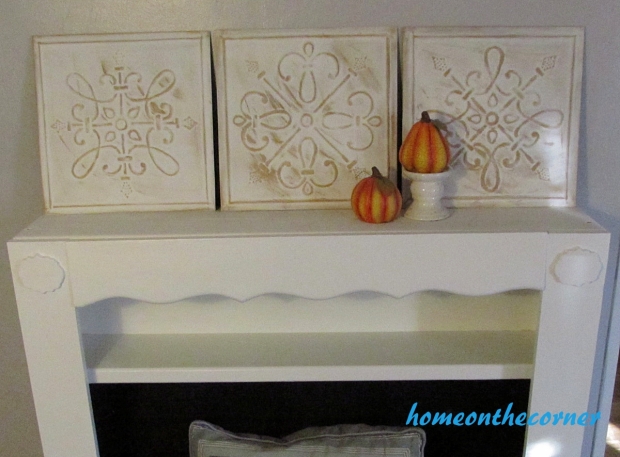
10. Thrift Store Medallion Makeover

This was the first time I used Antique Wax on a project and I love how it turned out.

metal medallion fall decor

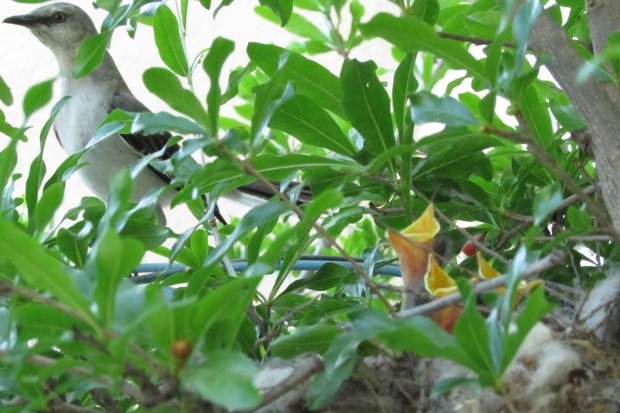
 9.  The Drama In Our Backyard

Spring Time! This was quite an adventure!

Daddy is watching!

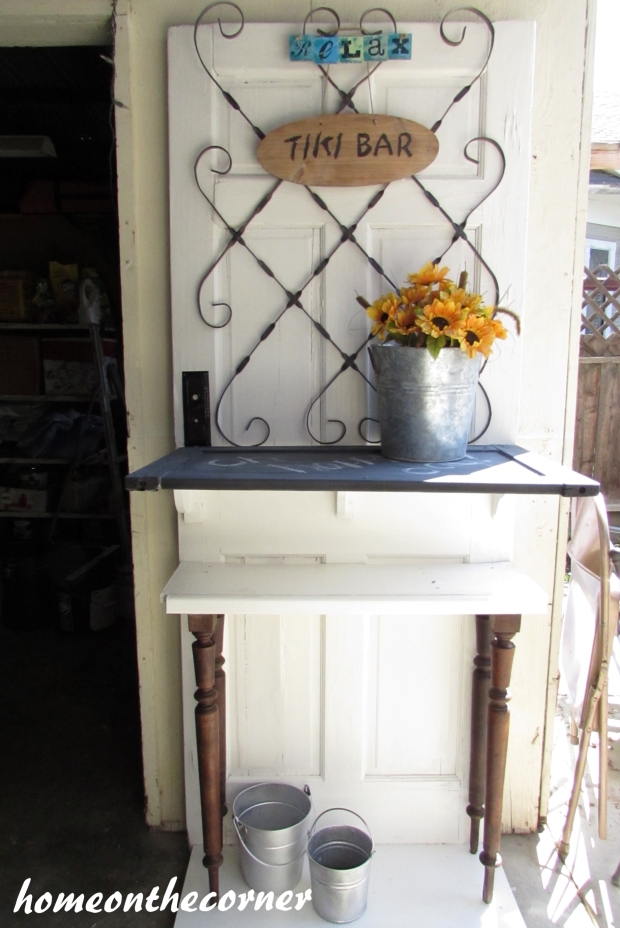
8. Old Door Beverage/Candy Station

We have used this Door Beverage station quite a lot. It’s a great way to add a little vintage charm to your backyard or patio!

old door beverage staion-homeonthecorner

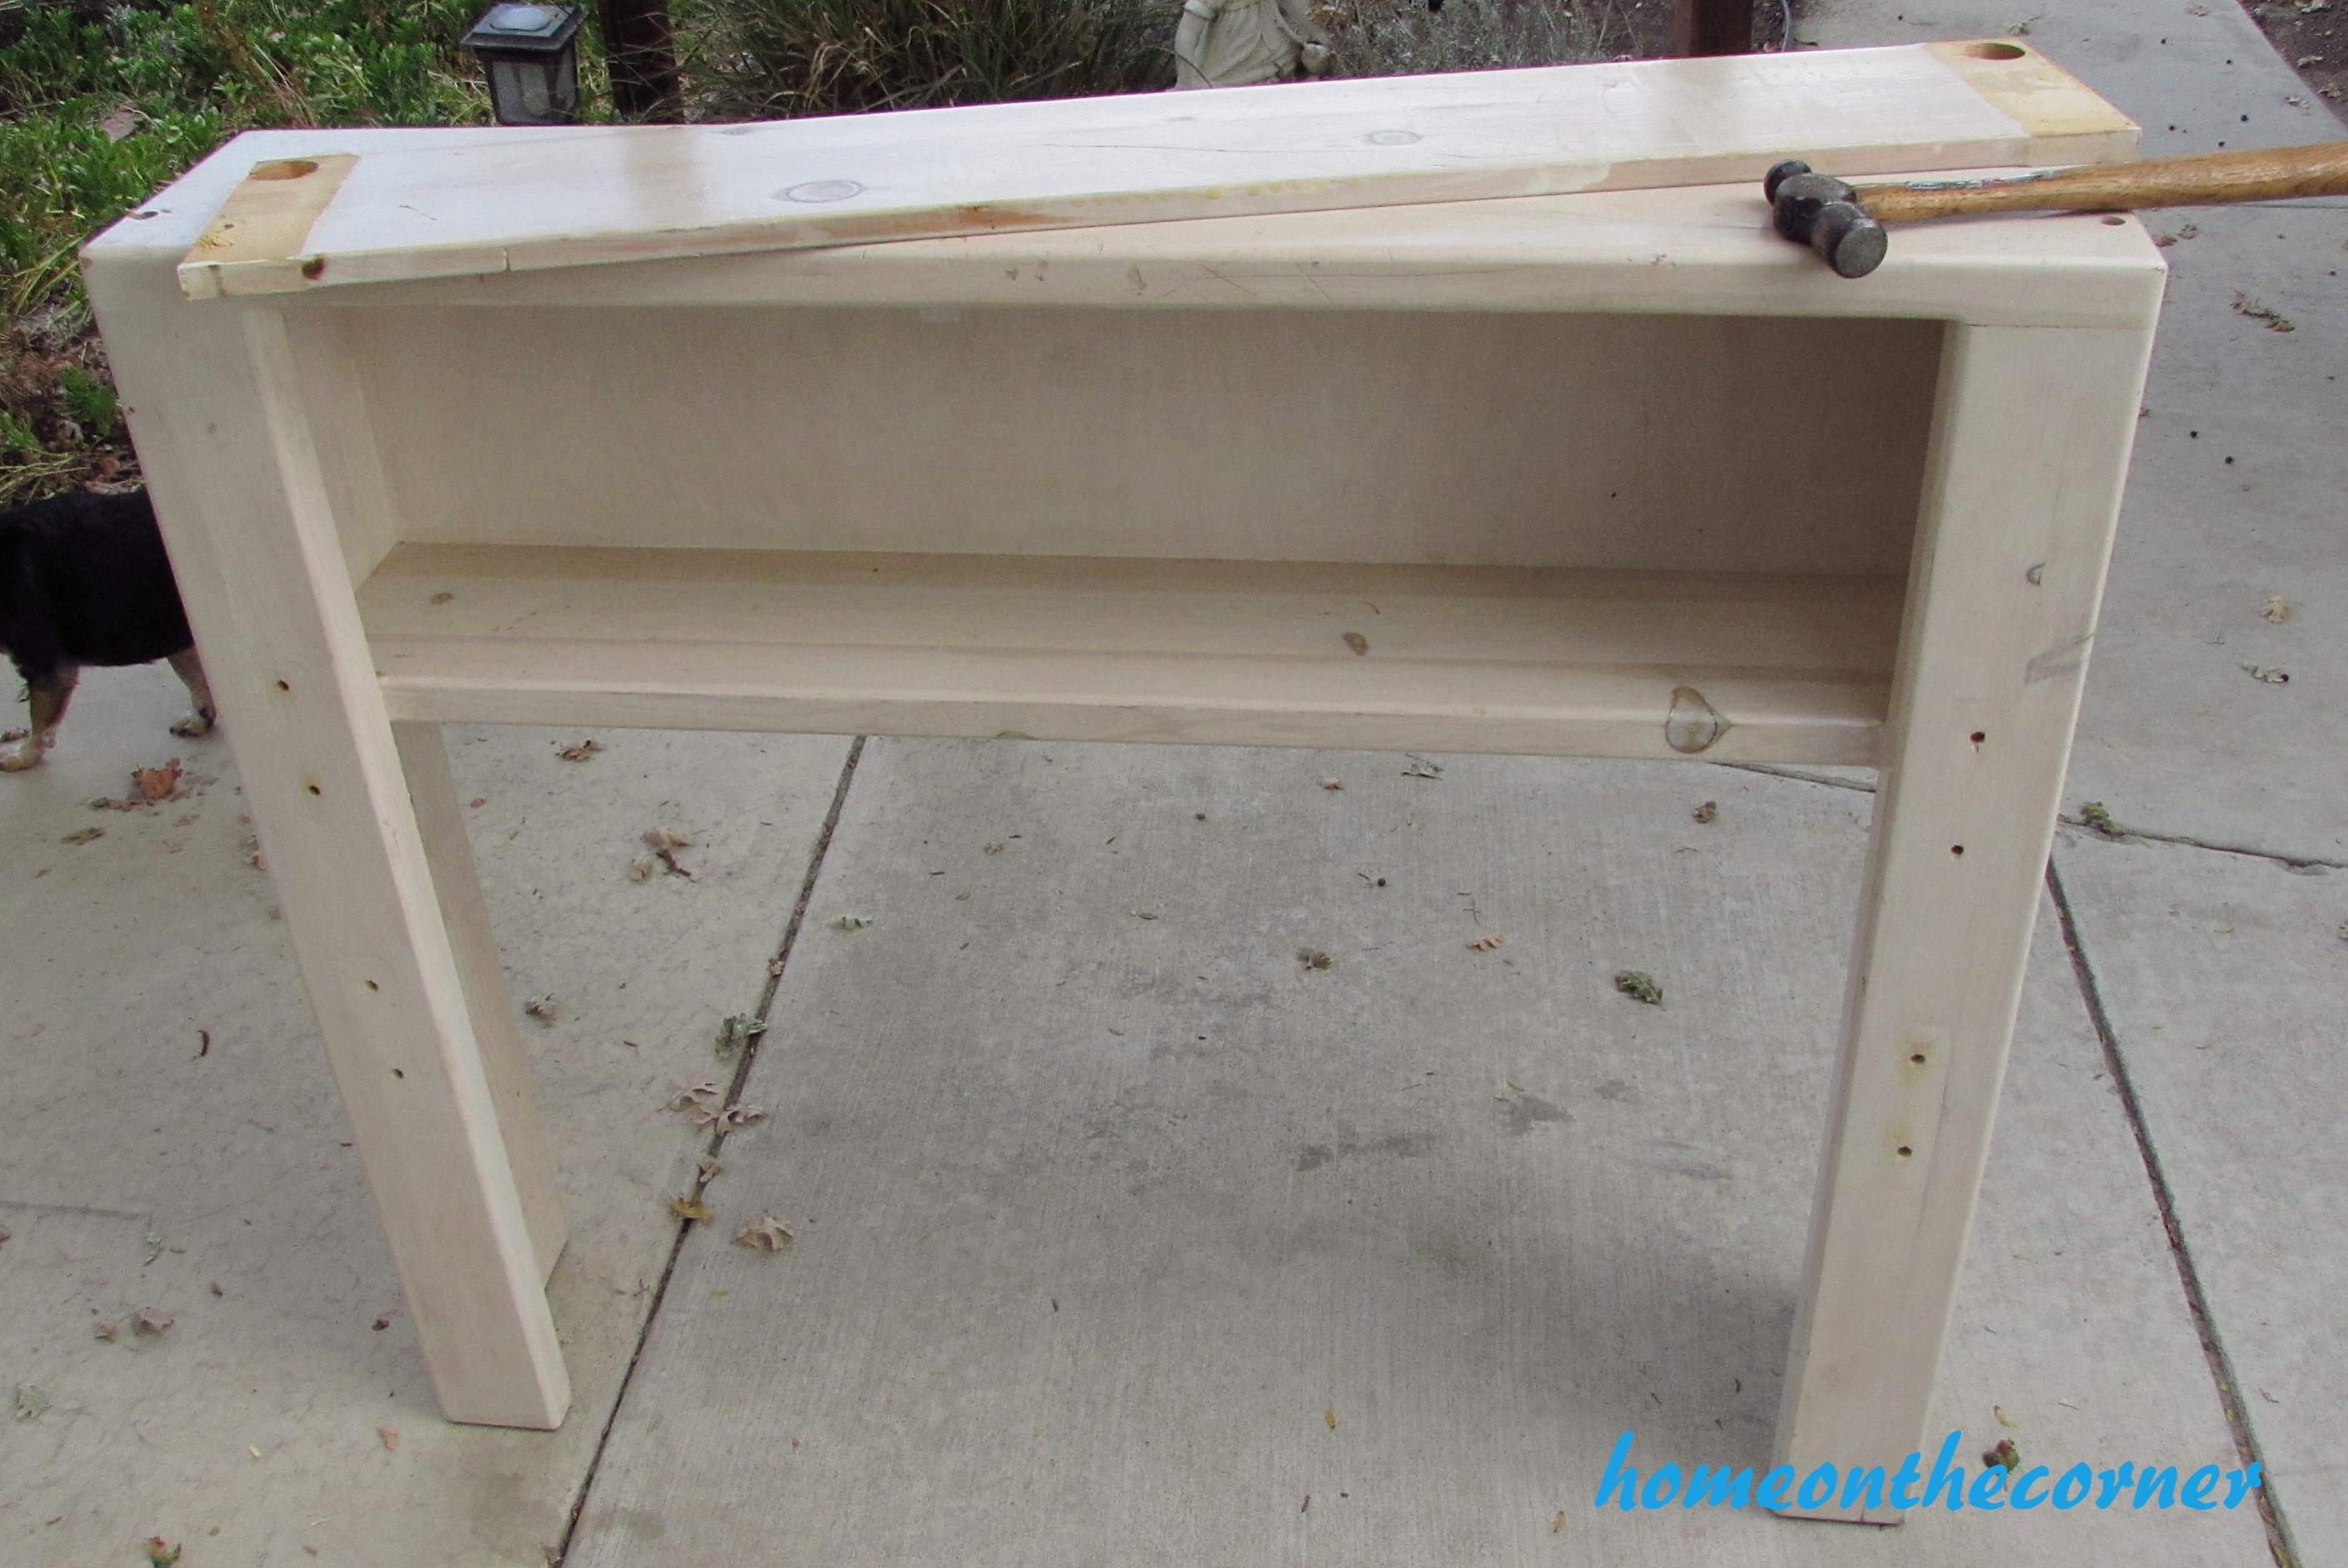
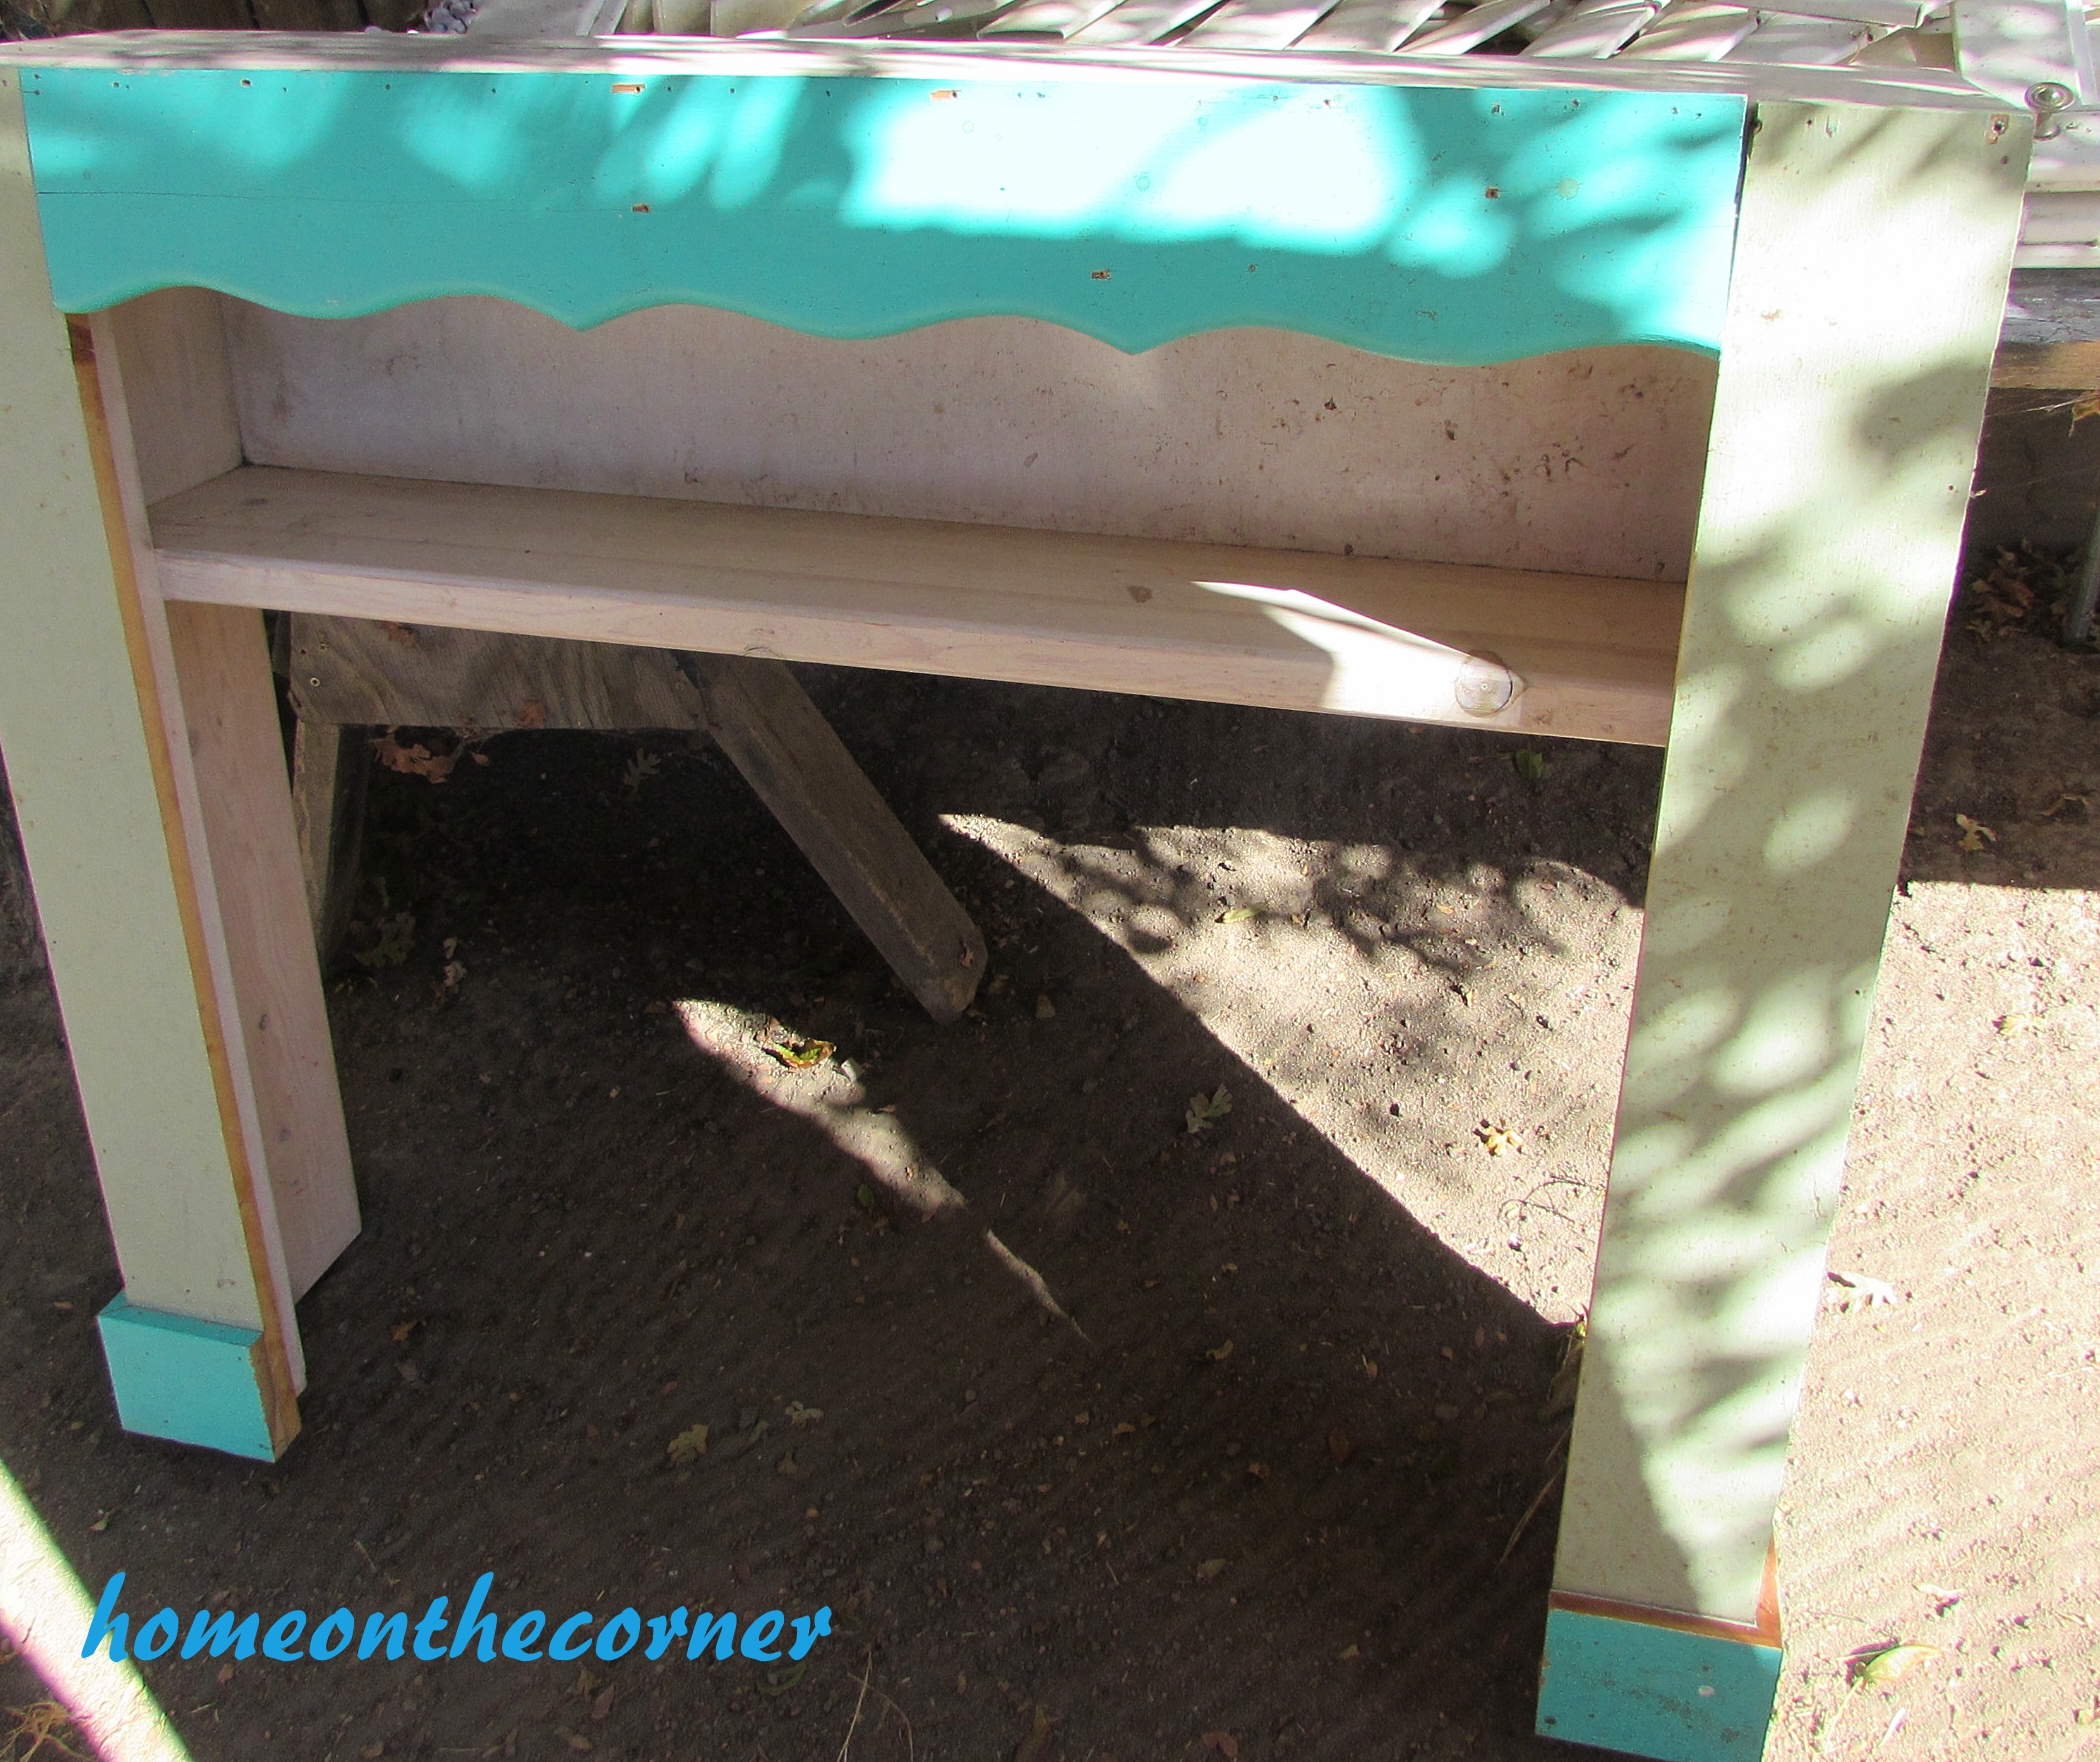
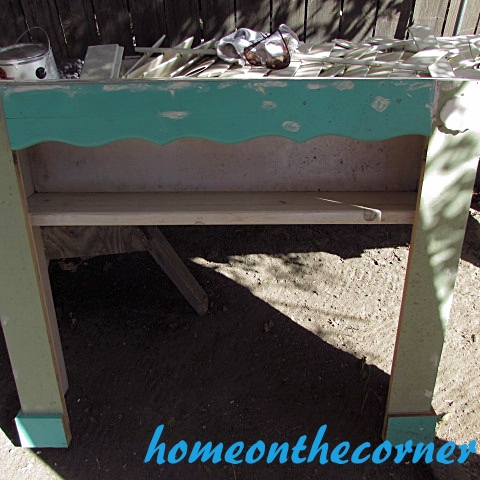
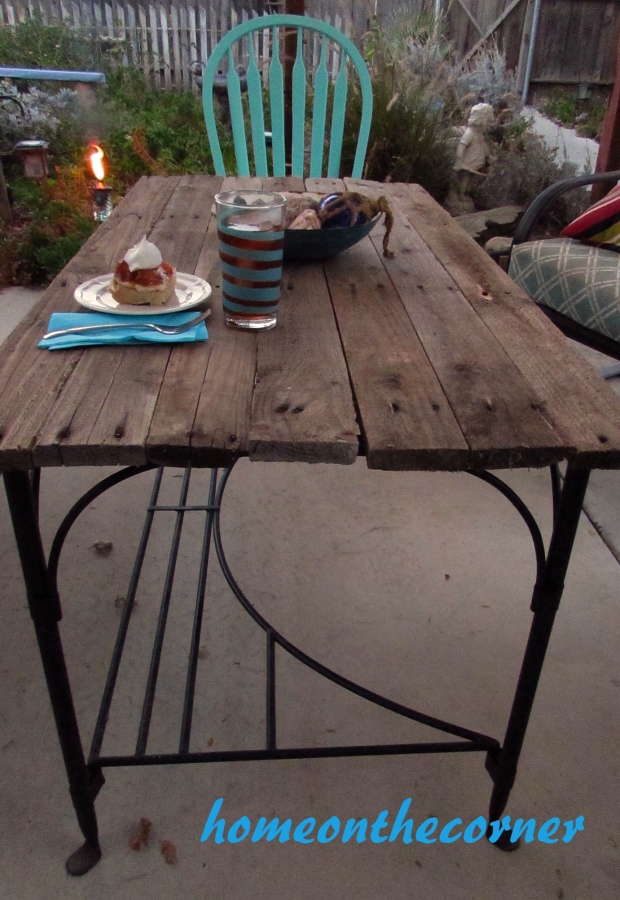
7. Recycled Pallet Table

Love, love, love this table! It really wasn’t something planned, but it turned out great!

deck pallet coffee table 2

6. Corner News-December 11, 2015

Awww! I don’t have to say anything else!

IMG_0095

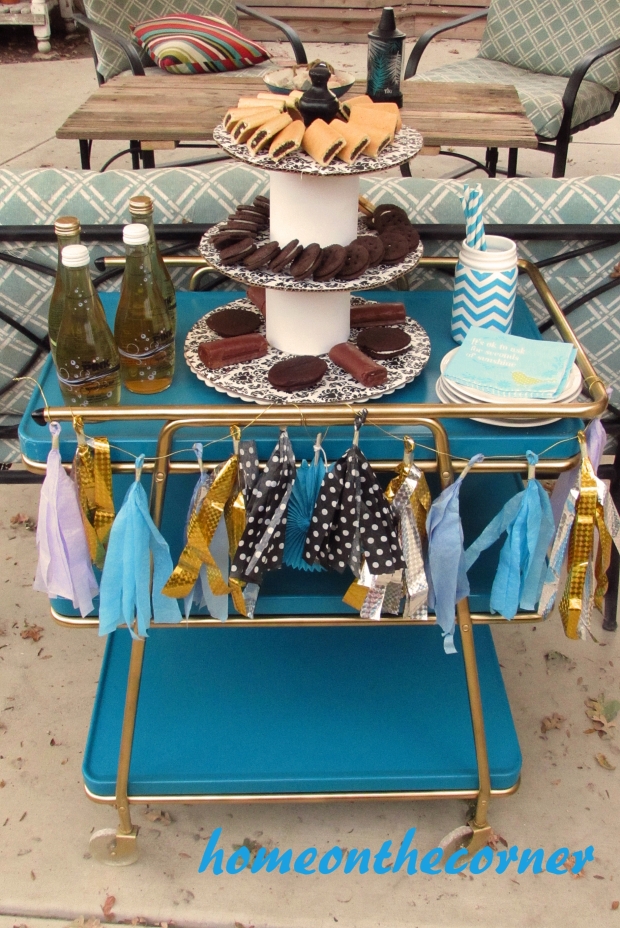
5. Fabulous Vintage Beverage Cart Makeover

This was a great garage sale find! It’s fun to use outdoors in the summer, but also indoors. Right now I am using it for a hot chocolate station.

Retro Beverage Cart

4. We Went Junking (and some other shopping too)

This was a fun day! Just love this truck!!

I want this!!!

3. My Beachy Spring Decorating

Funny how things change in my house so quickly! I don’t even have this shelf anymore! This spring decorating will look quite different.

IMG_2592

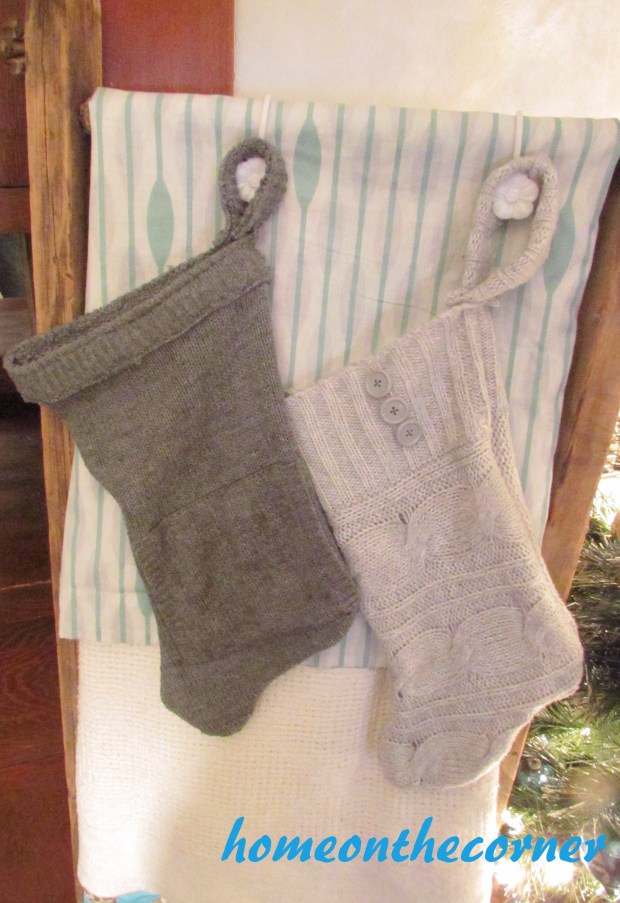
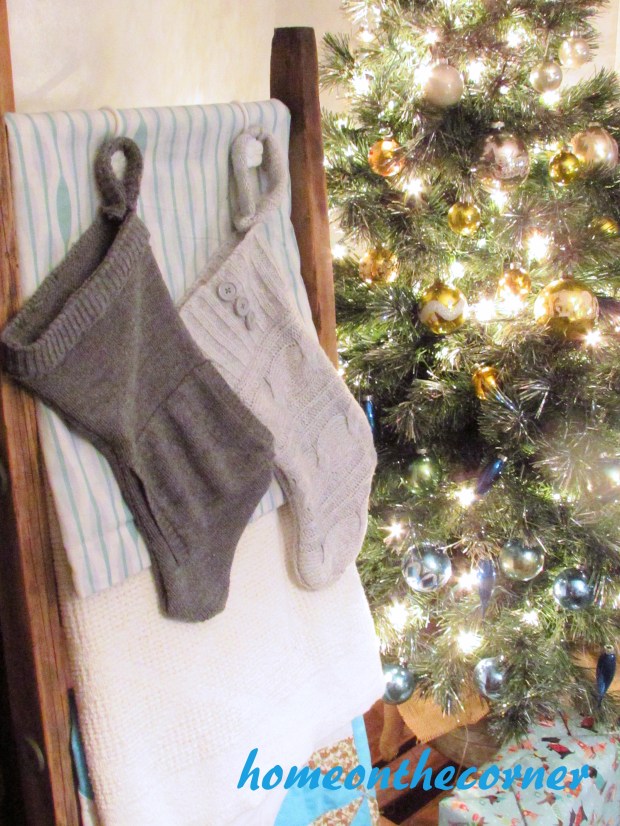
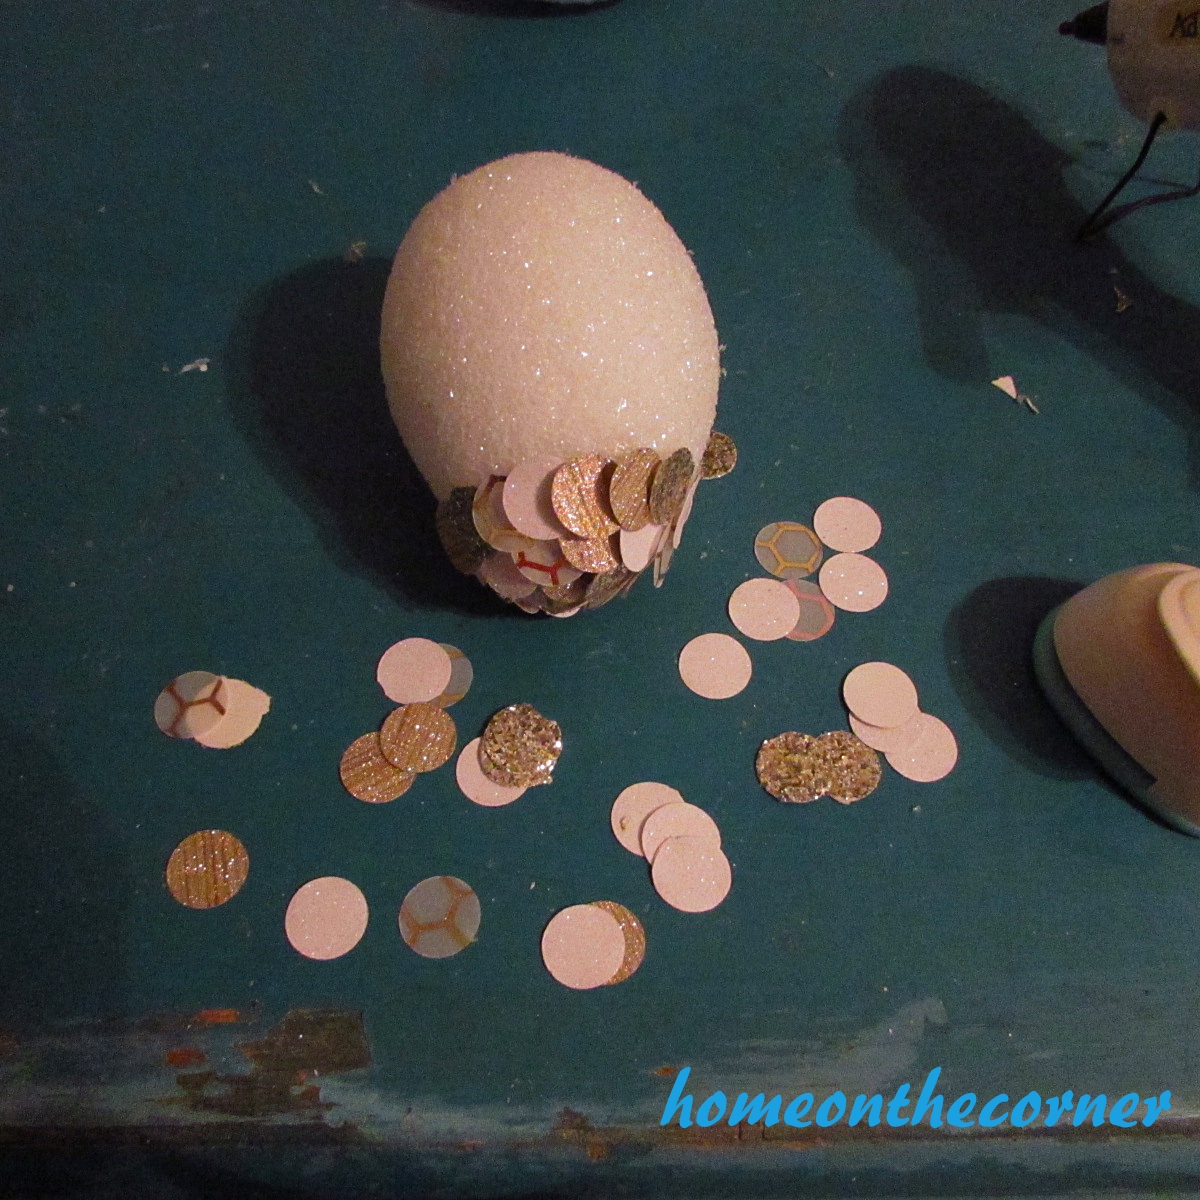
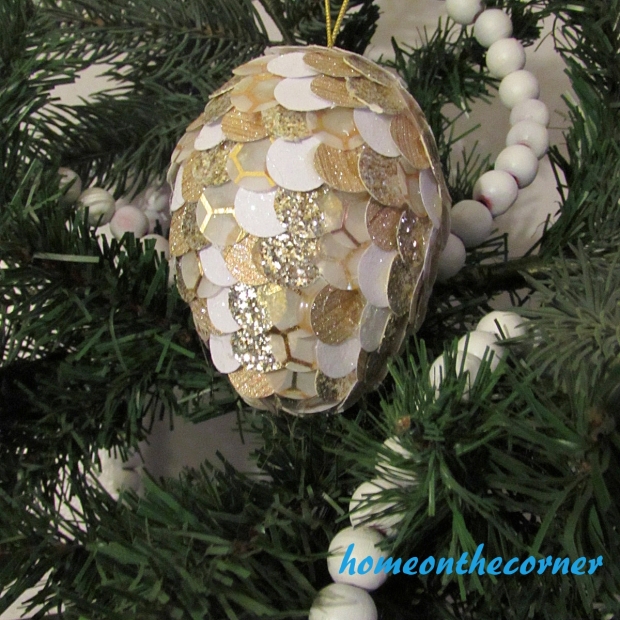
2. Paper Pinecone Christmas Ornament

I joined an ornament exchange this past year and it was so fun! I loved seeing what everyone else was doing and coming up with something special for my fellow blogger.

Christmas Ornament Exchange

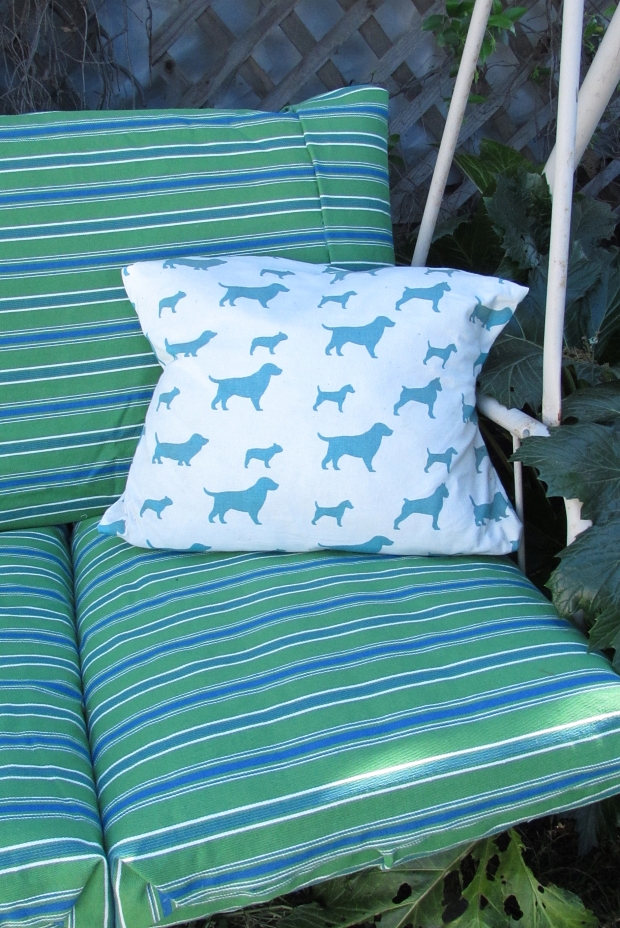
1. Recovering My Outdoor Swing Cushions (I Cheated a Little)

Wow! Number one! Is it because I admitted I had cheated? Anyways, I love how the swing turned out and love that I didn’t have to use a sewing machine!!

swinging chair 21

Wow! That’s a great list and we will have to stay very busy this year to keep up!

The most popular post?

No surprise here! Not with this cute little face! She will be coming home very soon!

IMG_0095

Thank you so much for a wonderful 2015 and we can’t wait to see what 2016 has for us!

sparkle                                      Sunshine and Blessings

Creating Your Own Sweater Stockings

The stockings were hung by the chimney in care…okay, we don’t have a chimney, but we do have a fireplace now! But I still didn’t hang the stockings there. Instead I used an old ladder for some and a new one for the others! I love how they look on the ladders with some cozy blankets thrown over. I showed you the stockings I was making for my pooches and kitties, but I thought I would give you a little more of a tutorial for them.

I started out with a pile of sweaters from a thrift store. They have a deal where you fill a handheld shopping basket and get the whole thing for $7.00. Pretty good deal! I found 7 sweaters in colors that I liked and thought would work for this project. Only 1 buck each! I looked for sweaters with a design, or pockets or buttons that I thought would add something extra to the stocking. (only 6 made it in the picture :))Sweater Stocking Tutorial Pile

Here is the stocking I used for the pattern. As you can tell, not really my style. After sewing this one, I realized I should have put the top of the stocking at the bottom of the sweater. The tops didn’t stretch out so much when I used the binding at the bottom or the neckline at the top of the sweater.

Sweater Stocking Tutorial Traceing

I’m going to be using a different sweater for the rest of the tutorial, because it was an oops. I traced the pattern on the outside of the sweater instead of the inside. 😦 But it still ended up working out! I actually got 2 stockings from the sweater. I think it was actually a dress. Notice how the top of the stocking will be on the neck of the sweater.

Sweater Stocking Tutorial Outline

After tracing the pattern it was time to sew. My favorite thing! NOT! But I did it anyway! I sewed right along the line I had drawn. Just don’t sew the top! That is your opening to put the gifts in!

Sweater Stocking Tutorial Seam

Once the sewing is done, cut around the edge. I cut just to the outside of the stitching.

Sweater Stocking Tutorial Cut

Here is the stocking all cut out.

Sweater Stocking Tutorial Inside Out

I turned the stocking right side out, which was actually inside out, but whatever! Then I took a piece of the binding from the neck that was left over and cut a little strip off.

Sweater Stocking Tutorial Ribbing

This will make my loop for hanging. I sewed it on with the machine, but it could easily be hand-stitched too.

Sweater Stocking Tutorial Loop

The collar of the sweater had some buttons on it so I cut them off and added them to the front of the stocking where the diamonds of the argyle met.

sweater stocking tutorial buttons

And there it is! It doesn’t looks to bad being inside out! I hung this one in my bedroom.

sweater stocking tutorial finished

Here are a couple of the others hanging by the dining room tree. I finished 8 of them in all! If I can make these, anybody can! I love how they look warm and cozy plus you can make them to match any decor,

sweater christmas stockings

Thanks for following along! Hope you have a wonderful week!

Sunshine and Blessings


Corner News-December 4, 2015

You better watch out! Christmas is only a 3 weeks away! Are you ready!? I am ready for a break from preschoolers and to just be able to relax at home. This time of year at school is just so crazy!! The children’s heads are filled with Santa, Elves, presents, parties and not school!! It’s fun to see the season and excitement through their eyes.

One project I worked on last weekend was making some stockings for our furry friends. All we had were some cheap ones in red and green. They so didn’t go with my Rustic Glam decor!! 🙂 I bought some sweaters at a thrift store in colors or designs that I liked. I turned them inside out and traced one of the old stockings with a pen. Then I sewed around the stitching, except for the top opening. After it was sewed, I cut it out. I sewed it first so it wouldn’t fray. I used some of the trim from the sweater to decorate the stocking, such as buttons and pockets. I love how they look! I will add a monogram as soon as we can decide who gets which one!

sweater stockings

sweater christmas stockings

This tree is in my dining room. It’s hard to see, but it is decorated with Shiny Brite ornaments and the colors start with silver at the top, down to gold, and then to turquoise. I love it! I keep finding these ornaments at the thrift stores and I snatch them up. I have found a bunch of pink ones for Lauren too.

sweater stockings and tree

Here is my new addition to my fireplace! Oohh! I am so excited to curl up by the fire!sweater stockings fireplace

Have a wonderful weekend! See you on Monday!

Sunshine and Blessings

Paper Pinecone Christmas Ornament-Ornament Exchange

Hi everyone! I have something special to share with you today! I know it’s a little early to be sharing Christmas ideas, but Erlene at My Pinterventures is hosting a 2015 Ornament Exchange. She has partnered 80+ bloggers to exchange ornaments and we want to share our creations or special finds with you! So, if you’re looking for some holiday ornament craft tutorials or ornament inspiration, you’ve come to the right place!

2015 Ornament Exchange

Today is Day 10. If you want to go back and start at the beginning and see all the great ideas, click here.  I was so excited to receive an email from Erlene about who my ornament exchange partner would be. I was even more excited to learn it would be Erlene herself!  She wrote to me that this year her tree will be a deep rich red, gold, and white.  There isn’t a theme, just a variety of ornaments in those colors and she likes unusual ornaments. Well, I love the white and gold idea, so I went with that. Lauren picked out the idea for the ornament and then I went shopping for the supplies. Here are the papers I chose: a gold glitter, golden stripes, clear vellum with gold hexagons, and I had white sparkly on hand.
christmas ornament paper pinecone scrapbook paper
I also bought the egg shaped styrofoam ball. I had the circle punch already and of course, my glue gun. I started out by punching out the circles from each of the papers. I needed quite a bit, more than I thought I would. I kept running out!
christmas ornament paper pinecone supplies
I started at the narrow end of the egg. I glued on each circle, overlapping them as I went around. Then I added the next layer, overlapping the first layer too.
christmas ornament paper pinecone beginning
Here it is about half way done. I love how it is turning out!
christmas ornament paper pinecone sparkles
After all the circles were attached, I added gold twine to the top for hanging. I think this looks so pretty! It will look even better when the lights from the tree make it sparkle and shine!
Christmas Ornament Exchange
Christmas PInecone Ornament
I tried it out on white branches too.
Christmas Ornament exchange Pinecone
Christmas Pinecone Ornament on White
 Today, I’m excited to be kicking off day 10 of the Ornament Exchange, along with these other great ladies. Just click on their link to go see what they have made!
Displaying 2015-ornament-exchange-day-10.jpg
I’m so glad I was able to make this for Erlene! Thank you, Erlene, for the opportunity to join in with all these talented bloggers. I have really enjoyed being a part of this exchange.
This will be just the beginning of the Christmas posts you will be seeing! I’m so excited to share some of my decorating, crafts and tablescapes ideas with you!
Sunshine and Blessings

DIY Headboard to Faux Fireplace Reveal

I’ve always loved the look of a fireplace. Unfortunately, I have never lived in any house, even growing up, that had one! I am so deprived :)! So after scouring Pinterest and all the blogs I follow, I decided I should try and make my own sometime. This past summer, Lauren and were at Goodwill and came across this headboard for only $3.99! Sold! There were two, and I probably should have bought both of them, but I was so excited to just find one! Then it sat for quite awhile. It always takes me time to think about how this is going to work and exactly how I want it to look.

Faux Fireplace Headboard

We took off one of the pieces that was under the shelf. I found some more pieces of wood at another Goodwill that had scallop across one side and decided that would work too. Yes, they are bright turquoise, but everything will get a few coats of paint.

Faux Fireplace Makeover Before Paint

I added a little extra to the bottom too. I had these ornaments from last year that I never did anything with, so I glued them up near the top to add some interest to the piece.

Faux Fireplace Medallion

After patching all the holes, I gave it a couple coats of paint.

Faux Fireplace Patched up

We added a thin piece of plywood to the back which I painted black. We also added a board along each edge in the back so it would sit flush on the wall since we have 6 inch baseboards. So here it is!

Faux Fireplace Full View

I am so pleased with how this turned out!

Faux Fireplace Reveal

It was different to decorate a mantle, but I am looking forward to all the different ways to style it.

Faux Fireplace Top view

Here are the Christmas ornaments I never used last year. I’m so glad I could find a good use for them! I made the acorn garland by hot gluing acorns from my yard onto a piece of twine.

Faux Fireplace with Acorns

My mom and dad found this box in a dumpster. Um, yes please! It’s perfect here for now.

Faux Fireplace Wood Box

It won’t be long until this is all decorated for Christmas. I am also wanting some kind of heater for inside so my doggies and I can cuddle up in front of it when it gets cold. It will be the perfect spot!

Faux Fireplace Fall Decor

I hope you enjoyed the reveal! I’m so glad it is done and ready to go! Now on to the next projects!

Sunshine and Blessings