Steps to Painting Farmhouse Chairs with a Brush

Happy summer! I have so many projects to do!  Eeekkk! One at a time, right?

So I started with my kitchen chairs. I have the chairs that actually belong to my grandma’s table, but they were getting so much use, I didn’t want them to get too worn out. So when the girls were young, we bought 6 oak ones at a liquidation store. Nothing fancy, just something to have around the table. But by now, they were pretty worn too. Paint time!

Kitchen chair makeover

I know there are lots of different ways to paint and products to use, but I thought I would share what works for me. This time I used just a good old brush and can of paint. I am going to try chalk paint next time and I would like to try a sprayer too, just sayin’!

I cleaned up the chairs, removing dust and any leftover food. I find it easiest to turn the chairs upside down so I can make sure all the underneath is primered and painted well. I didn’t sand this time, and the primer seemed to hold pretty well.

kitchen chair makeover paint underside

There are hundreds of different primers out there, but Kilz is the one I like the best. It goes on thick and covers really well. I have never had any problems with it not adhering or peeling off.

kitchen chair makeover Kilz pimer

After the underside of the chairs was dry, I turned them over and primered the top. Be sure to let all the coats dry before starting a new one. I painted just one coat of primer on all the chairs.

kitchen chair makeover primered

As you can see, I had a very curious kitty come by to see what I was doing! I debated about leaving the pawprints because they looked so cute, but I did end up painting over them. The kitty does still have paint on her ear though!

kitchen chair makeover kitty pawprints

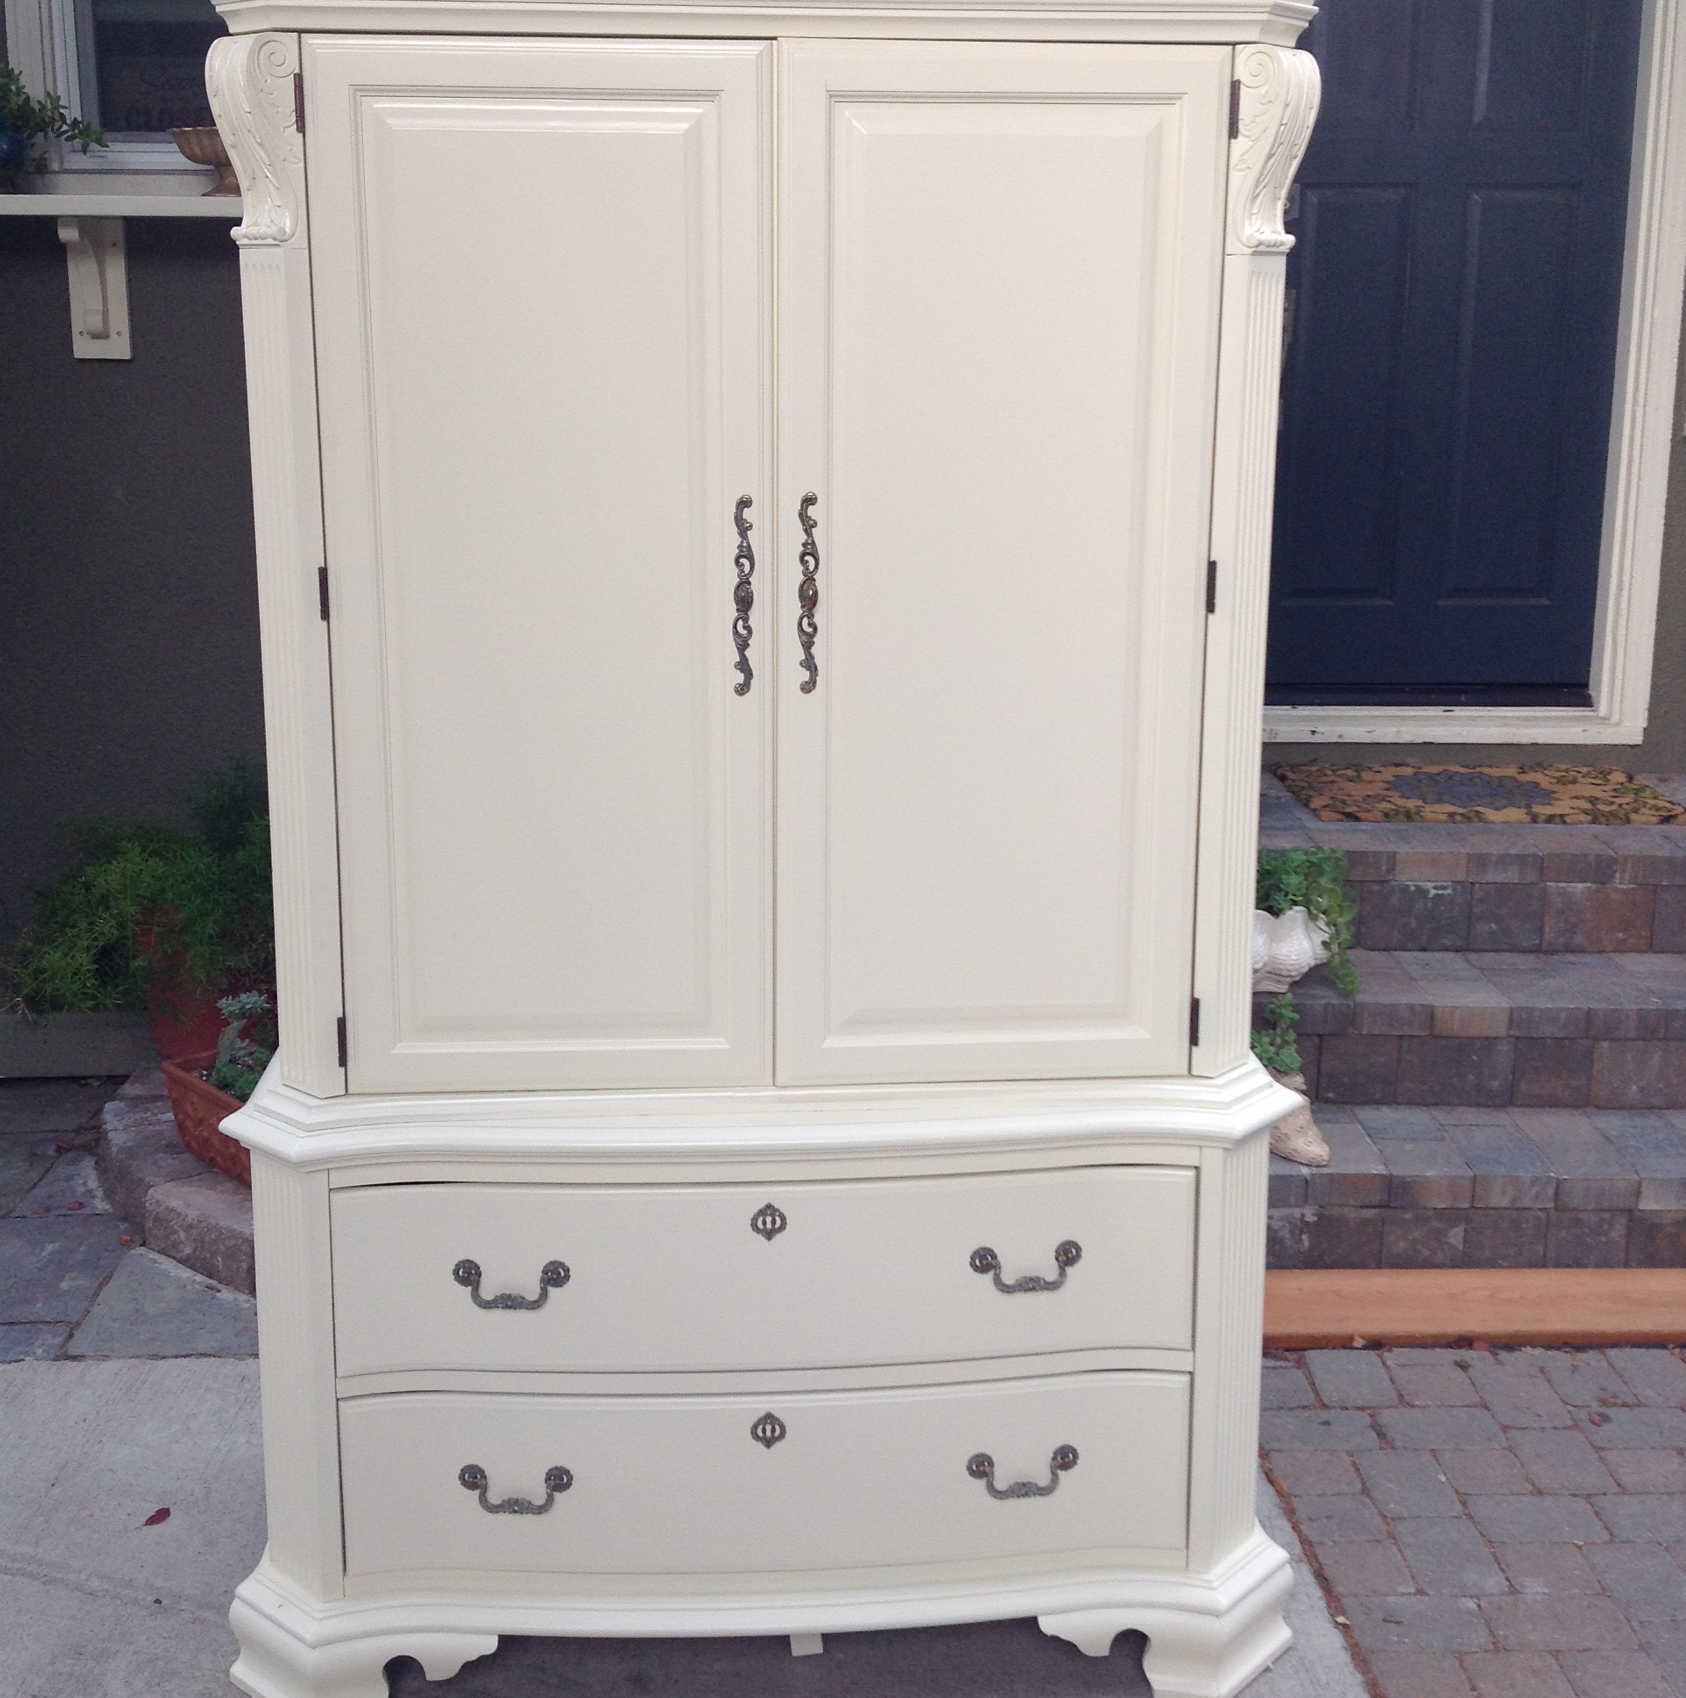
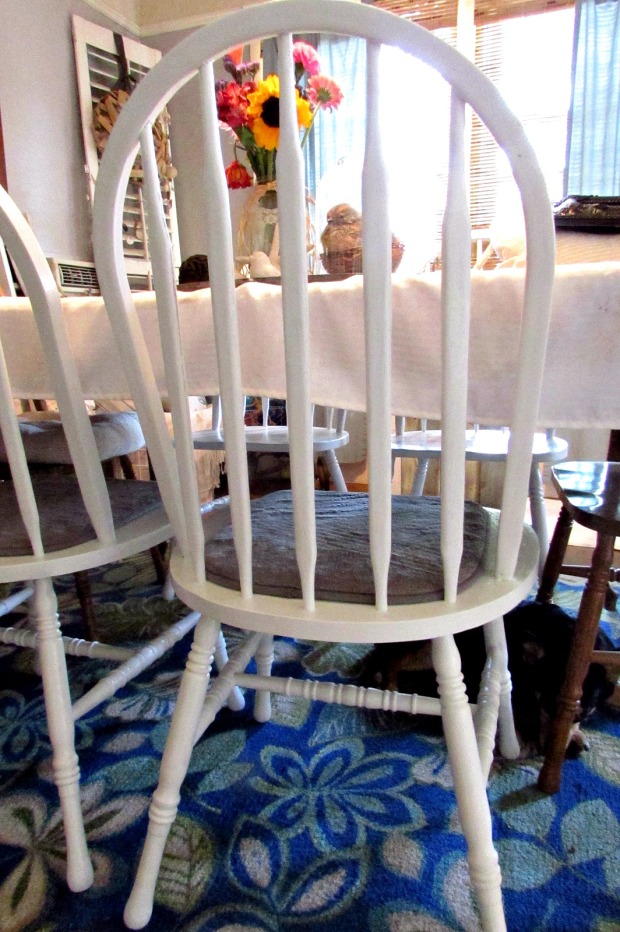
Once all the primer was dry, it was time for the paint! I followed the some pattern as with the primer. Turn the chairs over and start underneath. When it’s dry, paint the top. I used Orchard Supply brand paint, Benjamin Moore’s Cloud White. I did paint a second coat of the paint, but I purposely did not do complete coverage.

kitchen chair makeover painted cloud white

I wanted the chairs to have more of a farmhouse look to them. A little worn. Plus I don’t have to worry if the dogs or cats do a little scratching on them.

kitchen chair makeover farmhouse

Again, wait for everything to dry and then add a protective finish over the whole chair. I used Minwax Water Based Polycrylic Finish. It goes on very smoothly and dries quickly. It’s not tacky to the touch and it cleans up great.

kitchen chair makeover minwax polycrylic finish

They are all ready to sit at the table again! I love the white! What a difference! I have 2 more to paint and then the farmhouse table. I am going to do the table with chalk paint. I will let you know how that goes!

collage

So fresh and clean! I think Ezzy likes them too!

kitchen chair makeover white farmhouse

I will see you next time with the table! Have a great week!

Sunshine and Blessings

Toolbox Restyle-Blue Coastal Style

Hello! How was your weekend? We spent Friday night watching our local Triple A baseball team play, Saturday was a catch-up on blogging day and Sunday, I volunteered at the shelter after church. I would say it was successful!

I also worked on this Toolbox Restyle. As you know, I love the coastal and beachy style. And Lauren is kind of moving that way too when she moves into another place. She made this toolbox years ago as part of a 4-H Woodworking project. I have mostly used it outdoors with candles and such, but decided to fix it up for her to use in her new place. In the meantime, I get to enjoy it in my living room!

Toolbox makeover restyle title

I cleaned the box up and gave it a good polish and then wound some rope around the handle. I secured the ends with a little hot glue.

Tool Box MakeoverTool Box Makeover with roper

Next, I searched around the house for a few things to fill it with. I tried to add a little bit of navy blue, since that seems to be what Lauren is moving towards.

Tool Box makeover styled

I found this old paper spool of ribbon in Lauren’s stash. It had pink lace on it. I removed the lace and wrapped white and silver ribbon on it instead. I love the old spool!

Toolbox makeover ribbon spool

This bowl had been green. I liked the design and the shape, but not the color, so I spray-painted it white. I added some white rocks to the bottom, ‘planted’ the (faux) succulents and added a little garland of seashells. The bowl was the perfect fit for the middle section.

toolbox makeover succulents

I didn’t get a picture of the mason jar, but it hold some seashells and rocks Lauren had been saving. I covered the top of the lid with some scrapbooking paper.

This candle holder was purchased by my mom from Goodwill. It came in a set of three and I liked the height in the back of the box. Lauren and I talked about possibly cutting the little part off the top so she could use a pillar candle instead.

toolbox makeover candlestick

I found this block of wood in our wood stash and added some burlap and navy blue ribbon. A blue candle is perfect for the top and the block fit perfectly in the toolbox.

toolbox makeover wood block

There are so many different uses for this box. This would be great to change out for the different seasons too!

toolbox makeover spool, plants candlestoolbox makeover closeup

I’m glad I was able to do something with a piece of art Lauren made so many years ago. It will make a great conversation piece in her new place!

Want to see more coastal decor? Click on the pictures below!

dining room refresh driftwood bowl seashell garland      boho seashell mobile clam, snail   seashell speciman frame crab   Board with

Sunshine and Blessings


Pallet Project Update-Kitchen Plate Rack

pallet farmers market collage

I’m finally back with a project today!! I’m sure you are all thrilled! 🙂

Steve cut out this pallet rack for me several years ago, so I don’t have a tutorial for that part, but you can find them on Pinterest. Lauren, a friend and I did some craft shows a few years ago, and I had made pallet racks to hold books. This one had never sold and had been just waiting for me to come up with a project for it. Finally inspiration struck!

Pallet plate, platter holder update

I spray painted black over the letters first.

pallet plate and platter holder update black

While it was drying, I picked out the phrase I wanted to put on it and found the fonts and size on Microsoft Word. I printed them out and then cut them down to make them easier to work with.

pallet plate and platter holder update lettering

To transfer the lettering to the wood, I rub pencil on the back of the paper. Then I turn the paper over, place it where I want it to go and trace the letters. When you are done, there should be a faint outline of the words. You can see how I did this for another sign too.

jpallet plate and platter holder update farmers market

Once my tracing was on the board, I painted it in with white chalk paint. I used a really stiff brush to fill in each letter. After it was dry, I sanded it down a bit to look more worn. The last step was to go over it with a clear varnish. I knew I was going to hang it in the kitchen, so it needed to be protected.

(please don’t look too hard at the kitchen, ugh! It really needs a make-over. BADLY!!!)

So here it is hanging over the stove. The perfect place to store some platters, plates, and cutting boards.

pallet plate and platter holder update in the kitchen

pallet farmers platter and plate holder

pallet market plate holder

pallet farmers market kitchen plate holder

After looking at the pictures, I realized it was kind of bare on the wall above it. I was roaming through my local Goodwill and found this little cow head. Perfect! Her name is Amelia. She is a little small for the space, so I mounted her on some old boards we had. I didn’t even know I had the one with writing on it. Love it!

pallet rack and amelia

amelia the cow

pallet amelia the cow lettering

I am on the lookout for a little wreath to go around her neck. Or maybe a cowbell! Have a wonderful day!

Sunshine and Blessings

Upcycled Old Metal T.V. Trays

Hello again! Did you all have a wonderful weekend? I pretty much just stayed home (saves money that way!) and worked on bringing some spring inside! We already have blossoms on trees and flowers blooming here. It’s probably too early, but it’s so beautiful, it’s hard to complain! I did get to work on a couple of projects too.

I have had these trays for years and could never really decide what to do with them. I have always used them for decorating outside because I felt like the floral design just lent itself to be outdoors. But they never had a specific purpose. I don’t know why this took so long to figure out, but an idea finally came to mind-at least for one of them.

floral metal trays makeoverfloral metal trays makeover single tray

I dug through some letters I have had for awhile and found enough to sort of make the word ‘garden.’ I had to add the leg for the ‘R’ and an extra line for the ‘E’, but I managed to make it work. I planned on doing the word ‘summer’ on the other one, but I didn’t have enough letters.

floral metal trays garden letters

Now that I have my letters, I put a little glue on the back of each one and placed them on the tray. Probably a spray adhesive would have worked better, but I didn’t have any, so I went with what I could.

floral metal trays garden layout

For the other tray, I tried covering the design with burlap and spraying around it.

floral metal trays burlap

With the letters attached on the first tray and lined up, I started spraying lightly over the top with white spray paint. I always use the Rustoleum 2X paint. Love this stuff!

floral metal trays garden painted

Once I knew the letters would stick, I sprayed more layers of paint. It’s best to spray several light layers and let the paint dry in between. Once the paint was dry, I removed the letters.

floral metal trays floral garden

I didn’t like how the second tray turned out, so I tried something different. I printed out 3 large flowers, laid them on top and sprayed around them. I didn’t like this either, so I am going to have to come up with a whole new plan. I will probably spray the whole thing white and then stencil something on top.

floral metal trays flower cutouts

On the first tray, I sanded a little around the edges and over the top. I still wanted it to look like it belonged outside. After the sanding, I sprayed a clear sealer over the top to add some protection for the outdoors. I also added drawer pulls to the edges so it could be used as a tray for serving. At least one out of two turned out good!

floral metal tray styled

I love how a little bit of the floral peeks through.

floral metal tray garden closeup

I wish it was warm enough to actually use this right now!

floral metal tray garden letters

floral metal tray with glassware

Hopefully it won’t be too long before we can enjoy a nice glass of tea out in the garden. Are you ready for spring? Have you started any spring projects yet? I would love to hear about it!

Sunshine and Blessings

Vintage Armoire

Vintage Armoire


 Hey everyone! I am so excited about this post today! A few weeks ago, we were invited by the online company Chairish and asked to pick one of the armoires and create a style board making it into a storage piece for whatever we wanted-toys, crafts, ect. Chairish is an exclusive curator approved, online marketplace for vintage furniture. If you have time, please go and take a look at some of their pieces. They are gorgeous!”

Lauren and I had fun looking at all the different designs they had. What a selection! But we finally narrowed it down to this American Drew White Wood Ornate Armoire.  We thought this could be used in any room. We decided to use it as a vanity and storage for make-up, jewelry, scarves and other accessories.

Wouldn’t this look amazing!

 
   Since we are using this for a makeup vanity, we wanted to put a mirror in the back to cover up the hole. I gave Lauren a few choices from Joss and Main, and this is the one she picked. Isn’t it a beauty?
Flower Capiz Wall Mirror
We also added a chair because you have to sit down when you are doing your make up right?  We found this really pretty white and cherry chair from Joss and Main.  Isn’t it cute!
Allie+Vanity+Chair
Now on to the jewelry. We wanted to be able to see what we had, but be able to have it organized and pretty. We choose a few different things. We picked an over the door organizer for the longer items and a drawer organizer for earrings.
We loved this metal tiered organizer for all the nail polish and lipsticks. It even holds emery boards.
 Kylie Cosmetic Organizer
 Kylie Cosmetic Organizer
 We also spotted these baskets at Bed, Bath and Beyond and thought they could be used for all sorts of organizing, plus they look pretty.
 
 This organizer from Joss and Main would be perfect for storing all those pretty scarves you have in your collection.  It could also be used for socks, belts or other small items.
 Drawer Organizer
 We also found some different beauty items to round out the collection. These all come from Ulta.
Only at ULTA! Lorac Nude Necessities Eye Shadow Palette is a limited edition sleek & sexy, metallized eye shadow palette that contains 12 silky, nude-toned eye shadows. A $100 Value!:          Only at ULTA! Lorac Nude Necessities Eye Shadow Palette is a limited edition sleek & sexy, metallized eye shadow palette that contains 12 silky, nude-toned eye shadows. A $100 Value!:      LoracNude Necessities Eye Shadow Palette
 So what do you think? What would you use an armoire for? I would love to have one someday, but I am not sure I could decide how to use it!

Nail polish
ulta.com

Nail polish
ulta.com

Nail polish
ulta.com

LORAC eyeshadow
ulta.com

Jewelry organizer
bedbathandbeyond.com

LaMont bath accessory
bedbathandbeyond.com

Beauty product
jossandmain.com

Home decor
jossandmain.com

Cherry furniture
jossandmain.com

Drawer Organizer
jossandmain.com